JacketFlap connects you to the work of more than 200,000 authors, illustrators, publishers and other creators of books for Children and Young Adults. The site is updated daily with information about every book, author, illustrator, and publisher in the children's / young adult book industry. Members include published authors and illustrators, librarians, agents, editors, publicists, booksellers, publishers and fans. Join now (it's free).
Login or Register for free to create your own customized page of blog posts from your favorite blogs. You can also add blogs by clicking the "Add to MyJacketFlap" links next to the blog name in each post.
Blog Posts by Tag
In the past 7 days
Blog Posts by Date
Click days in this calendar to see posts by day or month
Viewing: Blog Posts Tagged with: style, Most Recent at Top [Help]
Results 1 - 25 of 49
How to use this Page
You are viewing the most recent posts tagged with the words: style in the JacketFlap blog reader. What is a tag? Think of a tag as a keyword or category label. Tags can both help you find posts on JacketFlap.com as well as provide an easy way for you to "remember" and classify posts for later recall. Try adding a tag yourself by clicking "Add a tag" below a post's header. Scroll down through the list of Recent Posts in the left column and click on a post title that sounds interesting. You can view all posts from a specific blog by clicking the Blog name in the right column, or you can click a 'More Posts from this Blog' link in any individual post.
Mannstyle No film director gets the sound of gunfire like Michael Mann. It's not just that he typically uses recordings of live fire; plenty of people do that. There's an alchemy he performs with his sound designers, a way of manipulating both the sound of the shots and the ambient sound to create a hyperreal effect. It's not the sound of gunfire. It's a sound that produces the effect of standing close to the sound of gunfire.
Mann is celebrated and derided for his visual style, a style so damn stylish that any Mann film is likely to get at least a few reviews saying, "All style, no substance." I can't empathize with such a view; for me, style is the substance of art, and if any object has value beyond the functional, that value is directly produced by style. (Which is not to say that Mann's style is above criticism. Not at all. But to say that it is "only" style, and that substance is something else, something that can be separated from style, seems nonsensical to me. You may prefer the style of an Eric Rohmer or Bela Tarr or a Steven Spielberg or just the general, conventionalized style of mainstream Hollywood or mainstream TV ... but it's still style, and it's still substance created and transmitted through style.)
What generally goes unnoticed about Mann's style is how the aural and the visual work together. The visuals can be so ostentatious, so determinedly symmetrical (in his early work) or abstract (in the more recent films) or supersaturated or obscuringly dark, that the strangeness of the soundtrack remains unremarked. One of the most sensitive viewers of Mann, Ignatiy Vishnevetsky, noted it, though, in his review of Blackhat, pointing out the "patchy sound mixes" and "sound design [that] is deliberately erratic, rendering a good fifth of the dialogue unintelligible..."
Yes, and more: since his first abstract-expressionist film, 2006's Miami Vice, Mann has cast non-Americans as American characters for some of the leading men (Colin Farrell, Christian Bale, Chris Hemsworth) and non-native speakers of English as the leading women (Gong Li, Marion Cotillard, Tang Wei). The men do a good job with their American accents, but it creates an extra level of artificiality for them to work through, an extra way for them to distance their everyday self from their character.
The women wrestle with English well, but their tones and rhythms are noticeably different from a native speaker's, and the effect is to further make the dialogue difficult to apprehend, to distance the words spoken from their meanings and heighten their aural qualities.
The dialogue in Mann's movies, regardless of whether he's the writer, is unmistakably the dialogue of a Michael Mann movie — there is Mannspeak just as there is Mametspeak. It's clipped, jargony, declarative, pulpy. It sometimes drives critics crazy ("laughable" and "ridiculous" are words I've frequently seen used to describe the dialogue in Mann's movies). The actors tend to fall into similar rhythms from film to film, and you could play a one or two minute clip of dialogue from any of Mann's films, particularly the ones of the last decade or so, and you'd know it was dialogue from a Mann film, just as you can easily identify clips of dialogue from the movies of Robert Altman, Woody Allen, and Terrence Malick. Couple the dialogue and how the actors speak it with a recording style that is more common to amateur documentaries, and the effect is odd and, if you're able to tune into it, intoxicating.
The ways we understand and get to know characters in these movies are also very different from the techniques of conventional Hollywood cinema. Mann's always presented psychology via action, but in his most popular films — that is, his films of the 1990s — there's a pretty standard approach to psychology. That all changes with Miami Vice, where a new distance is placed between viewer and character while at the same time the filmmaking heightens the sense of our subjectivity melding with theirs.
Now, the characters thoughts, feelings, and desires no longer inhere within the character, but are, instead, expressed through the light, colors, angles, and sounds of the world as it is conveyed to us. Mann's characters are no longer characters so much as they are figures in a landscape, and the landscape is an extension of those figures' feelings.
That's why it doesn't much matter whether you can understand all the dialogue. The dialogue is just sound, and it's how that sound fits with the images (the light, the color), and how those images and sounds flow together, that matters.
Odd and even alienating as Mann's style has become, there's a profound unity to its effect. More and more, he's come to make movies that feel not so much like dreams as like insomnia.
This style is not what we might expect from someone as concerned with verisimilitude as Mann. He prefers going to locations rather than building sets; he makes his actors do months of preparation; he hires numerous consultants to get all the details right. And then, shooting and editing the film, he obscures it all, swirls it, hollows it out, fragments it into collages of drift, burst, and glimpse until all that is real feels utterly artificial. Mann's ultimate aim seems to be affect: to evoke a feeling of the hyperfake real, of the deeply flattened surface, of a world rendered into electricity jumping across a flat plane of endless night.
Blackhat Blackhat lost a lot of money. According to Box Office Mojo, it is Mann's least financially successful film since The Keep, a movie he's mostly disavowed. Produced for a reported $70 million, Blackhat has earned only 10% of that investment back and supposedly had the 11th worst opening for a film in 2,500 or more theatres since 1982.It is likely to end up being one of 2015's biggest flops, and that's saying something (for all the talk of Jupiter Ascending being a disaster, the Wachowski's film had some success in foreign markets and looks like it's made back its production budget, at least. Blackhat cannot say the same).
This is not especially surprising. Blackhat is marketed as a techno-thriller (the trailer, while hinting at Mannstyle, is pretty exciting), and its plot is, indeed, that of a techno-thriller. But anybody who goes into the movie expecting a techno-thriller is likely to be disappointed. "Boring" is a word commonly used in viewers' responses to the film.
The thrill is not in the movie's narrative, which gets subsumed and sublimed into Mannstyle. The thrill is in the movement, sound, and editing. Mann's affinities are more with Wong Kar-Wai than with any standard action filmmaker.
We could talk about the ideas in the movie, ideas about surveillance and punishment and information and reality. It's not for nothing that there are references to Foucault, Lyotard, and Derrida (The Animal That Therefore I Am) early on. But these ideas are not expressed as ideas that one can talk about and debate: they're ideas that are felt, sensed, whiffed, dreamed. They can't be separated from the mode of expression.
That's Mann's real accomplishment here. Ideas, like the books in Nick Hathaway's cell, get left behind.
The traces of those ideas, though, pulse through our circuits and burn across the night sky.
0 Comments on Essence of Mannstyle: Blackhat as of 5/21/2015 4:17:00 PM
A child learns early on to recognize tone of voice. The mother's soft, sweet coo means she is happy with him. The low growl utilizing his middle name means he pushed the boundaries a tad too far, but what does tone have to do with fiction?
Tone is the emotional atmosphere the writer establishes and maintains throughout the entire novel based on how the author, through the point of view character, feels about the information she relates.
You may not have thought about how you actually feel about your story. Take a moment to consider. Are you writing about ghosts with a wink and a nudge or are you aiming for chill bumps? Is the story serious and bittersweet or a satirical exposé?
1. Tone can be formal or informal, light or dark, grave or comic, impersonal or personal, subdued or passionate, reasonable or irrational, plain or ornate.
The narrator can be cynical, sarcastic, sweet, or funny. A satirical and caustic tone plays well in a dark Comedy. It won't play well in a cozy Mystery.
2. Tone should suit genre.
Are you writing a shallow Chick Lit comedy or a dark and mysterious Gothic novel? If you write a mixed genre, the tone should match the genre that takes precedence over the other.
If you are writing a funny romance, you have to decide if you want your reader to belly laugh her way through it or have a few moments that make her belly laugh while worrying about the outcome of the relationship. Some Romance fans love a frothy, light tone. Others prefer the melodramatic tone of Historical Romance. Yet another prefers a heart-wrenching Literary love story.
Some paranormal stories are eerie and set an ominous tone. Light Horror feels almost comic to the reader. Readers who prefer ominous, creepy paranormal might not enjoy the comical version.
3. Tone is demonstrated by word choice and the way you reveal the details.
It informs the narrator's attitude toward the characters and the situation through his interior narration, his actions, and his dialogue. If he does not take the characters or situation seriously, the reader won't either. Word choice, syntax, imagery, sensory cues, level of detail, depth of information, and metaphors reveal tone.
4. Tone is not the same as voice.
Stephen King writes horror. His voice is distinct. At times he employs quirky, adolescent boy humor (his voice), but his aim is to chill you and his quips impart comic relief in a sinister story world. Being heavy-handed with the humor can ruin a good horror story, even turn it into parody.
5. Tone is not the same as mood.
Tone is how the author/narrator approaches the scene. Mood is the atmosphere you set for the scene. If you are writing a mystery, a scene can be brooding and dark leading up to the sleuth finding the body. The mood can lighten as the detectives indulge in a moment of gallows humor. Tone defines your overall mystery as wisecracking noir or cozy British as they solve the crime.
6. Tone is not the same as style.
Style reflects the author or narrator's voice. It is also revealed through sentence structure, use of literary devices, rhythm, jargon, slang, and accents. Style is revealed through dialogue. Style showcases the background and education of the characters. It expresses the cast's belief system, opinions, likes, and dislikes. It is controlled by what the characters say and how they say it. Tone is revealed by the narrator's perceptions, what he chooses to explore, and what he chooses to hide.
Stay tuned for examples of tone next week.
For these and other tips on revision, pick up a copy of:
As promised, I’m sharing a most original WWW I came upon while reading NAMING THE WORLD, the collection of writing exercises gathered by Bret Anthony Johnston (Random House, 2007) I reviewed in Monday’s post.
The author, Paul Lisicky, titled the exercise “All About Rhythm.”
It appears in the section “Descriptive Language and Setting.”
Lisicky writes about finding a rhythm that matches the meaning of our story's drama – not a distracting rhythm but one that is crucial, that makes our fiction sing.
He began by quoting Virgina Woolf.
“Style is a very simple matter; it is all about rhythm. Once you get that, you can’t use the wrong words….Now this is very profound, what rhythm is, and goes far deeper than words. A sight, an emotion creates this wave in the mind, long before it makes words to fit it.”
How can we bring a poet’s central tools to our own work, he wondered, “and be more deeply aware of pauses, sentence length, stops, even alliteration and assonance in the prose we read and write,” all the while opening ourselves to our own rhythms?
Enjoy! Enjoy!
Esther Hershenhorn
* * * * * * * * * *
Paul Lisicky’s ALL ABOUT RHYTHM
“Take a paragraph by a writer whose work has been important to you.
Type it out once.
Then type it again.
Once you’ve done that, substitute your own noun for each noun, your own verb for each verb.
Replace all the adjectives and adverbs.
Play with it for a few days.
Then do another version.
If you’re lucky you might have the beginnings of a story.
Or, at the least, a more intimate sense of that writer’s rhythms.”
0 Comments on WWW: All About Rhythm as of 10/15/2014 8:12:00 AM
Signs aren’t the only thing greeting attendees at the entrance to New York Comicon. Amidst the registration booths and all too quickly emptied bins for lanyards ReedPOP has its own boutique, featuring the geek-chic fashion of Ashley Eckstein’s Her Universe line.
Her Universe has become a significant presence at both the San Diego and New York conventions, which in turn reflects as place as a market leader in pop-culture inspired fashion. I had the pleasure of speaking at length with Ashley back at SDCC after her successful geek couture fashion show, and as an attorney I have to say that she is a role model for anyone who wants to incorporate copyrighted and trademarked material in their line. In a world where “it’s better to ask forgiveness than permission” has led any number of creators astray, she has from the outset been conscientious (and ambitious!) in licensing characters for Her Universe clothes.
But that’s not the only way in which Her Universe reflects the better angels of geek community’s nature. Besides integrating the participatory spirit of comics-related media discussed in my last post, Ashley has also been a prominent advocate of geek fashion’s capacity to empower those who wear it, both through her clothes and her anti-bullying activism. Create, speak, show others who you are with fear – where the less imaginative may just see licensed properties, her community sees freedom woven into her designs.
Which brings us to the future of geek couture and its role in the community’s future. Walk around San Diego and New York Comic-Cons and you’ll see expressive fashion everywhere, from handcrafted TARDIS earrings and comic-related t-shirts carried in the ubiquitous TARDIS bag to sophisticated cosplay and brands such as Her Universe itself. As the Her Universe show embodied back at San Diego, the key to the future is to go beyond prints and other reproductions of licensed material to transformative geek-inspired design – in fact, for a useful indication of where things are going, watch the development of the co-branded Marvel line announced last July.
As I discuss in my Fashion Ethics, Sustainability and Development class for the Fashion Law Institute, when we wear clothes we wear ourselves – our values, our aspirations, our communities.* It should, then, come as no surprise that when we look at geek couture, we see the future.
*Check out Professor Susan Scafidi’s “Fashion as Information Technology” for more on this.
0 Comments on Her Universe and Ours as of 10/12/2014 5:15:00 PM
I’ve been duped. Tricked. Lied to. Taken for a ride to disappointmentville by a fancy I’ve held for years. In reality no one told me a falsehood. Like most times I find myself disillusioned, I did it to myself. A starry-eyed dreamer, I tend to put things onto such a pedestal that once attained, they can’t measure up to expectations.
Who can forget the Chia Pet of the 70′s that I saved and saved for. Don’t even get me started on sea monkeys. I had such high aspirations for them after seeing them on the back page of Mad Magazine. The promise of joy died quickly because the only time they moved was when I shook them out of the bag into their simulated habitat. Ant farms, the bass guitar, a shiny pastel jacket that I thought would be an absolute chick magnet. I was amazed when I found that on the discount rack and wore it proudly to school with my sleeves pushed up, only to find that the world had moved past Crockett, Tubbs, Miami Vice, and the style I flaunted. That first new car I had to have post-college before I understood the stranglehold sixty easy payments could be. I won’t even mention women of my youth, like Hilda* the friendly barkeep. For a foolish lad, women are the most dangerous sort of thing to deify.
I could go on. There have been a litany of things I prized – nah, idolized – right up until I got my grubby mitts on them.
And so, now, I am disappointed with baldness. I have always wanted to shave my head but been dissuaded by my lovely wife, who likes hair on my head, but not on my chin. If you recall my rant about Tom Selleck, I have never truly been satisfied with my hair. Current circumstances gained me quick approval to remove it and I did so excitedly.
I don’t like it and here are my grievances:
1. I always assumed it would be low maintenance. It is not. To my dismay, the hair on my head grows as fast as the hair on my chin. Who knew?
2. I thought it would save money – no shampoo, conditioner, or gel. See complaint number one, razors aren’t cheap and every shave seems to chew through one.
3. Who knew the skin under my hair was even pastier than the rest of me? I’m told paint stores can mix approximately 140 shades of white, welcome to Pure White.
4. When I was twelve, my football team had to get me an adult helmet, then pad the sides because my cranium was so long. Any time I hit someone, the thing wobbled side to side. Head shapes don’t change, they just expand. Let’s play a little game, shall we? I like to call it:
“Which one is Mark’s head?”
♦
Surprisingly difficult, is it?
So you can see why I’m disappointed. Like most broken things in my life, I have no one to blame but myself. I lifted baldness onto a throne it simply cannot occupy. Fortunately, I can grow my hair out to fix this monstrosity…but not quite yet. Part of me feels a little like a rebel since this has been against the marital rules for so long. And that, I like.
*Name changed to protect my stupidity
10 Comments on A Bald Dissatisfaction, last added: 5/6/2014
I have now had my morning chuckle! Mad Magazine :) My brother and I used to collect those.
lilkaraphael said, on 5/6/2014 4:34:00 AM
My husband tried it for six month and let it go for the same reasons. Let’s just say it was…comical!
Mark Myers said, on 5/6/2014 5:12:00 AM
I guess on the positive side, your husband and I have a choice.
Mark Myers said, on 5/6/2014 5:13:00 AM
Spy Vs Spy was my favorite! I had a ton of those and like so many things, I wish I had thought to keep them.
lilkaraphael said, on 5/6/2014 5:23:00 AM
True! :)
imagesbytdashfield said, on 5/6/2014 5:29:00 AM
I think I still have a box set of Mad Magazine that was sold on floppies. Need to find it and then get it converted to DVD
Mark Myers said, on 5/6/2014 5:40:00 AM
Haha! Floppies. How in the world would you convert those anymore? I didn’t know they sold them any way but paper.
imagesbytdashfield said, on 5/6/2014 5:43:00 AM
I got the set back when floppies (or maybe they are hard floppies gotta find the box first) were all there was.
Wendy said, on 5/6/2014 7:06:00 AM
Too funny! Don’t get sunburned while you are hairless! That is the pits. My husband tried the razor until he got burned, then went to the #2 comb on the shears. He did that for me, I am partial to bald men.
Mark Myers said, on 5/6/2014 9:06:00 AM
I have been careful, but I could use a little color up there.
I'm continuing my journey of what waters my writer's soul. I love to read books and I'm touching on a few books this month that have added creative water to my work. This week I'm going to chat about Kathi Appelt's TRUE BLUE SCOUTS OF SUGAR MAN SWAMP. This one fun read and has a swinging beat. In this storyBingo and J’miah, raccoon brothers are on a mission to save Sugar Man Swamp. Two things standout for me in this book -- language and style.
I love the language here. There is a rhythm in the cadence of the language that reminds me of music. Here's a bit of lyricism : "Nosotros somos paisanos. We are fellow countrymen. We come from the same soil." This bit gives me a good chill. I also love that the language uncovers place. For example: “They say that lightning never strikes in the same place twice, but the same is not true for courage. As it turns out, when courage strikes, it almost always begets more courage.” The choice of begets here coupled with lightning puts me in mind of an old time southern Gospel preacher. I also get some Texas swing and Texas drawl on every page. I kept smiling with each twist of phrase. Specific word choice creates universal appeal. It makes the language breathe. Check the similes in your book. Watch out for the cliches. Do better.
The style of TRUE BLUE SCOUTS is all about the southern storytelling tradition with the Texas tall tale tradition mixed in. Multiple story lines weave here, and reminded me of a great uncle of mine who was a master basket weaver. He knew just how to bend a strip of bark or a stalk of sugar cane into the perfect basket shape. Appelt jumps from head to head: raccoons, a rattle snake, humans,feral hogs, the Sugarman and more. She captures in her word basket the need to save our natural places, the preciousness of the world around us, and what exactly it means to be a hero. Style has a job, and in this case it's to bring everyone around to the back porch for a stor, to take the chills, the laughs, and riotousness and learn something too. Think about your style and do more.
I hope that you put you best efforts into the language and style of your work this week. It might just transform into something bigger than you thought it could be. I will be back next week with more April showers. I hope you return too.
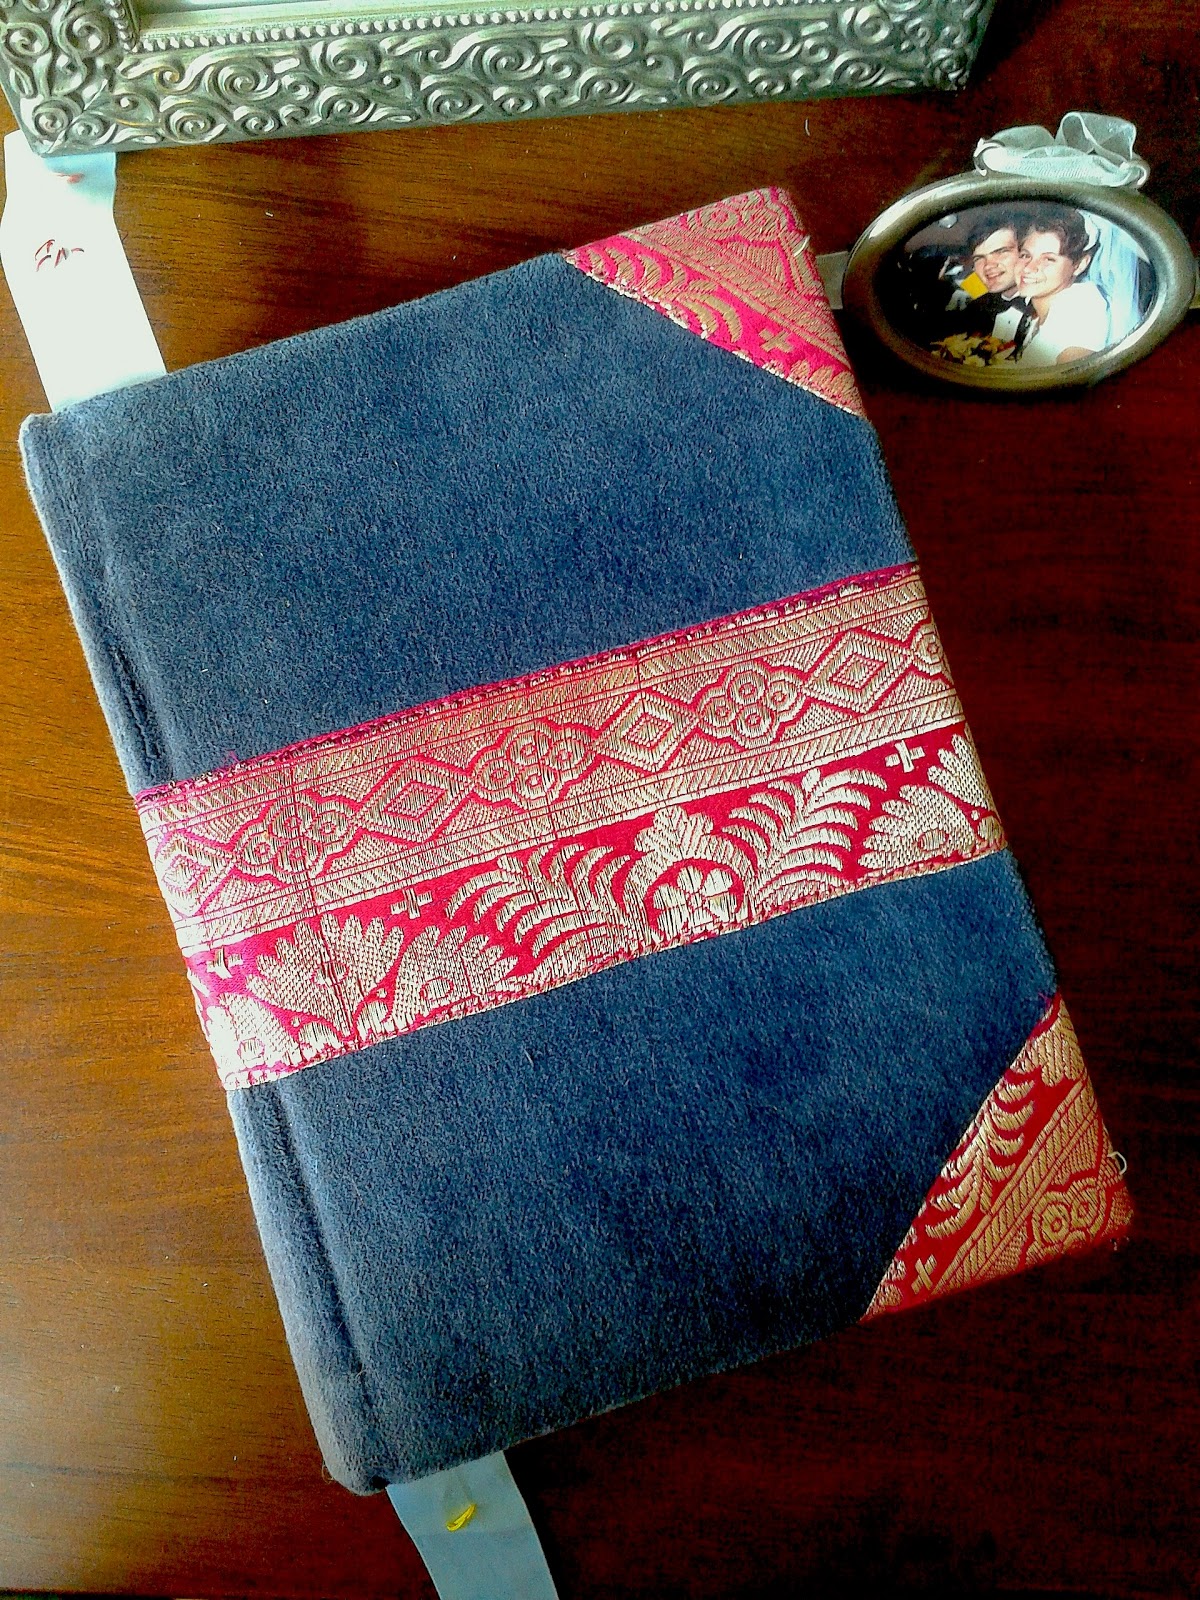
I have always loved this quote from Lee Damsky...just so awesome! I created this by using paper as my base then adding some acrylic (background) and dye ink to add details.
0 Comments on My Own Style as of 9/12/2013 7:34:00 PM
I had to laugh this week when I got a spam email with the title, “Loose 8 Ponds Quickly!” Wow, did this spammer need a copy editor.
A copy editor finds all the pesky little errors of grammar and spelling. Many publishers use the Chicago Manual of Style as their style guide. Because here’s a secret they don’t teach in high school: grammar and to an extent spelling, is a matter of convention. Grammar is an agreed-upon set of rules for how we punctuation, conjugate and parse our language. There are different style guides and each has slightly different rules. And the language is evolving.
For example, I heard recently that quotation marks as a way to indicate speech are being disregarded in some new publications. That doesn’t make sense to me! I’m conventional. But for an edgy YA novel, maybe it would draw in a few new readers, which is language in the service of the story.
Do you need to study the Chicago Manual of Style? It wouldn’t hurt; but it’s unlikely that most writers need to do that intensive study. You do need a solid grounding of grammar, though. Unless your character is uneducated, speaks in a dialect, or is sick, s/he should speak in standard English. If you can’t manage that, then you should take a class somewhere.
I recently read a story that started, “Because him and his whole family were going out to do some camping.”
Wow. Embarrassing. Here’s how to keep from being embarrassed.
Spell Check. I’ve been lax lately about running a spell check on everything that goes out. But I was recently embarrassed by an obvious spelling error and it jerked me back to reality. Everyone can make mistakes, so you should use the tools available to write as cleanly as possible. Use your word processor’s spell check! Then run over it again to catch things like he/eh, for/four/fore, their/there, etc.
Grammar Check. Likewise, run your word processor’s grammar check. Always.
Use the online Chicago Manual of Style. Not sure what word usage is correct or how to punctuate something? Use the online Chicago Manual of Style to answer all questions.
Want to go farther and test the limits? OK. Once you know the standards, feel free to play. Here are some helpful books.
For those of us living the writing life, whether we realize it or not, we are constantly learning as we read. Often I'll find myself engrossed in a book where the author's voice becomes so familiar I swear I'll never forget its rhythms and style. And while I sometimes can hold onto a general sense of these things, I'm finding I need to be more intentional with my reading if I want these impressions to last.
This year I've started using my commonplace book as a place to record quotes that have struck me as important. Sometimes it's a fresh simile, other times just a sentence to remember the atmosphere an author has so wonderfully invoked. I've recorded the last few pages of novels, those key moments when everything comes together. I've written down scenes when the protagonist reaches the end of his or her self and must become something new.
It's in looking for and taking note of things that I'm learning to grow as a writer.
Here are a few similes and metaphors I've collected these last few months:
"Alice's stomach was rumbling like an empty garbage can rolling down a hill..." PIE, Sarah Weeks
"I try to stuff myself between the seats, like coins." EMILY'S DRESS AND OTHER MISSING THINGS, Kathryn Burak
"Majid had a family network as complex and secretive as a walnut shell." THE RUINS OF US, Keija Parssinen
"Her voice sounds as hollow as the empty wasp's nests." CROSSED, Ally Condie
"The day is collapsing into dusk. The Gypsies in their white shirts are the only lamps. The moon is coming in like a pan on fire." SMALL DAMAGES, Beth Kephart
And some darn beautiful truths:
"I lay my hand on my heart. Our parents teach us the very first things we learn. They teach us about hearts. What if I could be treated as though I were small again? What if I were mothered all over again? Might I get my heart back?
My heart is unfolding." CHIME, Franny Billingsley
"That taste is still in my mouth. I know what it is. It's the taste of pretending. It's the taste of lying. It's the taste of a game that is over." LIAR AND SPY, Rebecca Stead
"In spring, Amherst changes into a storybook. The students grow wings from their heels and run through town spinning and singing. You get the idea that some parts of life are pure happiness, as least for a while. The toy store in the center of town puts all its kites outside, on display, so that the tails and whirligigs can illustrate the wind." EMILY'S DRESS AND OTHER MISSING THINGS, Kathryn Burak
What helps you process what you learn as you read?
5 Comments on Commonplace Book: A Year of Learning While Reading, last added: 11/2/2012
I haven't been purposeful about learning as I read. I do make it a point to talk about the books when I finish them, especially if something really worked for me, or really didn't. But this journaling idea is a good one.
For years I've thought about doing this, but am too lazy or distracted to actually DO it. I'm impressed, Caroline. And I love the quotes you chose, too. And your pretty notebook!
1. “It was a serious distraction and threat to more meaningful reform efforts.”
Something is wrong with this sentence. To diagnose the problem, remove one of the noun phrases from the beginning of the sentence and determine whether the remaining statement is still correct, then replace it and remove the other one. “It was a serious threat to more meaningful reform efforts” is correct, but “It was a serious distraction to more meaningful reform efforts” is jarring because the preposition is not idiomatically appropriate. The noun phrases are supported by different prepositions, so they cannot share the word to; assign the correct preposition to each one: “It was a serious distraction from and threat to more meaningful reform efforts.”
Should the word threat be preceded by the article a to make it parallel with distraction? No, because serious applies to both nouns, and an additional article would isolate threat from the shared adjective. Also, the phrase “and threat to” appears to be parenthetical, but it’s not necessarily necessary to set it off by commas, parentheses, or em dashes.
However, enclosing it in parentheses suggests a whispering insinuation, and using em dashes would signal a provocative interjection, so the context might merit either parenthetical strategy. In either case, though, threat should be assigned a repetition of serious — “It was a serious distraction from (and a serious threat to) more meaningful reform efforts” — or a distinct adjective (“It was a serious distraction from — and a grave threat to — more meaningful reform efforts.”)
2. “Elected officials and activists representing forty-five environmental groups attended the event.”
When two or more nouns or noun phrases follow one or more adjectives (as in the previous example), the assumption is that the modifying word or words applies to each noun. In this case, however, the subject consists of the elements “elected officials” and “activists representing forty-five environmental groups” linked by a conjunction, not “elected officials (representing forty-five environmental groups)” and “(elected) activists representing forty-five environmental groups” joined by and. To clarify this distinction, recast the sentence: “Activists representing forty-five environmental groups, as well as elected officials, attended the event.”
3. “He has to be, if not the, one of the stupidest people in TV news.”
The basic statement here is “He has to be one of the stupidest people in TV news,” but the writer has failed in an attempt to suggest the superlative as well, awkwardly implying also that “he has to be the stupidest person in TV news.” (The superlative is the ultimate form of an adjective, more extreme than the basic form — stupid, in this case – and the comparative, stupider.)
But “if not the” collides with “one of the”; the unstated — and incorrect — complete thought is, “He has to be the stupidest people in TV news.” To smooth out this disjointed sentence, introduce the superlative first in a complete thought, and then retreat to the milder criticism in a following modifying phrase: “He has to be if not the stupidest person in TV news, then one of the stupidest.”
Note that a comma does not follow be, because doing so would imply that two commas are necessary to set “if not the stupidest person in TV news” off from the bas
Recently, I wrote about word patronage, the often-unnecessary inclusion of self-referential expressions as “as you will” and “so to speak” in one’s writing. This post expands on that one to recommend that you inspect your writing for anything that smacks of spoken English.
If you’ve ever seen a transcript of an extended discourse — a written record of someone’s comments, rather than the prepared script for a speech — you’ll understand how widely spoken and written English can diverge.
Spontaneous speech, at least, is riddled with qualifications and equivocations. It’s easy enough to dispose of “um”s and “uh”s, “well”s and “you know”s when converting a transcript to an essay, but writers should purge their prose of other utterances, words, and phrases as well that add a lot to a word count but little to a description or an argument. (See this post, for instance, for a list of adjectival intensifiers and their adverbial forms to avoid.)
In addition, omit hedging phrases such as “as I see it,” “from my point of view,” “in my opinion,” and “it seems to me.” Search and destroy such pompous filler as “be that as it may” or “other things being equal.” These are all understandable (though not necessarily forgivable) indulgences in spoken English, whether impromptu or rehearsed — at best, they’re nearly meaningless phrases one tosses off while thinking of what to say next, and at worst, they clutter a speech, distracting and discouraging listeners. But readers expect your prose to be direct and dynamic, and there’s no place for such self-gratification in written form.
Before reading this post you might wanna check one we published a while ago titled 7 Rules For Formatting Lists. Here’s a quotation from it:
“The items in unnumbered lists are often preceded by dots or other symbols known collectively as bullets, though such markers are technically not necessary, especially in a recipe or a materials list. (In those cases, it’s implicit that the ingredients or components are added or constructed in the order listed — it’s actually a numbered list that needs no numbers.)”
A bullet list lets you
display a set of terms, phrases, or statements clearly.
prevent reader fatigue or confusion in the form of a long run-in list in a sentence.
avoid repetition by following an introductory phrase with “fill-in-the-blank” list items.
Keep these guidelines for constructing bullet lists in mind:
If each of the items in a bullet list completes a sentence begun with an introductory phrase, the first letter of the first word of each item should be lowercase, and the last word should be followed by terminal punctuation (a period, question mark, or exclamation point), as in the preceding bullet list.
The format in the previous list, however, is not recommended for items consisting of less than a few words, unless listing multiple items as a run-in list in a sentence would produce a ponderously long sentence.
If all list items are complete sentences, they should follow an introductory statement ending with a colon, as in this bullet list.
If all list items are incomplete sentences, they can follow an open introductory phrase or one ending with a colon; in the latter case, the first letter of the first word in each item should be uppercase.
The first letter of the first word of each complete sentence should be uppercase, and complete sentences should include terminal punctuation.
All items in a list should have the same format — a word a phrase, or a complete sentence — and should follow the same grammatical structure.
If every item in a list begins with the same word or phrase, try to incorporate the word or phrase into the introductory phrase or statement, then delete it from the list items.
Avoid creating a bullet list in which one or more items consist of very long sentence or more than one sentence; if this is the case, it’s better to use traditional sentence form.
A bullet list with a closed introductory phrase and whose items are single words should be formatted as follows:
apples
bananas
cherries
Likewise, a bullet list with a closed introductory phrase and whose items are short phrases should be formatted as follows:
personal identification number
automated teller machine
liquid-crystal display
The following elements are superfluous in a bullet list with an introductory phrase ending in a colon:
A comma after each item
A semicolon after each item
The word and or or following a comma or semicolon in the penultimate item
A period following the last item
A bullet list preceded by an open-ended introductory phrase may but need not include
a semicolon (not a comma) after each item;
the word and or or following the semicolon in the penultimate item (optional); and
People love books. Some people show their love by recommending books to friends and family members, others start websites to share their love of stories to the world. There are also people out there who want to show their love for their favorite books daily, wherever they go, to whomever they meet. Publishers Weekly found the top five books that inspired the most tattoos. This is devotion.
5. Fight Club by Chuck Palaniuk
Fight club resonates with people who are anti-authority and Tyler Durden is their hero. This one tattoo is an iconic image because Tyler was, among other things, a soap maker.
4. The Little Prince by Antoine de Saint-Exupery
The watercolor images inspire many tattoos but also the appreciation of the world’s beauty and wonder. This tattoo is of the prince himself.
3. Where the Wild Things Are by Maurice Sendak
This book reminds us of our childhoods and we grow up so fast, that maybe it’s a symbol of who we were as children: wild, carefree and full of imagination. This is tattoo is of Max in his iconic wolf outfit.
2. Alice in Wonderland by Lewis Carroll
There are a lot of tattoos of Alice in Wonderland out there. There are quotes, images and the cast of characters are depicted frequently: Alice, The Mad Hatter and especially the Cheshire Cat. Here is a depiction of the tree, the cheshire cat and a few other characters.
1. Slaughterhouse Five by Kurt Vonnetgut
This classic novel of war and time travel resonates with people in the mantra “So It Goes,” which represents the owner’s coping with worry or loss. Here is a tattoo of the mantra on someone’s wrist, which is where people usually get the tattoo, oddly enough.
0 Comments on Most Popular Literary Tattoos as of 1/1/1900
For some people, verse novels are unappealing because of the way words are arranged on the page. Others find them too pretentious, too simplistic, too weird. And that's okay. Readers have the right to feel however they like about certain genres or styles. What I love, though, is when readers are willing to try something new.
I'm finding a number of those who have posted reviews of May B. on Goodreads start in a similar way:
I’ve never read a novel in verse before and wasn’t sure how I’d feel about it. I wondered if it would slow down my reading.
Having never read a novel-in-verse, I intended to check out the first few pages...
This is the first novel in verse I've read.
I had never read a novel in verse before...
I generally don't like verse novels...
This is the first novel-in-verse I've read.
8 Comments on Verse Novels Not Your Thing?, last added: 11/24/2011
There are some novels in verse that I adore, and some that...well, I don't dislike so much as feel ambivalent toward--like in any genre! The only reason verse novels sometimes frustrate me is if their story and characters don't merit telling it in that style; it sometimes feels as if the author is cheating by attaching a gimmick to his/her book that it doesn't need. When the use is justified--and I love how your reviewer explained the obvious justification in your book!--then I am a firm fan, advocate...basically a won't-stop-talking-about-how-much-I-love-this-book person. :)
I have only read a few novels in verse and from those experiences it's not something I would pick up. I love the details in traditional novels that paint the picture. I want to know what the character looks like, sounds like and feel like I can play the book in my head like a movie. I have found that listening to a verse on audio works for me. For example I tried to read Crank, but it wasn't working for me so I listened to it on audio and loved it. I think if there is a verse novel that really draws my attention I would listen to it on audio.
Like Faith, I agree that just like any genre, there will be books that you like and books that you won't. Cari, I'm with you! I think the best way to experience poetry is to see, hear, and say it. As I used to tell my students, poetry is meant to be seen and heard. Listening to verse novels (or reading them aloud) is a great way to fully experience the story and the form.
Natalie, thank you. I'm excited for you to read it, too!
I've never read modern fiction in verse, but I find it interesting that nowadays it turns some readers off, when verse used to be the almost-exclusive format for storytelling. Since ancient times, when there was a story people wanted to remember, it was put in song, hence the phrase we still use: "unsung heroes." The idea of prose stories is only a few hundred years old, which sounds pretty old, but isn't in terms of human history. I'm interested to see how you handle modern expectations of description and dialog in what's really a very ancient tradition.
I've only read OUT OF THE DUST by Karen Hesse. Though I though it was wonderful, I haven't sought out any other novels in verse. But I'm excited for MAY B!
You already know I adore verse novels. Well, of course, not all verse novels (there was one I started and had to stop reading halfway through because it was driving me crazy), but some of my favorite books are verse novels, including MAY B. And I'm not just saying that for brownie points. :)
Creating the voice you want for your story or novel begins with Word Choices. It continues with control of your sentences. I emphasize control because many writers–well, they just write. Without consideration of sentence structures.
Sentences, as the basic building block of the written word, need careful attention. You can write long, short, simple, complex, parallel, convoluted or fragmented. Yes. Fragments work.
When do you use which sentence structure. Here’s where it helps to read your work aloud, listening for a smooth flow. Does the writing disappear and let the story come forward, or does the writing force you to stop and read again for clarity? Are there frequent stutters as the rhythm of the piece breaks down?
Where do you want the emphasis?
In Style: Lessons in Clarity and Grace, Joseph Williams takes a scholarly look at sentences and how to manage them. Of course, there are lessons on omitting the passive voice, creating strong subjects of sentences and making sure there is clarity throughout. He also speaks of putting the emphasis where you want it to be. For example, I often ask people to look at a paragraph and identify the most important word/phrase in that paragraph. Williams says the ends of sentences are positions of emphasis or stress. So, I ask the writers to reword the sentence and put the most important word last.
Consider the differences between these two sentences.
The Revolution has begun.
It was the beginning of the Revolution.
#1 is shorter and emphasizes that something has started.
#2 is longer and emphasizes there is a Revolution. It uses the “It was. . .” construction to push the important information to the end of the sentence. A careful writer would weigh the disadvantage of the weaker to-be verb with the advantage of putting the word “Revolution” in the position of stress.
The choice depends on where you want the readers to focus. It’s a choice that affects style, clarity and, of course, voice.
Here are other posts on using great sentences to create voice.
Everywhere I turn I see "email" (or is it "e-mail"?) punctuated differently. Can you tell me which is correct? —Kate T. WD online guru Brian A. Klems says that punctuating "e-mail" with or without a hyphen is ... Read more
I was very suspicious of high culture, not of low, and it took a long time for me to crack the code and say, ‘You know what, Picasso’s a pretty good cartoonist.’
This bit on style reminds me of Milton Glaser (“I don’t trust style.” and “The model for personal development is antithetical to the model for professional success.”):
Style is a capitalist invention. It’s a trademark. It’s very useful in the world of commerce to have a good trademark, but it wasn’t my first concern. I got restless…
0 Comments on austinkleon:
Art Spiegelman on Picasso, cave paintings and... as of 1/1/1900
Via the marvelous blog Reading Markson Reading, some words of wisdom from F. Scott Fitzgerald to his daughter:
A good style simply doesn’t form unless you absorb half a dozen top-flight authors every year. Or rather it forms but instead of being a subconscious amalgam of all that you have admired, it is simply a reflection of the last writer you have read, a watered-down journalese.
Fitzgerald's letter includes some recommended books, and blogger Tyler Malone follows up with a letter from David Markson to his own daughter offering a list of some favorite books. Great stuff.
0 Comments on "A Good Style Simply Doesn't Form" as of 1/1/1900
I, being endlessly excited by the topic, responded with a comment as long as the post itself. I didn't really mean to do that, and was embarrassed upon posting it to see just how much I'd written, but I was in a hurry and didn't have a chance to write concisely. But I wanted to offer a comment/question about translation -- specifically the fact that some great writing survives some really bad translation -- and see what folks did with it, if they did anything other than just groan and ignore me. Which might be the best response. Nonetheless, the post itself is worth considering...
I notice over at Ecstatic Days you left a comment about the translations of The Brothers Karamazov and how you read two of them. Which did you prefer? Which do you prefer for Dostoevsky translations in general? I emptied the Dostoevsky books I had from my library because they were Garnett translations and the Anglicization was really obvious.
The two Karamazovs that I've kept are the Oxford World's Classics translation by Ignati Avsey and the Andrew MacAndrew translation from Signet Classics. I've also read big chunks of one of the early ones, probably Garnett (it was 10+ years ago now...), and skimmed around in the Peavear & Volokhonsky, but though I enjoyed the P&V translations of Crime & Punishment, Gogol's stories, and Anna Karenina, I'm somewhat skeptical of their technique and the hype that surrounds them -- see, for instance, this, this, and this.
Just a little quick illustration for this week. I thought it would be fun to experiment and do something different this time specially now that I am working on several books at a time all in watercolor.
I think the brain kind of asks to please change a little, hee.. so I'm listening. Plus I'm always toying with the idea of having a second rendering style for other projects that might call for it. I''m sort of liking this. What do you think?
I sketched it real quick. The line work was done with a black Derwent sketching pencil and then I colored it in Photoshop.
Have a great weekend everyone!
21 Comments on Illustration Friday: Sweater, last added: 2/15/2011
I think it would be a great addition to your portfolio to work up more samples in this style. It's very sweet, just like you with just a pop more of color.
I love this! The bold lines and colors bring an extra layer of versatility, which will work in even more markets. I love that you can see the distinct Alicia sweetness in these characters.
Angela, thank you my friend! I appreciate your comment so much. I hope it can open possibilities to other markets as well. :o)
Thanks LAC! Well I tend to do simple all the time. I did sketch this very fast without erasing anything either so I think it can be a combination of both things. :o)
As soon as I saw your thumbnail in the IF roll, I thought to myself....hmmmm looks like Alicia is mixing it up a bit. Then I clicked on and read your post and saw your adorable illustration. Great new avenue Alicia! You are so talented!
I’ve spent some time today reading a terrific little book of writing instruction for both the beginning and experienced writer. The book’s been around for a long while.
After some thought, I have some questions regarding how certain aspects of writing discussed in the book are handled by today’s editors. I’d like to address one aspect in particular.
Transitions
In Brandon Rotal’s Little Red Writing Book the subject of transitions placed near the beginning. Rotal goes through the four types of transitions: contrast, illustration, continuation, and conclusion. All writers use transitions. They’re a necessary step in moving an essay, article, or story from start to finish.
Regardless of transition’s importance, in much of today’s editorial preference, specific transition words are currently discouraged. I’ve read recent articles written about the overuse of “however”, “though”, “therefore”, “but, etc. I’ve been told by various other writers to limit my use of such traffic signals in my writing.
Two important questions arise for me. How do transitions happen without initial trigger words? Does a writer’s style dictate use of transition words?
New Transitions
Whether a writer has fifteen years freelance experience or a mere few months, small considerations such as transitions can make or break an acceptance in today’s competitive market. If former transition words are no longer received favorably, something else must take their place.
Let’s start with the contrast transitions. If “however,” “but,” “on the other hand”, etc. doesn’t cut it anymore, there are ways to shift thoughts. After all, the brain does it all day long.
For instance: Rather than say “However, we couldn’t move the fallen tree without more industrial power,” create a substitute. Try something like “Moving the fallen tree would require more industrial power than we possessed.”
The meaning remains the same. The sentence is stronger. The traditional transition was eliminated.
“Nevertheless” can be left behind for “Notwithstanding.” It isn’t used as often. The key is to refrain from using it often. Of course, the writer doesn’t have to use any trigger words.
Example: “Nevertheless, the fallen tree would take more resources to remove than we had available.” becomes “Without bringing in additional resources from outside, we couldn’t move the fallen tree.”
The latter transition takes one less word and doesn’t use trigger words.
Using Style Transitions
As seen above, the writer uses a shift of thought to bring about transition in subject direction. Transitions don’t have to be abrupt and jarring. The writer can slide through them without breaking for turns.
For example: “While writing this piece I’ve had to think up more unusual transitions than I’ve taken time for in many weeks. Normally, I don’t sit and ponder the use of traditional transition words. I could get stuck in each sentence, if I allowed myself that luxury.
Instead, I try to ignore the existence of traditional transition words. I think of them as unnecessary descriptors and work to leave them out of my writing. It’s difficult, especially when a person has to change a total perception of proper writing style.”
New Version: “As I write this I have to create many new transitions. To eliminate the difficulty, I try to ignore the existence of traditional transitions. Shifting thought allows the writer to say as much in a more fluid way. If I think of transition words as unnecessary descriptors, my writing flows with strength and clarity.
The second version says the same thing as the first. The difference is length and flow. Personally, I like it better than the first one. In the end, that’s all that matters. If it works better, the likelihood of an editor liking it, too, increases, which is the final writer�
0 Comments on Making the Transition as of 1/1/1900
I love to watch movies for the costumes. (And if you’re anything like me, you do too!) I had placed Kit Kittredge: An American Girl in my Netflix queue months ago for this very reason. I’ve never had much interest in the American Girl doll phenomenon (I have to admit, I’ve been more of a Barbie fan) but when I saw the trailer for this movie I figured it would be a wealth of Depression era fashion inspiration.
“Depression era fashion inspiration” sounds rather contradictory. But even those families who had to pinch their pennies often managed, with a lot of creativity, to produce unique and pretty clothing for themselves. Feedsacks, scraps and old clothes were given new life and transformed things like day dresses and quilts.
My favorite part of everyday 1930s fashion (besides the sweetest prints and handmade sweaters) are the little details: plackets, collars, ties, buttons, etc.!
I don’t want to spoil the movie for you so I’ve only posted some of my favorites. There are plenty more highlights in the movie, including lots of inspiring grown-up wear! (I even spied some Remix shoes.) It’s a cute family film with a wonderful cast (Stanley Tucci, Abigail Breslin, Joan Cusack and Julie Ormond), albeit a little slow at times. It would be a good movie to watch on a Sunday afternoon or weekday evening with a pot of tea and some vintage sewing or knitting to work on.
Have you seen this movie? If so, what are your thoughts? What costumes movies do you find inspiring?
0 Comments on 1930s Inspiration {Kit Kittredge: An American Girl} as of 1/1/1900
Today’s dress parade features one new dress (homemade from a vintage pattern) and one vintage dress; yes, that’s me, mixing it up! Firstly is a dear, little dress I started last summer. I know, so slow. Ruffles look pretty but I don’t always enjoy making them, especially armhole ruffles that are always gigantic on vintage patterns. So something like this just ends up on the to do list for a while. Anyway, the pattern is from the Chicago Tribune, 1951, #2359.
Per my statement above, I cut down the armhole ruffles quite a bit. Even still, I feel like these are very pronounced. ”Hey everyone, check out my armhole ruffles!” But I’m sure it’s just me and my desire to be inconspicuous (so says the girl who BLOGS).
Cotton voile, how I love it. The weight and print are perfect for this vintage style. Because it’s so floaty, I added a ruffle at the hem to weigh it down and balance the silhouette. And you may recognize that belt - it’s from my vintage shop. I decided it went perfectly so out it went, into my closet.
The next dress is a doozy:
It’s bright seafoam green! And synthetic! But also really fun and cute. (Via Clever Nettle’s shop.) I really wish I had taken a “before” photo (I’ve got to remember to do this!) because I changed out the collar. It seemed like a trend back in the ’60s to make necklines look like they are backwards: high in the front, low in the back like in this dress. Personally, I’m not a big fan mostly because I don’t like the feeling on stuff on my neck with the exception of a really soft (and loosely applied) scarf.
Back to the neckline: the front was high and wide with a standing collar that came down in a “v” in the back, tied is a bow. I really liked the bow idea and wanted to retain that. Here’s what I did:
Removed the collar (2 pieces) and bias tape.
Cut a “v” down the front (I put in the dress and pinned the bottom of the “v” so I’d know where to cut).
Lined up the collar pieces to the front and cut off the access length; sewed down open ends.
Restitched the collar pieces on by hand (Doing it this way seemed to leave little room for wonky seams even though it takes longer [but it's better then picking out stitches!]).
Restitched bias tape to areas of neckline that did not have collar pieces sewn to it.
Created a loop from left over collar to make the bow in the front.


.jpg?picon=160)


.png.jpg?picon=4257)


.jpg?picon=1679)


.jpeg?picon=2982)


 Style: Lessons in Clarity and Grace


.jpeg?picon=2420)


I have now had my morning chuckle! Mad Magazine :) My brother and I used to collect those.
My husband tried it for six month and let it go for the same reasons. Let’s just say it was…comical!
I guess on the positive side, your husband and I have a choice.
Spy Vs Spy was my favorite! I had a ton of those and like so many things, I wish I had thought to keep them.
True! :)
I think I still have a box set of Mad Magazine that was sold on floppies. Need to find it and then get it converted to DVD
Haha! Floppies. How in the world would you convert those anymore? I didn’t know they sold them any way but paper.
I got the set back when floppies (or maybe they are hard floppies gotta find the box first) were all there was.
Too funny! Don’t get sunburned while you are hairless! That is the pits. My husband tried the razor until he got burned, then went to the #2 comb on the shears. He did that for me, I am partial to bald men.
I have been careful, but I could use a little color up there.