


 |
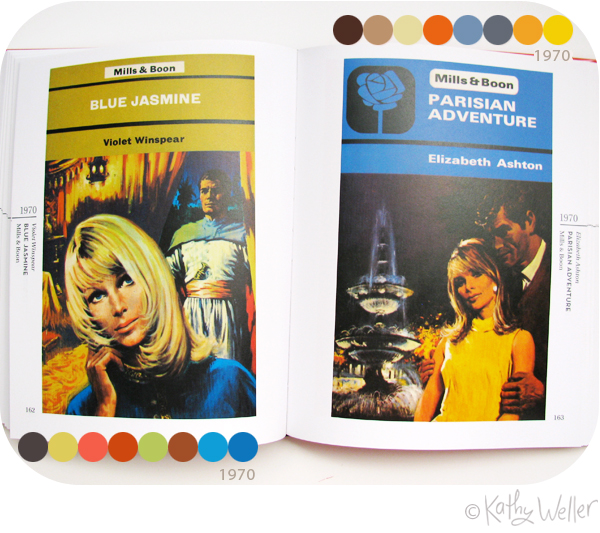
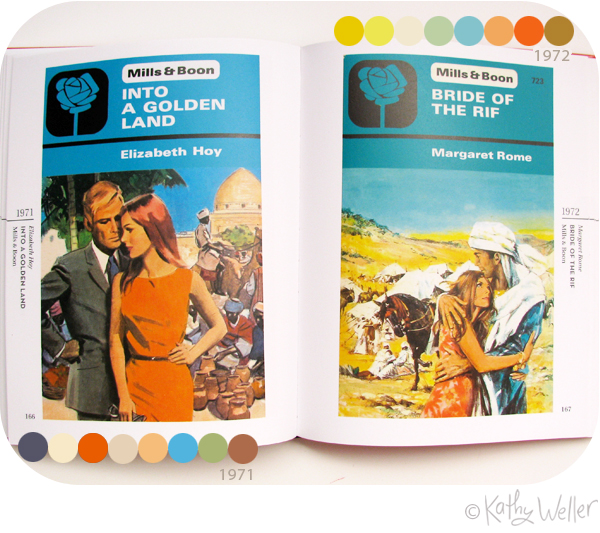
The Art of Romance: Harlequin Mills & Boon Cover Designs |


painterly, looser and the palette features more citrusy acid brights.
 By: Kathy Weller,
on 10/11/2011
By: Kathy Weller,
on 10/11/2011
Blog: wellerwishes (Login to Add to MyJacketFlap)
JacketFlap tags: Process, Painting, Resources + Reference, Workspace + Tools, Demo, Add a tag

I Googled and Googled... I tried different phrases, different combinations of words... all of my search tricks... Still, I came up short. I didn't let that stop me! I decided to just try it myself, using my best judgement, and look at it as gained knowledge if successful, and a learning experience if not. Well, I'm pleased to share that it went just fine, maybe even better than fine! I'm very happy with the results, and now I have a new skill under my belt. In order to share with you, I took some photos for you, in case you wish to try it, too.
Here are the materials you should have ready to go:
• Artists' painting matte medium of your choice (make sure it is the kind you use during the "working" phase of a painting) or another acid-free adhesive of your choice, but nothing too thick- should be around the consistency of heavy cream, give or take.*
•Foam brush
•A brayer
•A self-healing mat board
•Exacto knife
•Wax paper, Reynolds Freezer Paper, or some type of wide paper with a waxy side
•A bone folder (used in bookmaking and for other paper products) In this tutorial, I refer to "braying", but the bone folder can be used fairly interchangeably with the brayer, though I recommend having both on hand as each of their strengths compliment one another.
*Please note: Part of why I waited so long to try this before just biting the bullet and experimenting with mointing art prints is that I was concerned that my art print would bleed ink all over the place and there was an astounding lack of information regarding this possibility online..
By: Kathy Weller,
on 6/15/2010
Blog: wellerwishes (Login to Add to MyJacketFlap)
JacketFlap tags: Essays, Writing, Inspiration, Drawing, Process, Pencil, Technique, Resources + Reference, Add a tag
I am on a train commuting somewhere, via public transportation, several days of the week. This finite amount of time that I and many other people commit to every day—spent moving and shaking and some times reading something incidental—is actually a great time to zone into some creative problem solving via sketchbook. Wait, rocking around in your seat doesn't sound to you like an ideal time for putting pencil to paper for some inspired doodling? Hold up. I can make the argument that it's a GREAT time for it.
1) White noise is golden
It's interesting that all the white-noise surrounding me on public transportation actually seems to end up helping my mind block out any outside interference. When I am stuck on my commute, my drawing has my full attention. The ideas seem to come through my brain and onto the paper cleaner and more "white noise-free" than they sometimes do when I am sitting quietly and have no distractions at all. I'm not sure how it works, but I know that it works.
2) The positive effects of a bumpy ride
While moving, I don't get as lost in the details of a drawing, because I can't. I'm jumbling and bumbling all over the place. Since I never know when the next bump is coming, I am forced to let go of certain aspects of my artwork that I otherwise might get caught up in. For my riding time, the idea is to get down the nucleus of a concept—the bread and butter of any good illustration. I will more than make up for it later when I flesh out my clear, unfettered idea on solid ground.
3 ) Short bursts can deliver solid results
Since I usually travel in shorter spurts and have no other distractions, it's easier for me to focus on a specific sketching goal during these times. This is the perfect time to get working on the first phases of an assignment. I have started many projects this way with much success.
4) Drawing against the clock
Somehow, being in a public yet fairly anonymous atmosphere with no interruptions and only a finite period of time can have a great auto-focus effect. I often end up in just the right head space to succeed at solving a specific creative task. There has been times that my sketching is going so well that, when I get off the train, I plant myself on a station bench to complete my work flow. It can be that effective for me. Maybe it can be for you, too.
If you want to try a similar experiment but you don't commute, do this: Next time you have an appointment or a date with a friend, leave an hour early. Hit a comfy coffee shop to get some drawing time in first. You won't feel the jumble of the train, but you can benefit from the other aspects of drawing in transit. Sometimes, an offbeat change-of-creative-pace with a time line attached can add up to some surprisingly valuable results. Happy drawing!
© Kathy Weller.
This essay was previously published in SCBWI Bulletin Jan/Feb 2010 "Art Tips" column.
By: Kathy Weller,
on 5/5/2010
Blog: wellerwishes (Login to Add to MyJacketFlap)
JacketFlap tags: Reflections, Resources + Reference, PSA, MassArt, Add a tag
What an amazing day. I was first invited to Mass Art Portfolio Review day last year. This year, Irena Roman invited me back for another go, and I was so happy to oblige. This is one day when I can talk to these bright, talented young artists and find out what direction they are most drawn to. I get to look at their work and, from my own perspective and from listening to their goals, I can give them useful feedback and advise them. It's such a great feeling to be able to chat with these artists.
Basically, the illustration graduating class file into a room where reviewers line the edges of the room. Illustrators choose a reviewer to talk with for 15-20 minutes and then move onto another reviewer of their choosing. We all wear name tags and our posts are clearly marked with our professions, so they know where we're coming from.
the process is informal, not uptight. It's a chance for the kids to talk to creative professionals from all walks. They might be interested in working the fine art print market, or children's publishing, or editorial, or any number of markets. The point is that we are here to give them feedback based on what we bring to the table and where they are coming from and where they want to go.
It was such a whirlwind day that I did not remember my camera. My friend and guru Carol Eldridge did bring hers, however and she managed to get s a nice helpful student illustrator to take a picture of us (which I will link here once she posts it.)
There were several students who showed an interest in children's publishing. Here are some points I feel are important to putting together a good children's portfolio. I may not have had to hit every one of these points with someone today, but
About the art process itself...
• Be a ruthless critic about eyes. This may sound really trivial, but eyeballs are very important and they have to be relatable and convey emotion and personality, but also work with the character and the facial expression. If your eyeballs are too stylized, cold, cartoony or whatever whatever, just be brave and go and experiment with your eyes (which consequently will also eventually encompass the face and then the entire body of your character. Oh well what can you do!). Experiment until you can really feel great about your eyeballs. Don't worry if it takes years. Take years. You can still work while you take years. Just don't stagnate-continue to evolve, don't be afraid to do this. It's how you grow.
• Find a way to love and become one with full, rich and saturated color. The children's industry craves color. This is a simple fact. You are more likely to work if you work in juicy color instead of light, soft washy, beach bleached color. I am not suggesting you sell your soul here, I promise. You can evolve a style that works for both YOU and for the industry, I PROMISE. If you work in a softer medium (like watercolor) and would like to evolve while maintaining the integrity of your medium, this will require some experimentation. You may have some growing pains, but you can do it. I did!
• Anatomy of any living creature you draw is incredibly important. the line/painting style in which you utilize to execute the illustration doesn't matter if the "bones" aren't there. The important thing is that you have an understanding of the anatomy and gesture, and that the anatomical drawing is correct and natural in whatever stylistic form you choose to draw it in.
About the portfolio in general...
• Create a series of narrative pieces to take the viewer through a story. Anyone who is looking at your portfolio as your potential client is going to expect to see character/story progression in this very way. (Unfortunately I sound like a broken record on this one because they probably heard it one zillion times, but that's because it is really important.)
• Have characters interacting in a scene together. Show emotion and expression in faces. Show action. Show life. I
By: Kathy Weller,
on 2/21/2010
Blog: wellerwishes (Login to Add to MyJacketFlap)
JacketFlap tags: Essays, Reflections, Business of Art, Resources + Reference, Workspace + Tools, PSA, Add a tag

Before I bought my Cintiq tablet, I had been working on a set-up that basically could not sustain me in my career as a children's illustrator in the 21st century. I was working on a Powerbook G4 and used a 3x5 Wacom Graphire tablet. It was my first lap top. When I bought it, I was under the impression that it would support doing heavyish graphics. Due to the portability factor, I went for it. Well, I was right, It did support graphic files, even really large ones. But what I did not anticipate was how hot the machine would get. That was something I discovered pretty quickly. But a more nervewracking problem with doing artwork on the machine was an issue of camouflage - the screen "trickery". The matte screen just did not show all the lumps and bumps in a working illustration. It read light yellow as white. It read light blue as white. Light grey? White again. And the sad part is that, half the time, I did not even realize it until WAY after the fact. I remember: I would make an update to my web site. Then, next day, I would go look at what I had done on a regular desktop computer monitor, live and online. I'd be absolutely horrified that the graphics had some blatant mistakes in them. Ugh!
I discovered that I hated using my lap top/tiny Wacom tablet for design work. I also discovered that I simply could not get used to illustrating with the small Wacom with the laptop screen. There was just something completely uncomfortable about the tiny tablet / lap top combo that eas pretty much unbearable. I'd used Wacom tablets (6x8 mostly) for years preceding this point, so it was not a "getting used to it" issue. It was just that the combo was not working, and it wasn't going to start working. If I was going to move forward in my career, I simply had to get the right tools—NO if's, ands or but's!
I had an experience which propelled me quickly to decide to make these major changes. It happened during my work on the book "The Months". Throughout the entire job, things on my end could have gone SO much easier had I had the proper tools and hardware. Not just the Wacom/lap top situation: I desperately needed a large-bed scanner, but I had only a little 8.5 x 11 one, and there was just no time to work on acquiring the larger-sized one that I needed during the working time frame of the job. I completed the project of course, and the book did see the light of day! But I learned some very valuable lessons. One of the most important was to suck it up and get the right tools to do the job right. After so many horrible scans and terrible time trying to retouch my watercolor paintings with the lap top / tiny Wacom Graphire combo, I decided, ENOUGH! I was a professional and I was going to buy the best tools I could. I was worth it, my work was worth it. I was not going to continue to compromise my goals and art career due to the lack of the equipment I needed to function in the present landscape.
Around that time, the Wacom Cintiq was the newest offering. I hemmed and hawed for months, but after chatting with Carlyn Beccia about the Cintiq, I was willing to jump in, sight unseen. I felt that, if I knew that Wacom tablets worked for me in general, then the Cintiq would be a great step up. I knew there would be a big learning curve, but there is a learning curve with everything. Honestly, if there's no learning curve with something new, then where's the c
By: Kathy Weller,
on 2/10/2010
Blog: wellerwishes (Login to Add to MyJacketFlap)
JacketFlap tags: Marketing, Children's Art, Business of Art, Resources + Reference, educational, Vector Art, Add a tag
What is the difference between vector art and raster art, and why should a children's illustrator care?
Flash and Adobe Illustrator both create vector line art. One way to describe the value of vector art: If you export your Flash-drawn line art as an AI or EPS file, it is scaleable up or down -- as large or as small as you like -- without losing any quality in the end. Pixel resolution is not a concern when you are in a working vector file. The art in the working file is not dependent on pixel resolution... and if the finished file is also vector-native, such as an .EPS file, then the art in the end file is not either.
Photoshop, for all its wonderful qualities, creates bitmapped /raster art. And I am a die-hard Photoshop-head, for sure. I promise, I am not knocking my dear Photoshop . I'm simply pointing out something that just is not built into Photoshop. Photoshop, by contrast, uses pixels to DEFINE the resolution of the working file. It is not scaleable the way that vector art is. When you create your working Photoshop art, what you "set" is what you "get". What I mean is, what ever you "set" your resolution to - your file size to, is not changeable in the end. It is what it is. If you draw your racecar at 2 inches wide at 300 dpi, you cannot scale it up to 2.5" inches without loss of quality. (You'll get smudgey, dirty pixels around the perimeter of your car.) The one thing you CAN do that is contrary to this, is if you plan to work at a WAY higher resolution, say 600-1000 pixels per inch, you can then place that art into a regular print-res file for printing (300 ppi) and the art WILL be larger by virtue of the pixel-per-inch size differential. (This is not necessarily something I recommend doing, but it is an option for those times when you need to create a truly ginormous piece of artwork such as for a trade show booth, or for an extremely large outdoor advertisement to be used for a wall of a bus stop cover, for instance.)
I like to use Flash to illustrate and do line art because the line has an organic feel. But Flash also has it's drawbacks: you cannot create custom brushes for instance, and the line quality in Flash is not the most detailed. These issues are likely due to the fact that Flash was primarily created as a tool for animation, not for finished illustrations. (Fair enough, but I sure hope they upgrade the drawing capabilities in future releases). Adobe Illustrator also does a wonderful job creating vector art, and is the industry standard in vector art creation. In the past, I shunned Illustrator for it's lack of natural- looking, natural-feeling brushes. But nowadays, things are different. Illustrator comes with some lovely painterly brushes, and now, you can even craft your very own brushes with ease, right in the program itself! While I've always felt Illustrator also has it's own set of drawbacks, I now feel that, with Illustrator as it is TODAY, my own personal lack of breadth of knowledge of the program is my main liability with the program. It's come an awfully long way - and I will be exploring it in far more depth this year.
Ever since I myself discovered the value and importance of having a vector line style I can really stand behind, I feel as though I personally have been on a crusade to push vector art to my fellow children's edu illustrators. So much 'black line' art is called for in educational work. It's important for artists to make their own individual discoveries and find a method they enjoy to create this form of art. This serves both the clients' interest as WELL as our own. Specifically with 'black line' art, vector art is the most flexible type of file for clients, and it is becomin
 By: Kathy Weller,
on 2/1/2010
By: Kathy Weller,
on 2/1/2010
Blog: wellerwishes (Login to Add to MyJacketFlap)
JacketFlap tags: technical pen, Tips, Resources + Reference, Workspace + Tools, Add a tag

Take the pen apart
When you take the pen apart, have a wide-mouthed shallow bowl handy, or a workspace that is safe for small messy parts so you don't lose any pieces. Line your work area with paper towels to keep tidy.
First, unscrew the colored ring on your pen casing. Then, take apart the pen tip. There is a small tool that comes with the pen. It's called a "nib key". It looks kind of like a black nut (hardware - nuts and bolts, I mean). Use this to take apart the nib tip part. It's easy to do. This nut-like piece fits onto your pen over the tip. Once it is fitted on, just unscrew the tip part apart. (If you need a visual or further explanation, click here and scroll down a bit.)
Soak the working parts
Soak just the pen-tip working parts (not the casing) in a Rapidograph cleansing solution such as this one. You may soak in either a mix of solution + water or straight solution, depending on how much cleaning power your pen needs. You can do the soaking in a very small vessel with solution to cover, or almost cover, the soaking parts. This way, you will only use just the amount of solution you need to get your pen clean, and no more. Make sure to cover it to keep it safely away from pets or spills. Depending on how tough a job your pen is, you may soak it for anywhere from a couple hours to a couple days, give or take.
You can do just these steps above and let your pen parts soak for awhile. Then, rinse by running under cold water. Test out your tip on some paper towel occasionally, until you can tell that the tip is clear of clogging and it runs cleanly.
This alone is the general method to clean your pen. There is an additional, optional step you can take. Totally not necessary, but works very well: the Rapidograph syringe.
The Rapidograph pen cleaning kit (with syringe)
You can buy a great Rapidograph pen cleaning kit from the creators of the original Koh-I-Noor Rapidograph pen. It comes with a pen cleaning solution which you would use in the first step of cleaning. The second step: you use this balloon type of gadget that you attach to the pen nib, and you get to squeeze the balloon to force all the ink out of the pen tip to help clear out your pen or water/solution in and water/solution out over and over. This uses a suctioning action to clean your pen. (The suction/balloon squeezing works like a turkey baster.) It's a lot of fun and it is very effective! It works very well to get your pen squeaky clean. (Did I mention it's fun?) (If you do this method, mix up more solution/water just for the suction cleansing.)For more information on this, instructions do come with the kit (and it is not difficult).
General DO's and DON'T's for handling/using your Rapidograph pen
•DO Be really careful with the tip. Don't bang it or bend it. Excess tapping on the tip is a bad idea as well. They are strong enough for drawing but they are not invincible and I have killed a tip or two in my time. The pens are expensive to replace, too. So treat them with care.
•DON'T shake the pen to start ink flow. This will kill your pen. To start ink flow, hold the pen in one hand vertically (tip down). While holding pen firmly, ta
By: Kathy Weller,
on 9/24/2009
Blog: wellerwishes (Login to Add to MyJacketFlap)
JacketFlap tags: dog art, Video Demo, A Place To Bark, party animals, Party Animals Week, Tutorials, Dogs, Watercolor, Technique, Resources + Reference, pet portraits, Auction, Add a tag
Here's the final video featuring the painting I created for the Party Animals book! In this short video, I chat about the details I put in the piece and how those little things mean a lot.
> Enter my Party Animals book giveaway
By: Kathy Weller,
on 9/3/2009
Blog: wellerwishes (Login to Add to MyJacketFlap)
JacketFlap tags: Essays, Writing, Inspiration, Business of Art, Resources + Reference, pet portraits, the formative years, Adventures in pet portraiture, Add a tag

• I wanted to put myself in a position where I had no choice but to learn solid business and financial skills. Any type of business would help me learn this stuff, but if I was not passionate about it, I wouldn't follow through. (You can lead a horse to water...) To this end, pet portraiture has been a great "boot camp" for me to really learn the business of being an independent artist. I handle every part of it. Some might shudder at the thought of handling the financial parts. But it's especially important to learn that stuff, and even more so if it makes you uncomfortable. (That uncomfortable feeling is just your brain telling your body that you need some experience and improvement in that area.) If you intend to make a career as an artist, you are in the unique position where you simply have to learn how to run your business, and that includes the finances. Plus, since you are passionate about your business, you will learn all this stuff within the framework of something you truly love doing. That makes it less painful and more interesting. When you have setbacks, you learn from it, get up and try again. And when you have successes, it makes them all the more sweet knowing that you are responsible for every aspect of your business. It's a great feeling to have a handle on those things also from the perspective of self-esteem. I've been a life-long math-phobe. Hey, if I can do it, you can do it. Lastly, to learn things right from the get-go will preclude the development of any bad or lazy habits. A good accountant is an excellent, and I think necessary, investment. I have an accountant to help with estimating quarterly taxes and my yearly taxes and though they are not cheap, it feels great to know I am 'doing things right'.
• The over-riding criteria for my business was that it had to be something I was really passionate about. I love animals, and I always have. So, in that way, it was a natural fit. I also liked the fact that it was a kind of wacky, odd niche, which matched my personality. It was something that not everyone was doing at the time. I was sure that it would never be boring. But above all, my whole life I'd always loved creating cute and fuzzy characters through my artwork. Guinness was my first dog as an adult (a black pug, I married into co-parenting him). Guinness was my perfect creative muse, years before pet portraits were even a shimmer on my horizon. I drew and painted him all the time. Both Guinness's personality and his physicality perfectly matched my own creative sensibilities and lit up my imagination. (Today, a portrait of Guinness still hangs proudly in my home). Thanks to Guinness, I'd essentially already been doing pet portraits for a long time and strongly identified with the genre before officially making the leap. I have Guinness to thank for all of the inspiration. He was a wonderful companion and he clearly made a huge impact on me.
Today, though I still keep my toe in the pet portrait pool, my portraits are no longer the centerpiece of my creative work. But all that I have learned -- about business, about my art, about communication, about others and about myself, came first to me via the pet portraiture business. It's given me gifts too numerous to mention. It saw my ship out to sea, and powered it to sail high and proud. But the point is, I started *something* with my art. For me, it happened to be pet portraits. But it could have been anything. I was passionate and committed. I made something happen. In turn, it propelled me.
Starting your own 'thing', no matter how small it may be, has an excellent peripheral effect: It's a great confidence-builder. When you take yourself seriously as an artist and as a business person, and you walk it like you talk it, suddenly you will find that others are starting to take you seriously, too. As a career artist, you are a maverick. You are likely going to be paving your own way in everything you do professionally. As a creative professional, by default it comes with the territory. So get used to your entrepreneurial, independent business-person self. Embrace it. Own it! Every new venture you take on will be building on a previous one. Every new experience you gain is wisdom in the bank. In the long run, you will only get richer in all aspects for continually challenging yourself in new and different ways.
By: Kathy Weller,
on 9/2/2009
Blog: wellerwishes (Login to Add to MyJacketFlap)
JacketFlap tags: Business of Art, Resources + Reference, pet portraits, the formative years, Adventures in pet portraiture, Add a tag

Becoming a pet portrait artist was an outgrowth of my creative interests, desires and needs at a time in my life when I had not been doing much of my own art work at all. I'd been suffering with chronic hand and wrist problems for a few years, off and on. When those issues finally calmed down, I was hungry to build something with my artwork - something new, fresh and different - something that was really "me"! Maintaining my full-time job as a graphic designer/illustrator while starting up my new venture required some serious time-management. But, with proper prioritizing, I knew I was up for the challenge. I really wanted to jump back into my artwork head-first! Starting an art business would be a great way to do that, but choosing pet portraiture in particular really changed everything. It's helped me grow in so many ways.
I had a few overall goals for my what I wanted my pet portrait business to accomplish for me:
• I wanted to create a business which would be a framework for my continuing growth as an artist. I really wanted to get back into the habit of doing artwork consistently. Creating a business with timelines and deadlines would keep me on track. I would be accountable, and working under the umbrella of a business would be all the motivation I'd need. And choosing pet portraiture for my business would keep me producing, growing and learning - I viewed it as unchartered territory, I was excited about the subject, and the road was wide open for expression. In the end, it has accomplished all of this for me, and more.
• I wanted my business to foster my communication skills. Working this way would help me to learn how to better manage clients and projects in pet portraits and beyond, and, because the way I work with my clients is one-on-one, pet portraiture by default would accomplish this. Currently, I enjoy a very collaborative, creative workflow with my clients. Personality-wise, pet people are my kind of people, too: I'm just as nuts about pets as they are, so it's a good fit.
• I wanted to be able to do something where I would be in a position to be able to use my artwork to help others. With pet portraiture, I've had the opportunity to donate something uniquely special and valuable to many dog and cat charities and rescue organizations. That feels pretty good!
Stay Tuned for Part Two!
By: Kathy Weller,
on 8/20/2009
Blog: wellerwishes (Login to Add to MyJacketFlap)
JacketFlap tags: Marketing, Events, Conferences, Inspiration, Support, Networking, deals, Business of Art, Resources + Reference, Art Licensing, Other Artists, Plug, news ticker, social networking tools, Add a tag

Here is a banner opportunity to gain a LOT of practical information on crafting your career as a professional artist, all in ONE DAY, and for one reasonable price.
There are seminars and workshops I've read about (and several I've attended) which cover the ins and outs of particular niche arts professions. But this looks to be the most well-rounded, ONE day-long seminar I've seen yet which tackles marketing yourself as a professional artist from so many broad angles. The only thing I've seen close to this in depth and breadth is the seminars available at Surtex Show and, to a larger extent, Licensing International. These shows each run for 3 - 5 days and the seminars and workshops they offer are about 1.5 hours each. But there are so many seminars and workshops over the course of 3-5 days, that you can pick and choose from many, many topics of interest.
I've taken many seminars at both of those shows and I've got my money's worth. But I can tell you that it cost *mucho dinero* to take the classes alone, never mind the travel and hotel expenses involved. This workshop costs only $200 (well, $195, officially) for one full day. You get to choose four seminars out of eight offered, which breaks down to $50 per seminar, which is a good price per seminar (for comparison's sake, Surtex seminars last 1.5 hours and are $75 each). Plus, there will be time to talk shop with others in a social atmosphere at the beginning and end of the day.
If you are in the Boston area (or will be September 13), and you are a working artist in need of some information, resources and a little guidance in a few key areas, OR you are a student about to fly the college coop, it's most definitely worth checking out. Great opportunity to gain a lot for not a lot of time or money!
I've attended workshops and seminars with Carol Eldridge and I can highly recommend her to anyone interested in learning about art licensing.
Here is a list of the titles and speakers who will be presenting:
Art Licensing: What it takes with Carol Eldridge, Carol Eldridge Designs
Art Marketing Today: New guidelines with Susan Fader, Ditto Editions
Art Etiquette: The Do(s) and Don't(s) with Suzanne Schultz, Canvas Fine Art Gallery
Copyright & More: Know the laws with Brian LeClair, IP Attorney
Art Reproduction Today: Get the facts with Susan Fader, Ditto Editions
Art Representation: Is it for you? with Suzanne Schultz, Canvas Fine Art Gallery
Social Networking: How & Why with Corissa St. Laurant , Constant Contact
Speakers' web sites
Carol Eldridge (Art Licensing):
http://www.caroleldridgedesigns.com/
Susan Fader (Art Marketing Today, Art Reproduction Today):
http://www.dittoeditions.com/
Suzanne Schultz (Art Representation):
http://www.canvasfinearts.com/
Brian LeClair (Artists' Copyright Issues):
PDF bio download
Corissa St. Laurant (Social Networking):
http://www.constantcontact.com/index.jsp
---------------------------------------------
Art Marketing 21 Day Details
Date: SUNDAY, SEPT. 13, 2009, 8:30-5:30
Place: M2L, 104 BOYLSTON ST., BOSTON
• Participants select to attend 4 seminars from the 8 offered -- 2 from the morning session and 2 from the afternoon session)
ALSO INCLUDED:
COFFEE AND PASTRY During Check -In.
COCKTAIL RECEPTION at the conclusion of
the day.
THE COST FOR THE DAY IS $195.00
Registration form PDF
Email: [email protected].
By: Kathy Weller,
on 4/21/2009
Blog: wellerwishes (Login to Add to MyJacketFlap)
JacketFlap tags: Painting, Watercolor, Technique, Resources + Reference, pet portraits, dog art, Video Demo, Add a tag
Here is Part Two of my first dog painting video demo! I am new at this and these videos are not perfect by a long shot. I know -- but I will get better with time, and I am hoping that my enthusiasm and interest in sharing my process with you (plus the occasional painting tip you might glean from it ;) ) will keep you interested and watching! :)
You may be wondering. "What this painting is for, who is the client?" I promise to reveal this in a later video demo farther along in the painting. It will be fun to find out -- it is pretty exciting! So I hope you continue watching and listening to this work in progress!
By: Kathy Weller,
on 2/5/2009
Blog: wellerwishes (Login to Add to MyJacketFlap)
JacketFlap tags: Tutorials, Inspiration, Process, Children's Art, Technique, Resources + Reference, Flash, Vector Art, black line, Add a tag
 "Ring Bearer" above: Black-line work done in Flash
and exported as .ai file. Painting done in Photoshop.
Well, recently I read a great tutorial about how Flash works as a vector drawing tool by illustrator Bob Flynn. I use Flash at my day job, and, though I illustrate in Flash all the time, I never knew that you could export your work as an .ai file (Adobe Illustrator's native working file) and have absolutely no loss of line quality. Up until now, when I have worked between Illustrator and Flash, I'd always had a loss of quality in the vector art, as I'd move to and fro. Why?? I was cutting and pasting. NOT exporting. An "A-ha" moment, for sure, but I just never expected something as simple (and as useful!) as "Export > Export Image... to Adobe Illustator" to be an option in a product which is primarily used for screen resolution only. Live and learn!
Read the Flash Tutorial here
By: Kathy Weller,
on 11/20/2008
Blog: wellerwishes (Login to Add to MyJacketFlap)
JacketFlap tags: copyright, Business of Art, Resources + Reference, PSA, Add a tag

There is NO excuse for us visual artists not to copyright our work.
But there's GOOD NEWS! The U.S. Copyright registry now accepts e-filings.
There are two big benefits to utilizing the online system to register, instead of sending in hard-copies:
• The electronic filing fee is only $35, a $10 savings over the standard (hard-copy, mail-in) $45 fee
• You do not have to mail in hard copies!!! This is a BIG one for me, because including the good-quality prints of my artwork that are required for hard-copy registration can end up being expensive. (I usually register several works at once, so this is a big deal.)
Lastly, with the big scary monster under the bed called the "Orphan Works" bill threatening our security for the past couple years, we simply cannot take any chances. The onus is on us to be pro-active about protecting our precious assets of creativity - our work, our livelihood, ourselves!
For more on Orphan Works, read the Illustrators' Partnership of America's Orphan Works blog (...and, for the sake of argument, bi-partisanship, and in the spirit of sharing but not reflective of my own opinions on the subject), here is the Copyright registry's take on the OW bill.
© * © * © * © * © * © * © * © * © * © * © * © * © * © * © * © * © * © * ©
If you have never copyrighted your work before, no sweat. This is the perfect time to get acquainted with the process of doing it, and finding a way to make it a regular habit (like paying quarterly taxes). Start now!
By: Kathy Weller,
on 10/8/2008
Blog: wellerwishes (Login to Add to MyJacketFlap)
JacketFlap tags: children's books, Conferences, Children's Art, Business of Art, Resources + Reference, Add a tag

I subscribe to New England SCBWI's Yahoo Group listserv. Today, someone posted about a conference happening on Oct. 25 called What's New In Children's Books. Sounded good to me, so I checked out the web site to find out more. It turns out that there is a nonprofit organization called the Foundation of Children's Books that I'd never heard of before. Even better, they are located in Boston, and have several conferences throughout the year in places such like Boston College, MIT and Boston Aethenaeum -- all within easy access to the city, or in the city proper! I'm going to sign up for a few of these conferences. I'll let you know which ones I pick!
By: Kathy Weller,
on 4/12/2008
Blog: wellerwishes (Login to Add to MyJacketFlap)
JacketFlap tags: SCBWI, Conferences, Children's Art, Business of Art, Resources + Reference, Add a tag
 NESCBWI Conference, Nashua NH • Saturday, April 12, 2008
By: Kathy Weller,
on 3/14/2008
NESCBWI Conference, Nashua NH • Saturday, April 12, 2008
By: Kathy Weller,
on 3/14/2008
Blog: wellerwishes (Login to Add to MyJacketFlap)
JacketFlap tags: Tutorials, Process, Sketch, Children's Art, Resources + Reference, From Sketch To Final, Add a tag

Here's the next step -- a color study. Look at how rough this is. Sometimes I skip this step, but it is really important to do some color planning -- even if it is super rough, and even if it's just helping me to figure out what I don't want to do. (Sometimes I do it in my head, but I think that doing it on paper helps more, even though it never seems to mimic the finished product at all.) This is one step that's never not helpful.
This is just done on the print out from the rough rough initial sketch. See, it's totally non-fancy -- a very useful scribble. (You will see that this little color study helped me figure out what I did not end up doing.)
By: Kathy Weller,
on 3/13/2008
Blog: wellerwishes (Login to Add to MyJacketFlap)
JacketFlap tags: Tutorials, Process, Children's Art, Resources + Reference, From Sketch To Final, Add a tag

Here is the final sketch (the bottom paper on the lightbox). It's now on watercolor paper, ready to be inked.
When I trace from a sketch on the lightbox, I use the under-sketch as a rough guide. I like to have room for 'happy accidents'. I'm not someone who works incredibly tight from start to finish. I don't do too many preliminary sketches of a given illustration before diving in because for me, it dilutes the final product. I do as much preliminary as I feel is necessary for me to have a very good handle on the general composition and all the elements within it, but I do no more than I need to. I think it affects the life, excitement and energy in it. I build but i don't like to over-build, because I feel that beats it down. The law of diminishing returns is definitely in effect when it comes to my own philosophy about my sketching process. Too much is not a good thing, too little is not a good thing. Just enough is perfect!!
By: Kathy Weller,
on 3/12/2008
Blog: wellerwishes (Login to Add to MyJacketFlap)
JacketFlap tags: Tutorials, Process, Children's Art, Revisions, Resources + Reference, From Sketch To Final, Add a tag

I then scan the rough sketch, and then revise the composition in photoshop. I love to create the rough sketch traditionally; I like the line quality and the life in it. But I like to collage pieces of the sketch together, moving things around, to create a well-balanced composition to move forward with.
This is still super-loose, but I know where I need to go from here, and I plan to fill in the blanks
during the pencil sketch phase.
By: Kathy Weller,
on 3/12/2008
Blog: wellerwishes (Login to Add to MyJacketFlap)
JacketFlap tags: Process, Children's Art, Resources + Reference, From Sketch To Final, Add a tag
 This will be the first of a few posts outlining my process of creating a non-digital pen/ink/watercolor illustration.
I start with a very rough sketch from my sketchbook. I either re-sketch/re-doodle it to scale (as seen here) OR I enlarge the small sketchy doodle in photoshop to size (in this case 8.5 x 11), and print it out.
If I use a redrawn sketch to size, I also reference the original small doodle (by eye) when moving on to the next step.
By: Kathy Weller,
on 3/8/2008
Blog: wellerwishes (Login to Add to MyJacketFlap)
JacketFlap tags: Essays, Writing, magazines, Children's Art, Resources + Reference, stuff I bought, Add a tag
 The Horn Book now has a new monthly e-newsletter called Notes from the Horn Book. You can sign up to receive it, or read it online. Cool stuff.
I was in the bookstore today and almost picked up a brand new March/April copy of the Horn Book, but I thought better of it once I found out the price. Instead, I decided to subscribe, since I buy it all the time anyway. It's such a great magazine, the savings if you buy an annual subscription savings is substantial over newsstand.
This issue, the main story is called "What Makes a Good Alphabet Book? Let’s Start at the Very Beginning" by Lolly Robinson. You can read it here.
By: Kathy Weller,
on 3/4/2008
Blog: wellerwishes (Login to Add to MyJacketFlap)
JacketFlap tags: Books, Writing, Inspiration, Children's Art, Business of Art, Resources + Reference, stuff I bought, Add a tag
 I am an aspiring published children's author/illustrator. Yup! It's true!! :) Not sure if you knew that, but there it is. :) Here are two books which have helped me immensely with regards to writing for children.
I've been writing all my life, but have no formal writing training (aside from creative writing classes). I do work really well within a framework, though, and I really believe in having the knowledge of fundamentals and groundwork for any creative endeavor.
These books show you the basic writing frameworks for different genres in easily digestible formats (which also happens to be fun to read). Both have been indispensable to me and I'll bet they will remain open and occupying whatever available counter space there is in my studio for the foreseeable future.
(Note: Please do not be fooled by the titles. The material is not shallow. They are user-friendly, and a great introduction to your future children's writing career!)
Writing Children's Books for Dummies
Lisa Rojany Buccieri and Peter Economy
Very easy to navigate, covers all the basics. A fun and educational read. (You are not a dummy if you read this book. You are a smartie... But you WILL learn a bit about dummies, ha ha). You will refer back to it time and time again. Excellent index.
You Can Write Children's Books
Tracey E. Dils
If there was a superhero of reference books for style in children's writing, this might take the title. I have found so many answers to nitty-gritty writing-style questions between these pages. Stuff you didn't even know you needed to know is here. And all within a slim (gasp) 120 pages. The lady knows how to edit, too!
I feel I'd be amiss if I don't mention The Complete Idiot's Guide to Publishing
Children's Books, Second Edition by Harold Underdown of Purple Crayon fame.
I don't have this book (yet), but it is written by a very well-regarded and respected veteran who really knows his stuff, and it's gotten excellent reviews. It is on my Amazon wish list.
By: Kathy Weller,
on 2/21/2008
Blog: wellerwishes (Login to Add to MyJacketFlap)
JacketFlap tags: Children's Art, Business of Art, Resources + Reference, Business of Art, Resources + Reference, Add a tag
 (Eric Carle Museum of Picture Book Art)
Here is another (older) article from Christian Science
Monitor - same subject (from 12/31/2004):
Illustrators get their day in the gallery
Along the same theme, here is a gallery that
agents art by children's illustrators:
http://www.storyopolis.com/
And another:
Child At Heart Art Gallery
(...big thanks to Gina Perry for the tip!)
By: Kathy Weller,
on 2/2/2008
Blog: wellerwishes (Login to Add to MyJacketFlap)
JacketFlap tags: Business of Art, Resources + Reference, Other Artists, Essays, Inspiration, Support, Process, Business of Art, Other Artists, Resources + Reference, Add a tag
 The talented illustrator and blogger extraordinaire Megan E. Jefferey wrote this excellent essay to mark her SEVENTEENTH anniversary as a freelance artist. Lucky for us, she decided to share it with us all.
I discovered this post right around the time that she first posted it to her blog (August 2006). In it, I discovered so many gems of wisdom that were so pertinent to me at the time! (Come to find out, they truly still are.) I thanked her profusely for sharing it, and promptly hung the essay list on a wall in my office.
Cut to a year and a half later. I did a little rearranging in my office studio last night, and I came across my copy of "17 Things", which fell off my wall a year and a half ago. I read again, with just as much interest and thirst for the information as I did back then. It contains such evergreen wisdom which is applicable for freelancers in their first, fifth, and fifteenth year!! I hope you get as much out of this as I did (and still do)!
Hey Meg, thank you SO much (again). :) ...And, by now -- Ta - Da!!! -- you are WELL INTO into your 18TH YEAR!! Big Congratulations, Meg!!!!
By: Kathy Weller,
on 1/30/2008
Blog: wellerwishes (Login to Add to MyJacketFlap)
JacketFlap tags: Business of Art, Tax Time, Business of Art, Resources + Reference, Tax Time, Resources + Reference, Add a tag
 WHAT is in the green box? EVERY SINGLE infinitesimal receipt from the year 2007, that's what!!
I just completed adding up all of my receipts AND income from the year 2007. Whew!! Glad that's finally over.
I tell you, tax time gives me the heebie-jeebies. I can't help feeling that looming sense of dread when the time rolls around that I have to dig through every infinitesimal shred in my records and look at it under a microscope. I had a pretty easy time counting tonight on the calculator, which is a blessing. (My fingers were up for the challenge, I guess.) It wasn't one of those experiences where you add up 25 numbers, dare yourself not to make any numerical notations as a fail-safe, then dramatically forget which number you were on, and have to re-add the entire column all over again, from the beginning!! Ooh, nightnmare. No sirree, not tonight!! It went smoothly! YESSSSSSSSSSSS..........I can breathe now.
A few years ago (when I started freelancing for real) I decided that I was going to do everything RIGHT where taxes/accountability was concerned, no matter how initially painful it would be. And yes, it would be painful... I was never trained on financial responsibility and accountability when I was a youngster, and, to top it off, I was never a great math student in school... So, as you can imagine, the entire process has been a lot of work and very challenging at times, and a lot of holding my feet to the fire. But today I can hold my head high and say that I am SO proud of myself! I've come such a long way. It is not ever really completely painless, but I CAN say that "doing things right" gives me a amazing feeling of peace, relief, positivity and true confidence that I can't put a price on.
There is things one can do to make tax time less painful. Keeping a separate credit card and bank account help keep things organized in a tangible sense, as well as just mentally. Knowing that things are separated in this way can relieve daily stress and anxiety. Many freelancers who are in that 'limbo' area between working their day-to-day full-time job and freelancing the rest of the time may surmise that these additional steps are just added work and unnecessary. But to the contrary, I personally feel that it's incredibly important in many ways. It not only helps with just general organization of your business finances, it also trains you to have good financial practices, which will only help you in ALL aspects of your finances. It's also an unspoken promise to yourself that your goal is to TRULY THRIVE as a professional artist, and that your business is NOT an afterthought.... And all of those things are VERY, VERY important!! :)
My first step was making an appointment with an accountant. He gave me a crash course in small business tax 101 and he tailored it to my own business and needs. Taking this step is worth the expense. You gotta learn this stuff somewhere, and it might as well be from a professional in the field!! (If you're worried about the cost, don't. You and your business are WORTH it. You can expense it. Case closed.) The sense of empowerment you receive when you are learning the right way to do things is really beneficial in so many ways. The positive enforcement has ripple effects throughout other areas of your life!!! :)
View Next 1 Posts
Hi Kathy,
Thanks for the step by step. Have always wanted to try this with my own artwork but hadn't been able to find out what to do until now. Found you via Holly's Blogging Your Way Course. I've signed up too.
Also, noticed you are friends with Ellen Crimi Trent and Carol Eldridge. Small world. Looking forward to chatting soon. Cx
Hi Chris! How nice to "officially" meet you! Ellen has told me about you and your beautiful art work in the past. I admire your work! :) Great stuff! Thank you for commenting. How cool that you are also in BYW- I look forward to chatting with you over there!
:)
See you soon,
Kathy
This is awesome Kathy! Thanks for taking the time to explain it! I went to the RISDI art show today and a girl had done this to some of her fine art-and it looked great but i had no idea how it worked-now I do!!