I finally got around to successfully making a few prints of my art and putting them up in my new etsy shop.
But lemma tell ya ~
Making prints is not the "la la la, oh let's just print out a few little things and pop them up on etsy (or wherever)" kind of deal. Just so you know. At least not for me.
Oh, its not as bad as a lot of things I can think of. Its just not as simple as one would think. Here's what can go wrong:
Forget to select the right custom size for paper when you go to print. Here, instead of my special 6"x 8" inch size, I left it at 8.5 x 11, so my little bear printed like this on the paper ~
One sheet of paper wasted.
Then there are the times the printer decides to spit ink blobs on the paper. Not every time, mind you, just now and then, on certain images, just to be difficult. So you get this:
Another sheet down the drain.
Then there's the combination "need to adjust color" and "didn't print with even margins" example:
With some of my images, the color prints just fine. Others, it goes kind of dull or "bluish" and I really have to bump up the color or brightness in Photoshop.
Then there's my printer. I'm using an Epson C88 for these, which I think is a great little printer. But it tends to print the image starting about a quarter inch down from where its set on the page, leaving more white space on one end or the other. So I have to adjust the file for that before I print, and make I sure I know which end is going to get cut off or shifted down before I hit "print". (more paper wasted)
So its all a little fussy. When they do come out right, they're lovely! Its just the ones that don't make me pretty cranky.
On a more positive note, I'm really happy with the paper I'm using! Its Polar Satin from Red River Paper Co. They make really nice papers, cards, envelopes, everything, for every kind of printing job you can imagine. I highly recommend them. And this particular paper is like buttah. Its - well - satin finish, which isn't gloss or even semi-gloss - its just right. I'm printing mostly colored pencil work on it, and different "looks" of pencil (grainy, burnished, drawings on sanded paper, etc.) and they all look great. I've also done one pen and ink piece, and its perfect. I'm sure it would work well for watercolor or graphite too.
It also has a nice weight to it. The only thing is it doesn't take pencil on the front side
Viewing: Blog Posts Tagged with: Clear Bags, Most Recent at Top [Help]
Results 1 - 3 of 3
Blog: Drawing a Fine Line (Login to Add to MyJacketFlap)
JacketFlap tags: Red River Paper, Clear Bags, making prints and what can go wrong, Add a tag
Blog: Drawing a Fine Line (Login to Add to MyJacketFlap)
JacketFlap tags: Corel Painter, Mad Men, Clear Bags, NYTimes children's books, Paper Garden, Add a tag
They also publish a more comprehensive list.
Amazing, the range of art styles and talent, writing styles, types of stories, themes, etc. etc. Lots of creativity going on here! And lots of inspiration if you're a fellow children's book illustrator.
~~~~~
I've been a childen's book illustrator as well lately, but the "educational publishing" kind. Which means I can't show any of the art. (sad face) I've been having fun though!
Also just finished a building rendering, but don't think I should share until its safely in the art director's hands. Dontcha just hate when you're busy making art, but can't show any of it?
I'm itching to get back into doing children's book work full time. I've been off on a 'colored pencil' tangent for a while, which is fine, but I can't neglect the other halves of myself for too long or they get cranky. Actually, I'd like to put together a whole new fresh children's book portfolio. I KNOW. How many times have we all said that, then laughed. But seriously.
I'd like to develop a digital style in addition to my colored pencil style. These days, if you want to have steady work, it really helps to be able to work digitally. I can, with Photoshop, but its pretty basic stuff. I would in no way consider myself at this point to be a "digital illustrator" (although this most recent piece I'm working on and can't show has largely been done with Photoshop.)
I downloaded a free trial version of Corel Painter a few days ago, and am really impressed! Painter's strength is that it can mimic lots of traditional media, and comes with loads of brushes and special effects. Of course the first thing I tried was the "colored pencil" thing, and it was pretty good. I was just using a mouse, and think that if I was using my Wacom and pen I could have done a lot more. There are pencil tools, palette knives, watercolor brushes (wet & dry) and even a "salt" special effect (you know, where you sprinkle salt over watercolor to make a texture). Its super cool!!!! So I just may have to ask Santa for this for Christmas.
I'm still working on making note cards. Oy. I visited my local paper shop, The Paper Garden, for some card stock, then ordered clear bags to package everything in from Clear Bags. I've done some, but its a slow, "feed each card through the printer one. at. a. time" kind of operation. I'll get there, its just s l o w.
Mad Men is over for the season. I'm already going through withdrawal. But what a great last episode, eh what? Wow.
Blog: Drawing a Fine Line (Login to Add to MyJacketFlap)
JacketFlap tags: greeting cards, Beverly, JoAnn, A Cottage Affair, Clear Bags, Michaels, Hold Everything, Strathmore cards, Avery labels, Add a tag
Yesterday I delivered some new greeting cards to a local shop who carries my art and knitting (A Cottage Affair on Fair Oaks Blvd in Lyon Village, Sacramento, CA.).
I needed to box them up, or something. So I decided to be stylish and pulled out one of my cool Edwardian hat box cases (which I bought at Hold Everything, ages ago.)
I managed to carefully squish them all in, just. The little pocket in the lid was perfect for the notecards. Yay!
Here they are, unsquished a bit. There are several dozen all totalled, of all different designs.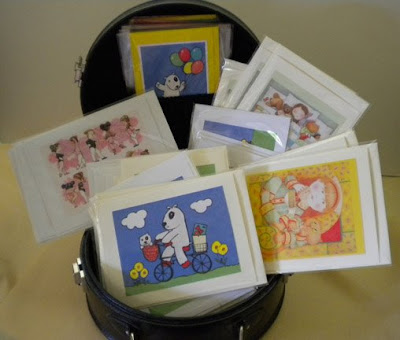
I thought I'd share a little bit about how I make my cards. The ways to make a greeting card are endless of course. There are whole books written about making cards, for goodness sakes!
But the most basic elements of a traditional one-fold, image on front card are the same. You can go to town embellishing and having fun. But here's what I do for my most simple ones.
First I get some card stock with matching envelopes. I often buy these in bulk from a crafts store (Michaels, JoAnns, Beverlys, etc.). I also like to use Strathmore's special cardstock which comes in a variety of sizes and styles (some with a deckled edge, some notecard size, some with a colored edge, etc.) You can also make your own out of any kind of paper, of course. You can also buy envelopes (or make them if you're really industrious.)
This is a pack of ivory colored basic 5 x 7 card stock with the fold already scored, and matching envelopes.
You'll also need some supplies: mat knife, tape, a burnishing tool...
I love this tape they make now for scrapbooking that comes on a roller. You can get permanent, repositionable, archival, refillable, etc. It just depends on what you want.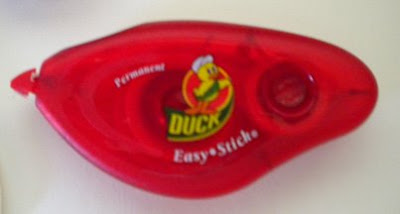
You also need your images! I do sometimes print my images directly onto good card stock, but I've found that a lot of my work looks better printed on glossy photo paper. So I usually print up a bunch of images on that (at the right size ~ somewhat smaller than the 5 x 7 card size, or whatever) and then cut them out and tape them neatly and cleanly to the front of the card.
No jaggedy edges or scuffed image or crooked taping is allowed! It has to be PERFECT.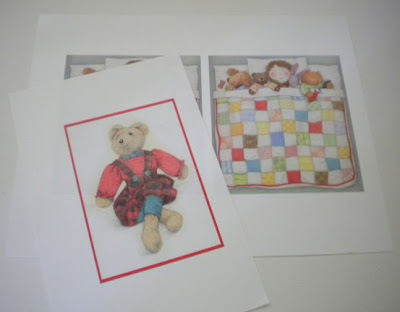
Then there's the back side. You always want to put your name or contact information on there somehow (at least I do). And maybe the title of the art, your copyright notice, company name, whatever you think is important.
Sometimes, if I'm doing a really small amount of cards, I'll set up a file in Photoshop and print the back side of each card. But doing it this way is very time consuming, because you have to feed each card through the printer one, at, a, time. (Same thing goes if you're printing the image directly onto the card stock.) It can make you crazy, especially if you have a big order. BUT. If you're doing something special, and its the only way to do it right, you just have to do it.
What I usually do for the backs now is print up a sheet of labels, and use one of those on the back. I love these ~ Avery #8667. They're small, and CLEAR, so if you burnish them down onto the card, they kind of disappear. They work well if you have colored card stock and don't want to stick a big white label on the back (tacky).
I just format them in Word (Office), its super easy. You can fuss with the typeface, make them be in color, whatever.
Then I always put my cards in a plastic bag. It keeps your card clean and protected and looks soooo much more professional.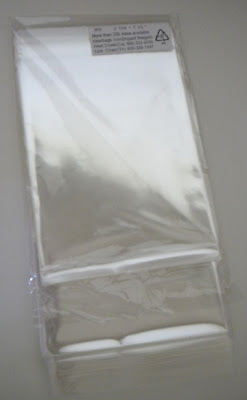
Clear Bags makes about a jillion different kinds of bags for everything you can think of. There are probably other places to get them, but I've always used Clear Bags and have always been happy with them.
I also print up a page of "Card Inside" blurbs. I do a lot of blank cards, but sometimes there are "Merry Christmas" or "Happy Hannukah" ones or whatever. When you have the card sealed in a bag, the buyer can't open it up to see what it says inside. So you have to put a little note with it. I just cut these up and pop one in the bag with the card, on the back side.
So here's what one looks like all packaged up.
Front ~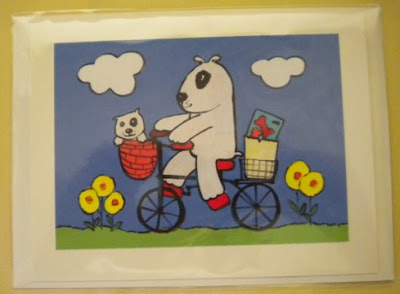
And back ~
And that's it!
It always takes way more time to put these together than I think it will. Even though I know that, I still think I'm going to just whip 'em out. And I don't. You have to print out the images, cut them, adhere them to the card stock, fold the card stock and press the edge with the burnisher to get a nice crease, print out the labels for the backs and then stick them on, then put them in bags with the 'inside message' blurb, and seal them up. It can get very tedious.
I'm just saying.
It does help to have studio mates to keep you company and cheer you on ~


Well misery does indeed love company! After reading about your printing woes, I feel much better! :-) New art, yes, a grand idea!!!
Thanks for the post and the links to your various supppliers! Greatly apprieciated!
Hehe, I had to laugh at this Paula, just because you describe your trials with the printing so vividly and it would drive me nuts too! It would be great to just draw and leave all the technical stuff to an 'assistant' wouldn't it?! I think lots of people will be very interested in buying prints of your art (me for one!). Thanks also for the info re. papers, very informative :)
Yep, printing is a barrel of laughs. I usually sit down intending to make one little print and end up wondering where the day went. My favorite trick is printing on the wrong side of the paper.
Speaking of which--I've had a terrible time getting accurate reproduction on anything but Epson papers. Did you have to do a lot of experimenting on your paper? I hate wasting ink. Also, 2200 prints are considered giclee's?? I didn't know that. Where did you learn that?
I wanted to try selling Etsy, but for images I couldn't get past certain clauses in their agreement (you know which ones.)
Paula, you described the "joy of prints" perfectly! And all this time I thought it was just me. Hate wasting paper and ink. I guess the up-side is that learning by trial and error makes for a lasting lesson.