new posts in all blogs
Viewing: Blog Posts Tagged with: Rainy Day Fun, Most Recent at Top [Help]
Results 1 - 12 of 12
How to use this Page
You are viewing the most recent posts tagged with the words: Rainy Day Fun in the JacketFlap blog reader. What is a tag? Think of a tag as a keyword or category label. Tags can both help you find posts on JacketFlap.com as well as provide an easy way for you to "remember" and classify posts for later recall. Try adding a tag yourself by clicking "Add a tag" below a post's header. Scroll down through the list of Recent Posts in the left column and click on a post title that sounds interesting. You can view all posts from a specific blog by clicking the Blog name in the right column, or you can click a 'More Posts from this Blog' link in any individual post.
If your kids would like to give their family and friends a home-made and unique gift for the holidays, why not try this simple and economical one: necklaces made from metal washers. When I first spotted this on PINTEREST, I couldn’t believe how simple and clever an idea it was. 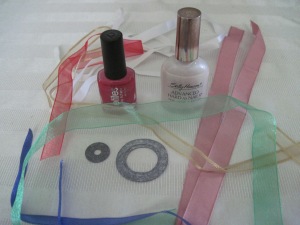 Assemble an assortment of washers (you can get them at LOWE’S, HOME DEPOT, SEARS, or any hardware store. I actually found mine on the sidewalk. Then paint them with nail polish in desired colors. You can use several coats and colors, but let each layer dry thoroughly before adding a second coat. Then tie a ribbon or yarn through the washer to hang. For mine, I added the smaller inner washer with a piece of jewelry wire. You can also sprinkle glitter, add tiny sequins or whatever catches your eye.
 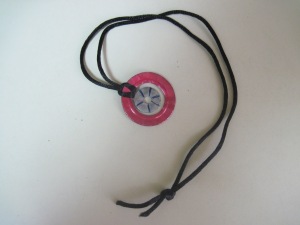 These are so easy and cheap to make, you can give them as party favors or to friends/neighbors as a “thank you”.
For more ways to decorate these washers, visit the washer jewelry pages on PINTEREST. http://www.pinterest.com


I am thrilled to bring you today’s post from fellow blogger Katey Howes who blogs about literacy, parenthood and writing for kids at: http://www.katiewrites.wordpress.com
Every Monday her blog features a new Raising Readers post to help parents raise kids who love books. Katey is mom to 3 girls and countless manuscripts, all of which vie for her time and attention. She wrote this seated on a kid-sized chair while supervising the painting of wooden treasure chests from the craft store. The dishwasher and clothes washer were running, but there was still a good bit of cinnamon sugar on the floor from cooking streusel muffins with the kids that morning. (My kind of Mom!)
You can often find Katey discussing children’s literature, song parodies and household disasters on twitter @kateywrites or on Facebook at her author page: http://www.facebook.com/kateywrites
Here’s Katey:
My hall closet, originally intended for coats, is absolutely stuffed with boxes of board games and puzzles. I have a hard time resisting a new game – especially one that tricks my kids into using their brains. Unfortunately, it seems like these games get more expensive every time I turn around. Just today I came across a boxed set of card games that promise to help preschoolers with their letter skills: 
From what I understand, this box contains 2 sets of 26 letter cards, a joker, and instructions for alphabet-themed versions of traditional games. For $19.95.
ABC Go Fish? Great idea!
$20 worth of great? No way.
Index cards and markers great? Oh, yes.
As a matter of fact, there are a lot of great, educational games you can make at home for a lot less money and just as much fun.
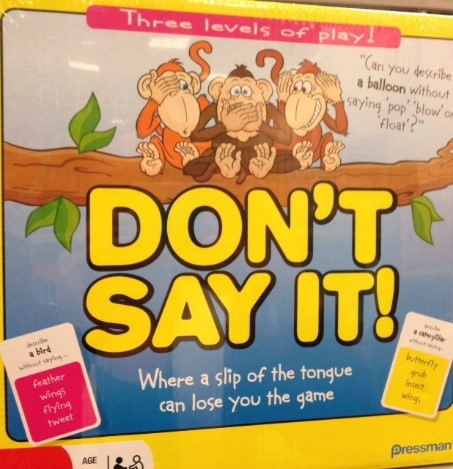
Don’t Say It retails for $16.95 and can be best described as Taboo for kids. Each card has a key word at the top. The goal is for the player to read that word silently, then describe the word in such a way that other players can guess what it is. The challenge? The player describing the word cannot say the other words on the card. For example, a player may need to get others to say “PIG,” but without using “sty” “bacon” “ham” or “mud.” 
Want to make it yourself? Index cards or card stock, a list of vocabulary words and your imagination are all you need. To level the challenge for kids of different ages, you can make your own rules: perhaps kindergarteners can’t use the 1st word on the list, but can use the others.
Want to leave the hard part up to someone else? Lucky for you Teach Speech 365 made a fabulous version of this game and sells the printables for $5.50 at Teachers Pay Teachers. http://www.teacherspayteachers.com/product/Dont-Say-It-Describing-Dash-461132 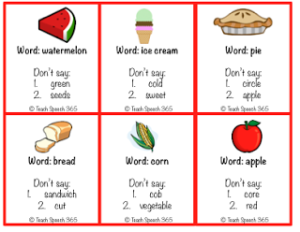
Zingo is the name given to a variety of products that help practice literacy skills like letter recognition, sight word reading, and simple spelling. The games come with a dispenser that pops out cards when you push the handle. Players then try to match the card to their playing card. The first to fill their card Bingo-style wins.
I love these games – and kids do, too. But buying a new one for each level of learning is an expensive proposition – since each dispenser and card set are a slightly different size from the others. I recommend skipping the bells and whistles and simply creating your own BINGO cards using the parts of speech your child is currently working on. http://www.BingoBaker.com makes it quick and easy to create printable templates.
Scrabble Junior claims to make the classic game easy and fun for kids – and does so by providing you with a game board pre-printed with words for kids to fill in. For older kids, the back side of the board is more like a traditional Scrabble board, so it grows with kids. If you don’t already have Scrabble around the house, this may be worth the $13 it retails for at Toys R Us. If you already own Scrabble, think instead of making cards with words from your child’s classroom list. Draw tiles from the handy bag and see who can fill in their cards first!
Scrabble also sells a game called Alphabet Scoop with a fun twist. All the tiles are placed in a bowl. Each player has 1-3 cards with words on them. They take turns scooping out tiles with a spoon and trying to fill in their word cards with matching tiles. Fill in a word and yell out “Yummy!” to win. Again – seems pretty easy to make a version of this at home and customize it to your children’s reading levels!
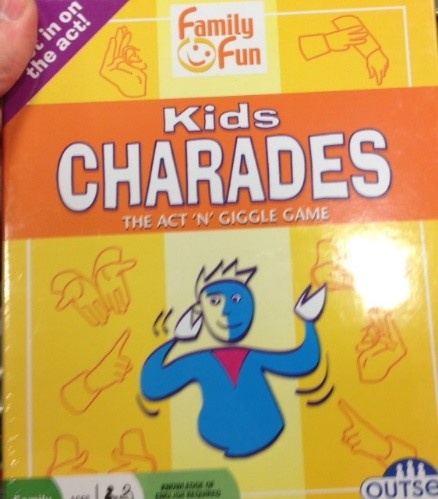
Kids Charades from Family Fun retails for $19.95 at Barnes and Noble and other retailers. It is a great way to get reluctant readers to get in on the action, as they draw a card, read it to themselves, and then act it out for the group. Once again, with a little ingenuity, a kitchen timer and a stack of scrap paper you can make this at home in a flash – and tailor it to your children’s interests and reading levels. You could even put favorite book titles or characters into the mix! 
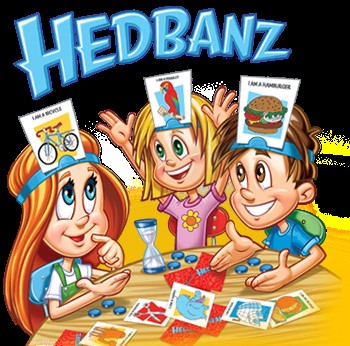
My kids – and my daughter’s Daisy troop – totally love the game Hedbanz – at least, when we make it ourselves. I have yet to cave and buy the boxed game that sells for $15-$20. Here’s how it works:
Players draw a card and do NOT look at it. Instead they stick it to their forehead, facing out, so that the other players can see/read it. Use elastic headbands worn sweat-band style around the forehead to hold the card in place. (Or, if you’re short on supplies, just write your clues on post-its and smack ‘em on the kids’ heads!) 
Players then take turns asking questions like “Am I an animal?” “Do I have four legs?” and the like until they guess who they are. The player to guess first OR the player to guess the most cards by the time a timer runs out is the winner. Make this game easier for beginning readers by using pictures with words. Make it harder by eliminating the pictures. Have kids studying together? How about making it fun by putting glossary terms on their heads? “Am I metamorphic rock?” “Am I magma?” “Am I George Washington Carver?” The possibilities are endless.
I’m sure there are plenty of you out there with ideas for games you can make at home for less. I’d love for you to share them in the comments. And if you’re looking for more games that grow brains, check out Board Games That Build Readers and Board Games That Build (Bigger) Readers on Kateywrites. 
I wish I’d thought of some of these great ideas to use when my kids were small. They are great for classroom use as well, since we teachers are on a tight budget. Thanks for a fabulous post Katey!


On Monday I featured some new iPhone Apps for kids. Today I have three free ones to download onto you Android device.
1. HAY DAY: A building game in a happy country town filled with positive, colorful things and lots of fun for young kids.
2. KIDS DOODLE – COLOR AND DRAW: Your kids will love this drawing app thanks to its colorful options and ability to play back their drawings in a video montage.
3. BUBBLE POPPING FOR BABIES: A very simple game for your baby or toddler. Various forms of ocean life trapped in bubbles are released when baby touches them. Great for building eye-hand co-ordination.
What are your kids’ favorite Apps?


Whether you’re planning a fall road trip or have a long wait at the doctor or dentist, you can keep your children busy with these new FREE apps to download onto your APPLE iPhone.
1. MY HORSE: If you don’t have room in your apt. or backyard for a real horse, get your child a virtual one to love and care for.
2. SPONGE BOB DINER DASH: This game allows the player to help serve customers at the Krusty Krab and make sure they all have a good time.
3. MY LITTLE PONY – FRIENDSHIP IS MAGIC: Help My Little Pony and friends rebuild the town to restore it to sparkling magic.
4. PBS KIDS VIDEO: Numerous PBS apps feature a large inventory of video clips from popular TV shows. For multiple age groups.
Tune in on Friday for more free apps for ANDROID devices.


To make your own carrot clarinet:
Watch the amazing demonstration by Lindsey Pollack at TedxSydney2014. When you get ready to make your own clarinet, use caution with the drill.
http://www.theblaze.com/stories/2014/07/02/he-starts-out-with-only-a-drill-carrot-and-mouthpiece-but-its-the-final-product-thats-leaving-people-in-disbelief/
Who knew carrots were not only delicious but also quite lovely to listen to.
For other interesting sites that have easy-to-make instruments, check out:
http://www.spoonful.com/crafts/music-instruments
and: http://www.freekidscrafts.com


By: darlenebeckjacobson,
on 7/18/2014
Blog:
Darlene Beck-Jacobson
(
Login to Add to MyJacketFlap)
JacketFlap tags:
art,
Activities,
web sites,
summer fun,
Rainy Day Fun,
holiday crafts/gifts to make,
www.redtedart.com,
www.thelongthread.com,
Children,
Add a tag
If your children are bored or you just want to get them away from video games for awhile, try some of the summer craft projects at: http://www.thelongthread.com 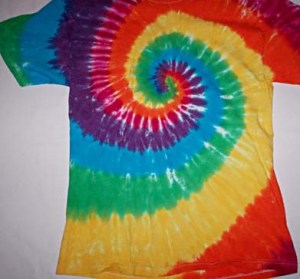
You can learn to tie dye T-shirts, make a seashell garden, make your own kites, sun prints, and much more. There are crafts for all ages and easy step-by-step directions.
Another site with dozen’s of kid-friendly craft projects is: http://www.redtedart.com
Get crafty this summer!
“Forget not that the earth delights to feel your bare feet and the winds long to play with you hair.” – Kahlil Gibran


By: darlenebeckjacobson,
on 6/1/2014
Blog:
Darlene Beck-Jacobson
(
Login to Add to MyJacketFlap)
JacketFlap tags:
Inspiration,
art,
Activities,
web sites,
summer fun,
painting with children,
Rainy Day Fun,
Home Schooling Ideas,
exploring art with children,
www.louvre.fr,
Add a tag
Along with summer vacation and no school, comes boredom and cries of “there’s nothing to do!” Sometimes even playing outside gets old when the sun is too hot or bugs to pesky. Why not help your child develop his or her artistic side. There are numerous web sites that teach art lessons, origami, crafts, puppetry and many other artistic endeavors.
You can also explore the great artists and their masterpieces with virtual tours of art museums like the Louvre in Paris: http://www.louvre.fr where you’ll see the Mona Lisa, Winged Victory, and many others. Or try the Museum of Modern Art in NY: http://www.moma.org
If you are anywhere near our nation’s capital this summer, be sure to stop in and visit the art museums there. Most, like the NATIONAL GALLERY OF ART, are free. Some even have special summer programs for kids. http://www.nga.gov
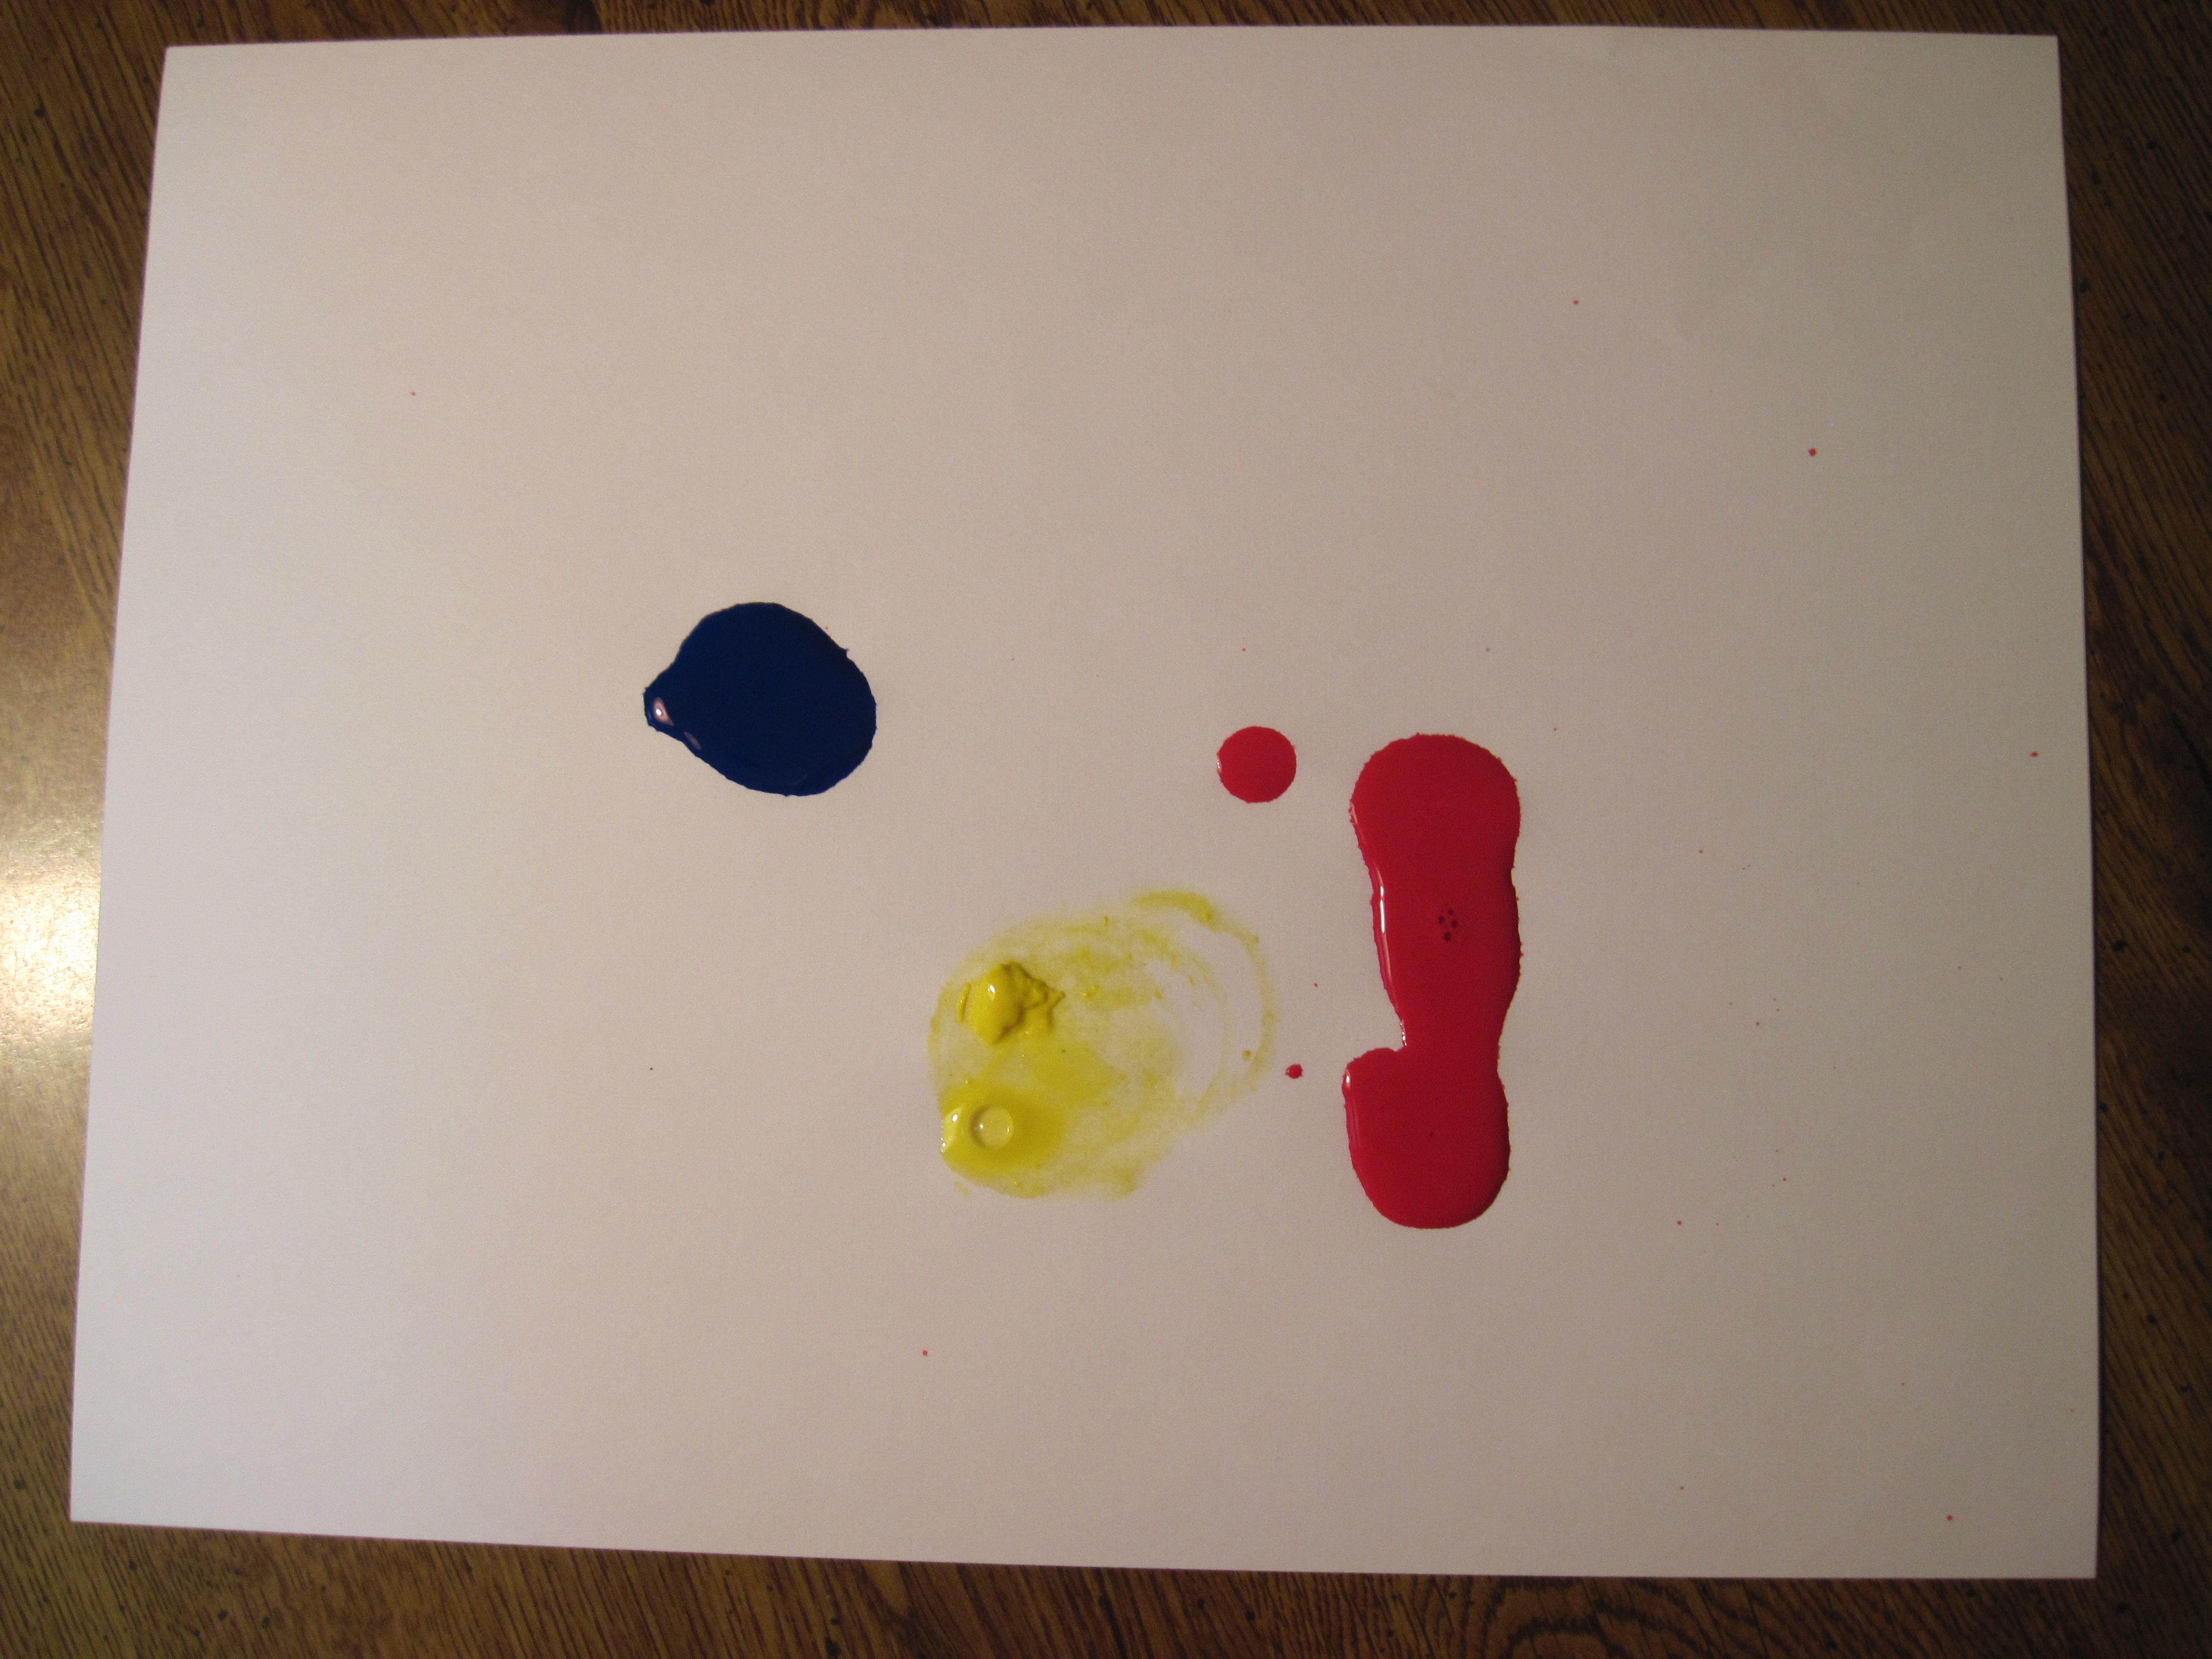
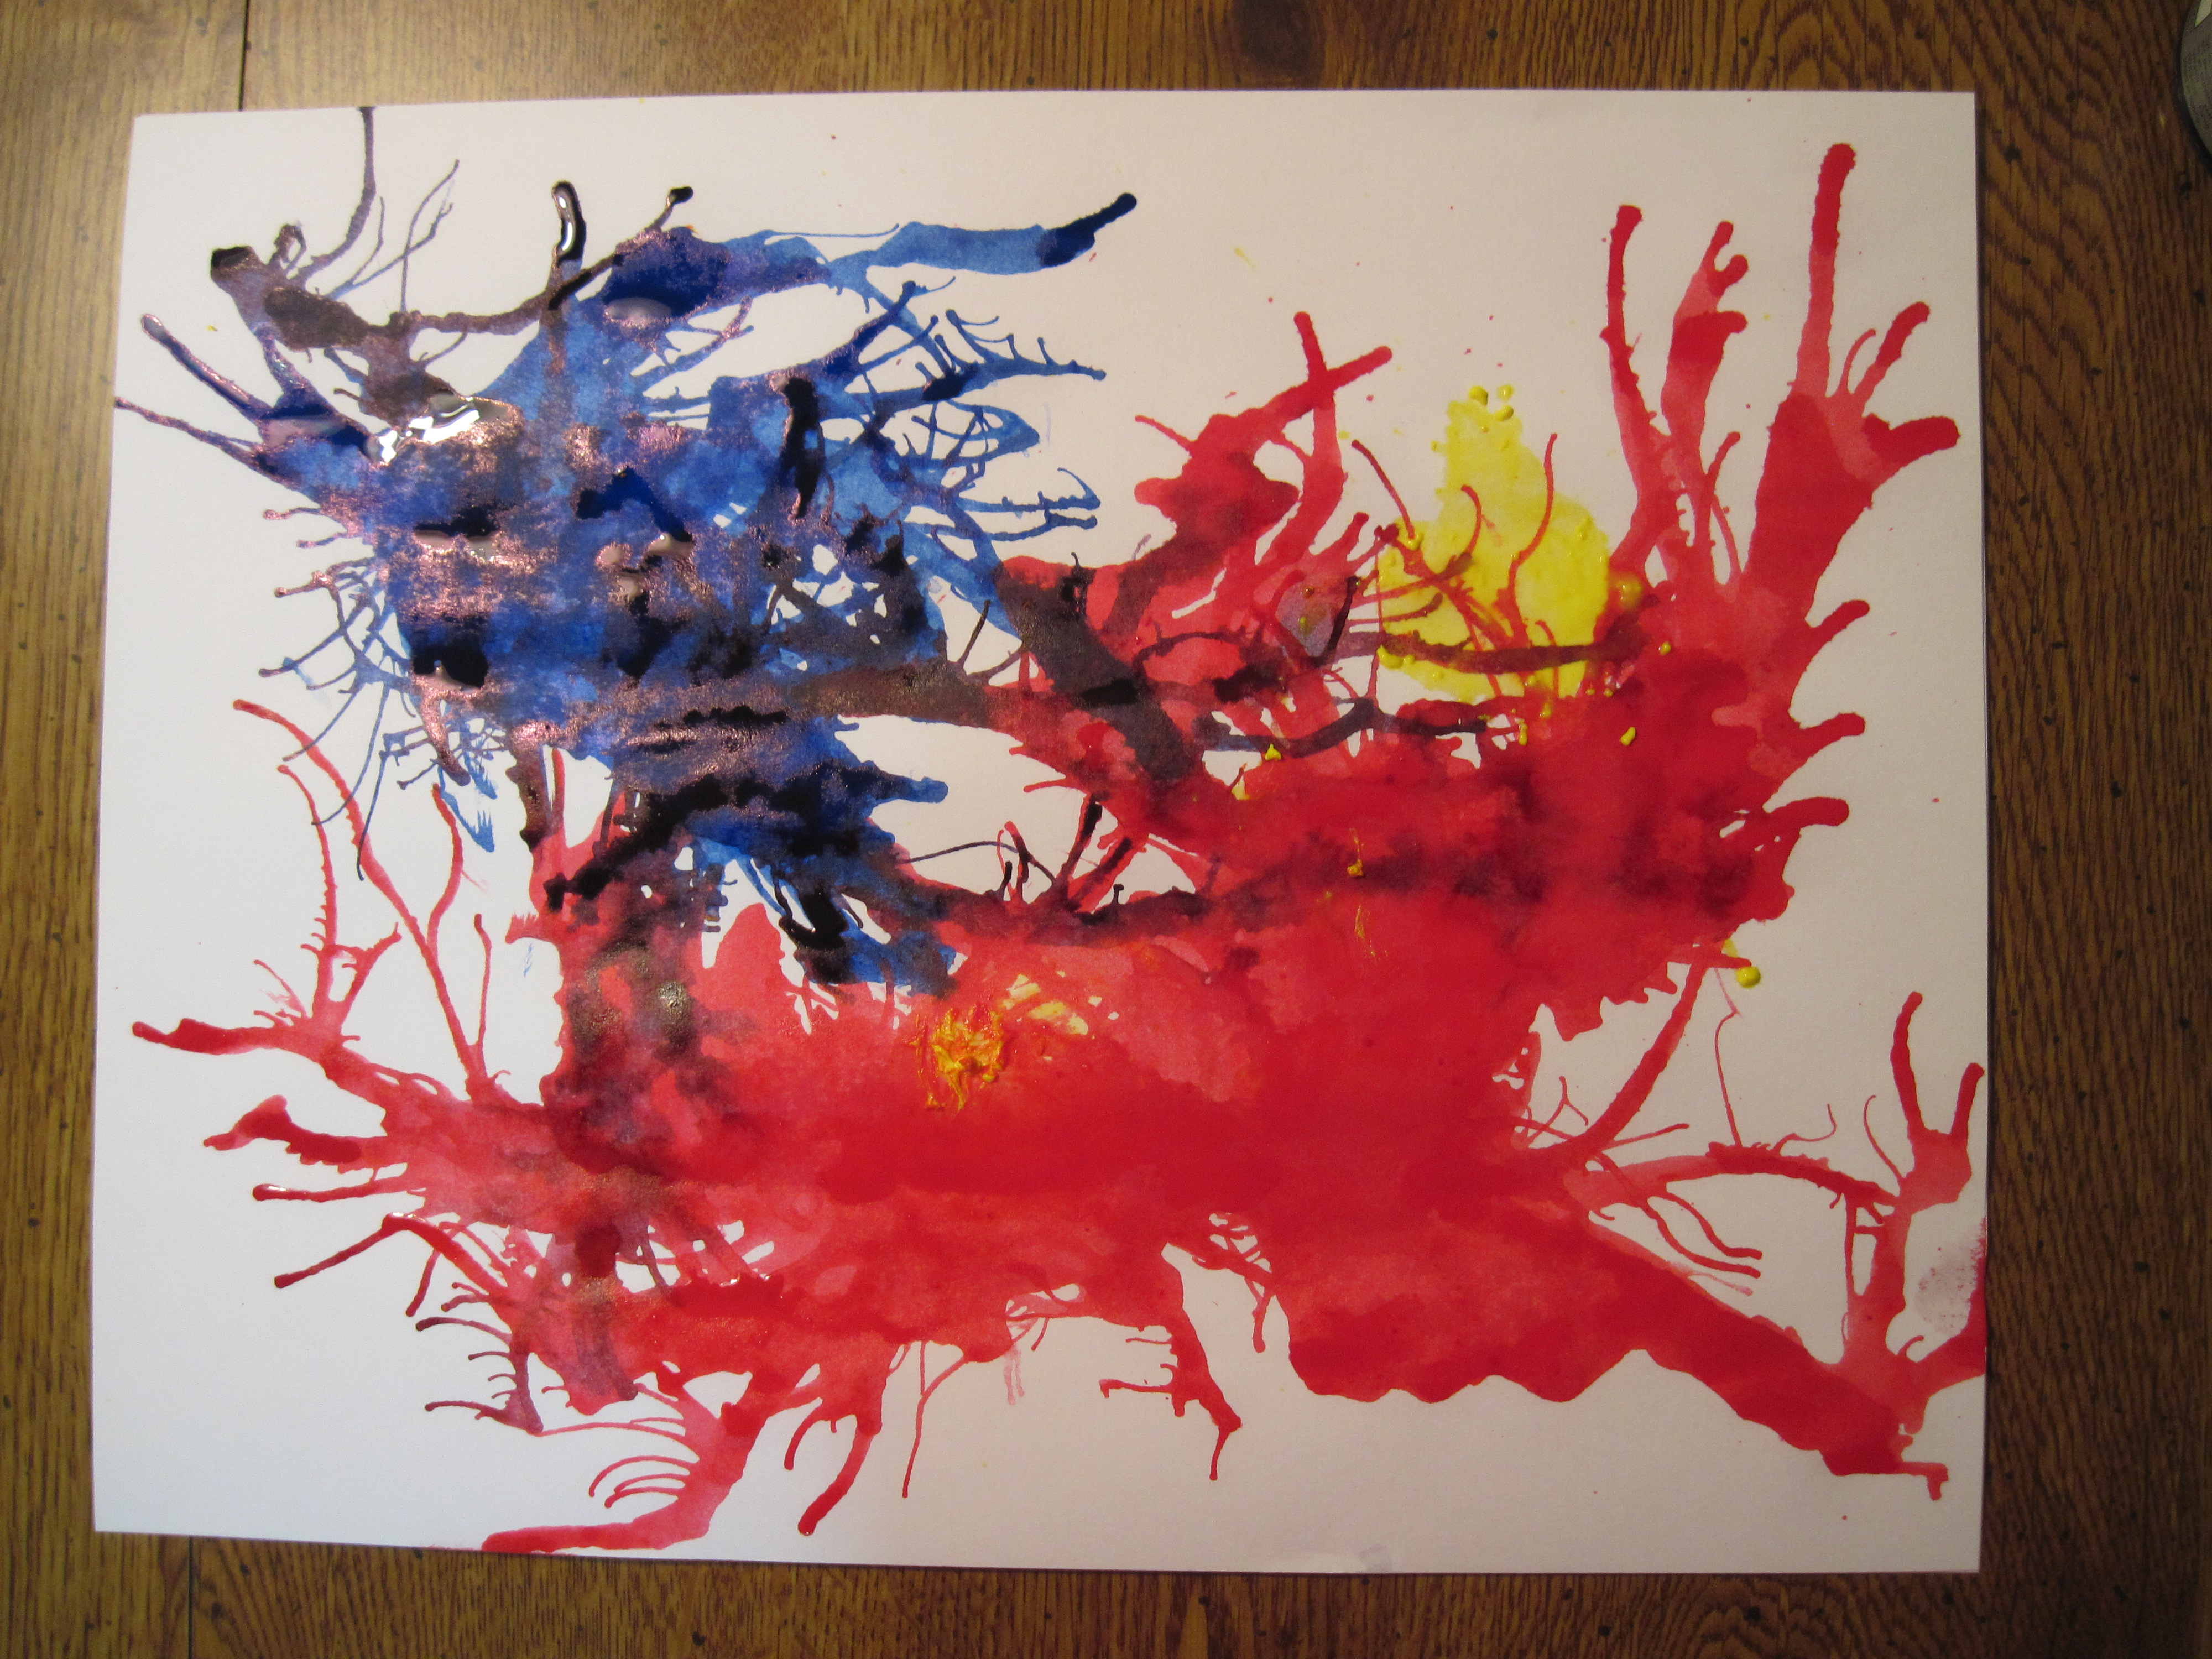
Here’s an easy art project that produces a finished product your child will be proud to hang on the wall. All you need is water based paints, paper, and a drinking straw.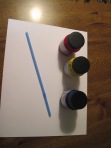
Pour a few drops of paint on a sheet of paper.
 Now here’s the fun: Use the straw to BLOW THE PAINT across the paper, rotating as you go so that you get interesting angles and tendrils. As the colors cross each other you’ll get new shades and shapes. There is no right or wrong and the end result is frame worthy!
  Send me your masterpieces and I’ll share them on this blog. Make some art!


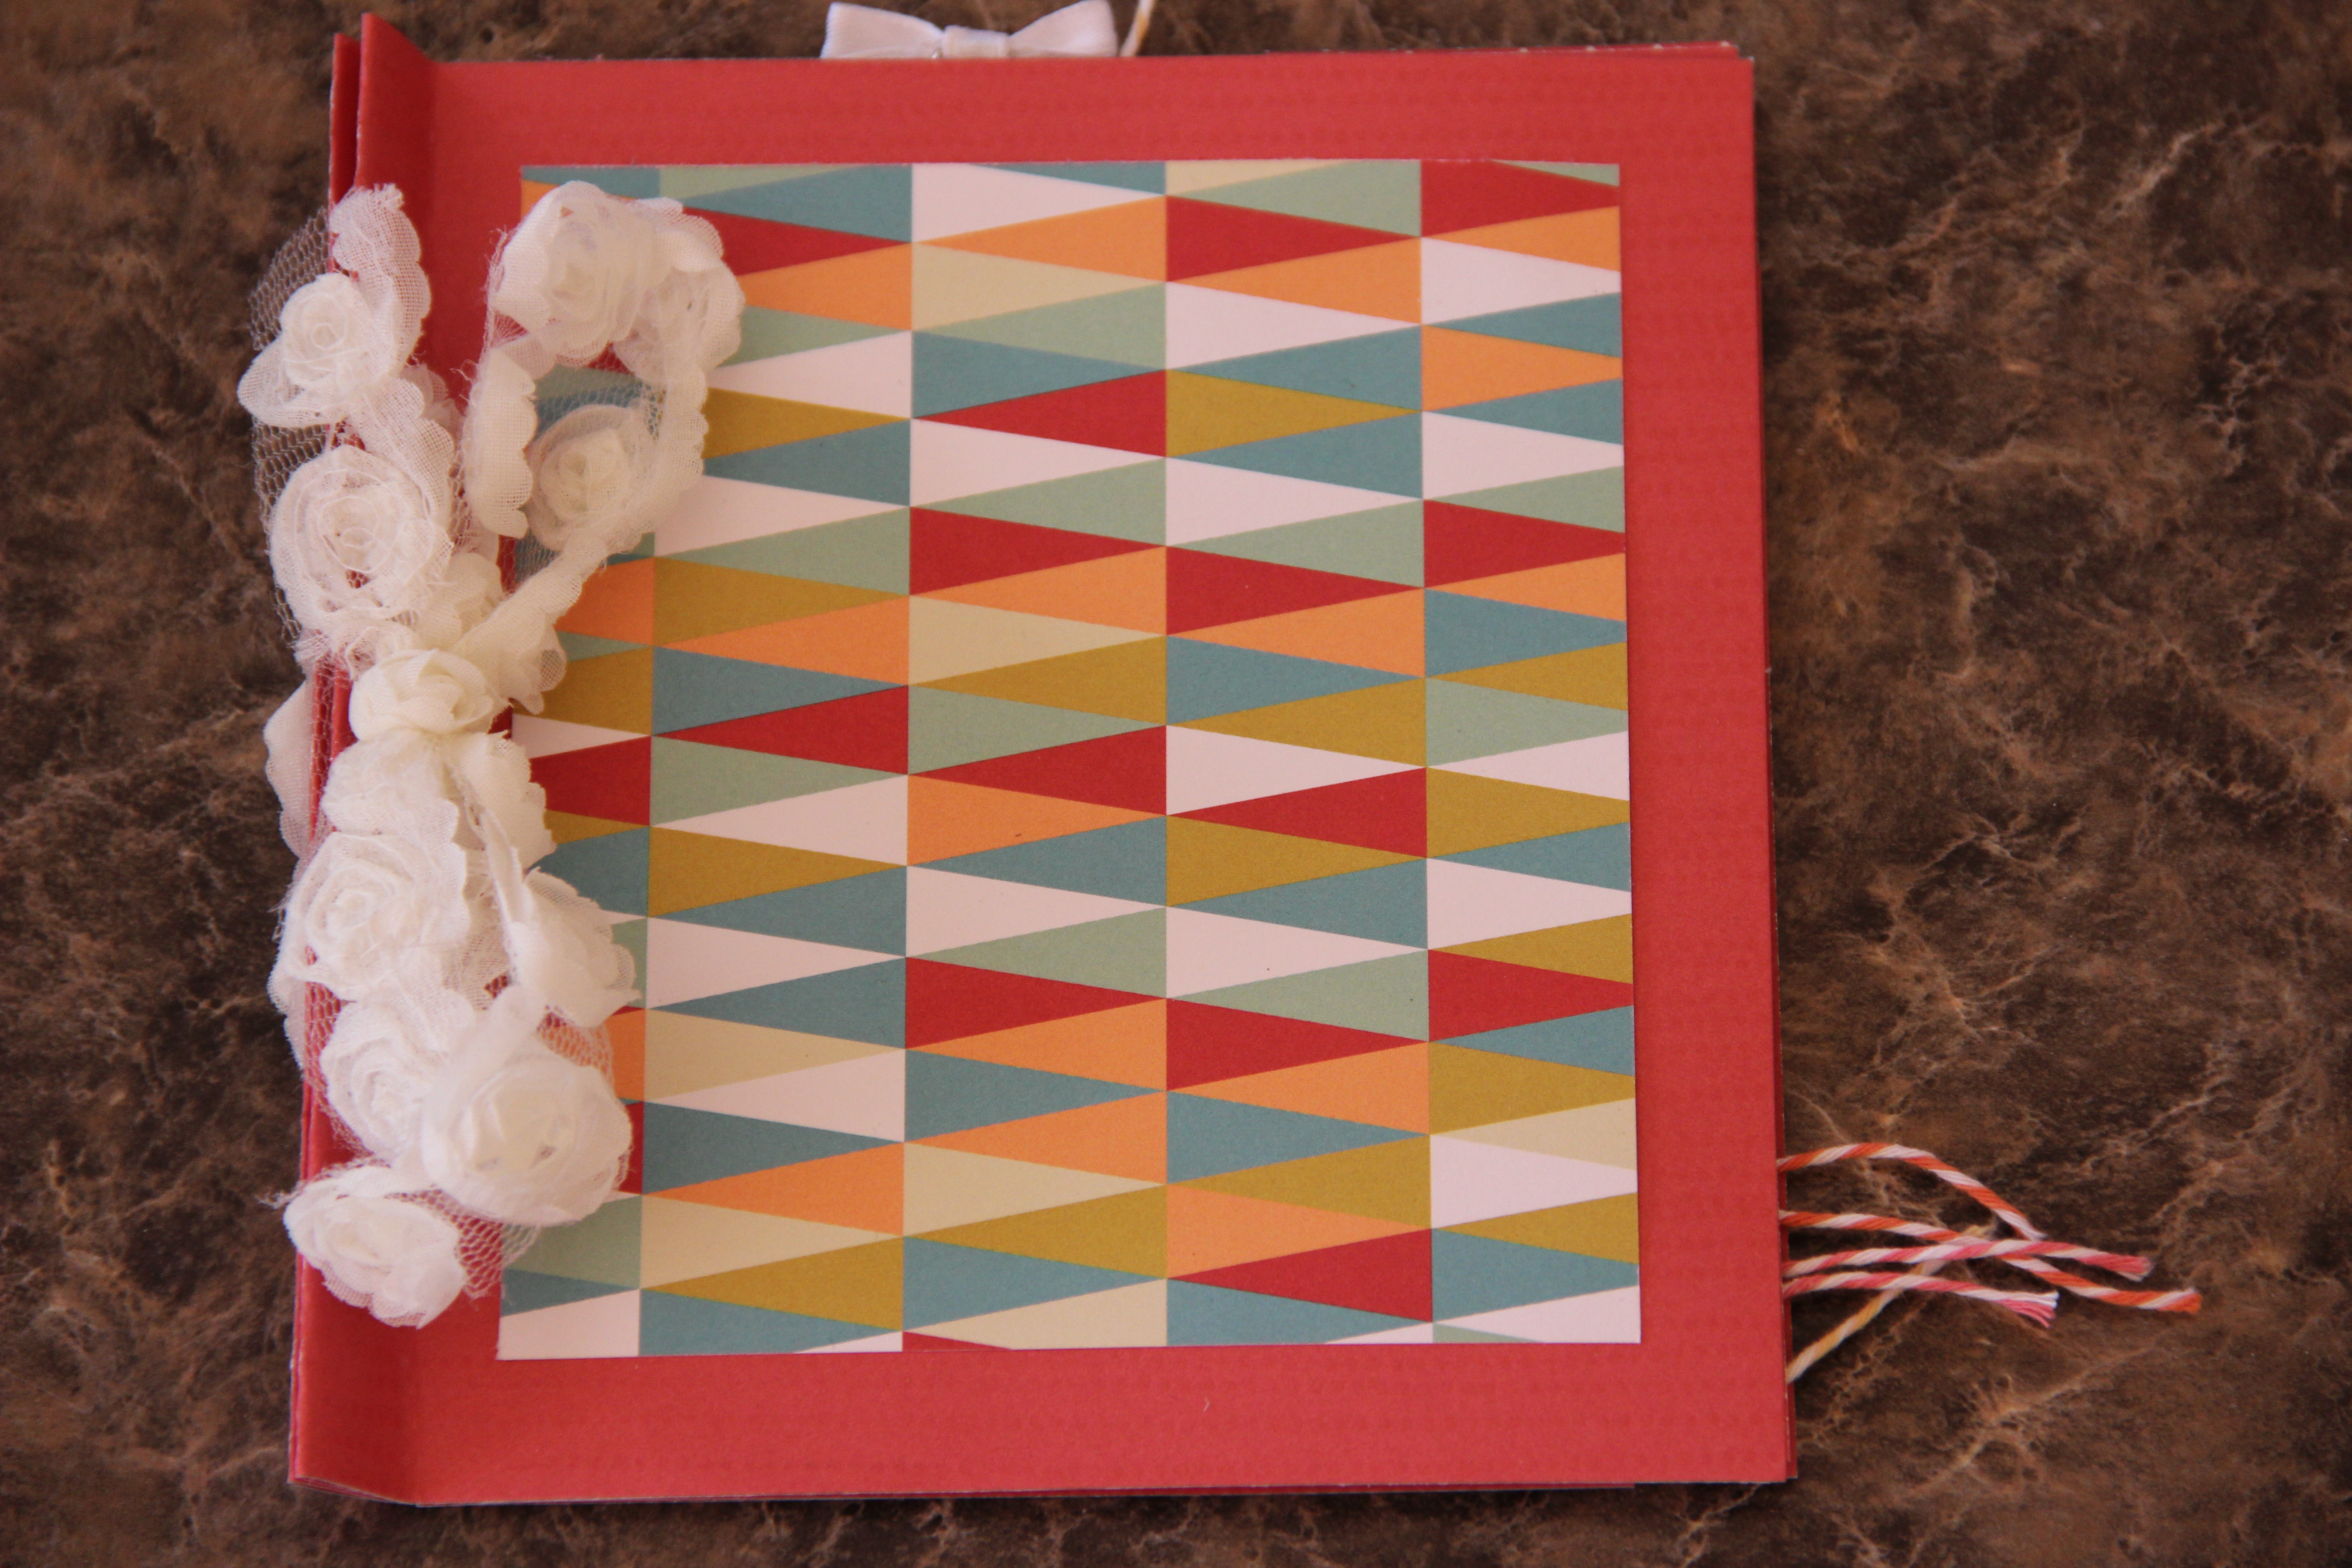
Make this simple paper book and enclose some of your favorite pictures and mementos. Or use it to highlight your poems, stories or other worthy endeavors. You can add extra pages by inserting plain card stock between each page. It makes a great home-made gift for mom, grandparents or teachers as well.
1. Cut one piece of 12 x 12 cardstock in half. Fold each piece in half. 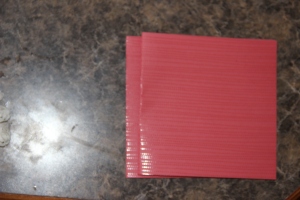 For a book with more pages, use TWO pieces of cardstock and proceed as directed.
2. Place each folded half on top of one another and punch two holes through the folded side. Approximately 1 ½” down from the top and 1 ½” up from the bottom.
3. Bed over the folded side about ½” so it creases all four pages together.
4. From the bottom or back side, bring up each end of a ribbon cut 18” long, through each punched hole. Tie it together on front.
This is your book. Continue to decorate in your own personalized way
or follow the guidelines below to make it look like mine.
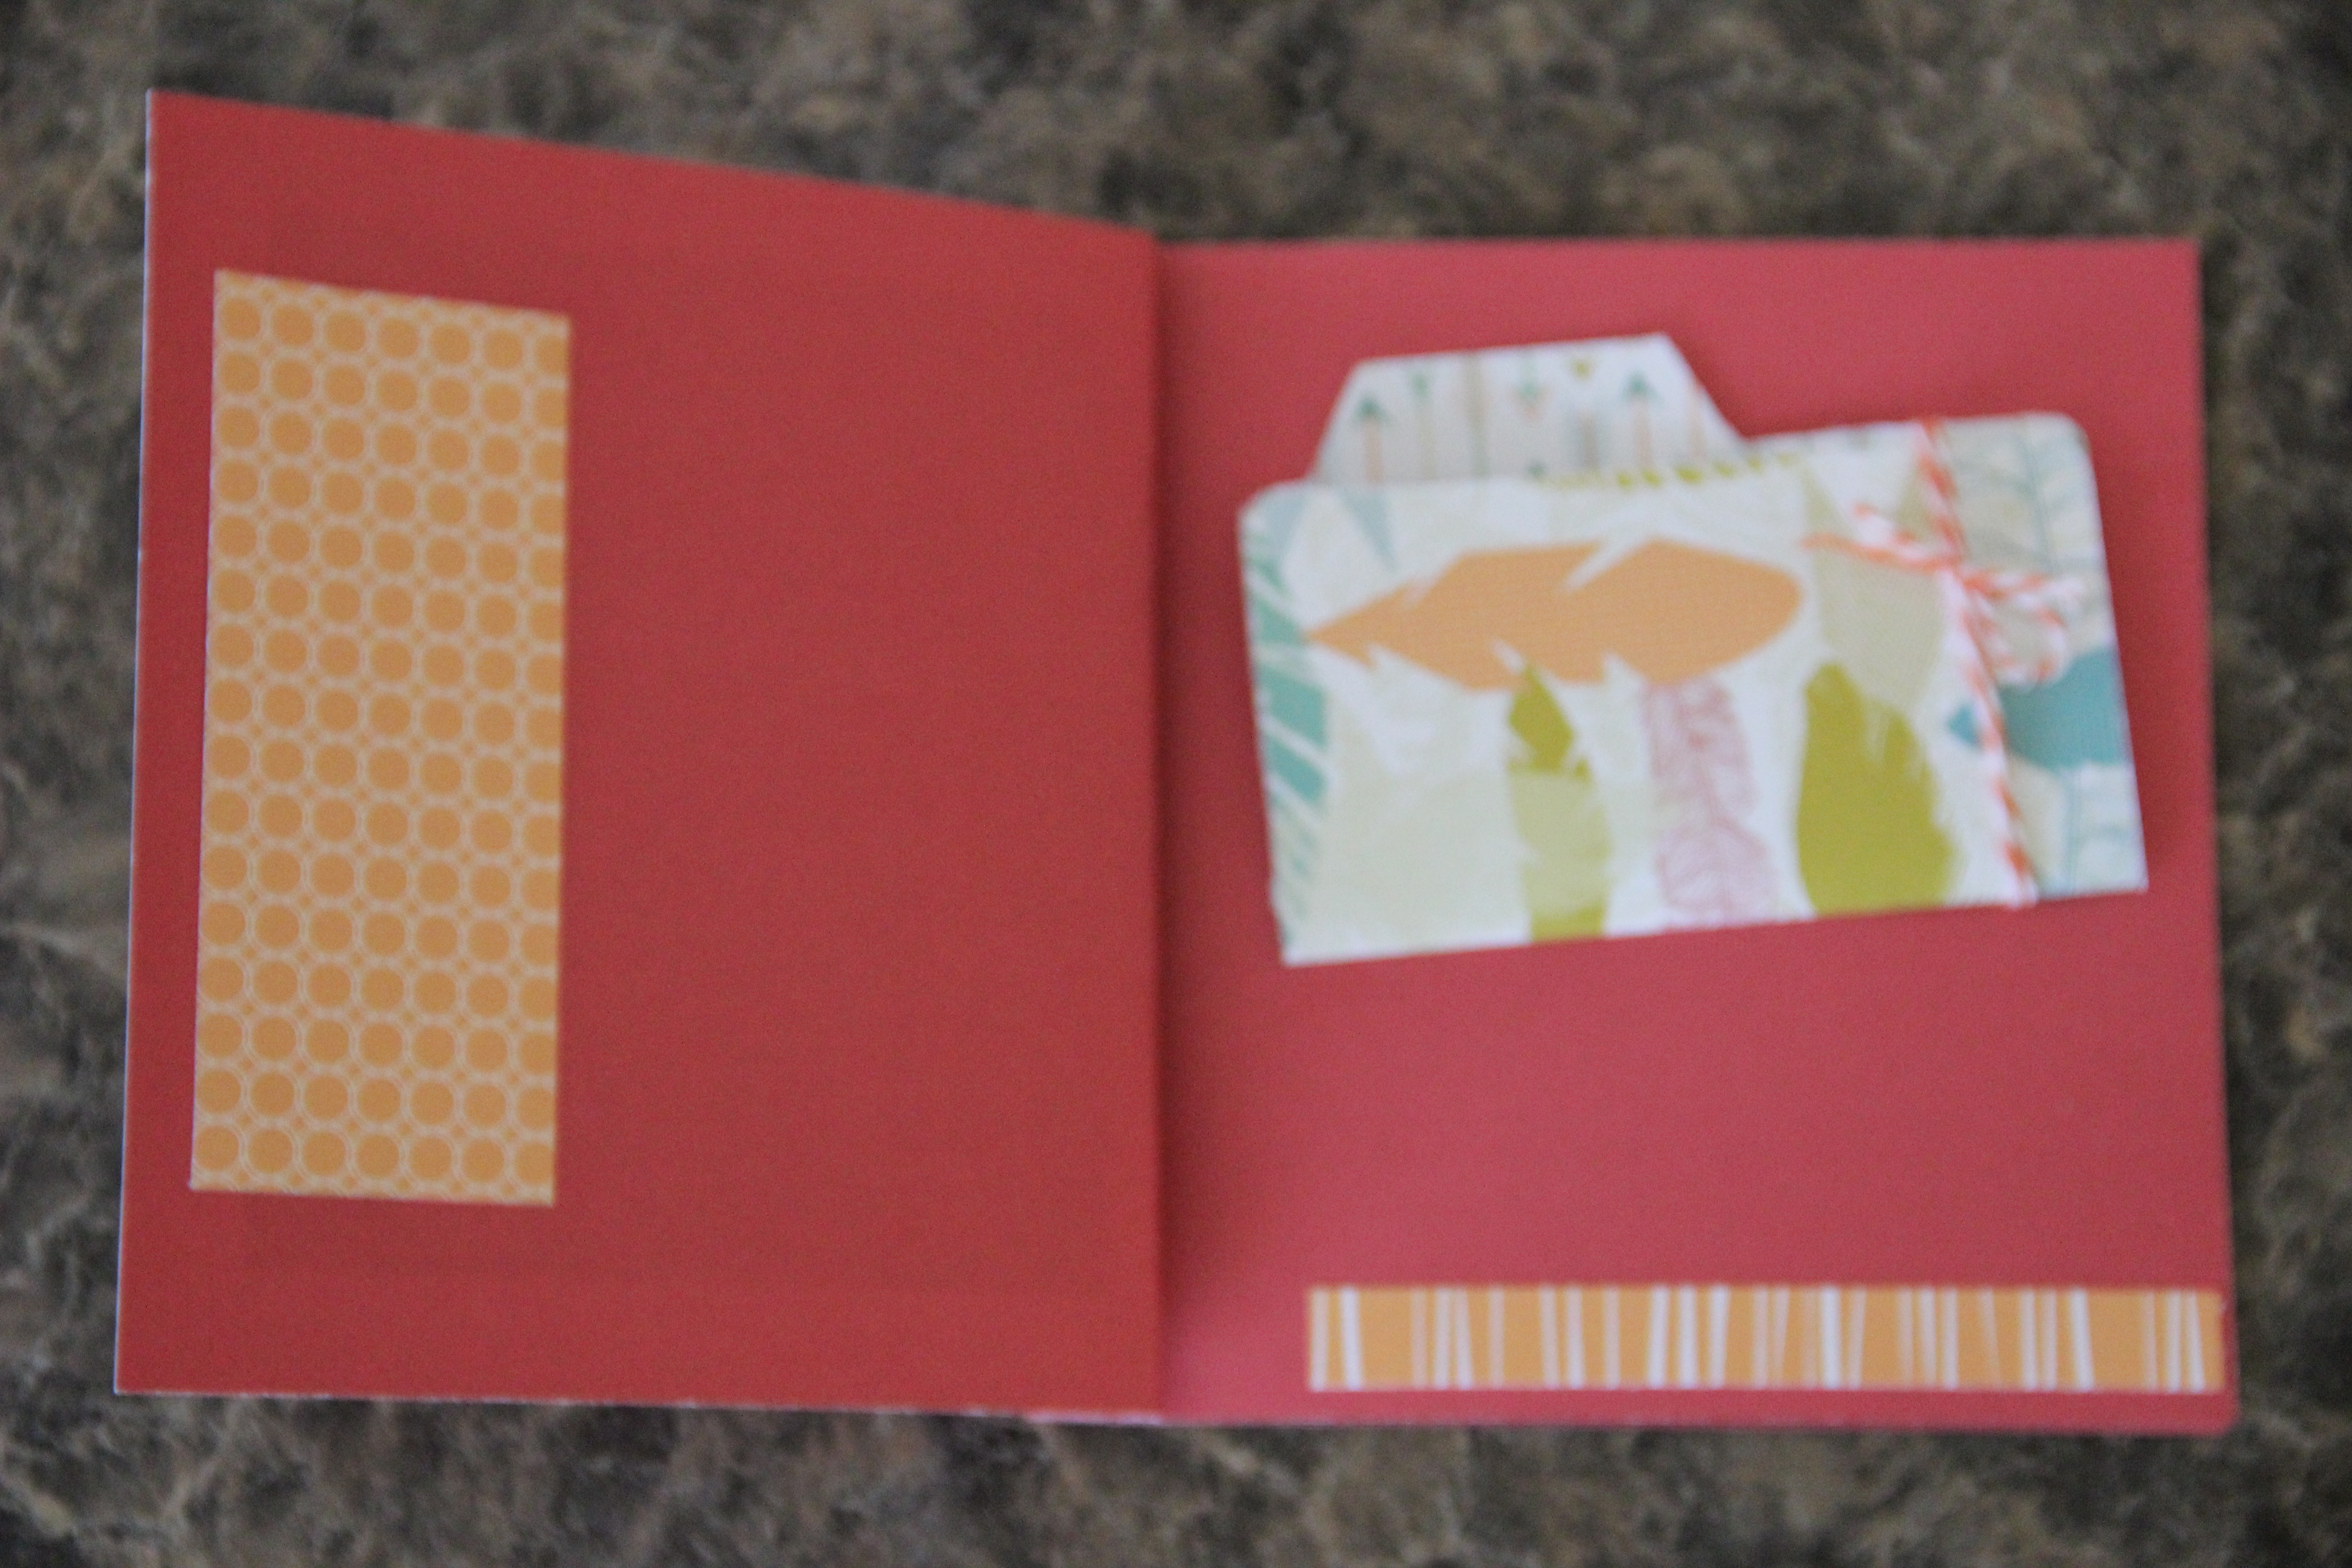
Front Cover- cut a piece of decorative paper 4 ½” x 5 ½”. Glue on. 
Inside front cover- cut a piece of decorative paper 1 ¾” x 4 ¼”. Glue on.
Page 3: -cut a piece of paper 4 ½” x 5 ½”. Notch the top like a file folder. Fold in half. Wrap a 12” piece of colored string around the right side of page, tie, and glue folded paper down.
Additionally, cut a small strip of paper ¾” x 4 ½” and glue. See photo. 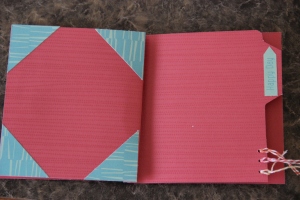
Page 4- Cut two, 2 x 2 “ squares. Cutting on a diagonal, cut each square in half forming four triangles. Place one triangle in each corner of the page.
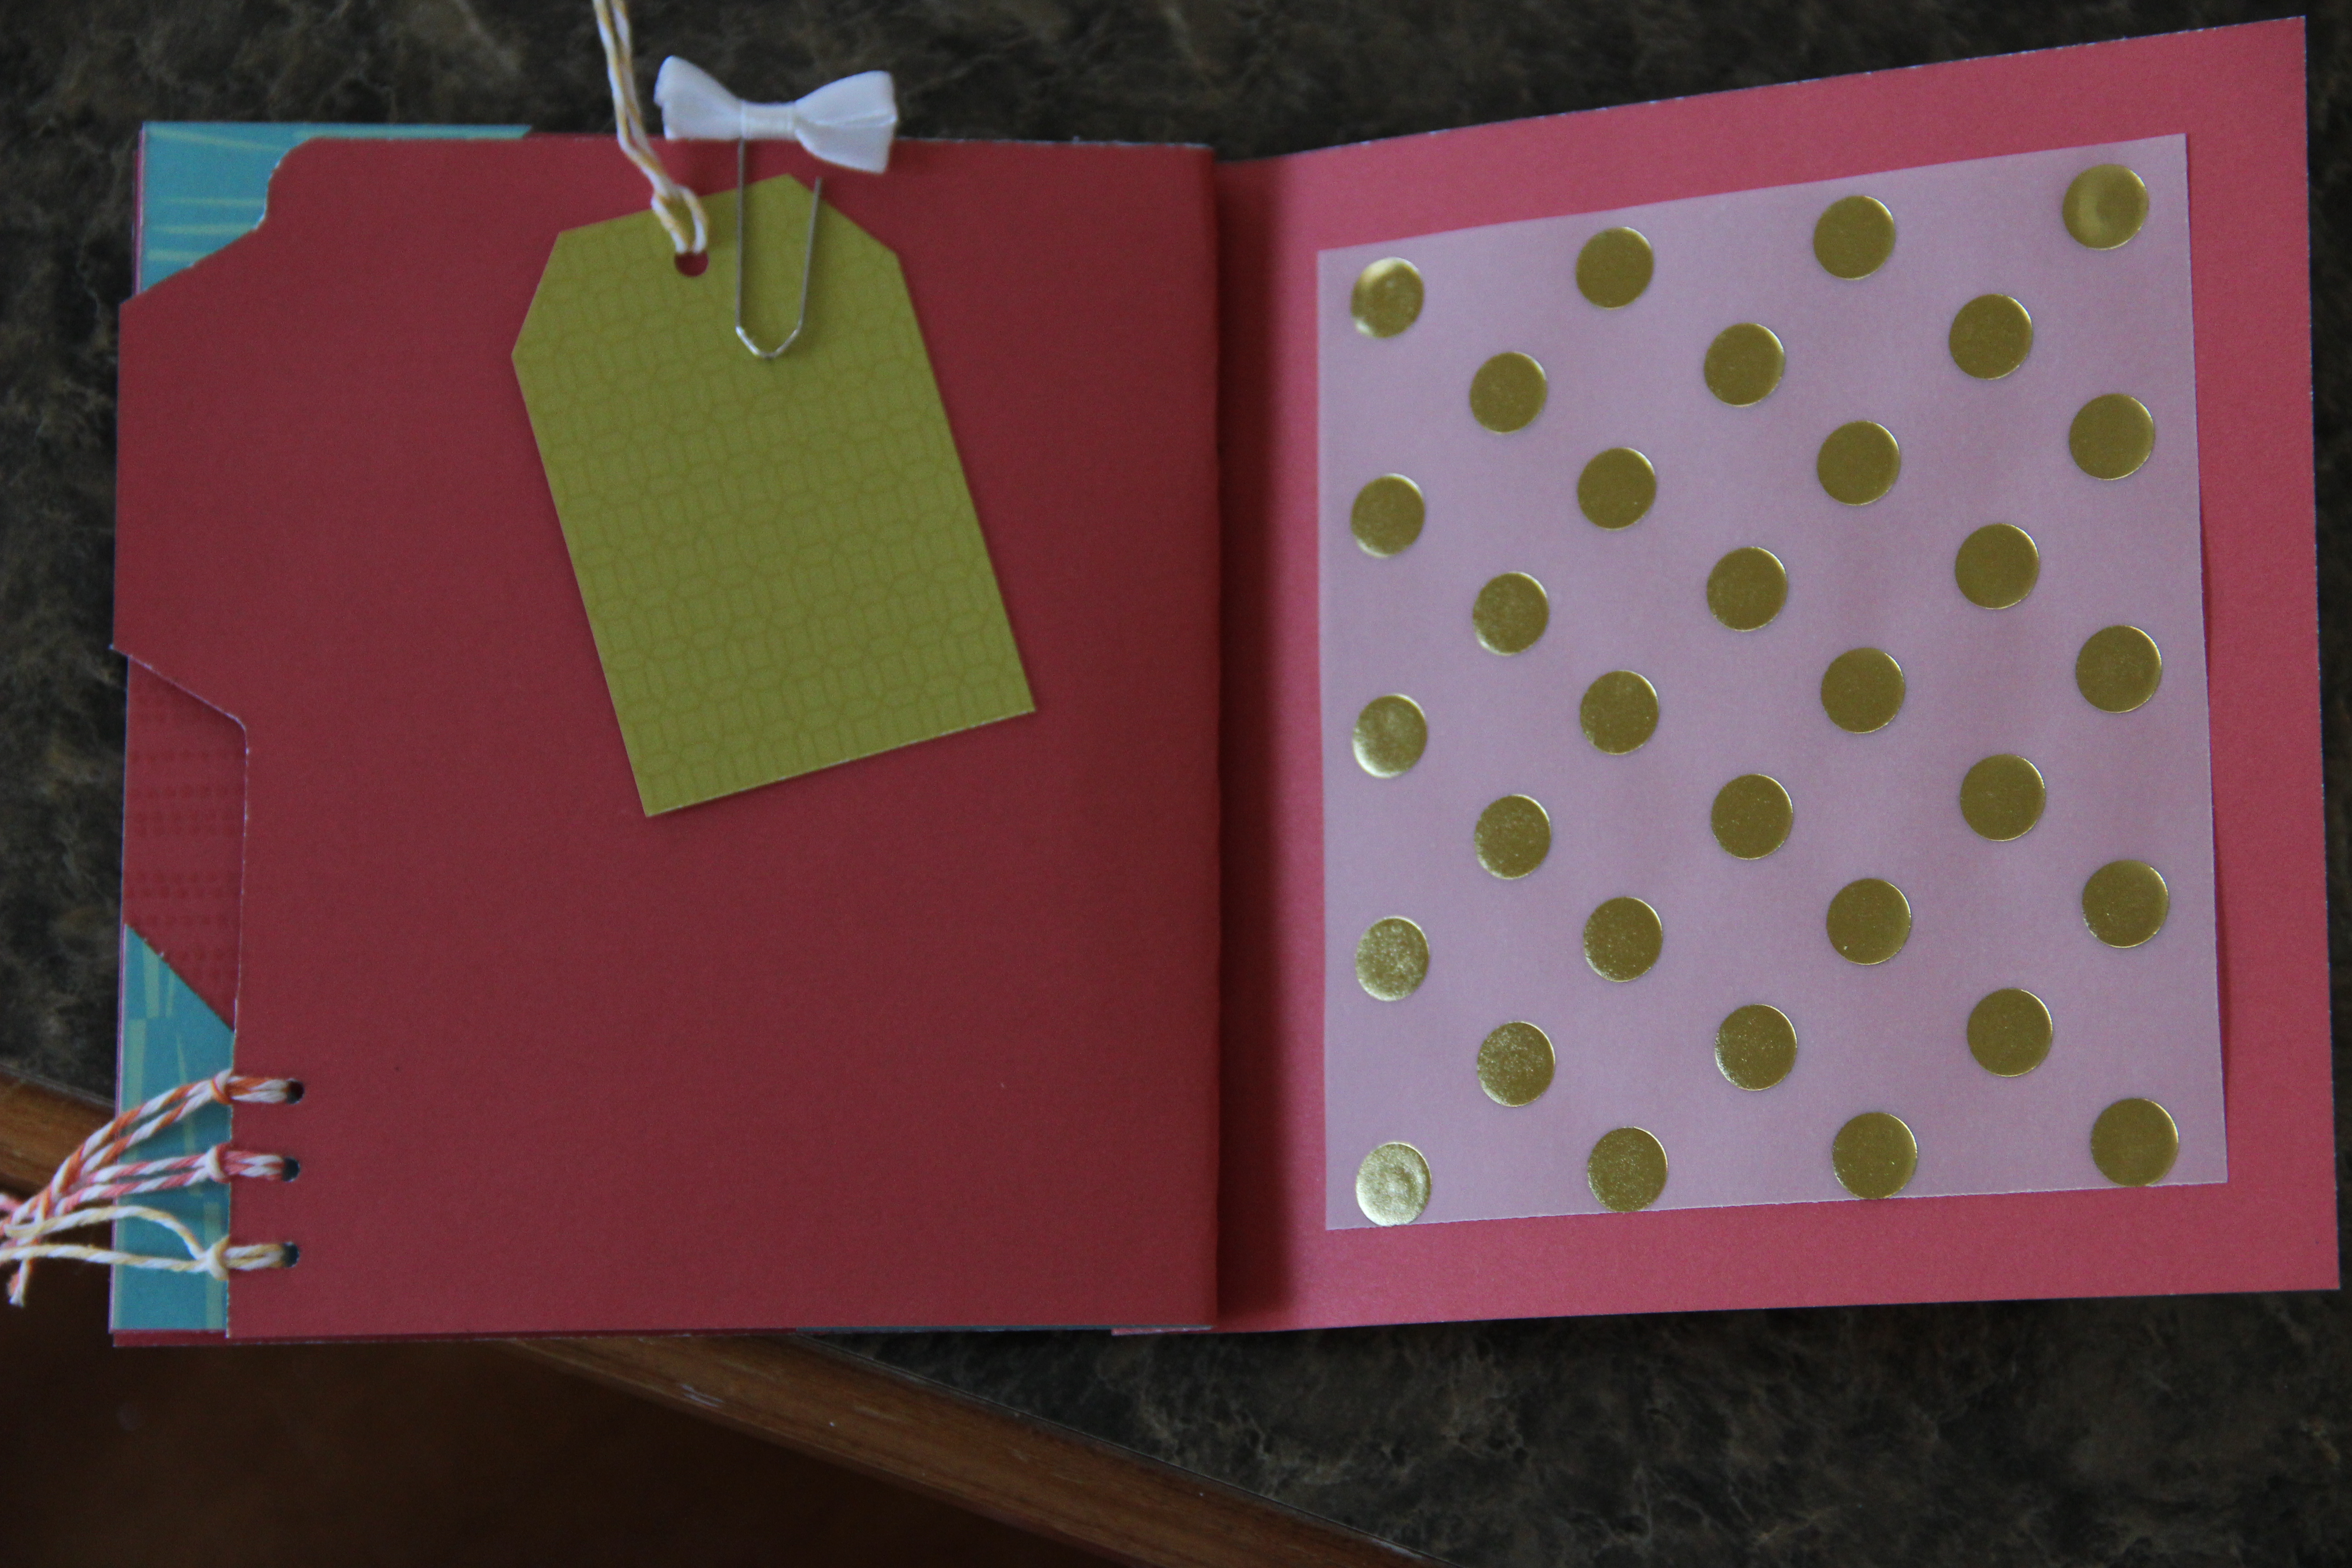
Page 5- Notch out the right side of page 5 like a file folder. Cut a strip of paper ¾” x 2” to glue inside the file folder notch. With a hole punch, punch three small holes along the right edge and string ribbon through each hole.

Page 6- Cut a small 2” x 2 ½” tag. Punch a hole and run a ribbon through it. Attach a paper clip to the top of the page. Attach another ribbon or bow, to that.
Inside Back Cover- Cut a piece of paper 4 ½” x 5”. Glue on.
Your mini book is complete.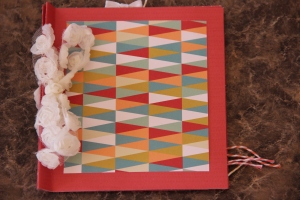
All of the supplies used to make this darling book are from Close To My Heart. The paper products are exclusive and are only available through the month of May 2014.
Visit Shiela’s website: http://www.shielafuller.ctmh.com If you have any questions, please email her at : [email protected].
How to win a prize from Shiela:
Sign up to receive updates from Darlene’s blog AND send an email to me telling me you are a new subscriber: [email protected] You will be entered into a drawing to win the My Reflections Free to be Me paper packet. Winner will be announced June 2, 2014. Contact me for any questions. I periodically send scrapbook workshop emails and a newsletter.


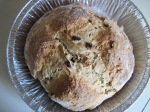
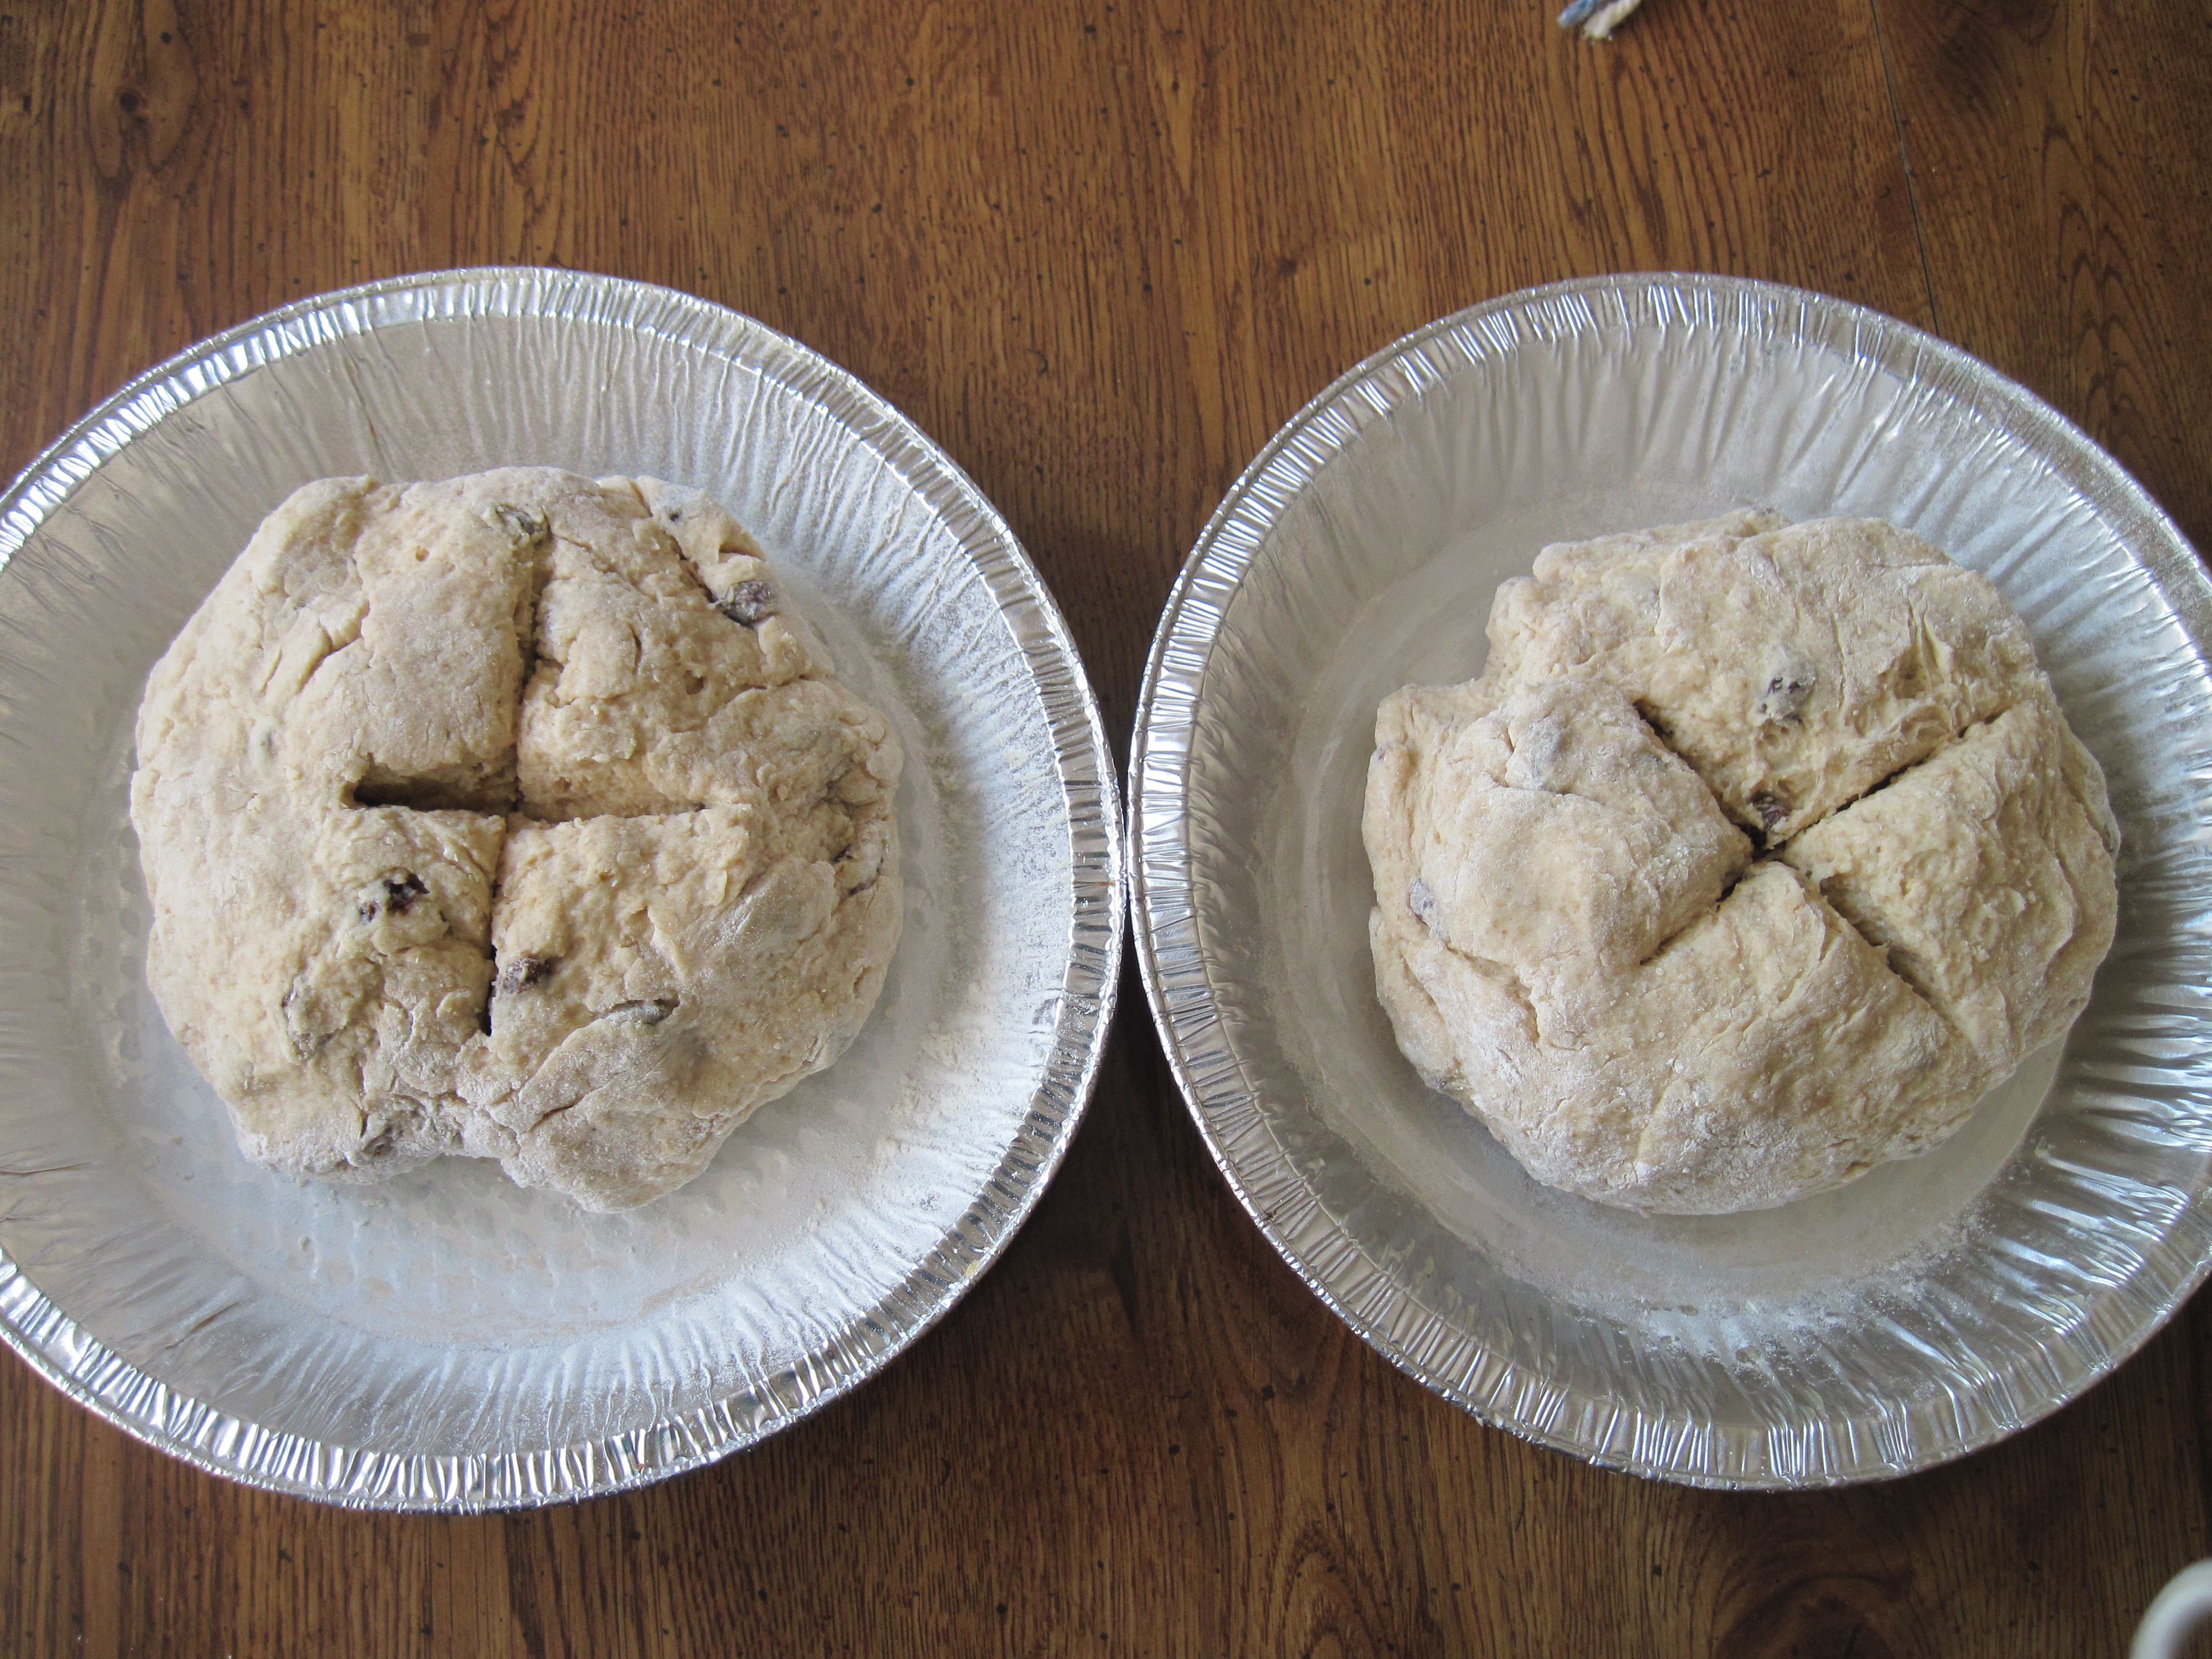
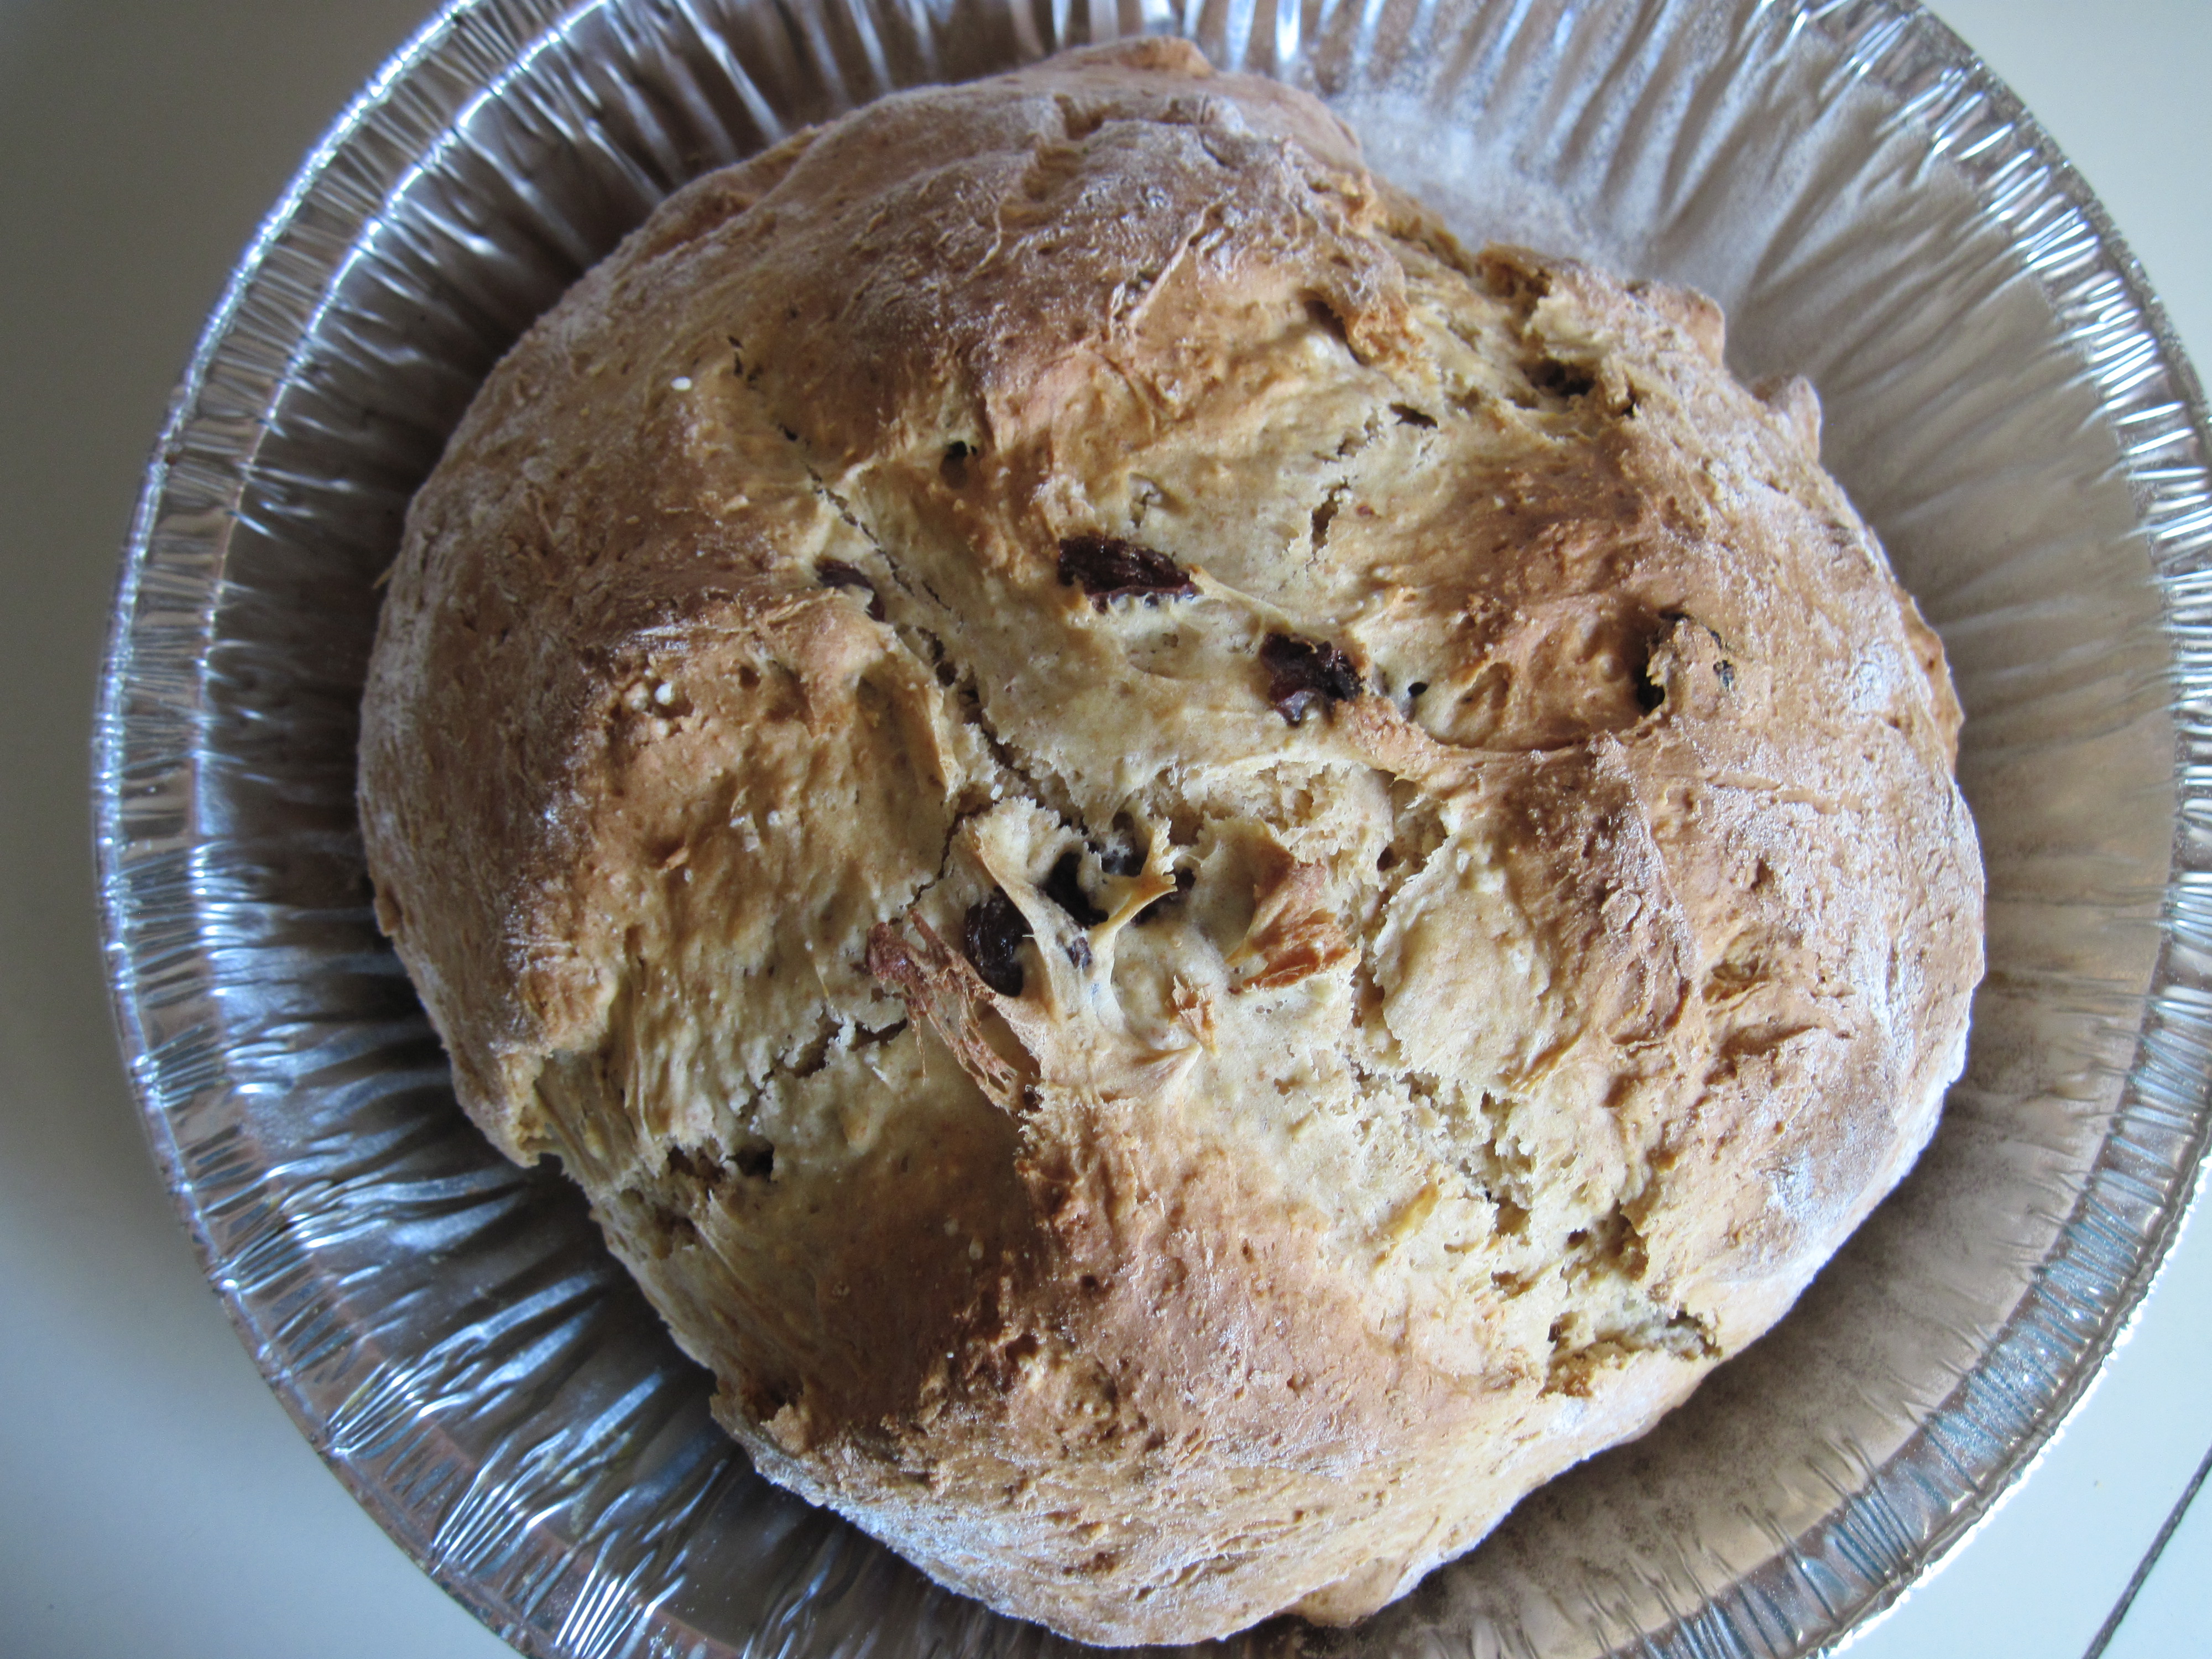
This recipe for Soda Bread is more moist than many thanks to the buttermilk. If you can’t find buttermilk, use regular plain yogurt (NOT Greek).
Irish Soda Bread
4 C flour (I use 1C whole wheat) ½ C sugar 1 T baking powder
1 t salt 1 t baking soda 1 C. raisins plumped (see note)
4 T melted butter 1 ½ C buttermilk 1 lg. egg
- Preheat oven to 375. Grease and flour a round pan or cookie sheet.
- In large bowl, combine flour, sugar, powder and salt.
- Pour melted butter into dry ingredients and mix until the mixture resembles coarse crumbs. Stir in raisins.
- In a separate bowl beat buttermilk, egg and baking soda. Add to flour mix until blended.
- Turn dough onto floured surface, and knead until smooth – about 1 minute. If dough is sticky, flour your hands as you knead. Shape dough into two round loaves.
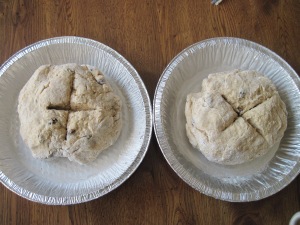
- Place dough in prepared pan. With a sharp knife, make 2 crisscross slits in dough.
- Bake for 45-60 minutes until a toothpick inserted in the center comes out dry. Let rest for 10 minutes before removing from the pan.
- Serve sliced with butter or jam. Bet you can’t eat just one piece!
NOTE: Pour boiling water over the raisins and let them stand for 5 minutes to soften. Drain and pat dry.


If you get a chance to stop by IHop between 7AM and 10PM tomorrow, March 4, 2014, you can join in the celebration of their 9th annual NATIONAL PANCAKE DAY fundraiser. You can eat your favorite pancakes, or make a donation that will benefit children’s hospitals and charities across the country. For more details visit: http://www.ihoppancakeday.com


By: darlenebeckjacobson,
on 7/26/2013
Blog:
Darlene Beck-Jacobson
(
Login to Add to MyJacketFlap)
JacketFlap tags:
Recipes,
Activities,
summer fun,
Science activity,
Rainy Day Fun,
Home Schooling Ideas,
Children,
chemistry.about.com,
easy science experiments,
Make your own ooblick,
Add a tag
Oobleck was the name given to a type of slime in a Dr. Seuss book that was capable of gumming up a whole kingdom. The oobleck the you can make for a science project isn’t gummy, but it does have interesting properties of both solids and liquids. It normally behaves like a liquid or jelly, but if you squeeze it in your hand, it will seem like a solid. This recipe and article were taken from: chemistry.about.com How to Make Ooblick by Anne Marie Helmenstine, Ph.D.
Difficulty Level: Easy Time Required: 10-15 minutes
You Will Need
water corn starch food coloring (optional)
1. Mix 1 part water with 1.5 to 2 parts cornstarch. You may wish to start with one cup of water and one and a half cups of cornstarch, then work in more cornstarch if you want a more ‘solid’ oobleck. It will take about 10 minutes of mixing to get nice homogeneous oobleck.
- Mix in a few drops of food coloring if you want colored oobleck.
Tips:
- Oobleck is a type of non-Newtonian fluid called a dilatant.
- If you slowly lower your hand into oobleck, it will sink, but it is difficult to quickly remove your hand (without taking all the oobleck and its container with you).
- If you squeeze or punch the oobleck, the starch particles will not move out of the way quickly, so the oobleck will feel solid.
- Oobleck can be molded in a container, but when the mold is removed, the oobleck will lose its shape.
If you want to learn more about cool chemistry projects check these links:


Beginning June 1, 2013, Children can bowl two games a day all summer long for FREE. For details and to register for this great activity (especially when it’s too hot to be outdoors) go to http://www.kidsbowlfree.com
And, don’t forget to mark your calendars for Free Slurpy Day at your local 7-11 store. On 7-11-13, 7-11 is giving away free Slurpies to customers. Stop by and get one before or after you bowl a game.
Who said you can’t get anything for free?


 Assemble an assortment of washers (you can get them at LOWE’S, HOME DEPOT, SEARS, or any hardware store. I actually found mine on the sidewalk. Then paint them with nail polish in desired colors. You can use several coats and colors, but let each layer dry thoroughly before adding a second coat. Then tie a ribbon or yarn through the washer to hang. For mine, I added the smaller inner washer with a piece of jewelry wire. You can also sprinkle glitter, add tiny sequins or whatever catches your eye.
  These are so easy and cheap to make, you can give them as party favors or to friends/neighbors as a “thank you”.
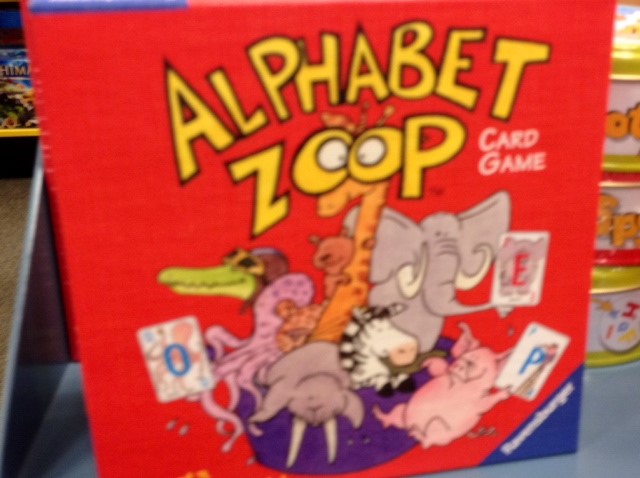


Darlene, it’s been so great getting to know you and share ideas. Thanks so much for letting me contribute to your blog.
[…] Game On! Brain Building Board Games to Make or Fake at Home.. […]
It’s been my pleasure Katey! I’m so glad I discovered your blog as well. You have a wonderful wealth of ideas that are “right up my alley” in terms of creativity and kid friendliness.
I absolutely LOVE board games, and when it makes learning fun—all the better! :) I love the Hedbanz one :) And I know there are some very creative mom bloggers out there who do very creative stuff, including games. I like the idea of making it yourself, and I think it would be fun, too, to actually make/invent a game WITH your kids :) Great post, ladies!
Thanks for commenting Donna. I am a huge fan of made up games as well. If I were still teaching, these games would definitely be part of the classroom materials.
Thanks, Donna! My kids and I have made a few board games together – and it is a lot of fun. Maybe I’ll have to post about that sometime!