What is JacketFlap

  • JacketFlap connects you to the work of more than 200,000 authors, illustrators, publishers and other creators of books for Children and Young Adults. The site is updated daily with information about every book, author, illustrator, and publisher in the children's / young adult book industry. Members include published authors and illustrators, librarians, agents, editors, publicists, booksellers, publishers and fans.
    Join now (it's free).

Sort Blog Posts

Sort Posts by:

  • in
    from   

Suggest a Blog

Enter a Blog's Feed URL below and click Submit:

Most Commented Posts

In the past 7 days

Recent Posts

(tagged with 'dyeing')

Recent Comments

Recently Viewed

JacketFlap Sponsors

Spread the word about books.
Put this Widget on your blog!
  • Powered by JacketFlap.com

Are you a book Publisher?
Learn about Widgets now!

Advertise on JacketFlap

MyJacketFlap Blogs

  • Login or Register for free to create your own customized page of blog posts from your favorite blogs. You can also add blogs by clicking the "Add to MyJacketFlap" links next to the blog name in each post.

Blog Posts by Tag

In the past 7 days

Blog Posts by Date

Click days in this calendar to see posts by day or month
new posts in all blogs
Viewing: Blog Posts Tagged with: dyeing, Most Recent at Top [Help]
Results 1 - 5 of 5
1. Self-Dyed Silk Anda Dress

Dyed Silk Anda Dress

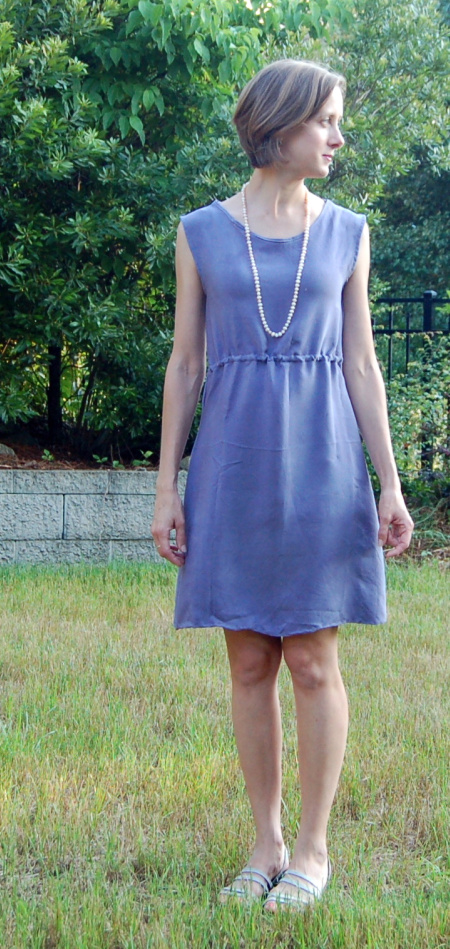
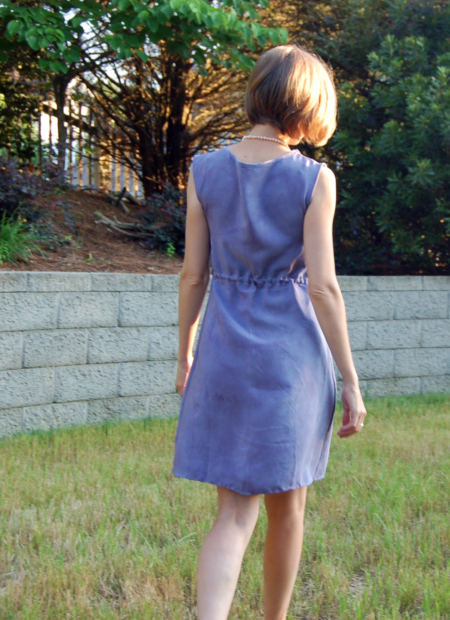
Tada! I finally worked up the nerve to finish this dress, after lots of fear over working with silk. It’s got plenty of flaws (ahem, wonky tonky hem), but I’ve gone ahead and declared it wearable because…I like it anyway. After all that work, I’m not resigning it to the closet.

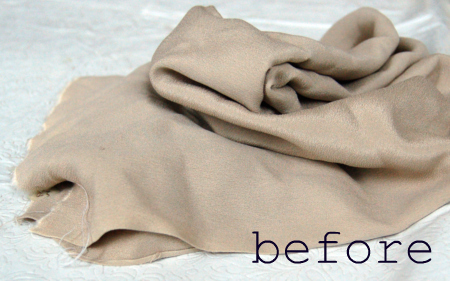
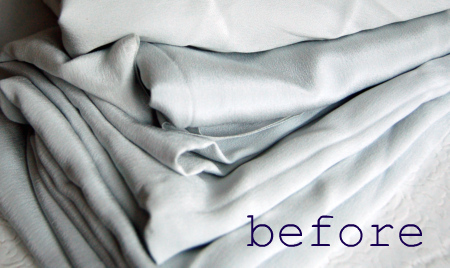
The silk (crepe?) was gifted to me by a friend who was moving. The original color, blue-grey, was a bit too pale for me, so I overdyed it (click here for before and after). That was over a year ago!

I cut the pattern out way too big, I think overcompensating for fit issues in my first Anda, which was a wee bit snug in the booty. So then I had to cut the silk version down, but  when I finished, the sleeves stuck out in the oddest, ugliest way. I’ve since learned how to use bias tape better—-that might’ve been the problem. Great bias tape tutorial here at Collette Patterns.

I cut off the sleeves and used the bias tape as a facing, which worked much better.

Silk Anda Dress

I’ve worked on the hem some since these pictures were taken, and I will keep tweaking, but I don’t know if it’s ever going to be just so. I’m okay with that. I found another tutorial at Collette Patterns about rolled hems, but it’s too late to re-do this one completely.

I have to say, working with silk really is tricky, but I think I learned a few things, and I’d try it again. If you’re sewing with silk, another helpful resource is Sunni of A Fashionable Stitch. She offers helpful silk sewing tips here. Now I need a tutorial on ironing silk. I swear, I did iron it before these photos were taken.

Pattern: Burda Anda, with modifications

Sandals: gift from my friend (via Vietnam via Texas via Germany)

Necklace: a gift from my in-laws.

Photographers: my kids (5 and 9) Didn’t they do a great job? My primary photographer was, um, watching golf and could not be disturbed.

For more of my sewing, check out this link. This was my third Anda, the second being a linen colorblock one. I’m sure I’ll make more Andas, but I think it’s about time for me to move on to something else.

Have a great weekend! And oh, if you’re into Instagram, I’m finally actually using it, so you can find me there at emilysmithpearce. I’d love to see you there.


0 Comments on Self-Dyed Silk Anda Dress as of 6/21/2013 1:37:00 PM
Add a Comment
2. Overdyeing Silk

Dyeing things gives me such a rush. It feels like magic, and also like haha! I got what I wanted for next to nothing!

A sewing friend who was moving away (a long time ago now) gave me some silk (crepe de chine?) from her fabric stash. Silk! I’ve never sewed with silk before. But I was stumped. The colors are all very, very pale, and I just couldn’t imagine myself wearing them. Paleness tends to wash me out. Months later I had a brainflash. What if I dyed the silk? But silk. Silk! It took me a long time to work up my nerve.

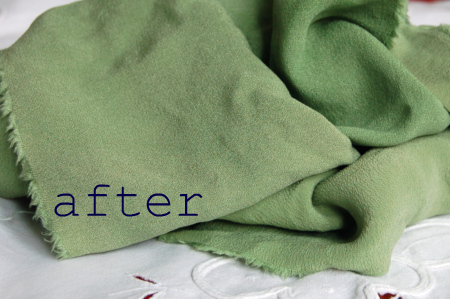
Finally, months after that, I started with a small piece and used the old Easter egg/ Kool Aid dye technique.

Initially I was going to try some embroidery or resist or something to give it some more interest, but then decided to keep it simple. I ended up really liking the color. Warning, though—-this was German Easter egg dye. PAAS will work the same, but I find their colors to be a bit, well, Easter eggy—whereas this green was nice and grassy. You can always mix your PAAS or Kool-Aid colors to get something a bit more nuanced. I think there are even tutorials out there on mixing Kool-Aid colors—-usually with regards to yarn dyeing.

On to silk batch #2. I was a little bolder this time with several larger pieces of pale blue, and decided for an indigo color using two shades of Deka fabric dye.

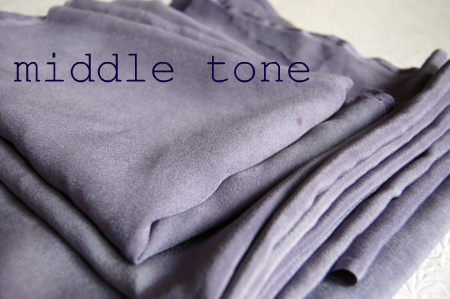
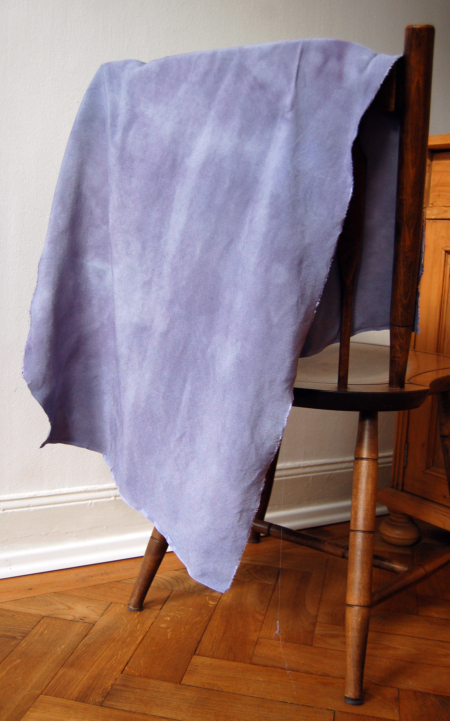
I didn’t use a full load of dye, but the fabric didn’t take the color as deeply as I’d expected. The blue I ended up with was beautiful but dried a good bit lighter than I wanted:

I really liked the mottled effect I got in this first dye job:

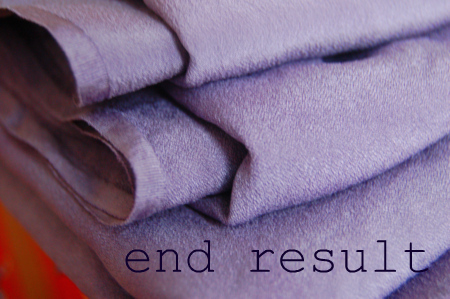
I dyed it one more time to get a deeper color. It doesn’t show up quite true in this photo (below), but I really like the way it turned out–it’s just a tiny bit deeper than the middle tone. The mottled effect is gone, though. I’m planning to make another Anda dress out of the fabric. Wish me luck! My most recent sewing projects have not been going very well.

For tips on overdyeing, check out this previous post.  For more of my adventures in fiber art, click here.


3 Comments on Overdyeing Silk, last added: 3/16/2012
Display Comments Add a Comment
3. Drum carding


the original hot pink spun on the left, the new blend on the right

I've now tried and instantly become addicted to drum carding. On Saturday I rented the Louet junior drum carder from Lettuce Knit and so far I've made lots of blended batts and reached the point where I am now rummaging around to find more things to card. It's like that.

Batts resulting from the hot pink blended with dark brown, and the hot pink blended with pale pink

So just to show you how it works, and how fun it is, I'll show you my main project. I had a 1/2 pound bag of very vibrant hot pink corriedale top that was languishing around since I didn't really like the colour anymore. It was just too bright. So I dyed some of it dark purple/brown, then blended that with the original hot pink to soften the colour. Then I blended some of the original hot pink with some very pale pink.

 Then I blended the resulting dark pink and medium pink with more of the pale pink while keeping the stripes fairly distinct.

I find I use the dog brush a lot while drum carding. I use it to remove the batts with gentle short strokes so that little strands aren't left behind. You can also turn it around and use it to burnish the batt as you would with a burnishing brush. It smooths the batt down and you can make a denser batt.

 The resulting batt - rolled up


The batts aren't too wide with the junior drum carder, so I've found the best way to handle the batts once they're done is to draft them out a little bit, then wind them up into a ball. Drafting out a bit helps straighten out any last little bits of fibre that aren't perfectly aligned and makes the batts easy to spin.
Add a Comment
4. Dyeing merino

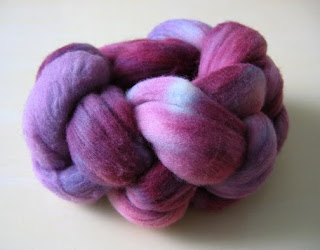
The last few days have been all about wool. I've done some more dyeing with Kool-Aid. I used four plain white merino 50g braids that I bought at Lettuce Knit recently.

This one is called Koi pond:


This one is called Lilac:

and lastly this one is Rusty Ship, because it reminds me of rust on an old ship:

I did two braids in this colourway (100g) so that I would have enough yarn to finish a project. I can't wait to spin these! After spinning plain brown for so long, it's so fun to be spinning colours again. I just finished spinning this corriedale braid from Kristyn of Pleasurecraft:

into this:

Spinning 2-ply is my favourite now. I think this skein is Sport weight (around 14 WPI).

Today I've been doing some drum carding, I rented the Louet Junior drum carder from Lettuce Knit. I'll show that next!

3 Comments on Dyeing merino, last added: 1/19/2010
Display Comments Add a Comment
5. Kool-Aid dyeing revisited

This morning I did a little Kool-Aid dyeing with some white roving I had in my stash. I've been seeing fat braids of yummy hand painted roving online but I'm feeling poor so I decided I should try it myself. We'll see how it goes...

I've noticed that roving with mixed colours can look garish, but once spun up and plied it changes how the colours work together. I've been seeing stunning examples on Flickr which have really inspired me.

While looking up info on spinning I found some tips on dyeing roving. I was reminded about how easy it is to do dyeing with Kool-Aid which allows you to use your regular dishes. I even had some Kool-Aid left over from dyeing yarn a long time ago so I didn't even have to go to a bunch of grocery stores trying to find a range of flavours.

Steps:

1. Add warm water and 1/2 cup of vinegar to a microwaveable dish. I used a ceramic dish. Place your roving lined up in rows to soak. You can push the roving down into the water but throughout the process handle it gently so that it doesn't felt - no twisting/wringing etc. And no moving the wool from hot to cold which shocks the fibres and can lead to felting.
*Don't use a rectangular dish that won't fit into your microwave because you will be sorry when you have to try to move a soppy mess of Kool-Aid soaked roving into another smaller dish and you will be very frustrated and feel stupid. Ask me how I know.

I mixed a variety of flavours: orange, strawberry, lemon-lime and raspberry with red and blue food colouring

2. While the roving is soaking you can organize your colours. I opened the packets of Kool-Aid into glasses of water and stirred them. You can use some paper towel as a palette to dab with each colour so that you can see it clearly. Mixing can give you colours like brown and olive green, if you prefer bright colours don't mix! Of course you can add extra water to dilute a colour and make it lighter.

3. After soaking the roving for 10 minutes I applied the Kool-Aid. Pour or spoon the Kool-Aid onto the wool wherever you'd like the colour to go. You can use a spoon to gently pat and spread the colour around. Remember it will blend a bit more by itself.

4. When you're happy with how the roving looks carefully place the dish in the microwave. The water should just barely cover the yarn.

5. Microwave for 5 minutes and take out your dish using oven mitts. Tilt the dish a tiny bit so that you can see the water. If it's clear then the wool has absorbed the dye.
This is the only picture I took of roving in the dish, this one was a bit of a mistake, I meant the colours to be more distinct. I'll wait and see how it looks spun up & plied

6. Let the dish of roving sit and cool down. Once it's cool you can rinse the roving and pat with a towel before hanging to dry. Remember not to twist or wring the yarn.

Next post you can see how mine turned out!

1 Comments on Kool-Aid dyeing revisited, last added: 10/31/2009
Display Comments Add a Comment