new posts in all blogs
Viewing: Blog Posts Tagged with: Paint Technique, Most Recent at Top [Help]
Results 1 - 25 of 111
How to use this Page
You are viewing the most recent posts tagged with the words: Paint Technique in the JacketFlap blog reader. What is a tag? Think of a tag as a keyword or category label. Tags can both help you find posts on JacketFlap.com as well as provide an easy way for you to "remember" and classify posts for later recall. Try adding a tag yourself by clicking "Add a tag" below a post's header. Scroll down through the list of Recent Posts in the left column and click on a post title that sounds interesting. You can view all posts from a specific blog by clicking the Blog name in the right column, or you can click a 'More Posts from this Blog' link in any individual post.
Three tips for painting twilight streetscapes in opaques (gouache or casein):
1. Bring a battery-operated LED light so you can see what you're doing.
2. When you start, try to anticipate where the scene will be at peak color, and aim for that in your layin.
3. Paint a big yellow area under windows first and then paint the dark areas over them.
----
"Gouache in the Wild" at Gumroad $14.95
GurneyJourney YouTube channel
My Public Facebook page
GurneyJourney on Pinterest
JamesGurney Art on Instagram
@GurneyJourney on Twitter
 |
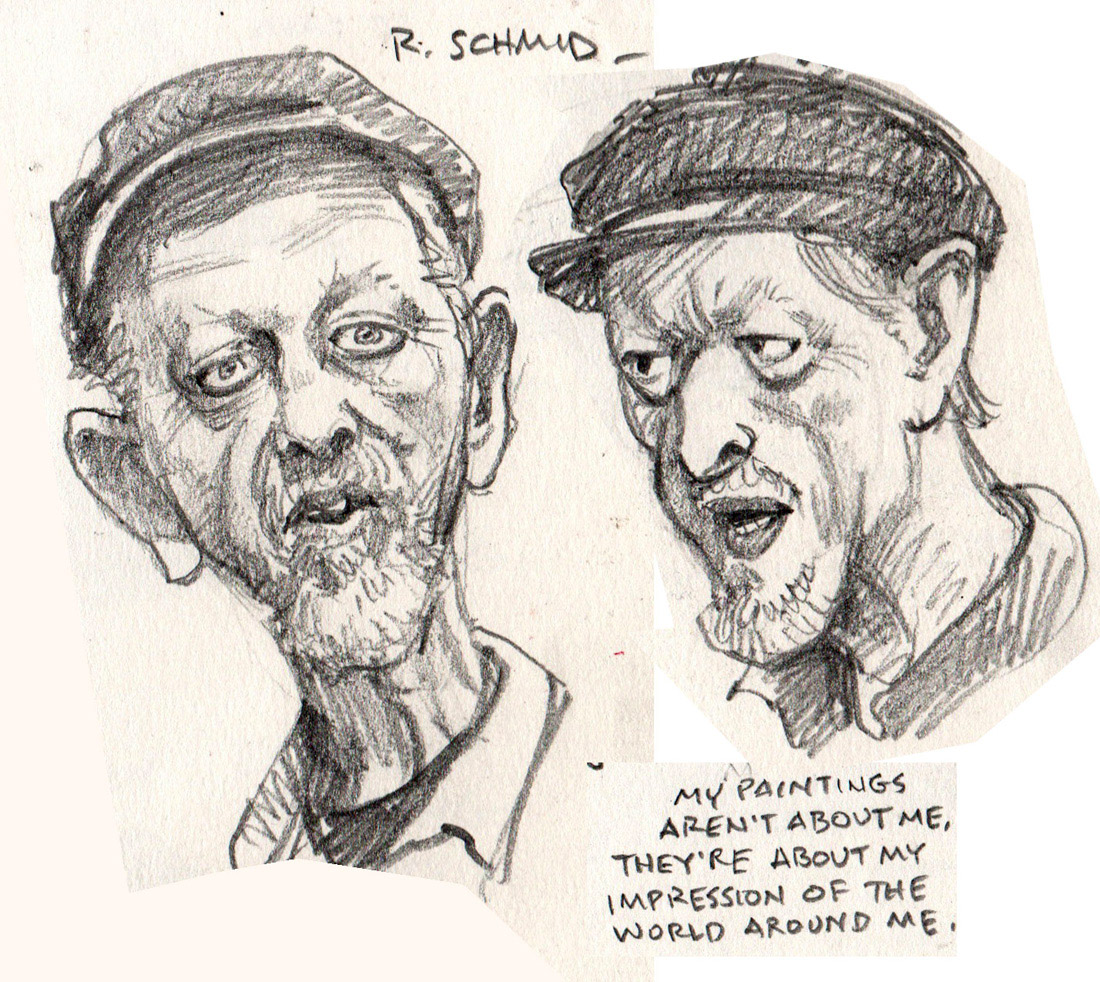
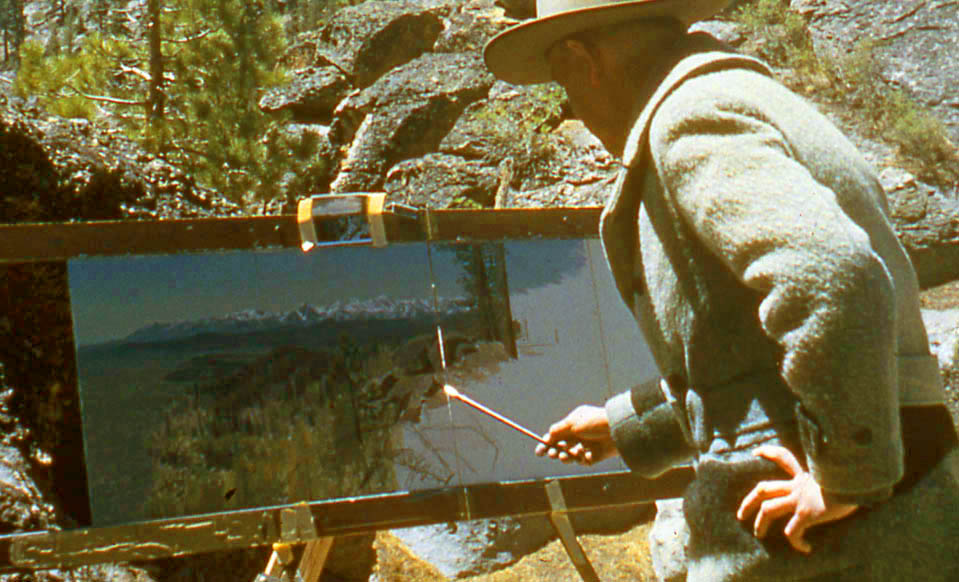
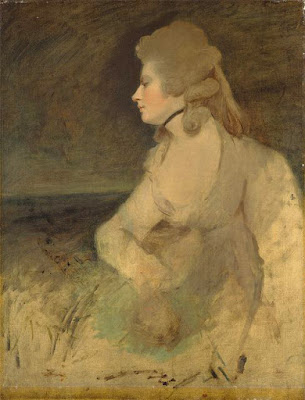
| Richard Schmid, sketched while he did a demo |
 |
| Painting by Richard Schmid |
He says: "Cultivate as many working methods as you can so that you can respond to the demands of painting different subjects. Don't expect that an effective way of painting a landscape will work as well for a child's portrait. Learn to paint thickly, thinly, loosely, tightly, quickly, slowly, and so on, according to the requirements of your subjects. Strive to expand your repertoire. For no other reason, work in different ways just for the satisfaction of confounding art critics."
----
His books are expensive (my copy cost more than $100), but they're worth it:

 Today we'll continue Chapter 9: "Painting from the Life" from Harold Speed's 1924 art instruction book Oil Painting Techniques and Materials
 .
.
I'll present Speed's main points in boldface type either verbatim or paraphrased, followed by my comments. If you want to add a comment, please use the numbered points to refer to the relevant section of the chapter.
Today we'll cover pages 173-180 of the chapter on "Painting from the Life," where he talks about Sir Joshua Reynolds, Thomas Gainsborough, Frans Hals, and Rembrandt van Rijn.
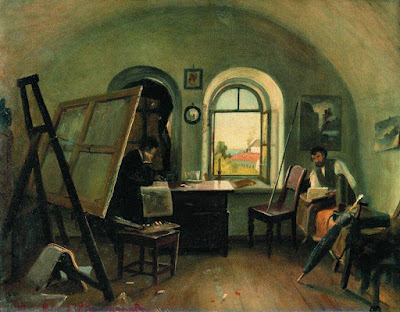
 |
| Sir Joshua Reynolds unfinished portrait |
Reynolds
1. Reynolds executed his portraits in monochrome and then glazed the color over it.The unfinished portrait above shows how his portraits must have looked in progress.
2. Reynolds' business approach for portraitsHe'd charge half on commencement and the second half on satisfaction. But "he had a room full of rejected portraits in his house when he died." According to Speed, he produced 150 portraits per year.
3. "The smaller the source of light, the less half-tones you get."Sharp, small lights create a sharp division of light and shadow. Soft light, which comes from large light sources (large windows or exposure of sky) leads to a more gradual shift from light to shadow.
Speed argues that smaller sources are more flattering, but that's generally not the consensus among portrait painters and photographers. Photographers of women in particular routinely use softer or more diffused lights, that is lights that emanate from a larger area. This soft light downplays highlights and unwanted lines and texture in the halftones.
4. Simplifying the modeling will flatter a face, even without changing the features or proportions at all. Powdering has the same effect by reducing highlights."The artist is not obliged to catalogue all these details." He says that a "mean vision," (meaning one that focuses on small, trivial forms) misses out on the larger, nobler vision.
I think what Speed is recommending is using a relatively smaller source of light, but ignoring or downplaying the minor details of wrinkles and highlights.
 |
| Gainsborough The Painter's Daughters (with ghost cat) |
Gainsborough
5. Method: paint thinned with turps and linseed oil. Commenced by rubbing in with burnt umber cooled with terra vert (green).This produces cool half-tones, into which reds and yellows are added into the lights, followed by darker accents. Note the drawing with the brush on the toned canvas. Also note the ghost cat.
In ateliers, the coloring of the first painting is called "dead coloring," and it is brought to life with warm glazes later.
6. "Swift unity of impression is one of the secrets of the charm, a thing that must always be caught on the wing."Painting children is always improvisational, even in Gainsborough's day.
 |
| Hals 30 Year Old Man with a Ruff, London |
Frans Hals
7. Spontaneous handling, painted with a simple palette. Painted with soft brushes, not hog hair (bristle). Speed speculates that a painting like the one above was accomplished in one sitting.
8. Blacks: thin painting over a warm ground.Note the brushwork in the ruff. Speed notes that it was painted with a gradated middle tone into which he has flicked lights and darks.
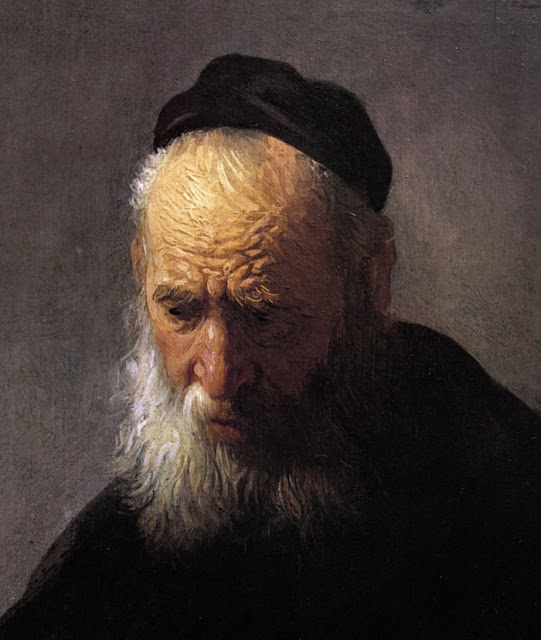 |
| Rembrandt Head of an Old Man |
Rembrandt
9. Analyzing R. is more difficult because of his variety of handling.Paint laid in with broken color and glazes, and sometimes with direct opaque handling. Generally Rembrandt reserves the thick paint for the lights, and keeps his darks smooth and transparent.
10. Color: "Rembrandt was a great master of getting the utmost variety out of a few earth colors."That was true of most of the old masters. Ultramarine blue, so common today because it has been chemically synthesized, was more expensive than gold, and was usually reserved for the cloak of the Virgin Mary.
Next week— Tone and Color Design
-----
----
GurneyJourney YouTube channel
My Public Facebook page
GurneyJourney on Pinterest
JamesGurney Art on Instagram
@GurneyJourney on Twitter
When painting from the figure, it's easy to get lost in all the subtle middle tones, and end up with a painting that has no force or impact. Shadows are usually darker than you think, and lights are lighter and more unified.
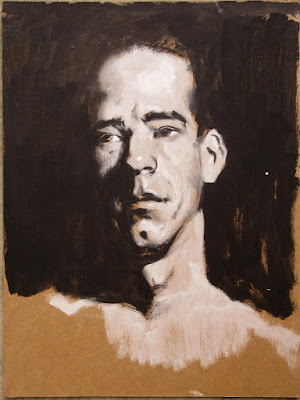
A helpful exercise to push your awareness in this direction is the High Contrast Study. Here's how to do it.
Material Prep before the Painting Session1. Find some 9x12 inch medium brown chipboard. You can also use mat board scraps (ask your framer), heavy brown paper, or even corrugated cardboard. The tone or color doesn't matter that much, as long as it's not black or white. Don't use precious or expensive materials.
2. Seal the surface completely with a layer of acrylic matte medium, brushed on freely.
 Material Prep at the Painting Session
1. Use two #4 or #6 bristle filbert brushes, one for white and one for black.
2. Use titanium white and black oil paint, and
keep them separate. You can "dirty up" the white just a little bit so that you have a little room for highlights, and you can mix the black with a little umber if you want, but don't put any white in your black.
Model Prep 1. Use a single light source on the model, and try to reduce secondary light sources such as reflected or fill light. This exercise doesn't work if there are multiple light sources. And make sure there's some light on your painting so you can see what you're doing.
2. Set up an simple background, either mostly light or mostly dark.
2. Position yourself in relation to the model so that some of the model's form is in light and some is in shadow.
3. Keep the sessions under an hour. The examples in this post were done in 15-20 minutes each.
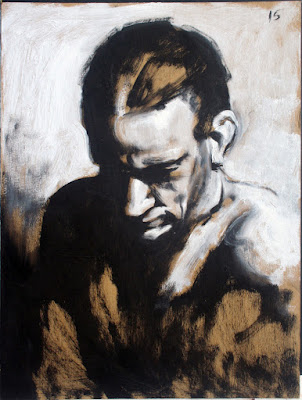 Process
1. Use the "black" brush to draw the lay-in, then mass in the shadows. After those are in, begin massing the lights.
2. Use black for all the areas in shadow, and white for all the areas in light.
3. If two areas of shadow come together, shape-weld them together with the black.
4. If two areas of light come together, group them together with white.
5. Try to avoid outlines.
6. Don't do too much blending at the transition between light and shadow.
7. You can leave some areas of the background tone of the board showing, but not too much.
 Next Steps
1. After doing this exercise in its purest form, you can allow yourself a little variation within the shadows and a little within the lights, but keep those variations very close in value, and don't be seduced by middle tones.
2. Replace the black with a more mid-range color, so that you do the same exercise but within a narrower value range. I'll show examples of this in the future.

Today we'll start Chapter 9: "Painting from the Life" from Harold Speed's 1924 art instruction book Oil Painting Techniques and Materials.
I'll present Speed's main points in boldface type either verbatim or paraphrased, followed by comments of my own. If you want to add a comment, please use the numbered points to refer to the relevant section of the chapter.
The chapter on "Painting from The Life" takes up a major part of the book, so let's break it down into parts, starting with the introduction and Painting from the life in two colors.
1. "Painting from the antique [plaster casts] is now much out of fashion."Fortunately it's not out of fashion any more, and is very much a part of the curriculum of modern academic ateliers.
 2. Why it's good to paint from casts before painting from a live model.
Speed explains why painting from plaster casts is a good idea. Skin has a lot of variation in local color. This variation has to be considered in addition to the modeling. Also, hair also doesn't follow the normal principles of modeling. I would add that if the light is placed too near the model, there's a variation in value intensity that also must be considered.
3. "Keep your work as large and simple in treatment as possible." This is consistent with Speed's advice throughout: State the broad masses with a big brush first and save the nuances for later.
4. "Reflected lights in the shadows are what give the luminous quality to them, without which they are heavy and opaque."Speed explains how reflected light usually comes from the direction opposite to the light, making the darkest part of the shadow (often called the "core" of the shadow), just beyond the terminator. This isn't always true, however. If there are sources of reflection or secondary fill lights near the viewer, the core won't be apparent. It's often an artistic choice whether to include it. The core of the shadow is also generally not apparent with indirect, diffused, or overcast light.
5. Painting from the life in two colors.Speed suggests using blue-black for the cool color. You can mix such a blue-black by mixing some French ultramarine deep with ivory black. On the warm side, you can use Venetian red or burnt sienna. As Speed says, the relationship of warm and cool colors is one of the most important features to watch in flesh painting, or for that matter, any painting.
 6. The advantages of painting with limited palettes
"In training oneself, the thing to aim at is taking the difficulties one at a time, and concentrating the whole attention on them....Muddling along with a full palette, and the whole difficulties of painting presented at once, which is the common method, is asking for trouble."
Using limited palettes is like living within a strict financial budget, where you're forced to account for every expense. It forces the painter to get the most out of the limited resources, and encourages clean handling.
"Fine coloring usually results from a simple palette the range of which has been fully used. You are forced, by starting with two colors, to find the utmost that can be obtained with them." Later when you use a full palette, you won't be seduced into using too many bright colors.
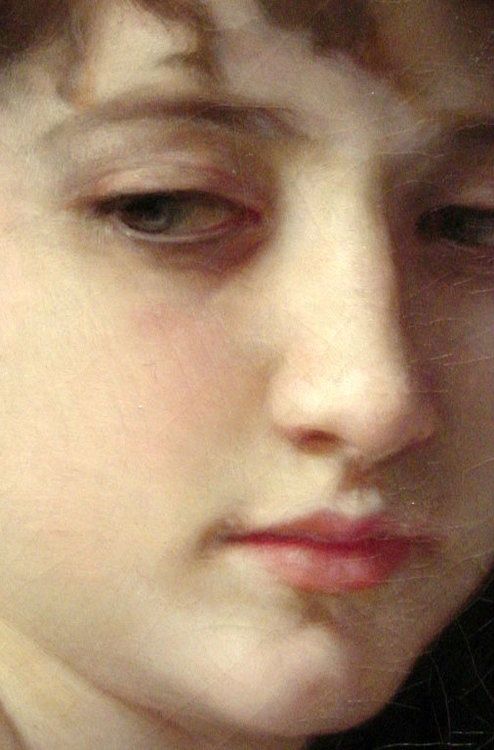
7. "In flesh, seen under an ordinary indoor aspect, the half-tones are usually the coolest colors, the warm being in the shadows and to a lesser degree in the lights."I'm always a little skeptical about such hard and fast rules, but this is a good one to think about and experiment with. The Bouguereau detail at left shows a very nice distribution of warm and cool colors, with slightly cool halftones and warm colors in the shadow and the forms and hollows of the form. I suspect that subsurface scattering and the peculiar qualities of how skin reflects light may be a part of this principle.
Next week—Chapter 9, "Painting from the Life," continued.
-----
----
GurneyJourney YouTube channel
My Public Facebook page
GurneyJourney on Pinterest
JamesGurney Art on Instagram
@GurneyJourney on Twitter

Felice House, a painting professor at Texas A and M, says: "Just today a student came to me with a question about how you prime your surfaces. We looked through the blog but couldn't find details. If you can fill us in that would be really helpful."
OK, Felice. Let's talk plein-air oil first. Before I leave home to go painting, I prep a bunch of panels in advance. That way the priming is dry when I'm ready to start.
I use Masonite or wood panels. The wood panels are typically birch plywood panels with canvas glued to them. I start with a coat of gesso . Then I cover that with a Gamblin oil ground
 .
. With its alkyd resin binder, this oil priming takes a day or two to dry. Putting a couple drops of cobalt drier speeds the drying time.
Typically I'll mix the oil ground with burnt sienna or English red oil to give it a light brown or pink tone. Here's a study where I left the priming. Sometimes I'll tone a panel to a cool color—bluish or grayish. I often choose to prime the board the complementary color of the landscape I expect to paint.
For those who aren't familiar with oil priming, it presents a more impermeable surface to the paint you apply in the field, so the paint floats on the surface more. Oil priming is rather slick and shiny, though, and doesn't take well to pencil or charcoal, so I just do my drawing with the brush.
In addition to
Gamblin oil ground, there's
Williamsburg oil ground
. Both use titanium white for the pigment. Some artists prefer a lead white ground, which is OK as long as you're fully aware of the health risks.
Many people prefer to paint over acrylic gesso priming alone, without the oil ground. This allows for a pencil or charcoal underdrawing. But for field sketches, I find gesso too absorbent, which is why I like the oil priming.
When doing a painting in the studio, such as a smaller Dinotopia painting or a science illustration, I'm working in oil, but I have to start with a very careful pencil drawing on illustration board. For larger Dinotopia paintings I do the drawing gesso-primed canvas covered plywood panels. The gesso priming reduces the canvas texture so that it's not so insistent.
After doing the pencil drawing, I need to prepare the surface for subsequent layers of oil, so it has to be sealed first. Otherwise the turpentine would melt the pencil.
I use
workable fixative
and acrylic
matte medium to provide that impermeable layer. It's also possible at this stage to pre-texture the surface with acrylic
modeling paste
to give the paint more surface texture, even if the oil is applied thinly over this priming. This is my secret for using oil on jobs that require short deadlines.
I demonstrate this method of priming on my recent tutorial:
Tyrannosaurs: Behind the Art.
You might want to check out my
previous post about the Dinotopia priming technique. Also, my book
Imaginative Realism: How to Paint What Doesn't Exist
covers many of my technical methods.
Also, have a look at my earlier posts on
Constable's Oil Painting Materials and
Warm Underpainting

 |
| Andrew Wyeth, The Coot Hunter, 1941 |
In 1942
 American Artist Magazine
 introduced the 25-year-old Andrew Wyeth as “One of America’s Youngest and Most Talented Painters." The article describes his painting methods, providing a valuable document, because Wyeth was mysterious about his technique in later years. Here is an excerpt:
Watercolor technique"He works on a medium rough watercolor paper which he has made up in blocks (22x30 in). He objects to stretched paper, says he believes it loses its capacity for brilliant effects. All his painting is done with three sable brushes, Nos. 5, 10 and 15. The never uses those broad flat brushes so many artists employ for large, covering washes.
 |
Andrew Wyeth’s palette and the three brushes
with which he paints all his watercolors. |
"In view of the gusto with which Wyeth works, one is surprised to see such a small palette in his hand, especially since in his rapid painting he must require a quantity of “runny” washes on short order.
"In beginning a watercolor Wyeth very rapidly lays in the large masses in their approximate colors, but without detail definition. This may or may not have been preceded by a slight pencil indication.
 |
Wyeth often makes rapid ink sketches like this,
on the spot, and then does the watercolor in his studio. |
"Thus the paper is entirely covered in the first few moments, except for white areas which are untouched by the brush—Wyeth never uses white body color. Occasionally white, or near white, is obtained by a heavy stroke of the brush-handle in a still-wet wash.
"Working back into the wet areas he develops his picture, pulling definition out of the blurred color masses, working all over the picture while it is still moist.
"The technic of watercolor—that is, in the fluid method—presupposes rapid and skillful execution. Yet working within the limitations of its properties some artists proceed with a degree of deliberation. It is quite possible, technically,—and without sacrificing freshness—to work on a picture over a considerable period, even to come back to it the next day. Many artists spend at least two or three hours on a picture. Wyeth’s practice is to skim off the white heat of his emotion and compress it into a half hour of inspired brush work. He is the first to admit the presumption of this kind of attack, and is ready to confess that it fails more often than it succeeds.
 |
| Andrew Wyeth, Pennsylvania Landscape, egg tempera on board, 1942, 35x47 inches |
Egg Tempera Technique"Mindful of the dangers inherent in practiced facility with his watercolor brushes he has put them away in moth balls for a season and, during the past year, has been devoting himself to tempera painting, employing a technic that imposes strict disciplines.
"In his temperas Wyeth’s objective is to cover up his brush strokes and obtain a sense of freedom through pattern rather than technic. He paints these pictures with a single sable brush not over 3/4 of an inch long.
"These are done on Masonite upon which three coats of whiting mixed with casein glue are applied as a ground. The pulverized glue is heated, in water, in a double boiler. Wyeth sandpapers the final coat to a very smooth finish. The panel is made rigid by a framework attached to the back. He paints with dry colors mixed on his palette, as he works, with distilled water and egg yolk.
"His procedure is to make a monochrome underpainting in black ink. The colors, applied over this black and white, have a quality of weight and depth preferred to the result of direct painting in color. This is in accordance with the traditional method of old masters who used this medium.
"This turning from the freedom of watercolor to the exactions of tempera illustrates the intelligent purpose of a young artist in seeking strength and breadth as foundation for the work he hopes to do later on. Through his tempera paintings he is acquiring the habit of accuracy and is seeking an intimacy with nature which he feels he cannot attain with his watercolor brush alone. Thus fortified he believes his watercolors, though painted in a burst of enthusiasm, are more likely to be informed and interesting in every detail.
"�Too often,’ he says, ‘a watercolor appeals solely by virtue of tricks and fortuitous beauties inherent in the medium itself. My aim is to make every part of the picture alive, interesting.’
"The casual observer, turning from Andrew Wyeth’s impulsive watercolors to his tempera paintings, executed in the spirit of old master craftsmanship, might well be puzzled. They appear in temperament as well as in technic like the work of two separate individuals. They are, in the sense that the well-rounded man is a different man at different times, as he takes devious directions to arrive at a goal that cannot be approached by a single paths. Only the artists himself can see the map whereon those divergent paths finally meet in the ground strategy of a single purpose.
"We shall watch for the meeting of those paths in the work of Andrew Wyeth."
——-
Excerpted from "Andrew Wyeth, One of America’s Youngest and Most Talented Painters,"
American Artist Magazine, 1942.

Today we'll take a look at Chapter 8: "Colour: Practical" from Harold Speed's 1924 art instruction book
Oil Painting Techniques and Materials.
I'll present Speed's main points in boldface type either verbatim or paraphrased, followed by comments of my own. If you want to add a comment, please use the numbered points to refer to the relevant section of the chapter.
The first half of this chapter is about painting methods, and I'll just present a list of some of the main bullet points.
1. Throwing eyes out of focus vs. squintingSpeed says that the former is better for judging color; the latter for judging value. To be honest, I can't throw my eyes out of focus on command. I can sort of go cross-eyed, but I can't really blur everything out. Anyone have any tips for me?
 |
| Portrait by Harold Speed |
2. Impressionists pioneered the scientific / objective painting of color.They invented a way to make almost anything paintable. However, Speed reminds us that there are pitfalls to be guarded against: superficiality, slovenly drawing, and neglecting the beauty of deep shadows.
3. "When sunlight is seen in very strong quantities its component prismatic colours can be observed."He says this is obvious even to the untrained eye. But I'm not quite sure what Speed means. I suppose he means something like a chromatic aberration in a lens. I can't really say I've experienced the colors "unmixing" in my eye. I can see halation effects, especially when I squint, but not the separation into component hues. Speed says that breaking up bright light into prismatic colors is the only way to convey strongly glaring light, but I would suggest that there are other ways, especially those used by JMW Turner and Frederic Church.
Speed then goes on to catalog a variety of painting methods, which I'll just list (for the sake of discussion) rather than try to recapitulate.
4. (page 177) "Method of old tempera painters: Painting color thinly over another repeatedly, thereby getting a play of two colours." Flesh painted in terra vert (greenish gray) with pinks and ochres thinly painted over. Vermeer's
Lady at Virginal painted this way, Speed suggests.
5. Painting opaque color into transparent; first scumbling the transparent all over, and then painting into it, leaving it to show through where necessary.Speed reminds us that combining transparent and opaque colors gives the most potential for richness and variety.
6. "All colors are made warmer when painted over light grounds transparently, and all colors are made cooler when mixed with white."This is a quality of paint mixing that just takes practice. "For sheer beauty of color," he says, "nothing can touch transparent color."
7. Movement in color. Big topic of this chapter. Speed talks about various ways to make colors change from one passage to another.
8. Finishing hot. When completing a painting using certain methods, you can't keep retouching it. Speed uses the comparison of driving an old car up a steep hill. If you don't make it over the top of the hill, you have to back up and start all over.
8. Broken color.Spots of adjacent color that mix in the eye.
9. Mixing several colors on one brush load.
10. Pre-Raphaelite method: painting into a tacky white ground.(oil technique) Has anyone tried this?
11. Titian method: red and black, allowed to dry, over which you apply a thin film of white.12. Pure glazing.He says it's out of favor, but that beautiful effects can happen that way.
13. Putting a thin border of bright colors around the edges of large masses.Cecilia Beaux and Wayne Thiebaud (above) comes to mind.
Next week—We'll follow along with his demo, which starts on page 125.
-----
----
GurneyJourney YouTube channel
My Public Facebook page
GurneyJourney on Pinterest
JamesGurney Art on Instagram
@GurneyJourney on Twitter

Here's the second in a series of brief videos called "Basic Painting Tips." (Link to YouTube).
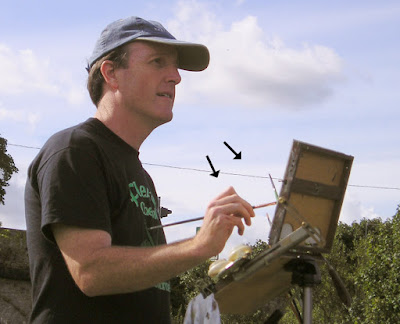
The idea here is to lift up the painting as close as you can to your view of the subject, with the palette as close as possible to the painting. Both palette and painting should be approximately perpendicular to the line of sight (arrows). It's also important that palette and painting are in the same lighting. If the painting is in shadow and the palette is in full sunlight, judging color mixtures becomes needlessly difficult.
Pochade easels for oil painters, like the Open Box M above, place the palette just below the painting, while other systems such as the Parallel Pallette place it just to the side. With watercolor or runny paint, the palette usually has to be more horizontal. The homemade Lightweight Sketch Easel that I've been using lately uses a hinge system that lets you place the palette at any angle.
These short tip videos are intended for beginning painters, but I hope they will interest experienced painters, too. The idea is to grab an excerpt from my longer videos that can serve both as a stand-alone information piece and a teaser for my longer content, which covers both beginning and advanced material.
Future videos will include things like:
• Palette Arrangements (how the colors can be placed)
• Diffusers
• Brush materials
• Brush shapes
• Oil priming
• Overlapping edges
• Drying time
• Shadow colors
• Using enough paint
• Area by area
• Loose block-in
BASIC DRAWING TIPS
• Eye level
• Viewfinders
• Measuring lengths
• Measuring slopes
• Ellipses
Is there a topic you would like to see covered in a future video? Teachers, are there reminders that would help your students? Please let me know in the comments.
-----
On topic of palette position, you might also check out my previous blog posts:
• Using a sketchbook easel vertically
• Plein-air tip: Go vertical
PAINTING TIP #1: Large to Small)
Full video "Fantasy in the Wild" available in two forms:
Digital download from Gumroad (HD MP4)
DVD (NTSC Region 1)
This unfinished Maine seacoast study by Hudson River School artist
William Hart (1823 – 1894) gives an insight into his oil painting method.

It appears that he has pre-toned the canvas in the lower area with a thin layer of burnt sienna which was dry when he arrived the location. The gray area of the beach at lower left and the blue colors of the sea at right are laid opaquely over the warm underpainting.
Those blue colors are just a flat base coat that, had there been time to finish, would have been detailed with waves. The top area of the rocks are subdivided further and further with the brush, progressing from large forms to small ones.
 |
| William Hart, White Pine, Shokan, Ulster County, New York, c. 1850-'60 |
The idea of laying large, flat areas and subdividing them applies to Hart's watercolors as well. He lays down the entire silhouette shape of the tree mass in a flat, dull-green tone, preserving the white of the paper where he needs it. Then he systematically subdivides those green tones with smaller forms.
-----
Watercolor from Albany InstituteMore insights on Hart on
Mike Ettner's blog
In this new YouTube video, I demonstrate a useful principle that will help you with speed and accuracy in plein-air painting. (Link to YouTube)
I do a study of an excavator in gouache (opaque watercolor), using big brushes and big shapes at first, and then I finish with smaller brushes, spending time only on the details that interest me the most. The whole study took about two hours, but it gave me essential information as I developed the design for the giant robot.
This is an excerpt from Fantasy in the Wild: Painting Concept Art on Location, a 71-minute video workshop packed full of such essential info.
This video is especially valuable to you if you're interested in fantasy, science fiction, concept art, or anything that requires combining imagination with observation.

A couple of months ago we took a look at
Ivan Shishkin's opinion of photo reference in his landscape painting. Now let's examine more about his specific working methods.
Preliminary Drawings
He would advise his students: "Before starting the painting, you have to do a sketch to clarify the idea and plan what you're going to be doing on a big canvas."
Note in the sketch at left, Shishkin draws a grid, probably to help him enlarge the composition onto the canvas.
Shishkin continues: "It's also important to do a preliminary drawing [on the canvas] with charcoal. Put a layer of charcoal on a clean canvas and wipe it with a dry tissue. You'll have a smooth base tone, and you can draw over that with more charcoal. You can erase off halftones and lights using an eraser made from a chunk of black bread. If you do that you will get the effect of lighting you need, and then you're ready to continue with the final painting."
Shishkin typically used ink to clarify the outlines of the trees in his preliminary drawings. Once the preliminary drawing was finished, he would proceed to do a tonal underpainting in monochrome before painting in full color.
Paint and palette organization
"He carefully mixed organized groups of colors on his palette. All the colors must be prepared in groups in advance on the palette. He began by applying the darkest tones of paint. Then he proceeded to the halftones, and so on up to the light." (From a letter from Ivan Shishkin, St. Petersburg, 1896).
Shishkin studied in
Düsseldorf, so it's not surprising that he used primarily German paints. "He used zinc whites for big studio paintings and lead whites during his traveling and for outdoor painting, because they dry more quickly. He painted on canvases from Dresden if he could."
"He used to buy a lot of different paints. But if he didn't know the specifications of a given kind of paint, such as lightfastness and durability, he avoided it."
"Because of this he completely stopped using carmine oil paint after
[Vasily] Polenov showed him a chart of paints that was left in the sun for 10 years, and carmine completely disappeared."
 |
| Ivan Shishkin and A. Guinet in the studio on the island of Valaam |
Here's a list of Shishkin's paints:
Red paints:
English red, Chinese vermilion, rose madder, and rose doré, mostly used for glazing. Burnt sienna was his favorite.
Yellows:
Yellow ocher, cadmium yellows and oranges, zinc yellow (for backgrounds and leaves in the sunlight), raw sienna, chrome yellow (rarely), and Indian yellow (for glazing). He never used gamboge or aureolin. Sometimes he used Naples yellow for sand and roots. Occasionally for foreground textures he would mix fine sand into the paints.
Blues:
Sky blue (?) and Prussian blue.
Greens:
He used a lot of different ones, including: permanent green, cobalt green, chrome green, vermilion green, emerald green, and others.
Blacks: Ivory black and lamp black oil paint.
-----

Eighteenth century British landscape painter
Alexander Cozens promoted a novel technique for generating compositions. He called them "blot drawings" and their purpose was to unlock the imagination by suggesting random shapes and forms.
Cozens described a blot as a "production of chance with a small degree of design."
It wasn't a completely new idea. Chinese artists had used similar methods for centuries, and Leonardo da Vinci had suggested in his notebooks that artists might find ideas for compositions in wood grain or stains on the wall.
Cozens' student Henry Angelo, recalled that he:
"dashed out upon several pieces of paper a series of accidental smudges and blots in black, brown, and grey, which being floated on, he impressed again upon other paper, and by the exercise of his fertile imagination, and a certain degree of ingenious coaxing, converted into romantic rocks, woods, towers, steeples, cottages, rivers, fields, and waterfalls. Blue and grey blots formed the mountains, clouds, and skies'. An improvement on this plan was to splash the bottoms of earthenware plates with these blots, and to stamp impressions therefrom on sheets of damped paper."
Cozens published a description of the method in his pamphlet: "A New Method of Assisting the Invention in Drawing Original Compositions of Landscape" (1785-6).
Cozens' ideas later inspired the Surrealists and Abstract Expressionists to develop techniques such as
automatism, where freely-created abstract designs were generated by random or unconscious processes.

Let's resume the GJ Book Club with Harold Speed's 1924 classic The Science and Practice of Oil Painting , which continues where his previous book, The Practice and Science of Drawing left off.
I'll present his points in bold either verbatim or paraphrased, followed by comments of my own.
1. "Painting is drawing (form expression) with the added complication of tone and color."
One of Speed's great contributions as a teacher is to narrow the gulf in students' minds between drawing and painting. As he says, the key is to break down the problem into easy stages and to take one thing at a time. In his previous book, he talked a lot about "mass drawing," by which he meant seeing form in terms of tone. The jump from charcoal to monochromatic oil isn't that great. His book is a good lifeline for those who have been frustrated by all the variables of a full-color painting.
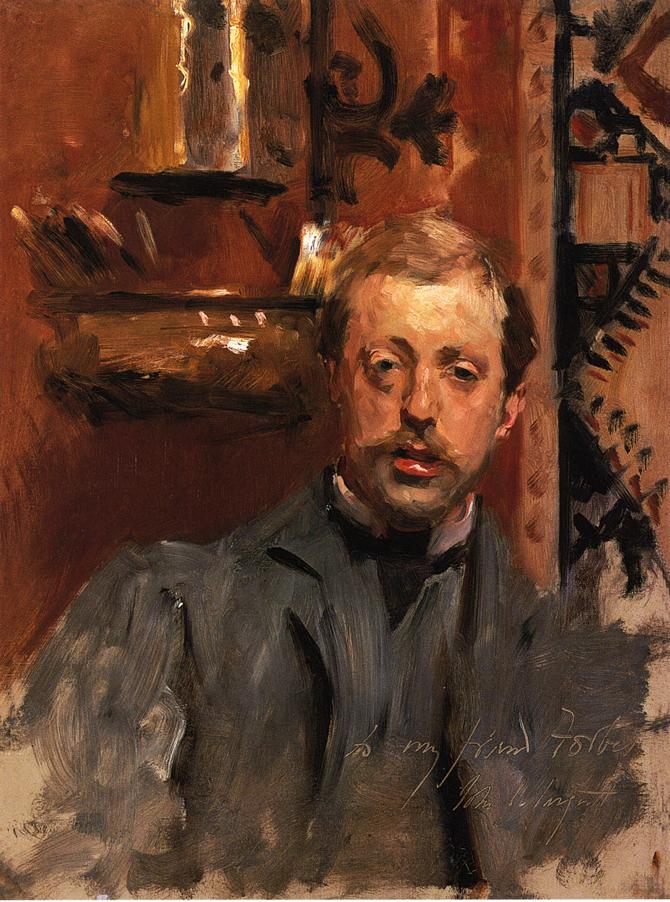 |
| J. S. Sargent, portrait of Charles Stuart Forbes |
2. The impressionist movement has required a reformulation of the course of study in art schools because of the new vision that the movement has given us.From the standpoint of British art schools in the early 20th century, this impressionist way of seeing would have been regarded "Continental" or "beastly French" as Sargent joked. Eventually the British painters adopted the ideas of broken color and direct painting, but there were many in the Royal Academy who resisted it.
3. There are two modes of teaching: hard drilling on technical methods or leaving the student to figure out a technique on his own.Some of the great teachers have come from both camps. Frank Reilly was more of the former, while Howard Pyle was more of the latter. But, Howard Pyle had the luxury of incoming students who had already been drilled on academic methods. The problem with the first method, Speed suggests, is that the student can get lost in technical issues and lose sight of their unique expressive potential. Later in the introduction Speed suggests that any art school should nurture the natural impulses of each individual student while providing the technical tools.
4. Every work of art starts with a nebulous idea.This is true for me, and my thumbnail process is so important to work through. The buzzword for this process these days is "iteration." A lot of people seeing a finished painting assume the artist just sits down and renders out an idea fully formed.
5. "The best definition of a genius I have seen, is that he is described as the man most under the influence of these mental uprushes from the subconscious."I know what he means, but I think the statement could be misleading. So many great geniuses like Michelangelo define genius as "eternal patience," or "the infinite capacity for taking pains" or "90% perspiration." Those uprushes from the subconscious only arrive, in my experience, in the context of steadfast effort. Patience, steadfastness, hard work, and an insatiable dissatisfaction. Who else but Sargent would have the intense application to wipe out a portrait again and again after 15-20 false starts.
6. Conscious / unconsciousSpeed talks a lot about the relationship between the conscious and the unconscious. I love the idea that we should study consciously and paint intuitively. His preoccupation with the unconscious was very much of his time, as Henry James and other psychologists were building on what Freud had posited about the workings of the creative mind.
More recently, neuroscientists have explained the process by which skills are internalized. Beginners focus consciously on each skill, and then gradually, through practice, the neural pathways migrate into deeper subcortical regions of the brain.
7. Practical / intuitiveIn the later part of the introduction, he sets up for the analytical approach that he'll use in his course of study, without neglecting the value of intuition and elusive rhythms that are harder to dissect. He wisely chooses to avoid the mysteries of the origins of creativity and to stick with more practical and rational matters.
At the end of the chapter, he decries the loss of drawing as a commonplace skill practiced by non-artists, perhaps a consequence of mystifying the process and undermining the value of traditional skills.
He ends with a great quote: "It is only those you cannot discourage who are worth encouraging."
I'd love to hear your thoughts in the comments.
-----

 |
| Adolph Menzel The Balcony Room, oil, 1845 |
Adolph Menzel was painting from life in oil many years before the Impressionists. His friend Paul Meyerheim described his way of working: “Especially in the time where the whole world was painting out of that brown soup, it was Menzel's characteristic to put every tone correctly mixed and thickly into the right place."
Meyerheim continues: "He never performed the method of glazing. He always painted differently than his contemporaries and as a result the world wasn't familiar with his technique."
"He compared glazing or similar transitions with transparent colors to the use of the pedal on the piano, stating that a good pianist can play everything as if he was using the pedal. Yet as a matter of fact everything has to be played on the keys themselves without the tones getting blurred.”
-----
Thanks to
Christian Schlierkamp and
Christoph Heuer for help with the translation.
From
Paul Meyerheim
The guy at the counter wears a T-shirt that says, "I speak my mind because it hurts to bite my tongue all the time." He doesn't say a word.
 |
| Diner Talk, gouache, 5x8 inches by James Gurney. |
Behind me a college girl is talking to her companions. She says, "If I don't have enough Red Bull to get me through the day, I will be pissed." She never stops talking.
The first step in painting the scene is to place the main figure and work out the perspective of the counter, stools, and far wall.
Then I paint the main guy using black gouache fairly transparently. Tip: Before you start painting someone in a restaurant, check their plate. If it's nearly empty they might not be there long.
I begin to introduce some white gouache and build opacity, add detail, and correct errors.
------

You can make a limited palette out of almost any two colors, as long as one is cool and the other is warm.
 |
| Catskill Roadhouse |
For this painting I used ultramarine blue and cadmium red scarlet, together with white. It's basically red, white and blue, so you can call it the "American palette."
With two colors that are near complements, it's fun to work over a surface primed with a color from the far side of the spectrum. I'm using blue and red over yellow. The yellow is about 95% covered up, but where it peeks through, it energizes the color scheme like a pinch of spice.
You might try orange + violet + white over a cyan underpainting, or yellow + cyan + white over magenta. You can also introduce black, either as an accent if you want to deepen the darks, or if you want to use it as a color of its own (such as black + orange + white over blue).
A two-color-plus-white palette has some advantages:
1. It's extremely fast to set it up and get it running. (I was painting while Jeanette was still fooling with her umbrella.)
2. It's good for beginners because it reduces your choices to light or dark and warm or cool.
3. It puts you into realms of color that you would never think of if you had all the color choices available.
I was using casein, but this method would work for any opaque paint: gouache, acrylic, or oil. If you're doing the painting in gouache, the priming should be done with a paint that gives a sealed surface (such as colored gesso, acrylic, or acryla gouache) so that wet layers don't pick it up.

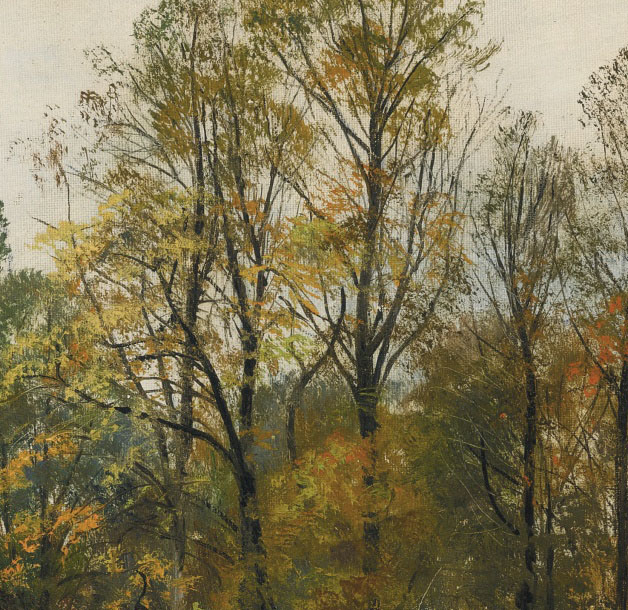
The landscapes of Ivan Shishkin (Russian, 1832-1898) are notable for their truth to nature. He knew a lot about botany and painted outdoors on a regular basis. This autumn landscape in oil is about 16 x 26 inches.
A detail suggests three things to my eye.
1. The sky must have been dry or nearly dry from a previous session, rather than painted all wet together. If it was previously painted, it then have been "oiled out" with a very thin layer of painting medium to make it receptive.
2. He must have had a wide variety of brushes, and switched between them as he built up the foliage and branch textures. A big old, splayed brush, dabbed against the canvas, could have provided the foliage textures.
3. The branches are painted with a very thin round brush, and some of the lighter branches in the lower right of this detail seem to be scraped out of the wet paint with a knife or a brush.
4. The foreground leaf masses are laid on quite thickly. The full effect is loose and direct, but not "brushy"�that is, it doesn't look like a collection of brushstrokes.
-----
The Shishkin painting is
Lot #1 in an upcoming Sotheby's sale of Russian pictures in London on June 2.

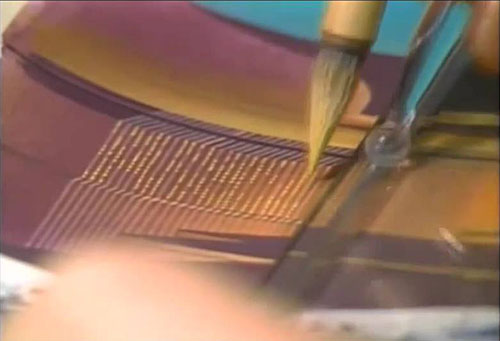
The animated film "Ghost in the Shell" was released in 1995, and the backgrounds were produced with physical paint.
Observer
K Huitula described the technical process: "They were painted with about 30 different colors of bottled poster color [a liquid form of gouache, also known as tempera]. On wet paper, first the basic color surfaces and tones are painted with a bigger brush, after which you move on to smaller details little by little."

"The straight lines are painted with a brush, taking support from a ruler and a stick gliding on its groove.

Here's an example of such a grooved-ruler device in action (thanks,
Todd Bowlin)
"A paintbrush [airbrush?] is used only very seldom to achieve some certain effects, still most of the painting is done with a traditional brush. Hair-dryers are also used for drying the painting when needed."
"While not working on a precise project, all the free time is used for making painting exercises, taking advantage of the studio library consisting of various books on nature and photography. Also different variations are being done from the same painting, varying the colors and the impression of lighting."
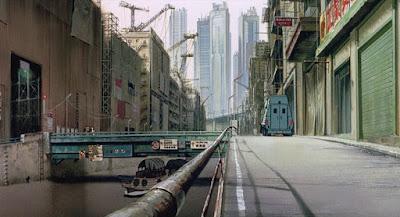 Ghost in the Shell
 was based on a manga by
Masamune Shirow. The film was produced by the company Production I.G., and the crew of about 200 people was directed by
Mamoru Oshii. The backgrounds were the work of Hiromasa Ogura and his team.
The original film cost 5 million dollars to make. For the upcoming
Hollywood live action remake, the fee for actress Scarlett Johannson alone is said to be 10 million.
-----

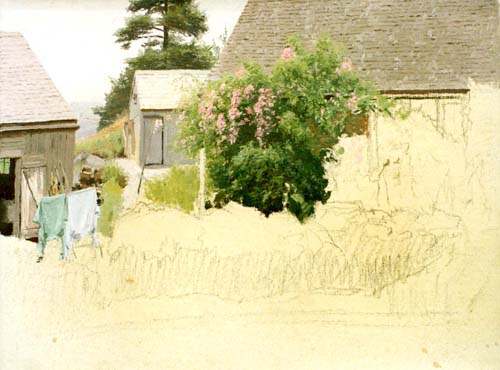
This small oil study by James Perry Wilson was left unfinished, allowing us to see how he did it. After a careful line drawing, he painted from background to foreground, completing each area before moving on to the next.
This photo shows J. P. Wilson at work on an outdoor study, with two panels side by side in a special frame so that he could paint a panorama. This one also seems to be completed area by area.
The method is sometimes called "window-shading," because it resembles unrolling the final canvas like pulling down a window shade. It was a common practice for painting museum dioramas, for which Wilson is best known.
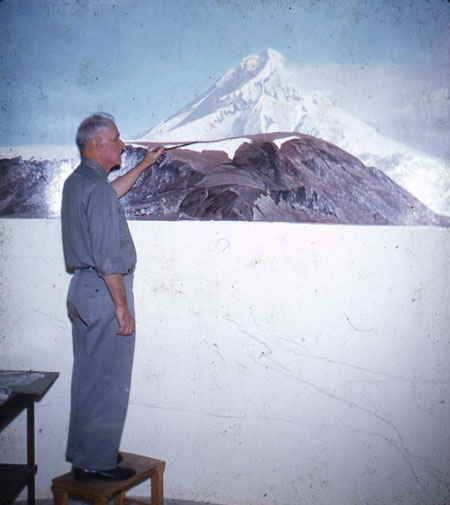 |
Francis Lee Jaques painting the Peabody Museum's Alaskan Brown Bear diorama,
Courtesy Peabody Museum of Natural History and Michael Anderson |
According to
Michael Anderson of Yale's Peabody Museum, Wilson would have seen the practice used by his colleagues, such as
Francis Lee Jaques: "From the horizon, Jaques would typically paint down and from left to right, though not always. Sometimes he would skip around painting an area to completion and then going to another area, painting it to completion and so on. Jaques typically painted the birds first and painted the background around them later."
Both artists would have done a tight color comprehensive of the overall scene first, and used that as a guide.
Frederic Church painted this study of the view from his home Olana in winter. I would bet that he painted it area-by-area from background to foreground.
Window-shading is a fast way to work, and it can yield almost photographic results. It's a good way to paint fast under challenging conditions, such as winter landscapes or sunsets.
Ilya Repin used a similar method in this study from costumed models. Over a preliminary line drawing, he applied the paint to achieve a finished effect area by area, like a coloring book or paint-by-number. There's no block-in.
There are several advantages to this method. In oil, especially with an oil-primed board, you can make use of the white of the board for small highlights that show through thin textures of paint.
------

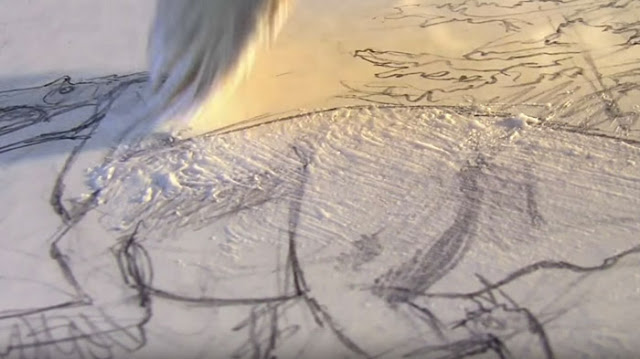
The technique that I have used for most the illustrations in Dinotopia: A Land Apart from Time is an oil wash method that's quite fast and versatile.

I do a quick pencil drawing on heavyweight illustration board and fix it with workable fixative. Then I seal the surface with acrylic matte medium , applied quickly overall with a housepainting brush. While it's wet, I squeegee the matte medium to a whisper-thin layer using a scrap of cardboard dragged along the surface. Here's a video showing how that step looks.
When that layer is dry, I scrub in the oil colors with a bristle brush, thinning them with a combination of odorless mineral spirits and alkyd painting medium
 . The resulting layers take a couple of hours to dry to the touch, and they're dry enough overnight to permit additional layers.

What I like about the method is that you can use it entirely transparently, as I did in the painting above, or you can paint semi-opaque or fully-opaque passages, and bridge into a more conventional oil painting technique.
-----
Book: Dinotopia, A Land Apart from Time  (on Amazon).
Book: Dinotopia: A Land Apart from Time (signed from my web store U.S. only)
More about Dinotopia techniques and methods in my book: Imaginative Realism: How to Paint What Doesn't Exist
Listen to the latest episode of the Dinotopia audio podcast.
There will be an exhibit of Dinotopia originals at the Stamford Museum and Nature Center in Connecticut from February 14 - May 25, 2015. I'll be giving an illustrated lecture there on Sunday, February 22.

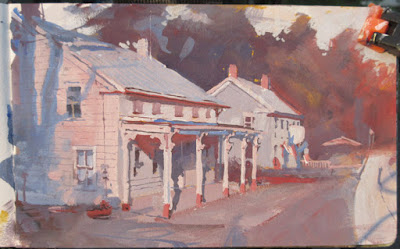
Here's a short video showing the making of my watercolor townscape in Bryan, Texas. (Direct link to video)
Camera:
The video is shot with a very compact point-and-shoot camera mounted to a street pole with a flexible tripod
 that can grab onto just about anything.
Paints:
----
Full length tutorial DVD from Amazon:
Watercolor in the Wild
HD download at Sellfy (Paypal) or
Gumroad (credit cards)

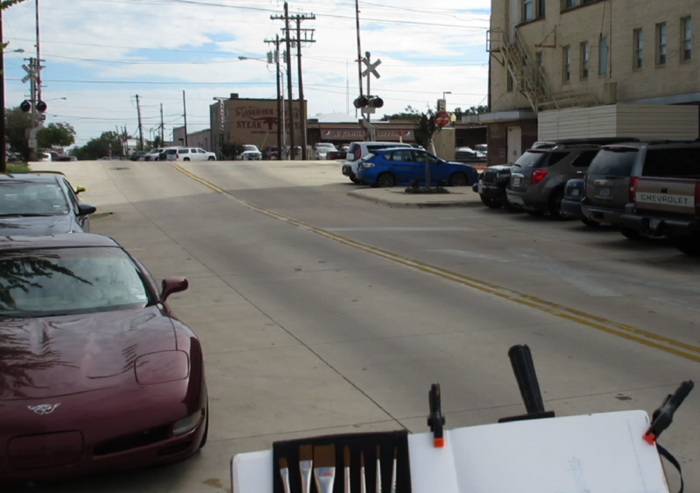
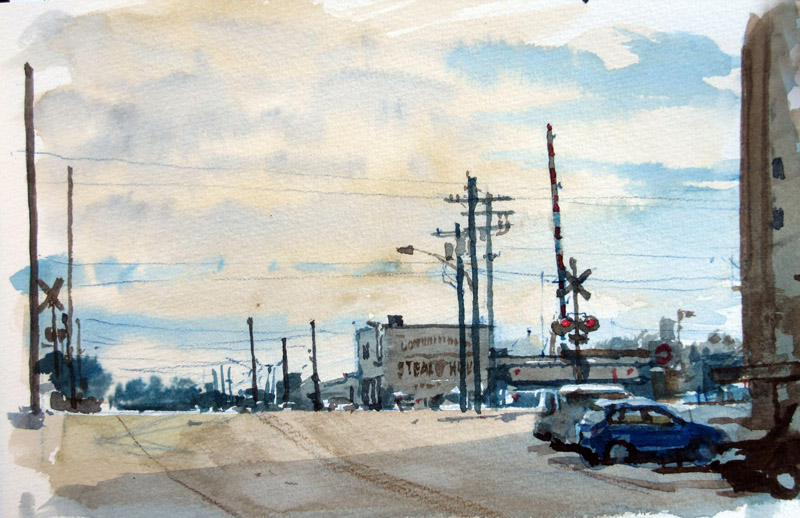
Here's a step-by-step watercolor sequence. I'm standing on the corner of 24th and Main in Bryan, Texas, looking east across the railroad tracks to the Longhorn Steakhouse.
The watercolor sketchbook is held up to standing height by a pochade easel on a fully extended tripod.
I'm attracted to the tight grouping of telephone poles and the gray light. The lay-in is drawn with a blue water-soluble colored pencil, which will partially dissolve. Note the eye level or vanishing point is below the level of the tracks.
I wet the entire sky, covering it with some overall warm color, then the light gray cloud shadows, and as it starts to dry up, the distant blue sky. Then I cover the big planes of the shadow, leaving a few white accents.
The poles and small details go in with Payne's gray and a round brush.
The whole painting takes an hour and a half. I shot some video, too, so I'll edit that and upload it next week.
Now...off to paint in Austin!
------
Materials:

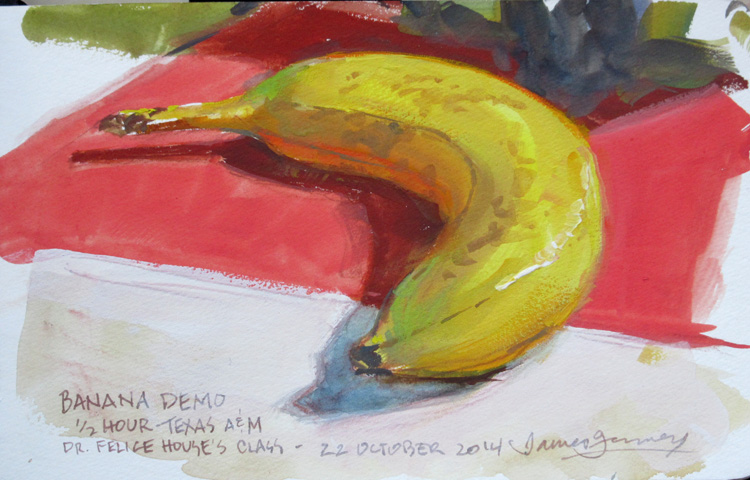
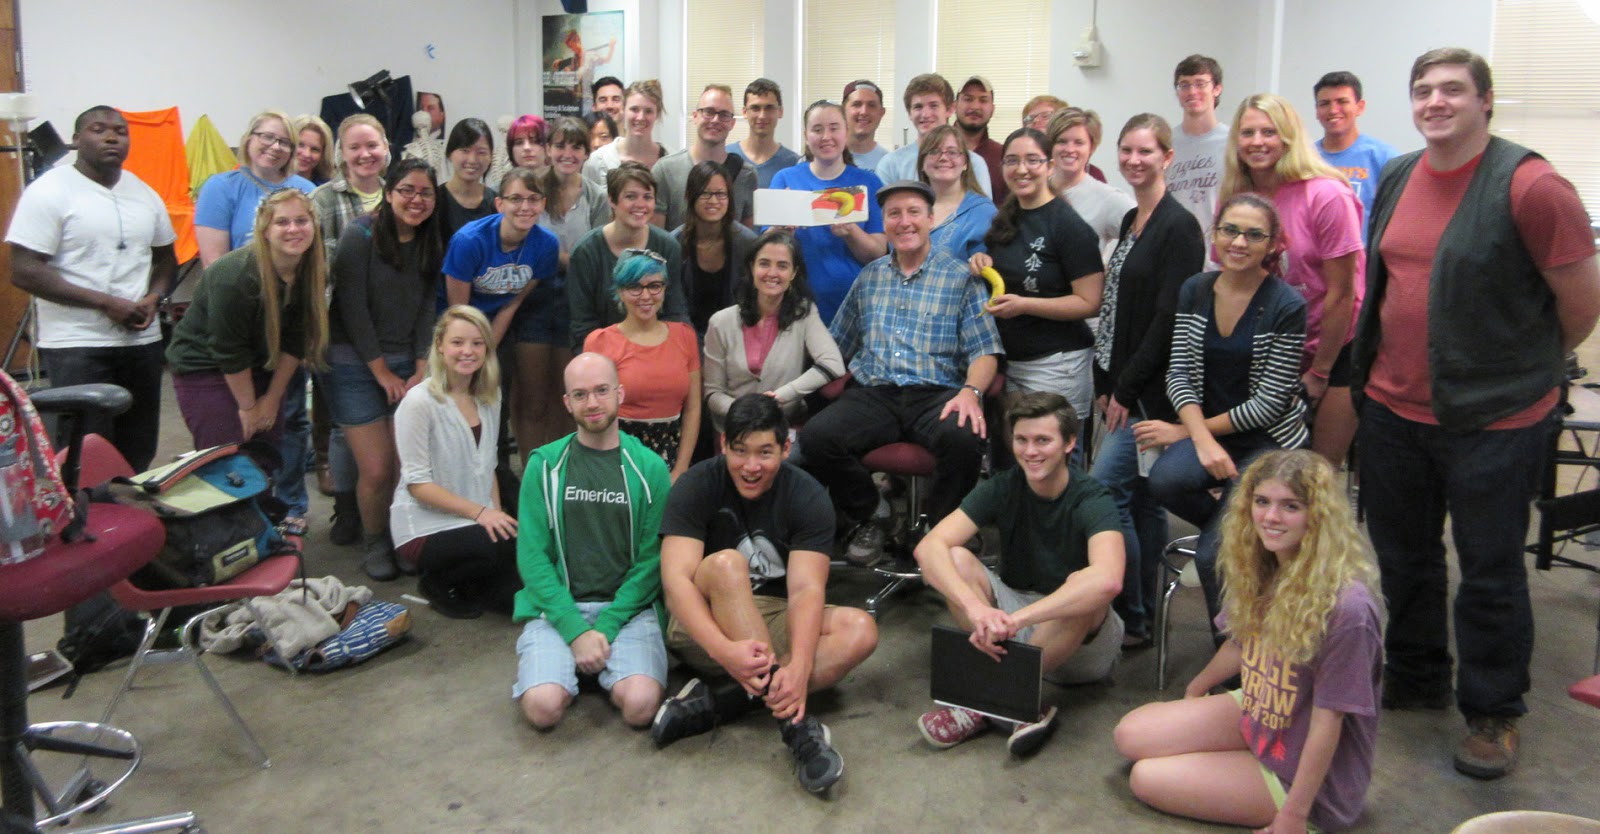
Yesterday I painted a half-hour still life demo in gouache for the Painting 1 class at Texas A and M, where I'm here this week as artist in residence.
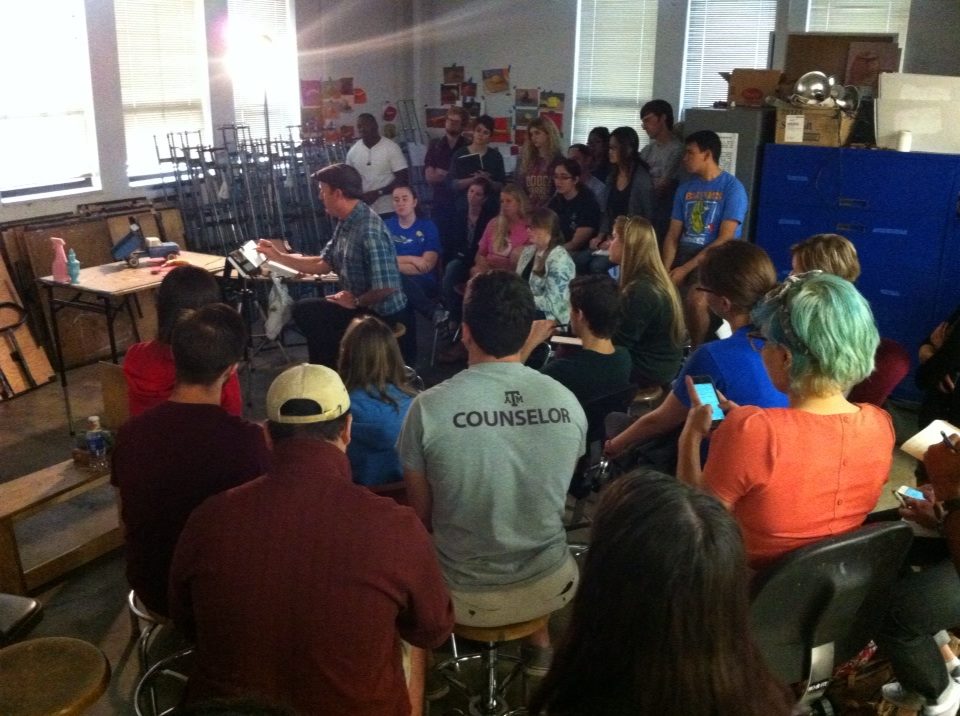 |
| James Gurney at Texas A&M, photo courtesy Felice House |
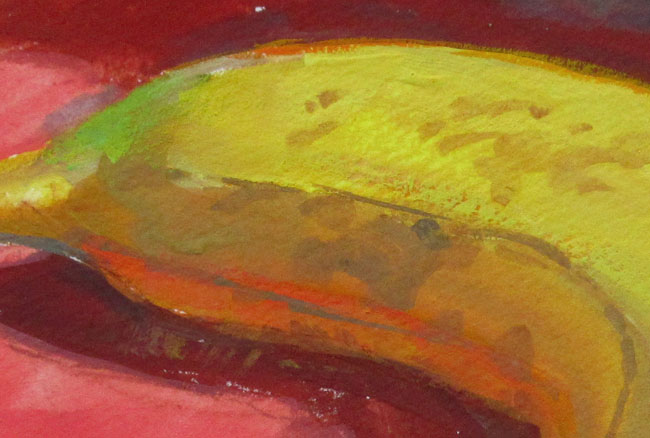
The subject is a banana sitting on a red piece of paper. Painting a high chroma object strongly lit against a high intensity background is the same assignment that the students have done earlier. So they get to see me wrestling with the same issues that they have faced.
Every color that we see is a combination of the color of the light and the actual color of the surface (or "local color"). In this case, the down-facing planes in shadow are receiving reflected light from the red paper, shifting those color planes toward orange.
As the top planes turn toward shadow near each end of the banana, they catch the blue window light, which mixes with yellow to make green.
I make an effort to vary the edges around the form from soft to hard to soft. Nearly the whole painting is done with 3/4 inch and 1/2 inch flat
brushes
. I turn the brushes edge-on for the thin lines, and use the corner of the brush for the dots.
 |
| Painting by James Gurney. Photo by Felice House |
Gouache colors include:
white
,
lemon yellow
,
cadmium yellow medium,
cadmium red
,
burnt sienna
,
ultramarine blue
, and
cobalt blue
.
These are the only colors I have on the trip. Traveling with carry-on luggage means cutting back the colors so that they fit in the 3-1-1 TSA bags.
The palette surface is a metal pencil box primed and then painted white with
enamel spray paint
. The palette is held to my
lightweight sketch easel with
Neodymium magnets
.
The students ask great questions throughout the session. Many of them are using what they're learning from these painting exercises to inform them in their 3D digital lighting projects.
Seated to my right is the professor of the class,
Felice House. She says that the assignment "The Banana on Red" is a teaching project that originated with her first painting teacher at the Nova Scotia College of Art and Design, named
Sheila Provazza.
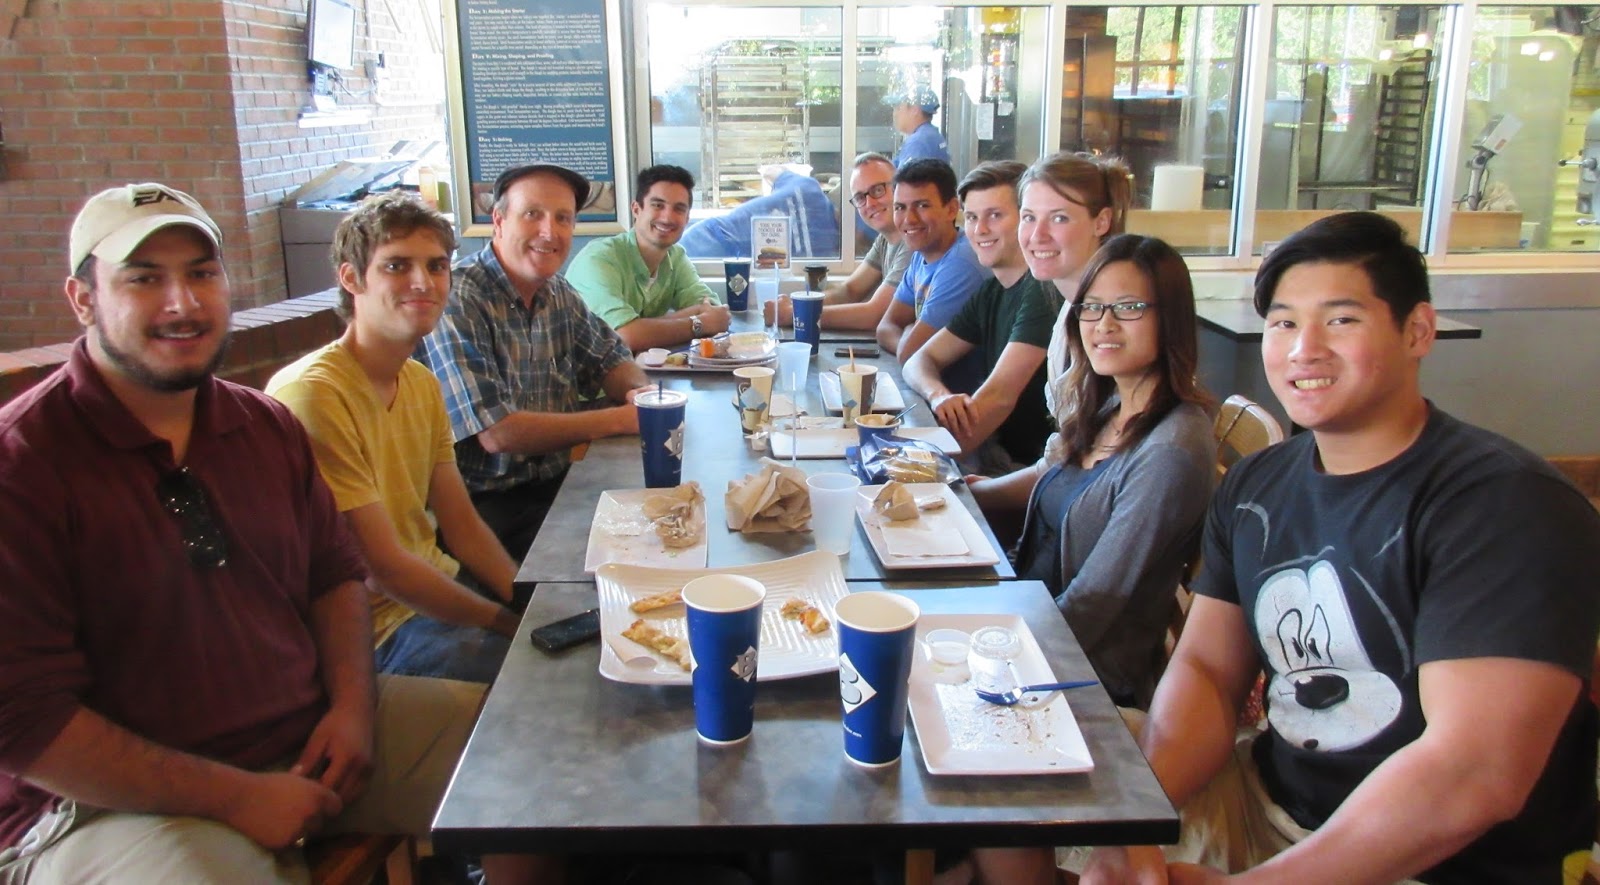
Whew! After that it's time for lunch and art talk with some of my student pals from the Department of Visualization. This week is going so fast for me and Jeanette and we're having a blast.
If you can, please come on by College Station tonight for my
Dinotopia lecture. I'll be glad to meet you or sign whatever books you bring afterward.

How do you convey the bustling motion of a city street in a painting?
Jules Bastien-Lepage attempted the effect in the background of "The London Bootblack" from 1882. Bastien carefully observed the action on the street and sketched his impression. He told the Irish painter John Lavery,
"Always carry a sketchbook. Select a person—watch him—then put down as much as you remember. Never look twice. At first you will remember very little, but continue and you will soon get complete action."
In his book "
The Realist Tradition," Gabriel Weisberg notes that:
"Bastien-Lepage seems to have been anxious in the bootblack picture to convey a sense of the movement and flashing color of the setting. Areas of white priming on the canvas were left exposed and others were scraped down 'according to a new method.'....'His idea was to lay on the colour rather more than an eight of an inch thick, and when it was quite dry he would shave off the surface, and thereby obtain beneath a delightful quality of surface."
For the figure, Bastien-Lepage found a suitable—but fidgety and reluctant—model on the streets of London, and prevailed on him to pose. He painted the figure with a
premier coup method that observers likened more to Whistler or Sargent:
"I was much surprised to see how very near Bastien-Lepage stood to his model, who was not even raised on a platform. The boy was only six feet from the canvas. Bastien-Lepage walked backwards and forwards a great deal, using very long brushes, which he held at the extreme end."
Another painter who tried to capture the impression of a busy street scene was Giovanni Boldini in his large painting "A Night on Montmartre." More about Boldini and this painting at my previous post "
Boldini at the Clark Institute."
-----
From the book:
The Realist Tradition: French Painting and Drawing 1830-1900
by Gabriel Weisberg
Book:
Jules Bastien-Lepage, 1848-1884

View Next 25 Posts


.jpg?picon=1009)