


 I started a quilt at the workroom a month ago by cutting out strips of blue patterned fabrics I had collected from my stash. I started cutting fabric before I'd decided exactly what to do, mainly because a quilt is such a big project I thought I should just start or I never would. I thought I might just do horizontal bars of the blue prints.
Since then I was re-reading Jane of Lantern Hill for the nth time and discovered something funny. When I was little and read the book she described her bed as a wooden "spool" bed and I imagined something shaped a bit like a wooden spool of thread, but shorter and wider in proportion. Reading it again now I realize that a spool bed is actually one with turned wooden posts, which is exactly what we have(this links to an old post that has lots of "before" pictures of our house too).
So when I came across her description of three quilts that her father gave her for their new house on the island I looked them up online. The one she put on her bed is an Irish Chain, and I decided that was exactly the pattern I would like to do for mine. It's fairly easy to make, and pretty and has that lattice look I like. Also I wanted lots of white in the background so all the prints wouldn't look too busy.
It's very simple. First I cut 6" squares, then divided each one into thirds, ie. 2" x 6" strips (below right). Then these are sewn together alternating the colours with plain white (below bottom left). You do colour-white-colour, then half as many that are white-colour-white. Each of these are then trimmed into thirds again (below top left). Then you piece together squares that look like a checker board. At this stage I trimmed each square again to make sure it was just the right size. These squares are then alternated with plain white squares. Once you put it all together, you don't see the checkerboard pattern, but a lattice, ie. diagonal lines of coloured squares. Especially if you kind of squint your eyes when looking at it.
I laid out all the squares onto a sheet so I could see how the quilt would look and Bradley helped arrange them so that there was a good balance of patterns. So far I've sewn together all the rows, and now I need to join the rows to each other to finish the quilt top. Which I'd like to do in time for the Workroom quilting Sunday and then I will work on basting the quilt top to the batting and backing.
 I say impatient because I've rushed through a lot of this and it's not as perfect as I'd like. Little mistakes tend to compound and the squares don't meet perfectly at the corners throughout as they should. I realized partway through that I should be using the hem guide that came with my sewing machine and it's made a huge difference. I've had to rework a few pieces to make them the right size, but it's going together fairly well now and will probably be nice once it's done. I hope!
Viewing: Blog Posts Tagged with: sew, Most Recent at Top [Help]
Results 1 - 4 of 4
 By: Claire Louise Milne,
on 2/21/2008
By: Claire Louise Milne,
on 2/21/2008
Blog: Needle Book (Login to Add to MyJacketFlap)
JacketFlap tags: sewing, crafts, blue, vintage, prints, quilt, sew, blue, vintage, prints, quilt, sew, Add a tag
By: Claire Louise Milne,
on 12/4/2007
Blog: Needle Book (Login to Add to MyJacketFlap)
JacketFlap tags: flowers, sewing, crafts, purse, bag, velvet, show, sew, floral, show, bag, purse, floral, sew, velvet, Add a tag
 I spied this fabric at the Designer Fabric Outlet store on Queen West (1360 Queen St. W, between Dufferin and Landsdowne) recently. This store is amazing, they have, if anything, too much choice. My favourite part is that all the fabric is in small swatches on hangers, organized by fiber, colour and pattern, and so it's very easy to browse through. My friend Sarah and I spent ages in there. Don't forget to go upstairs for extra fabric on bolts - and even more choices.
 As promised I'm showcasing some of the things I'm making for my table at the Artisan's Gift Fair this Sunday. I thought this fabric was really gorgeous and perfect for a evening bag. I love the colour scheme of tan, grey, white, black and red. Also the black parts of the flowers are velvet and very soft. Since I'm not home I don't have all my fabric with me, so it's lined with some of the linen I bought. Usually linen is a bit pricey for a lining but since I don't have anything else with me, this bag is just that much more special. There's a pocket inside, and I'll be adding a snap or button clasp when I get home.
I have a dressy black dress that needs something just like this to go with it! Just one question, should the closure be a snap or button? A snap is more practical and easier to open and close but a button could be prettier. What do you think?
By: Claire Louise Milne,
on 12/3/2007
Blog: Needle Book (Login to Add to MyJacketFlap)
JacketFlap tags: sewing, sketch, fabric, case, sew, sew, case, Add a tag
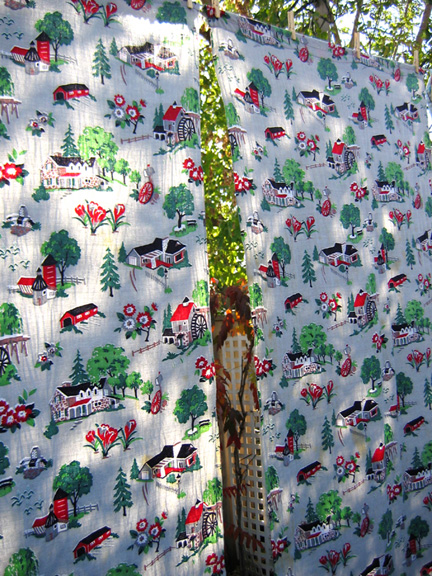 Just in case it's possible you're tired of seeing our cracked walls and subflooring...this is a crafts project I made earlier last month and didn't post yet. I bought these pretty barkcloth curtains on ebay and was looking for something to make with them. This is back when we could put our laundry out on the line! This post will also serve as a tutorial if you'd like to make this style of bag.
These are the fabrics I chose: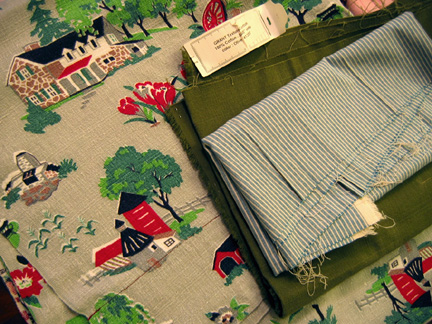 Here are the pieces cut out, two squares for the lining and two squares for the outside. Then two pieces to seam together for the flap:
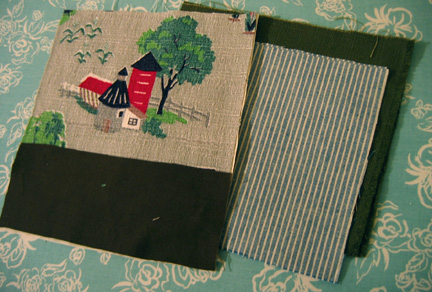 This is the flap seamed together then overstitched:
 The two squares are sewn together then box corners added to both the outside and lining:
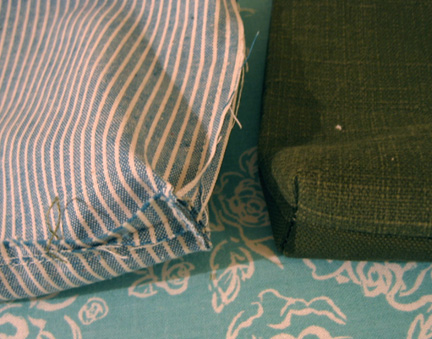 The flap is lined, turned right side out then pressed:
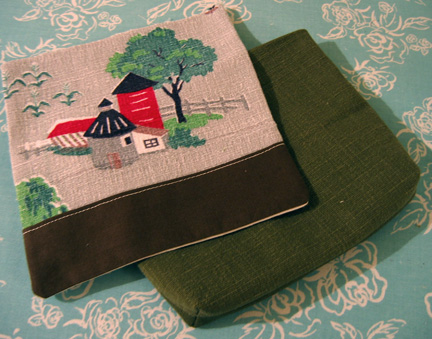 Tuck the flap and handles strap in between your outside and lining and pin in place. I added my label to the outside first:
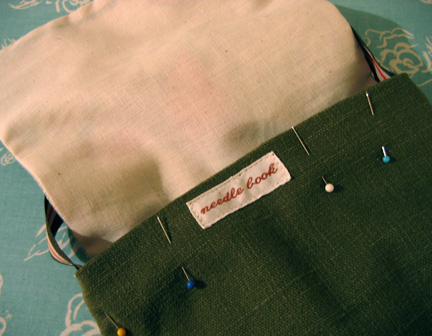 Voila! A cute case for a small sketchbook and pencil.
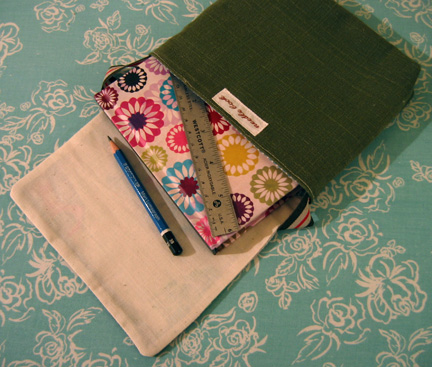 And here's the front of the finished case:
 I entered this in the sewbeit contest but didn't win... It sounds like the other entries were more creative. But I love the case anyway so it was good to have the contest to motivate me to sew it and take a break from other work. And there's lots more barkcloth so hopefully I'll make some other things with it for the sale.
.jpg?picon=160) By: Matthew Cheney,
on 6/1/2007
By: Matthew Cheney,
on 6/1/2007
Blog: The Mumpsimus (Login to Add to MyJacketFlap)
JacketFlap tags: science fiction, academia, panel reports, race, Add a tag
I have never gone to WisCon, and so I am always grateful afterwards for the many detailed reports on discussions from the convention, and the extensions of those discussions. The one I've been enjoying (and sometimes cringing) reading recently grows out of last year's panel and follow-up discussions of cultural appropriation. There are already a bunch of blog posts involved, but here are the paths in that I've been following:
- Transcription of this year's panel
- Oyceter's description and discussion of the panel and the following discussion session
- K. Tempest Bradford's discussion
That's so beautiful! I am still deciding what design I want for my next quilt of blues!
I love this style quilt and yours is looking very nice.
I've been dreaming of finishing my quilt and starting another but, I think it may have to wait as I have a new baby and will be moving very soon.
Also, I nominated you for a You make my Day award on my blog.
It's looks lovely! Don't worry about your corners. Once it's quilted you won't even notice.
I love it. I love white and open space on a quilt. I'm in a blue phase myself. I'm making a blue and white quilt presently. I love irish chain. Your's is turning out so sweet. Love love love it.
how lovely! i am an impatient viewer... hurry & finish, so we can see!
Very nice. Love the fabrics.
ITs LOVELY!
Looks great - reminds me I have to stop reading blogs all day and get back to my sewing :)
I really love what you did with those wonderful blue prints - Beautiful!!
I love blue and white together. You have such pretty fabrics to work with, too. I'm not a quilter (not enough patience & skill) and so I really admire others' quilts. By the way, I printed out your lattice scarf pattern for my mom who knits. She's 80 & knits or crochets almost every evening and was looking for something different to do. She really liked it. Thanks for posting the pattern.
Wow, you've been busy! I can't believe how much you've done.
It's very beautiful! The blue fabric selection is lovely and I bet the finished quilt will be amazing!
Love the colors. I like the use of white with them. This is quite an undertaking. Looks wonderful.