 I was so happy with how painting the cabinets has transformed our kitchen I'm going to show some "before" and "after"s, but there are still more changes to come. For those of you with something similar going on in your kitchen, I can tell you that this was our most affordable makeover yet at under $150. We had some leftover 1-2-3 primer, the cabinet paint (Debbie Travis, "cloudy white", semi-gloss latex) was around $40, new white hinges were around $40, new brushed nickel knobs and handles were around $60. Stores often sell these items in packs of ten as well, so you can really save there.
Here's the left side "before", I took this picture in the middle of unpacking. The old knobs were in the middle of the doors. And as I mentioned before the cupboards were made of fake wood laminate. Yuck!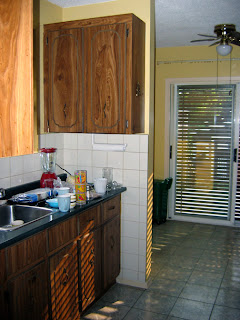 Here's the "after" of the left side. I don't even mind the green countertop so much anymore:
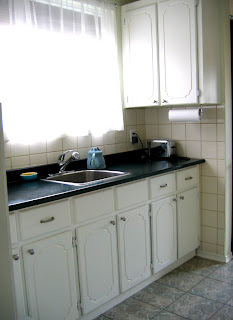 Here's the "before" of the right side. Somehow it was even worse - the whole kitchen felt gloomy:
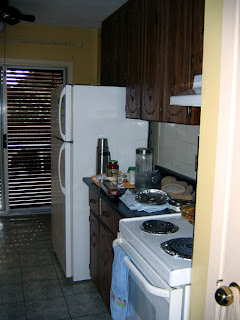 Here's the "after" of the right side. It's so much more cheerful now:
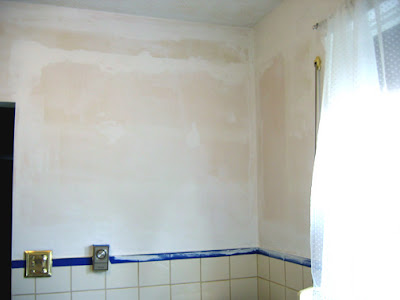
 And this third view is from the eat-in area of the kitchen (not renovated yet) looking back into the galley kitchen area. This shows the wall where we took down a cabinet. Unfortunately the thermostat and an outlet were wedged underneath and cut into the tiling. But later on we plan to redo the tiles in any case. Once you change one thing you realize you need to change other things too. My friend Jaimie inspired me talking about apple green tiles, and Katie Muth's tiles are so pretty.
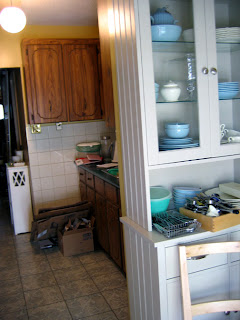 Here's the "after", the pale green wall paint (Debbie Travis, "chiffon", eggshell latex) needs a second coat but you can't really tell that from the photo!
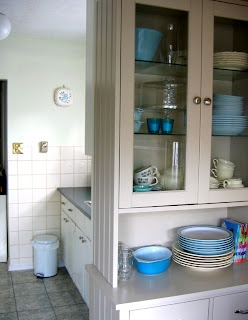 We've ordered a new faucet online, the current one is leaky and specializes in going from cold to burning hot and rather than getting it fixed we're going to just replace it with something nicer. And someday we may replace those vinyl floor tiles. It's a constant dilemma deciding how much to spend on the house. I used to think that it was so small we'd definitely need to move soon and shouldn't put too much work into it, but that tiny house in my last post really inspired me. I mean, ours is more than twice as big! I thought we had the smallest house in Toronto but now I see I was quite wrong.
Living in a small space is a fun challenge, making things work on a small scale can be very satisfying. I really believe it's a good thing, you know, environmentally and all that. Too many possessions can weigh you down, I'm always trying to pare down but it's hard because I can be a bit sentimental about things. I'm working on it though.
Viewing: Blog Posts Tagged with: Adobe Illustrator, Most Recent at Top [Help]
Results 26 - 32 of 32
Blog: Needle Book (Login to Add to MyJacketFlap)
JacketFlap tags: home, painting, house, home decorating, decorating, decor, reveal, small, kitchen, hutch, Add a tag
Blog: Needle Book (Login to Add to MyJacketFlap)
JacketFlap tags: flowers, house, home decorating, decor, otters holding hands, Add a tag
 Today is our wedding anniversary, I can't believe it, the year has flown by! These flowers just arrived from my parents and they were so gorgeous I just had to show them off. They smell wonderful too, mainly of tiger lilies which we had on the tables at our wedding. Mmmmmm.
 I even cleared off the big piles of fabric that were all over our dining table and gave it a polish in their honour.
We're going to meet up for dinner tonight after a very busy weekend working on the house. Bradley (my hero) was in the crawlspace clearing out a huge pile of lumber, a giant old water tank that would have made a great tin man, an old trunk that resembled some kind of mangy old pirate treasure chest and other miscellaneous junk. Everything went out to the front of our house along with shelves and other junk we've been clearing out of the house for the past few weeks.
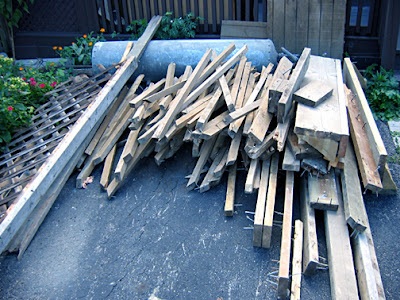 Yesterday we listed the lumber for free on craigslist and someone came to pick up a bunch of it this morning. We also left out some odds and ends at the curb which got scooped up. I'm always thrilled when people can use something we're getting rid of and it doesn't go to waste. Then this morning we finally had some junk haulers come and clear everything else away. (They told me the lumber gets recycled so that was good to know.) Finally that giant chore is done. Phew!
At the same time that Bradley was in the crawlspace I was painting a 2nd coat in the living room and then starting on priming the new bifold doors we got for the hallway. It took forever, I managed to watch The Princess Bride, Ella Enchanted and Mean Girls while priming the four doors. I used a regular paint brush for most of them, then a small artist brush to fill in the awkward corners at the end of each slat. I'm still not done priming all the corners, but it already looks better than the bare wood and it will be worth it in the end.
And finally, to end on a romantic note, I give you "Otters holding hands".
Blog: Needle Book (Login to Add to MyJacketFlap)
JacketFlap tags: home, house, home decorating, decor, ikea, living room, Add a tag
 Thank you for the nice comments about the house posts, I've hardly had time to do crafts but I did make a little bird bag I will show soon. I'm glad people are also interested in our renovations and decorating because it's definitely what I'm thinking about these days!
I have been swamped recently, though, with a big illustration contract so I've had less time to do things. But working at home means I'm looking around at everything that needs to be done and it can be very distracting. So I take little breaks in the day to do house things, and then work late into the evening on my sketches. Luckily this is one of the benefits of freelancing, you can pick your own hours as long as you meet the deadlines.
One of the things I couldn't wait to do was replace our bookshelves. In our old place we had a long row of short billy's on one wall and it gave us enough book storage and I think it looked nice. But we don't have a wall like that here, and we really needed something else. As you may have noticed I've become all about finding vintage furniture on craigslist, all "good old-fashioned workmanship - no more crummy flatpack!" recently. But I just could not find the perfect bookcases.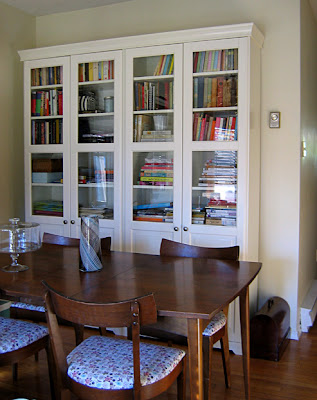 So finally I gave IKEA another chance and was smitten by the Liatorp bookcases. They seemed perfect for our space, two fit the wall I was planning to use perfectly, with lots of height, they have seven shelves (so more than two short billy's), and hidden storage at the bottom. You can join them together to give the feel of custom bookcases, and I like the details, moulding at the top, supports under the shelves (not just those metal pegs) and the edges of the shelves has a nice row of grooves. And you know how I feel about glass doors. Now that they're assembled I absolutely love them, and I really think they're the bookcases I've always wanted.
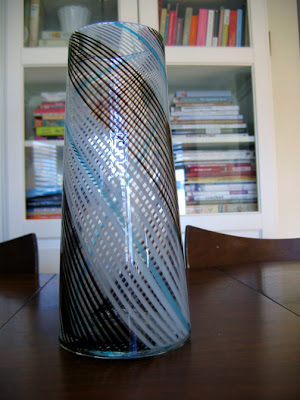 Incidentally, here's a detail of the vase which I found at Pier 1 (thanks to my friend Sandra who gave us the gift certificate!) I'm planning to use the vase colours throughout the room, pale blue, white and dark brown with cream - so it was the perfect addition.
 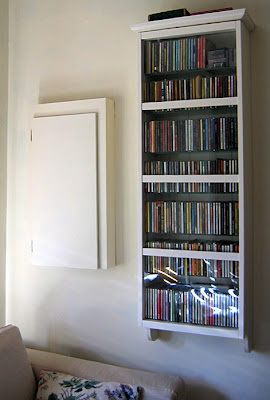 I also found a cd wall cabinet in the same style. This item is new, and I think I was the first person at the store to buy it as I called in the morning and it was out of stock, but when I got there I double checked and they said it had just arrived. It's perfect because it fits all of our cds exactly and now they're no longer awkwardly crammed into a small bookshelf taking up floor space. Plus we're doing matching which seems very grown up.
Here are my assembly tips (for all IKEA flatpack furnishings):
1. pretend you are a surgeon and lay out all the screws and pegs and tools and things on a tray so you are organized
2. use a tea towel under all those things so they don't roll around and drive you crazy
3. don't knock over the tray because you will have to crawl around looking under your furniture for all the little bits and it is VERY VEXING.
4. actually count them so you don't wonder later if something is missing or if you used the wrong thing
5. experienced assemblers will already know this, but each screw has a little number beside it at the beginning of the manual and next to the step where you use it so you can double check it's the right one
6. use the box your furniture came in as a mat to protect the pieces while assembling
7. when the instructions have a little "!" pay attention, or you will regret it
8. don't start assembling at 11pm at night if you are already tired and cranky
9. keep any extra bits for later - and the instructions!
Blog: Needle Book (Login to Add to MyJacketFlap)
JacketFlap tags: home, home decorating, liberty, decor, blueprint, bathroom, jansdotter, lotta, Add a tag
First of all Bradley's reaction to my living room "reveal" was very good, I think he said "holy smokes!" and loved it. The place is feeling much homier these days with just a bit of sorting, cleaning and lots and lots of painting.
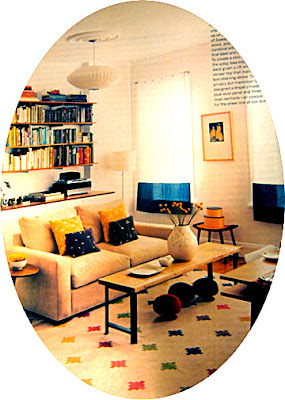 Lotta's living room featured in Blueprint
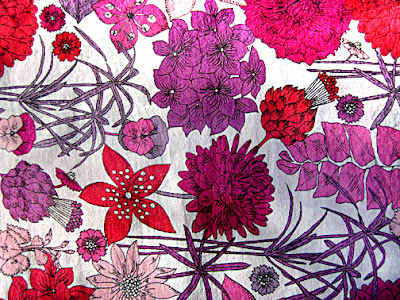 Thirdly, I was surprised yesterday to find some clothes at Gap Body made with Liberty fabric! They also had some headbands and hair elastics with flowers also from Liberty fabric. I bought a nightie made with the gorgeous (poorly photographed) pattern above.
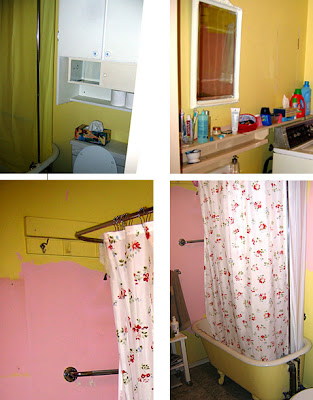
And finally our bathroom is not ready for a "reveal" but is dramatically improved so I'll give you some glimpses. First of all, here are some snaps of the "before". There was a bulky melamine cabinet over the toilet, bright yellow walls and matching shower curtain, with peeling paint revealing a Pepto-Bismol pink layer of paint underneath. There was a caramel colour shelf along one wall, and we put up a plain mirror temporarily. There is also an old washing machine and very old clawfoot tub. I love the clawfoot tub but it will need a bit of work - more on that in a later post.
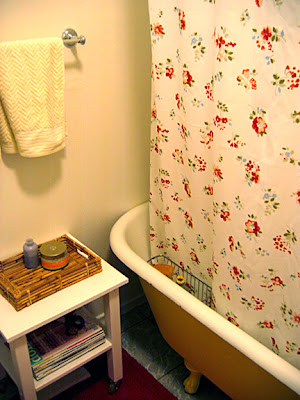
 First of all we replace the box flourescent fixture with a simple round flushmount. Then we painted the walls cil's "wedding white" which I think is the perfect white, not too creamy/yellow and not too cool/stark. Very similar (I can't tell the difference from the chip) to Benjamin Moore's "swiss coffee". We removed the extra shelving on the walls throughout and lots of odd hooks that were stuck on the walls to hold clothes drying lines, etc. The shower curtain and red rug are from IKEA. We also installed a nice new chrome towel bar and toilet roll holder.
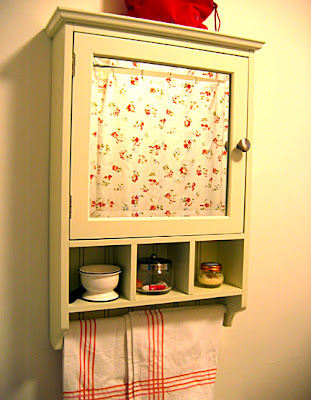
 After a surprising amount of effort we finally found a medicine cabinet we liked, this one is from Home Sense. I'd like to add a glass handle to it later, but it has a nickle one now that is perfectly fine.
  And finally, the nice plain wall over the toilet (that's right I'm showing you a picture of our toilet). We may add artwork here later but for now it's nice to have an uncluttered wall. The cabinet that was there seemed to kind of be looming if you know what I mean. For storage there's a linen closet in the hallway - a new luxury for us! So I can pretend I'm a minimalist...
 Still to do: window curtains, new plumbing for the tub (it leaks and has old wonky brass piping), including a new tub faucet (the old one is chrome laminate and a bit peely) a new showerhead, and a new pedestal sink/faucet to replace a melamine vanity. Also we'd like to do new flooring and install a new washer/dryer (there isn't really another place in the house to put them.) Finally if possible I love the look of beadboard wainscotting and light sconces - but we'll have to see how we do with the budget!
Blog: Needle Book (Login to Add to MyJacketFlap)
JacketFlap tags: decor, design, home, house, home decorating, Add a tag
 Bradley went camping this weekend, so I decided to surprise him with a mini "Changing Rooms" in our front room. The bathroom needs the most work, but I can't do a lot of the work myself, so that will have to wait. Aside from the bathroom, the front room was the least appealing.
First of all the walls were covered with the drab caramel colour and I think it made the room look darker and smaller than it needed to be. As you will see we had a lot to ask from our front room since the house is a little bungalow with only 1 bedroom and the front room is the largest room in the house. Please also note the eyesore of a box on the wall which covers the electrical panel and is made from fake wood laminate. Ick! Here's a before picture: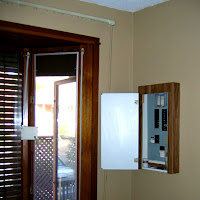 We'd unpacked most of our things so that we wouldn't have stacks of boxes everywhere, so at the start of the weekend this is what the room looked like:
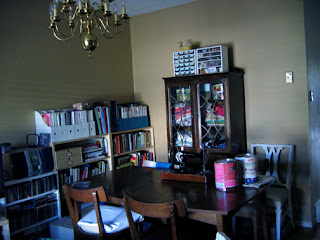 The first thing I did was paint the walls in the same creamy colour as the hallway. It was an instant transformation! I still have another coat to do, but it's good enough for the "reveal". The bookcases will have to be sorted and possibly rearranged or replaced with taller ones, but for now, here's the "later" of the dining area:
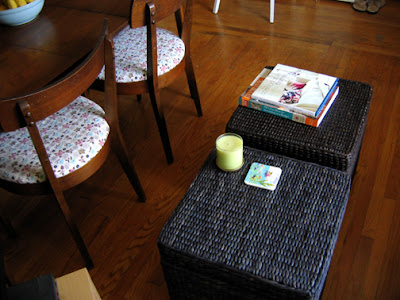
 I also re-covered the chairs with a 1950s vintage barkcloth fabric. It's a little whimsical but I think it works with the style of the furniture (the table also has a removable leaf not shown). The dining set was a craigslist find for $100 - the original chair covers were bright orange, then recovered (not very well) with four different colours and the fabric was dirty. So that was a big improvement. Here's a detail of the chairs, and the wicker ottomen/boxes that we're using as a coffee table, they also hold all our dvds.
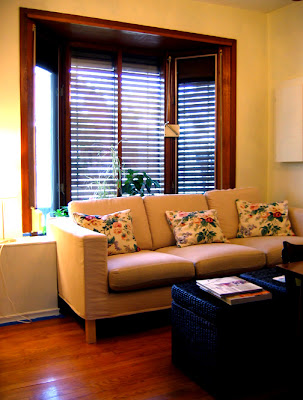
 This front room is also the living room, so here's a view of the living room area with our couch. As you can see the electrical box is now painted out to match the walls and it's much less noticeable. There's still some blue painter's tape showing because the trim isn't painted yet. Hey it was only one weekend! I wish I'd had Linda Barker or Anna Ryder Richardson helping me out. And ideally Laurence Llewelyn Bowen would be the host as he was in the later episodes of Changing Rooms, he is so funny and witty.
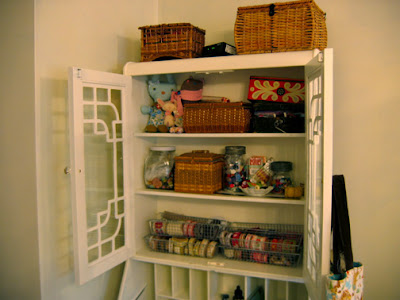
 And last but not least, this overworked room is also my studio. Of course I work on the dining room table as well. Another craigslist find was an art deco style secretary desk in a similar style to the one I already had. They only wanted $50 for it (which as you can imagine had me in a tizzy begging Bradley to rent a van and help me go get it immediately before they changed their minds). The desk was originally in a sorry state though. It was painted orange (in a very patchy way) and the lattice mullions were on the outside of the doors and warped and broken. Also the veneer was peeled away from one of the drawers (also in a very patchy way) and so there was a lot of work to do. But now the two desks look pretty similar. My old one still holds all my art supplies, and the new one has sewing and crafts things.
 So that's the big reveal - you're getting a sneak peek because even Bradley hasn't seen it yet. He's getting home in around three hours so I can't wait to show him! I hinted that I had done some work in the house but wasn't specific. Ideally he will cover his mouth and get teary, then say "oh my god" several times. Then he'll start pointing out all the great new features and make comments such as: "is this really our house??" and "I can't believe it, it looks so different!" and "look at our new chair covers!" etc. Well we'll see.
Blog: Needle Book (Login to Add to MyJacketFlap)
JacketFlap tags: home, house, home decorating, renovation, Add a tag
 Things are going well so far, we love our new house (especially our lovely deck and garden - we have a rose-of-sharon tree which is flowering now and a forsythia that has bright yellow flowers in the spring) but we've been swamped with things we want to fix up.
First of all I could. not. live with the flourescent light fixtures, so those are all gone now. I think they had some extra cold "let's do surgery!" style tubes in them, and it was really depressing. We've also been doing unpacking, painting, cleaning, clearing out some things that were left behind and even a little bit of demolition. There's still so much to do but I thought I'd share some of what we're doing with "before" and "later" pictures, although there aren't quite any "after"s yet!
The first wall to get painted was in the bedroom. Here's the before: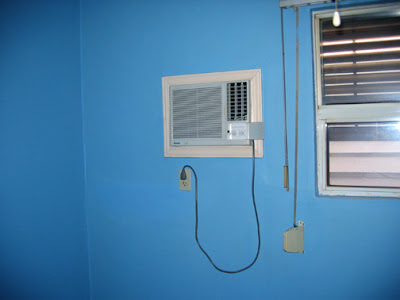 It's a tiny room, just big enough for our bed, side table, pax and bureau, and the dark blue was definitely not the right colour to make it look spacious. I love our little wooden bed, and even though we've just primed the walls it already looks lots better. Here's the "later" picture:
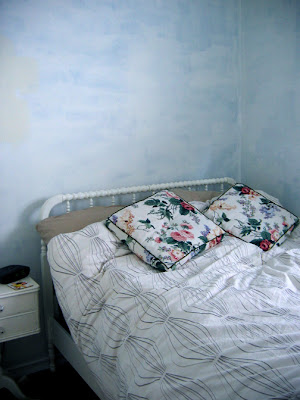 The hallway and front living/dining room were both a caramel colour that was also too dark. It wasn't doing much for our long hallway. The hall closet doors were pretty terrible, one of them was only half height, with a bit of curtain tacked on the bottom. Both of them were thick and awkwardly attached so that they swayed in and out of the alcove. Here's the "before" picture.
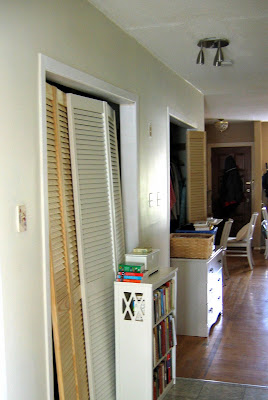
 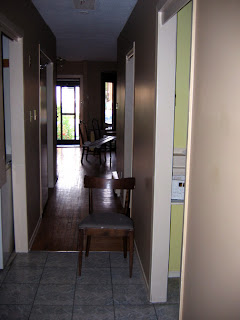 I painted the hallway a nice creamy white colour (cil "chalk"), and already it's looking much sunnier. We also added a new light fixture to replace the flourescent light, and that made a huge difference. Once the right sized bifold doors arrive, they'll all get painted white to match the trim and will fit neatly into the alcoves. The bureau will also tuck inside the cupboards once we remove the old chest freezer that was left behind. This is the "later" picture:
 The kitchen cupboards are icky fake wood laminate and the cabinet by the doorway seemed to jut out and we'd both hit our heads on it. We thought it made the kitchen have a bit of a crowded feeling and we actually have tons of cabinets - much more storage than we had before. The "before" picture:
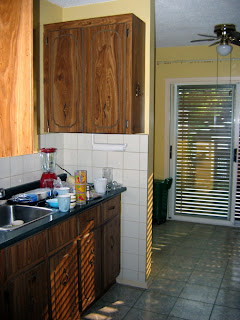 So we took out the cupboards by the doorway entirely - ahh! space! I read in a magazine that every kitchen should have one bare wall and it really does make a difference. It feels more like a room and less like a tunnel of cabinets.
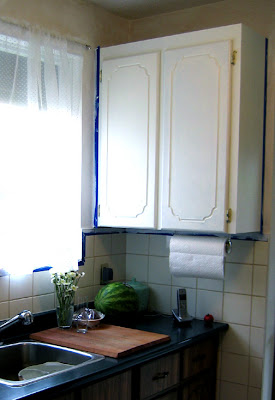
 And I primed and painted two of the cupboards. I like the way it looks - so I'll be doing all of them. They're odd custom sizes so we'd have to replace them entirely otherwise and that's not at the top of our wish list. I also made some swiss dot type sheer curtains. Here's a "later" picture:
 So that's all I'm going to show you for now. The craft/art studio is in the front room so I'll be sharing that too when it's in better shape!
Blog: Needle Book (Login to Add to MyJacketFlap)
JacketFlap tags: inspiration, magazines, sewing, crafts, fabric, home decorating, blue, storage, Add a tag
 from home & country June 2006 - I love everything about this page, the blue, the ceramics, the antique sewing machine and of course the whole nook aspect of it.
I feel bad I haven't posted in a long time. I'm not sure why, I'm still doing lots of sewing and knitting, and I've been sneaking lots of new things into my etsy shop. But I was thinking it might be because lately I've been obsessed with fixing up our home. You know when you reach the point where you have to apologize a little bit? You say things like: "Is it ok if I just tell you my idea for those chairs? Just quickly..."
 from Country Living March 2007 - I had to get this great issue which has interviews with several women entrepreneurs that are so inspiring, including a peak into Amy Butler's studio! (this isn't it). I love this craft's room - so airy but still full of goodies (you can click on the picture to see it larger)
I've painted more things than I care to list, including shelves, doors, walls and boxes. Incidentally I discovered the secret to painting slatted bifold doors. This is it: a small brush. I mean really small, like an artist's brush, and you just take your time (preferably with a movie on in the background) and paint. The big brush may seem faster, but trying to get into all those corners by waggling the brush (and pretty much ruining it) isn't worth it. I've tried both methods and the little brush was downright relaxing. It took around an hour per coat but it didn't stress me out and there aren't any drip marks either. Then I added a pretty glass doorknob.
 from Blueprint March/April 2007 - An incredible small space makeover - that's why I had to get this issue, the apartment is even smaller than my place at 307 square feet! This is where I got the idea for the shelving I'll be doing.
So what's next? Well I wanted another secretary desk but this one would be for my crafts things. But that seemed greedy. And as my always patient friend Jaimie (who luckily is also obsessed with home-making at the moment) mentioned might draw the limelight away from the one I just bought. So using a plain desk I already have I'm planning to create another miniature studio - but this time for crafts. And the pictures in this post are all my inspirations derived from my magazine addiction (but that's another story).
Of course I'll be showing the reveal in my next post!


What an inspiring reveal! Such a difference. It looks amazing! I love seeing the before and after shots too.
Thanks Quinn!
wow! what a transformation! you did an amazing job. i'm really enjoying your house posts this month as i have dedicated october to redecorating my very small house too! i also want to thank you for reminding me about craigs list for furniture. i've picked up some great pieces lately, thanks to your tip!
Thanks Megan, glad to be helpful. :-)
Wow! Well done. :0) I have a small 3/1. That's exactly the sort of redo I need to do for resale.
what an improvement. i love white cabinetry with green walls. i just saw an house with this combination. we almost got it as ours was the best bid but unfortunately, since our condo doesn't have a contract on it yet they went with someone else. it's so nice to have a clean slate and a new home is the perfect opportunity. congrats on a lovely job on all you have done thus far.
Beautiful updates - what a difference - Nice work!
Your kitchen looks so lovely now! Very inspiring. I particularly like the pale green paint; it looks like it tie the green counter-top and white cupboards together beautifully. Thank you for showing us all your house pictures!
wow...your kitchen looks like its all brand new.
paint is amazing.
each night now I sit at my big living room window and look out at my freshly painted white picket fence and it makes me feel so happy. my kids laugh at me.
i should do a before and after of my fence on my blog....soon, very soon.
Lori
Your kitchen looks fab, it looks like a completely different room. I love the colour combinations, very fresh and crisp :)
Wow, your transformations are really inspiring. You have a great eye. I love the accent of soft aqua blue - it's so fresh with the white.
I love before and afters! Looking good......
Very inspiring! What a difference some paint can do!
hey claire - the kitchen is looking really great!
Counters are very inexpensive, you should really consider getting a new one since you're going to be changing the faucet. It's just so nice to have a brand new CLEAN counter. But it gets addictive, you change one thing, you want to change everything right down to the drywall...
Also, consider cork for your kitchen floor -- now days it's water-resistant and comes in funky colours. It's also environmentally friendly and nice and warm for the feet...