
The blurb:
A chance encounter with a stranger in an airplane sends Elyse Bearden into an emotional tailspin. Suddenly, Elyse is willing to risk everything: her safe but stale marriage, her seemingly perfect life in an affluent Southern suburb, and her position in the church. As Elyse embarks on a risky affair, her longtime friend Kelly and the other women in their book club begin to question their own decisions about love, sex, marriage, and freedom. In the end it will take an extraordinary leap of faith for Elyse to find -- and follow -- her own path to happiness.
Review:
I enjoyed Love In Mid Air. Elyse is the lead character and although her failing marriage to Phil and her love affair with Gerry are critical and these relationships move the action forward, Elyse's friendship with Kelly is just as significant to the novel. It's the camaraderie and friendship of the different women in the book club, despite their small differences and occasional rivalries that made the characters come alive for me.
It's the dialogue that sets Love In Mid Air apart. Elyse's internal dialogues are a delight - the biting wit had me shaking my head and smiling at the same time. The book deals with infidelity, love, happiness, and the sacrifices we each make in our journeys towards self fulfillment.
ISBN-10: 0446540447 - Hardcover
Publisher: Grand Central Publishing (March 29, 2010), 320 pages.
Review copy provided by the publisher.
About the Author, courtesy of the publisher:
Kim Wright has been writing about travel, food, and wine for more than 25 years and is a two-time recipient of the Lowell Thomas Award for Travel Writing. Learn more on Kim Wright's site at http://loveinmidair.com/home/
Thank you so much to Miriam and Hatchette Book Group for this review opportunity!
Viewing: Blog Posts Tagged with: decor, Most Recent at Top [Help]
Results 1 - 11 of 11
Blog: Starting Fresh (Login to Add to MyJacketFlap)
JacketFlap tags: literary fiction, women's lit, Hatchette Book Group, Kim Wright's Love In Mid Air, Add a tag
Blog: Needle Book (Login to Add to MyJacketFlap)
JacketFlap tags: renovation, decor, ikea, kitchen, kitchen, renovation, decor, ikea, Add a tag
This is yet another one of those rambling posts about our kitchen chaos. I was thinking about it and if this was a magazine the story wouldn't be ready until I had a perfect final kitchen with beautifully styled pictures. But that's why blogs have something to offer that glossy magazines don't. When we were wondering if we could actually assemble our IKEA kitchen cabinets ourselves I was looking all over the internet for other people's work-in-progress pictures and suggestions.
So that's what this post is about because we've learned things along the way. But first of all I should mention that we had a very simple situation, relatively, because our kitchen layout was already working well, the appliances, plumbing and electrical are all in the same positions. Also, we have a galley kitchen with no corners, islands or oddly shaped walls (aside from the fact that they're not straight in some places but I'll get to that). So I can only say that if you are in a similar situation you can certainly do it yourself, but it's not easy. Unless you're really skilled with renovation-type work of course. I'd say we're handy, but not particularly skilled.
And after a few weeks of this we are tired out, with sore hands and muscles. I woke up this morning with a weird pain in the middle of my back and I had trouble getting up out of bed. I couldn't even turn over! I've been walking around today saying "ouch, ouch, ouch!" and trying to figure out what I can and can't do just now. I can sit and walk, but oddly I can't really lie down. I've tried a few things and I think it was from lots of sawing. I tried imaginary sawing and that hurt the most. But enough about my back.
On Friday I assembled the upper cabinets. We decided there may be a good reason to put those up first so we should try to do it. Our current deadline is Wednesday because that's when someone is coming to measure for our countertop so everything needs to be in place by then.Assembling the cabinets is the easiest part. Especially if you've assembled lots of IKEA things in the past and you're careful about reading the instructions. I think I spend more time undoing things (which is difficult) because of putting things in on the wrong side or whatever. I was also frustrated to find that one of the back panels sustained a crack somewhere along the way, and I drove in a couple of nails askew which caused some small chips inside.
I recommend putting the door hardware on before you hang the cabinets. The screws are actually a bit tough and take some work to get in and it's easier if you can brace against the floor.
As mentioned last week, I had this last wall to repair and paint. IKEA recommends that you paint one coat, then put up the cabinets, then do the second coat. This saves a bit of paint, and I guess you can do touch-ups if you scratch the paint. One of my tricks was not doing too much work on smoothing out the walls because in most places the rough spots where the old cabinets used to be attached were covered by the new cabinets.At this point you need to put up a metal rail that the cabinets hang from (get a nice big level it will be very handy). The rail wasn't long enough, so it was a tricky matter of working out where the studs were, where the cabinets were and cutting two pieces of rail that would maximise the amount of support for each cabinet. I recommend marking your studs on the wall with a pencil and measuring everything carefully and marking it on the wall.
Our oven fan vent can't really be moved and was the biggest problem. It determined where the vent would go, which determined where the cabinet above it would be which determined where all the other cabinets would be. We discovered there wouldn't be enough space between the countertop and cabinets - even our kettle wouldn't fit.Our brilliant solution was that we would (later on) create a small box that could be used as a small shelf. This box would attach to the cabinet over the stove, and the fan would attach to it. This meant the cabinets could be placed higher up. The other tricky part at this stage is working out the position of the little panel strips that fill gaps. In this case a 2" strip goes beside the over-stove cabinet so that its door can open fully, and this allows for a 1" space on either side of our free-standing stove.
At this point we measured and cut the rails with a small hacksaw. The saw is only $4 and works well but it takes a while to cut through the rails. If you had a power saw that cuts metal it would be much easier. The picture below shows Bradley attaching the first rail. You need to buy your own screws for this, we got some really big ones because there's going to be a lot of weight on this rail. And of course the rail needs to be attached to a few studs. The hardest part for us is that the battery for our new drill isn't working properly and it had barely any power.Then finally we could put up all the cabinets. This part isn't too bad, the cabinets are heavy but they attach at two places with a simple bolt. Then they can be adjusted afterwards by sliding them along the rail so that they are all snug against each other. Also you can make sure at this point you have a 2" gap on the side for the filler panel.
Luckily the walls on this side of our kitchen are straight. We have a single cabinet for the other side of the kitchen and the wall it's next to is on an angle. If we added a filler panel there it would be really obvious so we're just going to leave a large gap. It's possible because it's a single cabinet, and we can centre it on the small patch of wall next to the window that it's going on, but if it wasn't we'd have had a problem. Or it just wouldn't look right which is frustrating after spending so much time and money.This is as far as we've gotten. Next, you drill holes and attach the cabinets to each other, then add shelves and doors. Finally you add the hardware for the doors.
The only other difficult thing so far is drilling holes for our plumbing that comes from a side wall instead of directly under the sink. We did three neat holes for the pipes on one side of the end cabinet. We did this with a little hole saw kit - you can get a basic one for under $20. The pieces attach to your regular drill.But the drill isn't working well now and we have six more holes to go! We're going to need to buy a new battery. If your plumbing comes in directly below the sink it's a lot easier because you're cutting through the thin back panel, not through the thick walls of your cabinets.
In short, you can do it yourself. But you may find yourself getting really annoyed at the IKEA DVD and posters (included with any kitchen purchase) that make it look really easy. I found watching the DVD quite soothing until I realized they were basically installing cabinets in what seemed like a completely perfect room, without any crooked walls, unevenly spaced studs, oven vents, or evidence of plumbing or electrical outlets to worry about.
My biggest tip is to make a list and make sure you do things in the right order. I hope we are, because we're not done yet!
Blog: Needle Book (Login to Add to MyJacketFlap)
JacketFlap tags: decorating, decor, bathroom, kitchen, renovating, kitchen, decor, decorating, bathroom, renovating, home, Add a tag
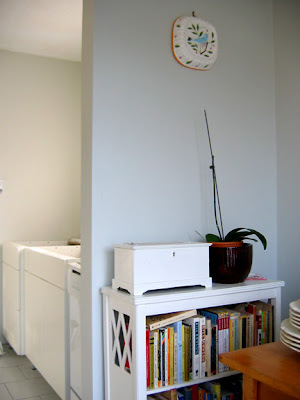 I can't believe what we got done this weekend. Friday I painted the eat-in area and moved in a small white shelf that fit perfectly in the spot the hutch used to have. Having books beside the kitchen table has made it feel so homey, it invites tea drinking and reading. It's so sunny in that spot, we just needed our small table back in place to make it a popular corner of the house again.
If you look just beyond that you can see that all the lower cabinets are now assembled, thanks to Bradley who has recovered from his cold and was behaving like a superhero all weekend. The cabinets even have their feet on now.
And he shortened the closet doors so they're now all back in place. Phew! We kept knocking them over while moving things around. I also finally added the second coat of paint in the hallway. The walls had been a bit scuffed up from the flooring work as well.
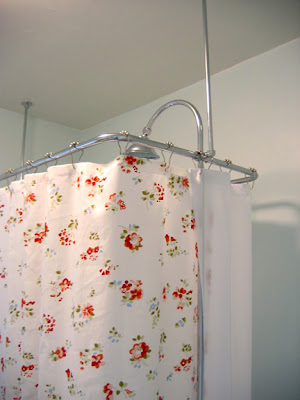
Friday I added curtains to cover the sliding doors. As much as I like to make my own, ready made curtains can be a real bargain considering how much fabric they have. I found these at Urban Outfitters, they're nice and sheer and soft. They came with an extra strip of fabric each, I sewed buttonholes and buttons on those to make ties. The rod is from the new Umbra store on John St.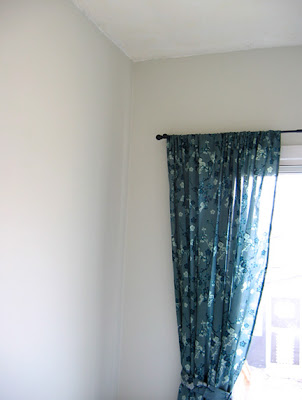 Although not kitchen related, I'd like to mention that we also finally assembled the shower for our clawfoot tub and I can't tell you how thrilled we were to be able to have a shower again.
 I also managed to get one of the shelves up. I'd like to get more of the white wicker baskets from IKEA to go on the shelves. As you can see I've painted the Ocean Air on the walls.
 Realizing it was time to order our countertop we went to Home Depot on Sunday. I had been hemming and hawing for ages about that choice. It was hard to decide what would work with our flooring, cabinets, sink and walls, and what we should spend and which material would be most practical. As I've mentioned before we hadn't planned on gutting the kitchen in the first place so we've been making decisions as we go along. I wouldn't recommend this method but so far we're very happy with the results. So anyway we ordered a countertop but I'll save which one for the reveal!
But before they can measure for the countertop we need to wrap things up, which means installing baseboards (while we can move the cabinets and get back there), setting up the wiring for the new dishwasher, having the plumber over to set up the plumbing and finally attaching the lower cabinets in place. Usually you're supposed to install the uppers first but this won't be the first time we've done something backwards. I guess the main reason was to try to keep the kitchen liveable as we did the work.
These are the old uppers: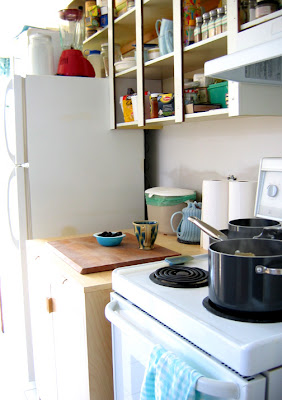 Until yesterday we were using these old upper cabinets for storage. But last night we finally emptied and took down the last of the old cabinets (well I moved some things but Bradley did the real work) and the wall now looks like this:
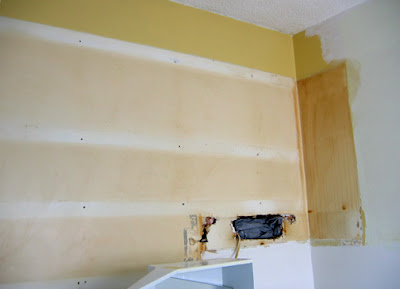 So cleaning, patching, sanding, priming and painting these last two walls is my job for today. Along with some illustration work in case you were wondering if I still have a job...
Read the rest of this post
Blog: Needle Book (Login to Add to MyJacketFlap)
JacketFlap tags: renovation, decorating, decor, kitchen, kitchen, renovation, decor, decorating, Add a tag
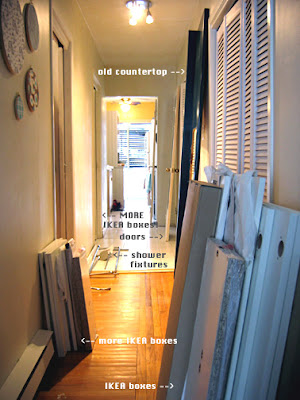 A few friends have asked us if our kitchen cabinets are installed and the short answer to that is "no!". I think we're a little tired out from all the renovating and we've definitely slowed down. So today I decided to post the state of things to answer that question, but I also thought that possibly the embarrassment of showing the sad state of our house will push me to get cracking.
The picture of our hallway really tells the whole story. Most of the IKEA cabinets are in boxes - and when I say most I mean all but the one that we've assembled so far. Just past that we have the shower fixture that we can finally install onto our clawfoot tub now that the plumbing has been fixed. The new flooring has raised the floor height of the entire area by around 1/2". So we had to wait a few weeks for new supply lines for the tub to arrive.
Across from that you can see our old countertop propped against the wall which we are getting rid of. Also the doors to various closets that are all around 1/2 an inch too tall now to fit back in place. Then on to the kitchen with more IKEA boxes.
It's partly that everything seems to take more time and trouble than expected. Just finding this wooden reducer to bridge the tile to the hardwood took weeks. But we were thrilled when we found one at Home Depot that was the right wood, the right stain, the right length, with a shallow overlapping bit for the tile side and a 3/4" step down to the hardwood floor side. Then it was just a small matter of borrowing a power saw to cut it, after cutting the adjacent new baseboards to make sure it would be the right length. Then finding the right glue to attach it and then going back for the caulking gun that was needed to apply the glue. Phew! So more trouble than we expected but it's finally done and it looks finished now. Now we just need to do the gap between the hall and bathroom...
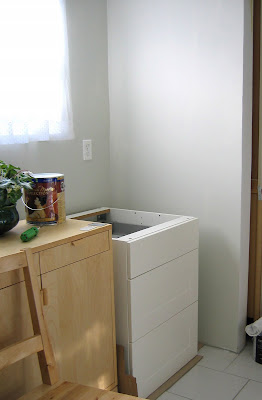 This is the one cabinet we've put together so far - now it just needs soft shutting mechanisms on the drawers, handles, legs and a countertop!
Which brings me to today's goal. I've painted the left side of the kitchen in the alcove area with our new colour. Choosing the perfect grey took a looong time but I'm happy with it now that it's on the walls. It's Benjamin Moore's Titanium, and it's a very soft pale grey that actually seems to look grey rather than a bit green, or blue, or beige as grey's often do. It also works nicely with the cabinets and the new floor which has tiny pale grey stripes in it.
But the walls on the other side still look like this:
And last but not least, the mechanized shutters that go over the back doors are broken and stuck halfway up. Or halfway down depending on how you want to look at it. So someone is supposed to be coming by today to repair those. So that's the state of things, now I'll surely be motivated to post some "after pictures" as soon as possible!
Blog: Needle Book (Login to Add to MyJacketFlap)
JacketFlap tags: design, sewing, crafts, studio, light, decorating, decor, dining, schoolhouse, living, home, fixture, Add a tag
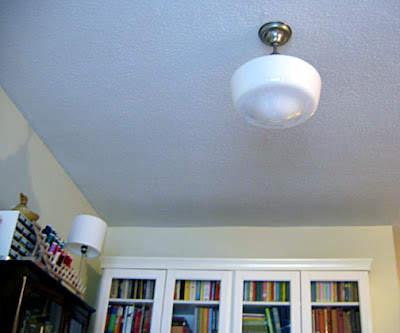 I mentioned to a couple of people that we got a new light for the front room and said it was a "schoolhouse" light and got blank looks. So I thought I'd show some pictures. This is a very traditional style of milk glass light fixture, in this case a semi-flushmount with a brushed nickel base. I thought everyone knew what a schoolhouse light was, but realize now that years of reading Canadian House & Home, Country Living, Domino, Canadian Home & Country, Elle Decor and Style at Home has possibly taught me things not everyone knows.
When did I become so home decor obsessed? I'm not sure. It had some practical applications when we were fixing up our condo in order to sell it, and of course we need to fix up our new home to make it comfortable, but I think you can tell it's gone beyond that. Luckily my girlfriends also seem to be a bit home decor obsessed themselves lately so I don't have to feel too sheepish for wanting to talk about tiles, paint colours and light fixtures all the time. (speaking of tiles we found some white 1" hexagonal floor tiles for our bathroom - I can't wait to install those!!)
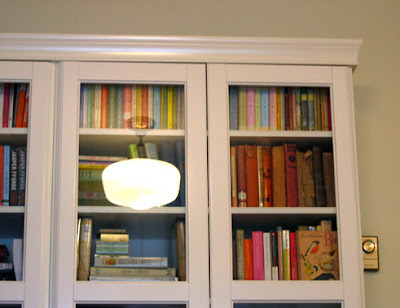 (That and my new vintage golden book Birds)
 Speaking of which, are you wondering why all the posts all of a sudden? Well it's an extra-posts-for-the-week-before-your-birthday treat for Bradley. And tomorrow is the big day! That's when I'll show you what I made for him.
p.s.
This is the old light fixture... just didn't really work with the decor and made the ceilings seem lower than they are, plus Bradley kept bumping his head. Plus environmentally speaking it was using a whopping 480 watts!
Blog: Needle Book (Login to Add to MyJacketFlap)
JacketFlap tags: home, painting, house, home decorating, decorating, decor, reveal, small, kitchen, hutch, Add a tag
 I was so happy with how painting the cabinets has transformed our kitchen I'm going to show some "before" and "after"s, but there are still more changes to come. For those of you with something similar going on in your kitchen, I can tell you that this was our most affordable makeover yet at under $150. We had some leftover 1-2-3 primer, the cabinet paint (Debbie Travis, "cloudy white", semi-gloss latex) was around $40, new white hinges were around $40, new brushed nickel knobs and handles were around $60. Stores often sell these items in packs of ten as well, so you can really save there.
Here's the left side "before", I took this picture in the middle of unpacking. The old knobs were in the middle of the doors. And as I mentioned before the cupboards were made of fake wood laminate. Yuck!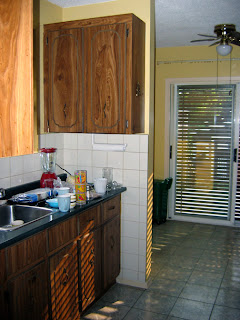 Here's the "after" of the left side. I don't even mind the green countertop so much anymore:
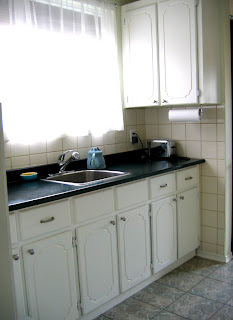 Here's the "before" of the right side. Somehow it was even worse - the whole kitchen felt gloomy:
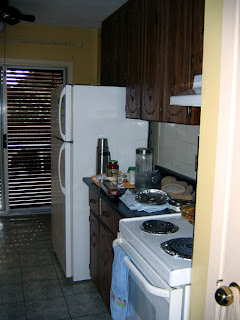 Here's the "after" of the right side. It's so much more cheerful now:
 And this third view is from the eat-in area of the kitchen (not renovated yet) looking back into the galley kitchen area. This shows the wall where we took down a cabinet. Unfortunately the thermostat and an outlet were wedged underneath and cut into the tiling. But later on we plan to redo the tiles in any case. Once you change one thing you realize you need to change other things too. My friend Jaimie inspired me talking about apple green tiles, and Katie Muth's tiles are so pretty.
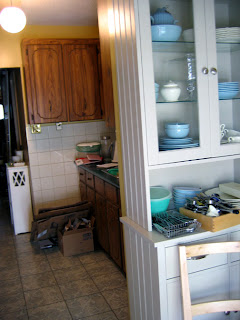 Here's the "after", the pale green wall paint (Debbie Travis, "chiffon", eggshell latex) needs a second coat but you can't really tell that from the photo!
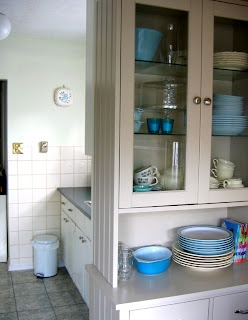 We've ordered a new faucet online, the current one is leaky and specializes in going from cold to burning hot and rather than getting it fixed we're going to just replace it with something nicer. And someday we may replace those vinyl floor tiles. It's a constant dilemma deciding how much to spend on the house. I used to think that it was so small we'd definitely need to move soon and shouldn't put too much work into it, but that tiny house in my last post really inspired me. I mean, ours is more than twice as big! I thought we had the smallest house in Toronto but now I see I was quite wrong.
Living in a small space is a fun challenge, making things work on a small scale can be very satisfying. I really believe it's a good thing, you know, environmentally and all that. Too many possessions can weigh you down, I'm always trying to pare down but it's hard because I can be a bit sentimental about things. I'm working on it though.
Blog: Drawing a Fine Line (Login to Add to MyJacketFlap)
JacketFlap tags: Fall, decor, gourds, cornucopia, Add a tag

What is this?
The Lunar surface?
A new skin disease?
No, its Fall decor.
A nice warty gourd.
I love these things. The checker at the store asked me first "What are these?" then, "Can you eat them?" (she was very young) and I sighed and explained that no, they're just for decoration. Like if you have a cornucopia you stuff it full of these and Indian corn and wheat and pumpkins and squash and...other things. Nuts. Preserved leaves.
At least that's all of what goes into mine. I'll take a picture when I get mine done.
I'd like to draw these too. That may not happen though, as I have a lot on my plate right now. These may have mold on them by the time they sit for a portrait.
Last year I saved my gourds well into summer, until all of a sudden, one by one, they started to rot. Ick.
Blog: Needle Book (Login to Add to MyJacketFlap)
JacketFlap tags: flowers, house, home decorating, decor, otters holding hands, Add a tag
 Today is our wedding anniversary, I can't believe it, the year has flown by! These flowers just arrived from my parents and they were so gorgeous I just had to show them off. They smell wonderful too, mainly of tiger lilies which we had on the tables at our wedding. Mmmmmm.
 I even cleared off the big piles of fabric that were all over our dining table and gave it a polish in their honour.
We're going to meet up for dinner tonight after a very busy weekend working on the house. Bradley (my hero) was in the crawlspace clearing out a huge pile of lumber, a giant old water tank that would have made a great tin man, an old trunk that resembled some kind of mangy old pirate treasure chest and other miscellaneous junk. Everything went out to the front of our house along with shelves and other junk we've been clearing out of the house for the past few weeks.
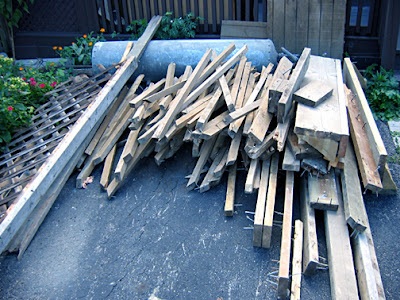 Yesterday we listed the lumber for free on craigslist and someone came to pick up a bunch of it this morning. We also left out some odds and ends at the curb which got scooped up. I'm always thrilled when people can use something we're getting rid of and it doesn't go to waste. Then this morning we finally had some junk haulers come and clear everything else away. (They told me the lumber gets recycled so that was good to know.) Finally that giant chore is done. Phew!
At the same time that Bradley was in the crawlspace I was painting a 2nd coat in the living room and then starting on priming the new bifold doors we got for the hallway. It took forever, I managed to watch The Princess Bride, Ella Enchanted and Mean Girls while priming the four doors. I used a regular paint brush for most of them, then a small artist brush to fill in the awkward corners at the end of each slat. I'm still not done priming all the corners, but it already looks better than the bare wood and it will be worth it in the end.
And finally, to end on a romantic note, I give you "Otters holding hands".
Blog: Needle Book (Login to Add to MyJacketFlap)
JacketFlap tags: home, house, home decorating, decor, ikea, living room, Add a tag
 Thank you for the nice comments about the house posts, I've hardly had time to do crafts but I did make a little bird bag I will show soon. I'm glad people are also interested in our renovations and decorating because it's definitely what I'm thinking about these days!
I have been swamped recently, though, with a big illustration contract so I've had less time to do things. But working at home means I'm looking around at everything that needs to be done and it can be very distracting. So I take little breaks in the day to do house things, and then work late into the evening on my sketches. Luckily this is one of the benefits of freelancing, you can pick your own hours as long as you meet the deadlines.
One of the things I couldn't wait to do was replace our bookshelves. In our old place we had a long row of short billy's on one wall and it gave us enough book storage and I think it looked nice. But we don't have a wall like that here, and we really needed something else. As you may have noticed I've become all about finding vintage furniture on craigslist, all "good old-fashioned workmanship - no more crummy flatpack!" recently. But I just could not find the perfect bookcases.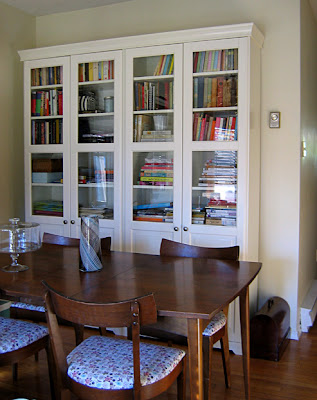 So finally I gave IKEA another chance and was smitten by the Liatorp bookcases. They seemed perfect for our space, two fit the wall I was planning to use perfectly, with lots of height, they have seven shelves (so more than two short billy's), and hidden storage at the bottom. You can join them together to give the feel of custom bookcases, and I like the details, moulding at the top, supports under the shelves (not just those metal pegs) and the edges of the shelves has a nice row of grooves. And you know how I feel about glass doors. Now that they're assembled I absolutely love them, and I really think they're the bookcases I've always wanted.
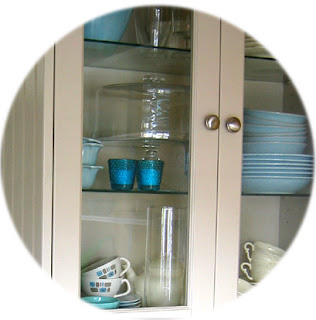
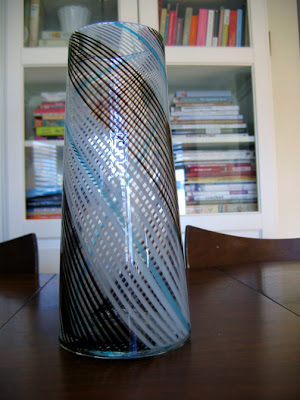 Incidentally, here's a detail of the vase which I found at Pier 1 (thanks to my friend Sandra who gave us the gift certificate!) I'm planning to use the vase colours throughout the room, pale blue, white and dark brown with cream - so it was the perfect addition.
 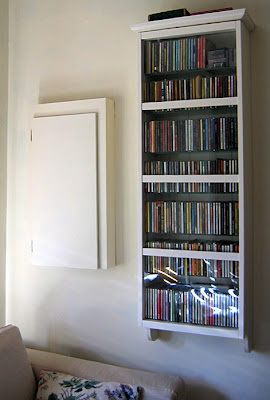 I also found a cd wall cabinet in the same style. This item is new, and I think I was the first person at the store to buy it as I called in the morning and it was out of stock, but when I got there I double checked and they said it had just arrived. It's perfect because it fits all of our cds exactly and now they're no longer awkwardly crammed into a small bookshelf taking up floor space. Plus we're doing matching which seems very grown up.
Here are my assembly tips (for all IKEA flatpack furnishings):
1. pretend you are a surgeon and lay out all the screws and pegs and tools and things on a tray so you are organized
2. use a tea towel under all those things so they don't roll around and drive you crazy
3. don't knock over the tray because you will have to crawl around looking under your furniture for all the little bits and it is VERY VEXING.
4. actually count them so you don't wonder later if something is missing or if you used the wrong thing
5. experienced assemblers will already know this, but each screw has a little number beside it at the beginning of the manual and next to the step where you use it so you can double check it's the right one
6. use the box your furniture came in as a mat to protect the pieces while assembling
7. when the instructions have a little "!" pay attention, or you will regret it
8. don't start assembling at 11pm at night if you are already tired and cranky
9. keep any extra bits for later - and the instructions!
Blog: Needle Book (Login to Add to MyJacketFlap)
JacketFlap tags: home, home decorating, liberty, decor, blueprint, bathroom, jansdotter, lotta, Add a tag
First of all Bradley's reaction to my living room "reveal" was very good, I think he said "holy smokes!" and loved it. The place is feeling much homier these days with just a bit of sorting, cleaning and lots and lots of painting.
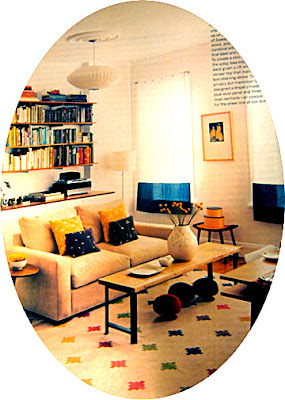 Lotta's living room featured in Blueprint
 Thirdly, I was surprised yesterday to find some clothes at Gap Body made with Liberty fabric! They also had some headbands and hair elastics with flowers also from Liberty fabric. I bought a nightie made with the gorgeous (poorly photographed) pattern above.
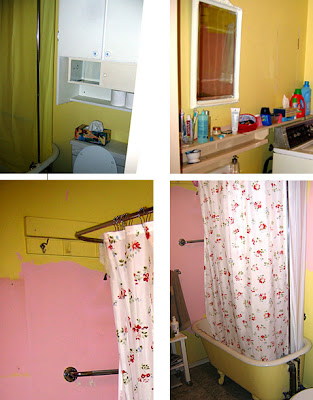
And finally our bathroom is not ready for a "reveal" but is dramatically improved so I'll give you some glimpses. First of all, here are some snaps of the "before". There was a bulky melamine cabinet over the toilet, bright yellow walls and matching shower curtain, with peeling paint revealing a Pepto-Bismol pink layer of paint underneath. There was a caramel colour shelf along one wall, and we put up a plain mirror temporarily. There is also an old washing machine and very old clawfoot tub. I love the clawfoot tub but it will need a bit of work - more on that in a later post.
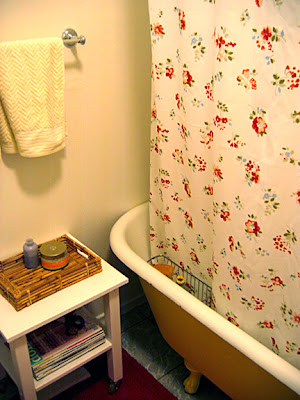
 First of all we replace the box flourescent fixture with a simple round flushmount. Then we painted the walls cil's "wedding white" which I think is the perfect white, not too creamy/yellow and not too cool/stark. Very similar (I can't tell the difference from the chip) to Benjamin Moore's "swiss coffee". We removed the extra shelving on the walls throughout and lots of odd hooks that were stuck on the walls to hold clothes drying lines, etc. The shower curtain and red rug are from IKEA. We also installed a nice new chrome towel bar and toilet roll holder.
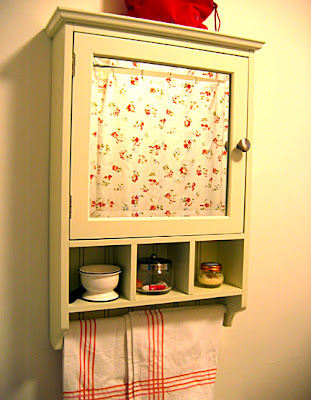
 After a surprising amount of effort we finally found a medicine cabinet we liked, this one is from Home Sense. I'd like to add a glass handle to it later, but it has a nickle one now that is perfectly fine.
  And finally, the nice plain wall over the toilet (that's right I'm showing you a picture of our toilet). We may add artwork here later but for now it's nice to have an uncluttered wall. The cabinet that was there seemed to kind of be looming if you know what I mean. For storage there's a linen closet in the hallway - a new luxury for us! So I can pretend I'm a minimalist...
 Still to do: window curtains, new plumbing for the tub (it leaks and has old wonky brass piping), including a new tub faucet (the old one is chrome laminate and a bit peely) a new showerhead, and a new pedestal sink/faucet to replace a melamine vanity. Also we'd like to do new flooring and install a new washer/dryer (there isn't really another place in the house to put them.) Finally if possible I love the look of beadboard wainscotting and light sconces - but we'll have to see how we do with the budget!
Blog: Needle Book (Login to Add to MyJacketFlap)
JacketFlap tags: decor, design, home, house, home decorating, Add a tag
 Bradley went camping this weekend, so I decided to surprise him with a mini "Changing Rooms" in our front room. The bathroom needs the most work, but I can't do a lot of the work myself, so that will have to wait. Aside from the bathroom, the front room was the least appealing.
First of all the walls were covered with the drab caramel colour and I think it made the room look darker and smaller than it needed to be. As you will see we had a lot to ask from our front room since the house is a little bungalow with only 1 bedroom and the front room is the largest room in the house. Please also note the eyesore of a box on the wall which covers the electrical panel and is made from fake wood laminate. Ick! Here's a before picture: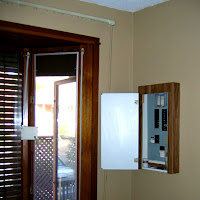 We'd unpacked most of our things so that we wouldn't have stacks of boxes everywhere, so at the start of the weekend this is what the room looked like:
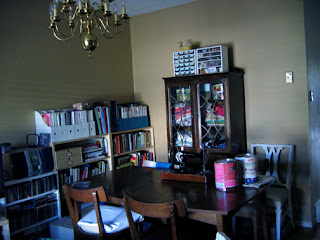 The first thing I did was paint the walls in the same creamy colour as the hallway. It was an instant transformation! I still have another coat to do, but it's good enough for the "reveal". The bookcases will have to be sorted and possibly rearranged or replaced with taller ones, but for now, here's the "later" of the dining area:
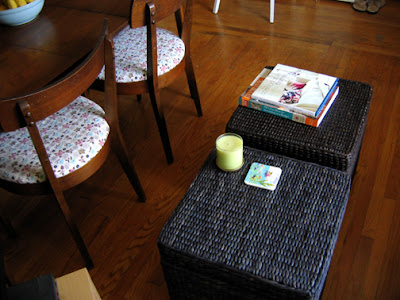
 I also re-covered the chairs with a 1950s vintage barkcloth fabric. It's a little whimsical but I think it works with the style of the furniture (the table also has a removable leaf not shown). The dining set was a craigslist find for $100 - the original chair covers were bright orange, then recovered (not very well) with four different colours and the fabric was dirty. So that was a big improvement. Here's a detail of the chairs, and the wicker ottomen/boxes that we're using as a coffee table, they also hold all our dvds.
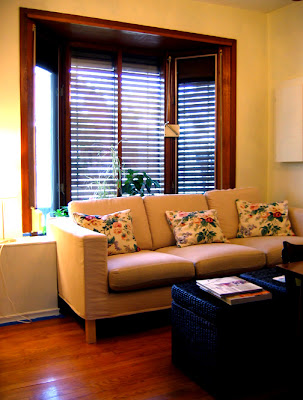
 This front room is also the living room, so here's a view of the living room area with our couch. As you can see the electrical box is now painted out to match the walls and it's much less noticeable. There's still some blue painter's tape showing because the trim isn't painted yet. Hey it was only one weekend! I wish I'd had Linda Barker or Anna Ryder Richardson helping me out. And ideally Laurence Llewelyn Bowen would be the host as he was in the later episodes of Changing Rooms, he is so funny and witty.
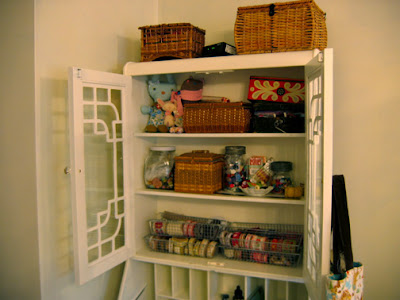
 And last but not least, this overworked room is also my studio. Of course I work on the dining room table as well. Another craigslist find was an art deco style secretary desk in a similar style to the one I already had. They only wanted $50 for it (which as you can imagine had me in a tizzy begging Bradley to rent a van and help me go get it immediately before they changed their minds). The desk was originally in a sorry state though. It was painted orange (in a very patchy way) and the lattice mullions were on the outside of the doors and warped and broken. Also the veneer was peeled away from one of the drawers (also in a very patchy way) and so there was a lot of work to do. But now the two desks look pretty similar. My old one still holds all my art supplies, and the new one has sewing and crafts things.
 So that's the big reveal - you're getting a sneak peek because even Bradley hasn't seen it yet. He's getting home in around three hours so I can't wait to show him! I hinted that I had done some work in the house but wasn't specific. Ideally he will cover his mouth and get teary, then say "oh my god" several times. Then he'll start pointing out all the great new features and make comments such as: "is this really our house??" and "I can't believe it, it looks so different!" and "look at our new chair covers!" etc. Well we'll see.


A very happy birthday to Bradley tomorrow! Can't wait to see the surprise gift. The new light looks wonderful.
Is it still a schoolhouse light if it's flush mounted? Because that's what we have in our living room. Two of 'em. Wouldn't be bad at all, except... they're purple. Ish. They have just a pale shading on the inside... not visible when it's off, but when you turn it on it gives the light a pinkish cast.
It's better now that we replaced the 60-watts with 100-watt-equivalent CFLs. But we've never been able to find compatible replacement globes (the opening is a strange size), so in the twelve years we've lived here, we've just put up with the odd color (of course, we have three or four floor and table lamps that see more use).
Yes, schoolhouse refers to the shape of the glass part.
I often see the shades alone at Home Depot and Rona, even Canadian Tire. But they are probably all a standard size that isn't working for your light.
This site may have something:
http://www.schoolhouselectric.com/shades.asp
Thanks for the comments!
do you have any favourite places in toronto for vintage lights? next week i am on a light quest...to illuminate all of the painting i've done!
This is a note to Megan:
Two great places to look for vintage lighting fixtures in Toronto are Sam the Chandelier Man on Queen St. W. right near Roncesvalles, and The Door Store on Castlefield. Both places had lots of schoolhouse lights and similar styles.
Or, you can just do what Claire and I did and go to Rona!
Queen West has a few places that have vintage lighting. There's the Roncesvalles antique area Jaimie mentioned - which has lots of other great stores there too.
There's also Queen W just west of Bathurst. Morba has lots of cool mid-century type lighting, I saw lots of great things there recently.
There's also one of my favourite stores, Chatelet which has pretty chandeliers. They have a good website where you can see things they have in stock:
http://www.chatelethome.com/
Also there's an antique area on Mont Pleasant, mostly below Eglinton Ave. with around 15 shops within 5 blocks and a few of them seem to have lots of lights.
For more modern/schoolhouse fixtures I recommend Restoration Hardware online (I bought a great little schoolhouse light for our former kitchen there, great quality) and http://www.schoolhouseelectric.com which I haven't tried yet but it looks great!
thanks claire and jaimie for the great tips! you know, i never knew before today that those were called "schoolhouse lights"!
All I've seen locally are the smaller sizes (and the really big sizes which probably aren't schoolhouse anymore) and ours seem to be 6" fitters.
Of course, it's probably a moot point now that we've decided to restore our bungalow to bungalowness, and we'll put in some nifty Craftsman-style chandeliers or something. So, um, if anybody *wants* purply-pinky schoolhouse lights, we'll be getting rid of ours...
I have schoolhouse lights in my 1930s Chicago loft, and they are my favorite part of the whole house! So I understand your love of light fixtures!