 This is our first Halloween in a house together, and we're also in a neighbourhood with lots of kids. They are always running around in front of our house and we can hear some of the funny things they yell out. So we're looking forward to giving out candy.
A week ago we bought a couple of tiny pumpkins on the way home and I drew spiders on them. This was to indicate to the neighbourhood kids that we would be participating in Halloween and we would have candy. The boy next door saw them when he came home and he yelled out to his dad - "they have pumpkins with spiders on them and on the back it says happy halloween!!" So now the kids know that even though we just moved in we understand the Halloween system.
So last night Bradley carved our big pumpkin after sketching out a few faces. We both agreed the pirate was the best. Scary but lovable. So here he is, ready to have a candle lit inside him tonight. As you can see he's lost a tooth - eeww! - and it's hard to see from the picture but he has scars all down the left side of his face. Perfect.
Viewing: Blog Posts Tagged with: bradley, Most Recent at Top [Help]
Results 1 - 2 of 2
Blog: Needle Book (Login to Add to MyJacketFlap)
JacketFlap tags: halloween, holiday, pirate, pumpkin, bradley, Add a tag
Blog: Needle Book (Login to Add to MyJacketFlap)
JacketFlap tags: tutorial, sewing, birthday, bradley, apron, Add a tag
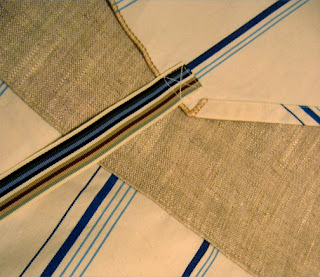 I think the first step for sewing for a man is the colour scheme, choosing colours they like that aren't too girly. I wanted to make an apron for Bradley - now that we have a barbecue. I found the perfect piece in my stash, a sturdy white cotton with blue stripes and a striped ribbon for the neck strap. This was a sample piece of fabric and already serged, so it saved some extra steps. I made it up as I went along but it worked quite well, so here's another tutorial.
Step 1: The rectangle was 26" inches wide and 34" long. I pinned the neck strap in place (20" + hem allowance), and folded over two corners at the top. At this point you can try it on to see if it's roughly the right size. I had to try it on myself then imagine myself a little bit taller.Step 2: Once the right amount of fabric at the top corners was folded over I cut off the excess and folded the edges and pinned in place. Then iron and sew!
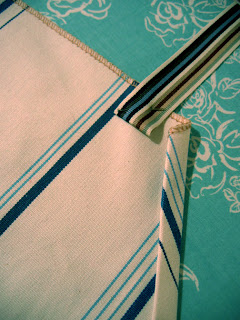 Step 3: The waist straps were just twill tape stitched in place. I recommend making them long enough so you can wrap around the back and bring them around to the front again to tie.
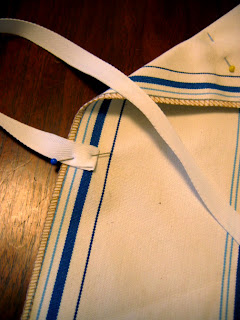 Step 4: Love is in the details. I hemmed the ends of the straps (by hand) so that they wouldn't fray.
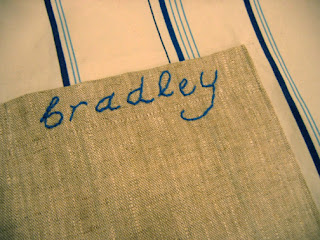
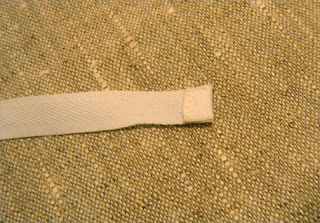 Step 5: I added a 9" x 17" pocket. The serged edges were just folded once then sewn in place, with a 1" hem at the top. Pin it in place before you sew then try on the apron to see if you like the position. I sewed a couple of extra seams to make divisions in the pocket. That way there's a skinny one to hold tongs. Finally, I embroidered Bradley's name to personalize it. I should have done the embroidery first, then hemmed the top of the pocket to hide the back of the embroidery but I didn't think of it. The easiest way to do it neatly is just pencil in the lines before you stitch.
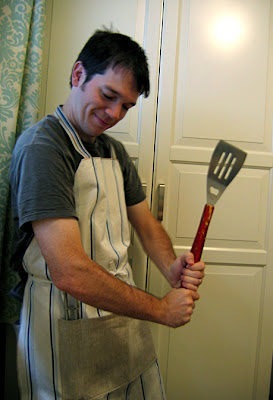
 Done! Bradley loved his new apron... Gosh he's handsome. And such a good sport letting me take pictures.


"the Halloween system" = lol
Have fun!
Bring on the little cuties in costume!
The Halloween System is indeed a time honoured tradition! The spiders are a great idea and I do love Mr. Pirate.
I love the whole Halloween system. We decorate with lots of pumpkins and a spooky Halloween tree! Love your spider pumpkins!
The pirate patch on the pumpkin is a great idea! Great spiders too. I forgot to get a pumkin this year. I usually get one and more and more people are celebrating Halloween in Norway this year. Isn't that weird - Norway has just recently imported the holiday!
I love your pirate pumpkin. So cute!