I needed to paint large numbers of fish on several double page spreads. Using the image hose in Painter X an artist can create a "brush" that does just that. I painted some fish, changed the size and direction of several and saved them as an Image Hose. Now I can choose that brush in painter and spray little fish of several sizes anywhere I want them in my digital oceans.
Viewing: Blog Posts Tagged with: Painter X, Most Recent at Top [Help]
Results 1 - 14 of 14
Blog: Ginger Pixels (Login to Add to MyJacketFlap)
JacketFlap tags: Ginger Nielson, Painter X, lil fishy, image hose, Add a tag
Blog: Whateverings (Login to Add to MyJacketFlap)
JacketFlap tags: paula j. becker, Painter X, Warm Up Drawings, kangroos, Add a tag
I’m experimenting, stepping away from the line work and using primarily paint (digital). This was done in Painter X with the digital watercolors.
Blog: Ginger Pixels (Login to Add to MyJacketFlap)
JacketFlap tags: children, Ginger Nielson, sheep, Painter X, texture, Add a tag
Using a technique like this once in a while can be effective. One just has to be sure not to overdo it.
I am hoping to find some other ways to create various textures that won't overpower the other spreads in this book. I love the journey that illustration takes me on each day!
Blog: Ginger Pixels (Login to Add to MyJacketFlap)
JacketFlap tags: children's illustrations, Ginger Nielson, Painter X, books for kids, seascape, Add a tag
Sometimes I need to PAINT with real paint before I finish an illustration in the computer. In this case I used hot press illustration board to begin a sea scene for a project I am currently working on.
I like to be able to use my whole arm ( and soul) when I am painting and my sketches and preliminary paintings are usually done on a rather large scale. They will be reduced in the computer to the correct size for the project underway. I used Dr. Martin's inks and some transparent acrylics for the first stage. Along with that combination I also used a house paint brush, a fan brush and some more conventional sable brushes.
After photographing the preliminary painting I transferred the image to my computer and completed it in Painter. The advantage for me is being able to get darker layers in place without having to wait a day for paint to dry.. and if I don't like a layer... I whisk it away.
In addition to transferring the painting to the computer I was able to stretch the entire image horizontally to accommodate the size I wanted to work with for this book.
If you look carefully you might be able to find two very recognizable constellations. Did you find them?
Blog: The Ballyhoo (Login to Add to MyJacketFlap)
JacketFlap tags: Digital Painting, Painter X, Watercolor Brushes, Add a tag
In this tutorial, I am going to cover the basics of using Painter’s digital watercolor brushes using last week’s experiment. I have to say up front that if you are looking for watercolor inspiration then this is not the place. I find watercolors one of the hardest mediums to work in and probably my least favorite. But people who make the switch to digital painting usually like Painter’s watercolor brushes the best.
Digital watercolors do allow you to experiment in a way that allows more freedom than traditional watercolor medium. (Those of you that have worked in watercolors know how unforgiving it can be.) The digital medium works the same as the traditional medium so I am not going to go into any watercolor techniques. First we start with a sketch. Watercolors are the only medium where I will start on a white piece of paper. I find this utterly terrifying because you cannot set a cool or warm mood with the color of your paper. But just like in traditional watercolor, the brightness of the paper becomes your base color.
There are two types of watercolor brushes in Painter. There are the regular old “watercolor brushes” that have been in Painter for ages and there are the “Digital Watercolor brushes”. The watercolor brushes are better for sweeping in washes of color in backgrounds, but you will need tons of memory to use these without grinding your machine to a halt.  The digital watercolor brushes work much more efficiently. You can select one of the digital watercolor brushes from the brush menu by clicking on the small arrow next to the brush.
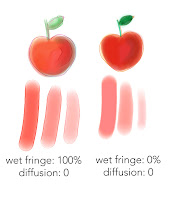 Next you want to choose a kind of digital watercolor brush and customize it to your needs. I prefer to start with the “Wash Brush.” The real magic in this brush is controlling the “Wet Fringe” and “Diffusion.” In this sample, the left doodle has a Wet Fringe of 100% with a 0 Diffusion. You can see that this creates a brush strokes that goes on wetter because you can really see the color accumulating on the stroke edges. On the right the Diffusion is kept at 0 and the Wet Fringe is 0. This creates a smoother almost marker feel. To me, it looks more like what you can get out of Photoshop which I personally think looks more "digital."
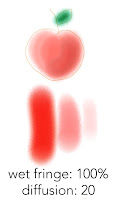 In this next example, the Wet Fringe is kept at 100% and the Diffusion is put at 20. This creates a very watery fluid brush which might not be the right brush for objects, but would look fabulous as a watery backgrounds.
Another interesting brush is the “Wet Eraser” under the same brush grouping. This brush allows you to easily correct your mistakes with literally a wet erase. Something that is difficult to do with traditional watercolors. (Note: the wet eraser only works on layers. Once you drop your layer down you will want to go back to the regular eraser.) 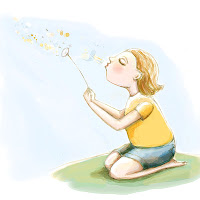
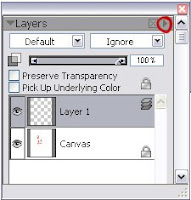 Another tip: Use lots of layers with watercolors. You can create a new layer in the same way that you do in photoshop by clicking on the small right triangle and selecting “new layer.” If you paint each wash on a seperate layer then you can lower the opacity as you go to and slowly build color. I drop the layer once I get it looking how I want it. (You drop the layer by clicking on the arrow to the right and selecting “Drop.” The drop is the equivalent to the "merge down" command in Photoshop)
I will cover Painter's pastel brush in another tutorial. I also plan to cover painting with a watercolor brush in Photoshop. The steps are a little less intuitive, but it can be done. Let me know if there is something in particular that you would be interested in seeing.
Blog: Jago Illustration (Login to Add to MyJacketFlap)
JacketFlap tags: painting, Sketch, sketchbook, painter X, handmade, Add a tag
Blog: Jago Illustration (Login to Add to MyJacketFlap)
JacketFlap tags: painting, Painter, painter X, Add a tag
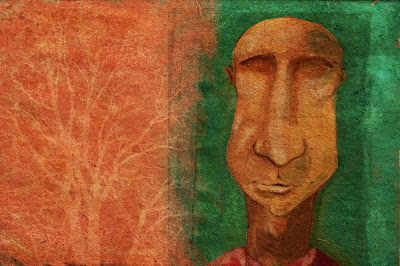
Drawn in pencil, painted Painter, finished in Photoshop.
Blog: The Ballyhoo (Login to Add to MyJacketFlap)
JacketFlap tags: Seeds, Watercolor Brushes, Spatter Water, Weeds, Painter X, Rice Paper, Hard Pastel, Illustration Friday, Add a tag
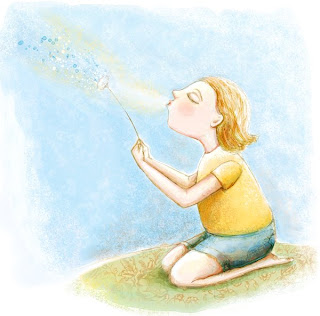 With this week's topic, I had a childhood memory of how I used to always wonder where the seeds from a flower would plant themselves when you blew them into the wind. (I know...totally corny!) I am sure my neighbors could have done without me blowing weeds into their yard.
Here is a quick experimentation with Painter's digital watercolor brushes and Hard Pastel on Rice paper. I have not used Painter's watercolors in awhile and I had forgotten how wonderful the brushes are for showing fluid movement. (the seeds blowing out of the dandelion are the "Spatter Water" brush.) When I worked traditonally, I could never control my spatters and would always end up with a muddy mess.
If people like this experimentation then maybe I will do a tutorial next on painter's watercolor and pastels tools. Let me know if you are interested...
Blog: Jago Illustration (Login to Add to MyJacketFlap)
JacketFlap tags: drawing, sketches, Sketch, daily, painter X, jago illustration, Add a tag
Blog: Jago Illustration (Login to Add to MyJacketFlap)
JacketFlap tags: painting, Sketch, Painter, daily, painter X, jago illustration, Add a tag
Blog: Jago Illustration (Login to Add to MyJacketFlap)
JacketFlap tags: Sketch, Painter, daily, painter X, jago illustration, Add a tag
Blog: Jago Illustration (Login to Add to MyJacketFlap)
JacketFlap tags: Sketch, Painter, daily, painter X, jago illustration, Add a tag
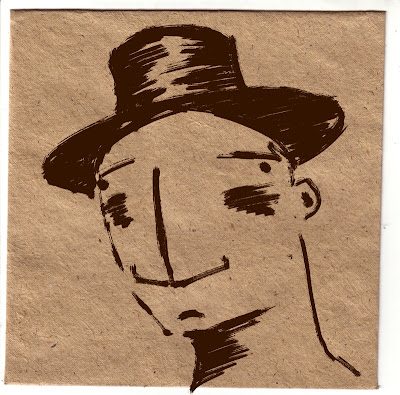
Painter X - Liquid Ink, coarse bristle
Blog: Jago Illustration (Login to Add to MyJacketFlap)
JacketFlap tags: Sketch, digital, Painter, painter X, Add a tag
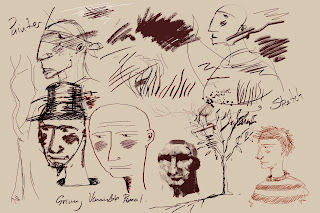

Trying out a demo of Painter X, seems to be a LOT faster than IX and the drawing tools feel like they've improved too.....
Blog: The Ballyhoo (Login to Add to MyJacketFlap)
JacketFlap tags: Mona Lisa, Loren Long, Painter X, Divine Proportion, SCBWI, Mona Lisa, Loren Long, Painter X, Divine Proportion, Add a tag
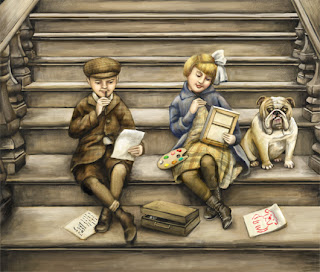 I have been trying to get in the habit of posting a digital painting or writing tip each week. But what is that saying about the road to hell….something about it paved with good intentions? Every week might just be a little too ambitious with my schedule.
So here is the tip for this week…
Many of you have probably already upgraded to the new Painter X And if you have not then here is one of my favorite new features. It is called the Divine Proportion tool.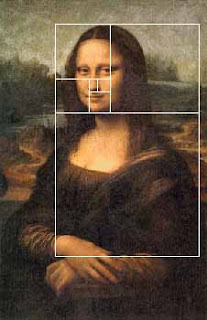
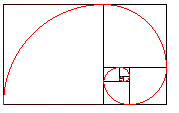 Divine proportion in art is sometimes referred to as the Golden Proportion, Golden Number or if you are a real geek, the Fibonacci Series. The golden number is basically 1.6180339887 otherwise known as phi. Inside of the big rectangle is another rectangle that has an exact ratio of 1:1.618. Inside of that rectangle is another rectangle with a perfect ratio of 1:1.618. Probably the most famous example of The Golden Ratio used in art is Leonardo's Mona Lisa The Golden Ratio can be found in Mona Lisa’s enigmatic face. Shown here:
I have always been fascinated with the idea of Math in art and always try to be aware of planning a composition so that that main action does not fall into a dead zone. The example above is the art I created for the 2007 SCBWI Publication Guide. (available to members at www.scbwi.org) Because this art was created to fit into a small space, I am going to use the divine proportion tool from edge to edge.
Here are the steps:
Step 1: Go to Window/Show Divine Proportion. The tool’s interface with look like this: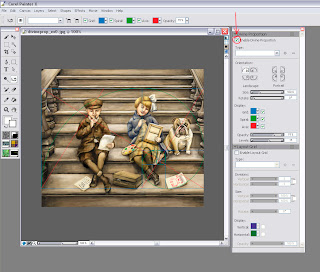 Step 2: Check the box for “Enable Divine Proportion” at the very top.
Step 3: You can now alter your Divine Proportion tool to match your composition. In this example, I selected a vertical orientation for my divine proportion because I want the eye to be carried up the stairs but the focus to be on the little girl’s expression. (In my original sketch she did not fall in this location so I moved her.
Here is an example with the image screened back so you can better see it: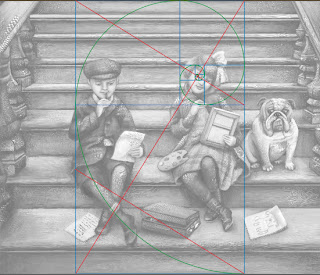
You can also change the rotation and the scale of the divine proportion by tinkering with the controls below the orientation. In most cases, you will not want your divine proportion to go from edge to edge. This image is postcard size and there is not a lot of empty space so the viewer takes the whole thing in at once. In a larger painting this will not be the case.
So of course, I started to wonder if other artists use Divine Proportion in their art. Here is an illustration from the super talented Loren Long and a good example of when you would move the Divine proportion tool.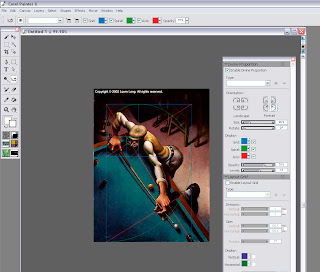
In this painting the viewer would not take in the dark space in the back. It is intentional dead space – sort of like an area for the viewer to rest before they take in the main action. In music, we would call it the build up. So if you move the Divine Proportion tool to encompass only the man then you will see that it falls perfectly into a golden ration.
You move the Divine Proportion tool by selecting it in your main tool bar. It looks like this:  When you move your cursor over your painting, your cursor will turn into a hand so you can position your Divine Proportion guides manually.
In Loren's painting, the first main rectangle encompasses the sweeping motion. The second rectangle encompasses the perfect hand to elbow to face ratio, and then the smaller rectangles encompass the concentrated look on the man’s face.
The composition is perfectly planed. Now let’s take a moment to hate him, but I suspect that Loren is not conscientiously aware of the math behind his art. Most artists do this naturally. For the rest of us….there’s the Divine Proportion tool. Loren has a New Book out now that is stunning as always.
But if all of this makes your head hurt then there is also the good old rule of thirds to go by. In the box below the Divine Proportion tool there is an option to turn on a layout grid. The layout grid will at least tell you if your main action is falling into the thirds of your painting. You can find this option here: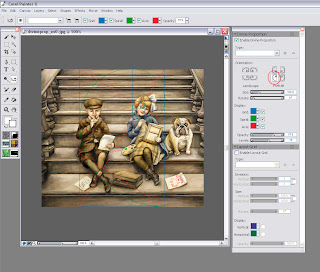
If you would like to learn more about how Math works in art then I recommend Rhythmic Form in Art by Irma A. Richter
I hope this tips help. If anyone is interested in how to do the same steps in Photoshop (not quite as easy) then please comment below and I will make that next week’s tutorial.


Fantastic!
Very nice profile! :)
Could you possibly answer a few illustration questions for me?