new posts in all blogs
Viewing Blog: Lightbulb Books, Most Recent at Top
Results 26 - 50 of 169
Lightbulb Books is the website of children's author Hannah Holt.
Statistics for Lightbulb Books
Number of Readers that added this blog to their MyJacketFlap: 1
I might have been a little over zealous with berry picking on Saturday…

It turns out 40 lbs of strawberries is a lot. I know, duh. But seriously, I made jam and froze berries and the kids ate more fresh berries than a digestive system really should have.
And yet, I still had gobs and gobs of berries. At eleven at night I was out of freezer space, so I started pureeing it by the bucket-load.
What can you do with berries when you have no more fridge or freezer space?
Make fruit leather, of course!

Here’s the recipe I used. It’s sort of a choose your own adventure recipe depending on how sweet you want it. Let’s just say making fruit leather is not an exact science. Everything is plus or minus 20 minutes, but this will get you in the ball park…
Strawberry Leather
- 3 cups pureed strawberries (about 1.5 pounds)
- (You can sweeten it with up to 1 cup of sugar for super-sweet, but if your berries are really ripe you won’t need it. Also adding sugar, will increase the cooking time…and your dental bills.)
Step 1: Strain the pureed berries through a fine mesh strainer to remove seeds.
Step 2: In a thick bottomed sauce pan, bring the berries to a low boil over medium low heat. Then simmer, stirring occasionally, for about 50 minutes. (The mixture will be thick enough to mound slightly at the end.)
Step 3: Preheat oven to 200ºF and line a 15×10-inch pan with parchment paper.
Step 4: Pour the thickened puree into the prepared pan and spread as evenly as possibly.
Step 5: Dry the puree in the oven until it feels sticky but will not stick to your finger (about 2 hours). Or you may cook it for 90 minutes and the turn to oven off and leave it in there over night. If you choose not to leave it in the oven overnight you will need to let the dried puree cool on the counter for at least 3 hours before eating it.
Step 6: Using kitchen scissors, cut up the cooled leather on the parchment paper and roll it up. It may be stored in a plastic bag at room temperature for about a month.

FYI, many fruits can be dried in the oven at low heat over long periods of time. Here are some bananas I dried the next day.

The strawberry puree dipped ones were my favorite, but they were all delicious.
Sometimes I’m asked how I made the switch from engineering to writing.
For me, it’s a no brainer. Engineering and writing require the same key trait—persistence.
That doesn’t mean all skills transferred. However, differentiating an equation isn’t that much different than writing a story, or painting a picture if you ask the question WHY. Why is 2x the derivative of x²? What makes a good story? Can the painting be pushed further?
Solving an equation to find the answer isn’t very interesting. The process is the intriguing part. It holds the keys to unlocking more equations and blazing new trails. You’ll never find those paths by flipping to the answer key. The longer way takes persistence.
Writing a picture book might not seem hard. Most only boast 500 words. Anyone can write 500 words. However, filling a word count isn’t any more interesting than looking in an answer key. The trick to writing a good picture book is in creating colorful characters. The character needs a journey with a beginning, middle, and end. This requires stakes, motive, disappointment, and success—all in 500 words or less. That is why I love picture books. It’s why I read over 200 each year and critique more than 100 peer manuscripts and write hundreds of thousands of words…so I can find that perfect 500.
It’s a work in progress. It takes persistence.
Lately, I’ve been doing a lot of this work: poring in hours no one will ever see. And that’s a good thing. I don’t need to be out there with all this all of the time
However, that means I haven’t been working on other projects, like my paper doll series. Well, I decided to make time. These dolls aren’t as perfect as I want them to be. They could really use five more hours. But often five more hours leads to five more hours, which leads to a complete overhaul. Somewhere I have to draw the line and be done. Persistence needs a deadline.
These dolls are a nod to the arts, but they’re also a tribute to creativity in all its forms.
I hope you enjoy!

Ann and Sarah Get Creative in Color (pdf)

Ann and Sarah Get Creative in Color (pdf)

If you find a bear trapped in a forest and release it, the bear will probably eat you.
It’s nothing personal. It’s just what hungry bears do.
You see, bears don’t feel gratitude the way people do. They also can’t experience complex emotions like empathy…
…much like young children. Children don’t develop empathy until around age five to six. Even then it’s just the beginnings.
It’s not that three-year-olds don’t care about your feelings. Rather, like bears, they can’t.

It’s Not Personal
It might feel personal when a four-year-old yells, “I hate you, and Aunt Mildred hates you, too!”
Only, it’s not.
Actually, what the child means is, “I have learned by trying lots of different words that these particular words get a big response.”
Take another common phrase, “I wish you would die!” Here’s what it means by age:
Four-year-old: What’s death? Who knows?! I’m not even sure when next Wednesday is, but you go all crazy when I say this. It’s awesome and makes me feel powerful.
Eight-year-old: I understand death. I think. I don’t actually want you dead. I probably want you with me right now, but I’m frustrated and don’t know what else to say. These words distract both you and me from what is bothering us.
Sixteen-year-old: I understand it, and I mean it. However, the long-term reasoning center of my brain isn’t fully developed, so what I really mean is, “it’d be convenient for me if you didn’t exist at this moment.”
So when your sixteen-year-old daughter comes home and says she can’t imagine a future without her new boyfriend DJ Bonecrusher, it isn’t love talking. Rather, futures in general are a difficult thing for her (realistic ones anyway). BTW, I don’t recommend telling her this.
What Can You Do?
First, of all take a deep breath. You aren’t a bad parent because your child pushes boundaries. All children push boundaries. It’s in their job description.
Second, keep rules basic and age appropriate. The more simple the rule, the more likely it will be followed. “Don’t open the game closet,” is more likely to be followed than, “only get out one game at a time, and be sure to close the door behind you, and don’t let your little sisters play with the Monopoly pieces.”
Third, only set up rules you are willing to enforce 100% of the time. Rules enforced 99% of the time are only suggestions. You can only constantly enforce a few rules at a time. Choose wisely.
Fourth, don’t jump to nuclear with the consequences too early. There is no level above nuclear. If you play the nuclear card and it doesn’t work, you lose. Start with the most gentle consequence possible. You will probably need several (first, time out in the kitchen with me, then time out in your room by yourself, then I start taking away toys and privileges, etc, etc).
What Can Children Feel?
Children are capable of love, kindness, and cooperation. However, these are learned behaviors. Show them love and they will love. Tell them when they are kind, and they will be kind more often. Be consistent about enforcing boundaries and they won’t cross them after the six or eleventeenth try.
On the other hand, spanking and yelling will result in more hitting and shouting. Don’t show a child how painful biting is by biting them back. Remember, the child cannot feel empathy; however, they will parrot your behavior.
It takes creativity and energy to model positive behavior. This means you need to take care of your own mental health. Ask for help. Reach out to other adults when you are feeling on the brink.
Momma Bear Speaks
It makes me feel growly when I hear adults say things like, “my children are monsters,” or “those children are bad!” Usually what these people mean is, “those children are horrible adults.” Children can be exhausting, strong willed, and frustrating, but they aren’t terrible, rotten, or ill willed. Children desperately need positive adults role models in their lives.
After all, without adults children might wander into the forest and make friends with bears. And that would be a true disaster because as we’ve already learned—bears are terrible people.

If you like this post, you might also like these books:

Children Make Terrible Pets, by Peter Brown
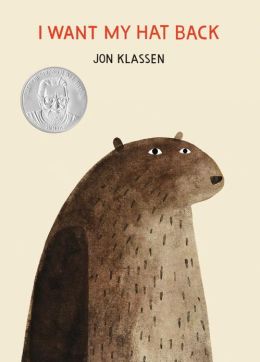
I Want My Hat Back, by John Klassen

Naked Mole Rat Gets Dressed, by Mo Willems
For a while now, I’ve been hoarding egg carton containers.

At first, I thought maybe I’d do a cute spring craft with them. However, then the yard project started, and I realized I need plants. Specifically, lots and lots of thyme.
Instead of grass, we are using thyme as a ground cover for a good portion of our backyard. Thyme needs less water than grass, and it smells great. Win-win. However, it’s a slow grower. So unless I want my yard to remain a dirt bowl this summer…

…I need to get planting. Now. Enter the egg cartons:

Here are a few tips when using egg cartons as seed starter planters:
- I recommend cutting slits between the individual cups before putting the dirt in. This makes it easier to separate them as needed later.
- When starting plants indoors, many need to be hardened before transplanting outdoors.
- The egg cups won’t hold a very large plant. Check the germination times and recommended outdoor planting season for each type of seed. You don’t want to be growing a sunflower for very long in these little cups.
- FYI, among other things, we are growing creeping thyme. Most thyme seeds you see in nurseries are culinary thyme. Culinary (or common ) thyme grows 6 inches tall. It’ll still make a good ground cover, but I wanted something walkable. Culinary or common thyme isn’t very walkable. It’s always a good idea to research the mature height of the seeds you plant.
With a little planning, starting from seed can save start up cost and time from your growing season. Happy planting!


Last year, my kids wanted to raise a wild caterpillar. We named him Greenie:

He’s that small sticky looking thing next to the apple leaf. We did lots of research, and we tried to make a good go of it. But it turns out we stink at raising caterpillars. R.I.P. Greenie.
Maybe sometime in the future we’ll order a premade kit and have better luck. For now, we’ll stick to the lesson we learned: wild things should be kept in the wild.
We did enjoy learning about butterflies, and I wrote a set of poems about the life cycle of butterflies. I’d like to dedicate them to Greenie (there’s a coloring page at the end!):
-THE BUTTERFLY SUITE-
Monarch’s Nursery
With a leaf for a crib
and no nanny to beg,
so begins life
as a butterfly egg.
Dining Hall
The sleepy little caterpillar loves to munch and munch,
laying on his underside for breakfast, brunch, and lunch.
Shedding skin that feels too thin, he eats leaves with a crunch.
The growing bigger caterpillar loves to munch and munch.
Dressing Chambers
Pupa, pupa changing quick,
hanging underneath your stick.
First you’re green and then you’re brown,
trading kid-clothes for a gown.
The Ballroom
They twirl and glide, this dancing pair.
Then dip a curtsy in midair.
Waltzing wind, they flutter by…
I wish I were a butterfly.
And here’s a butterfly life cycle coloring page:

Here’s a pdf copy: Butterfly Life Cycle Coloring Page.
And here’s a color version with answers: Monarch Butterfly Life Cycle.
We’re landscaping our backyard. By “we,” I mean my minions and me.

{Aren’t my minions cute?}
My top priority for landscaping is food: I want my yard to grow stuff I can eat. So the first step of this insane exciting project was making a sun map.
Growing fruits and veggies takes sun and lots of it. So I need to know how much sun my yard gets and where.
First I made a sketch of my backyard (I traced over a google satellite image):

Then I made ten copies and waited for a sunny day. Here in Oregon that can take a while…
When a sunny day arrived, I kept watch for the first hour of sun in my yard and sketched the area with direct sunlight

Every hour, I made a similar map until the sun went down. I’ll admit, I couldn’t stay home and watch the sun all day. I made my maps over a few days. However, you’ll probably want to make your map within a week to avoid sun shifting (more on that later).
After I had charted out all my hours of sun, I made a cumulative map:

The purple area gets 6+ hours of sun, so that’s the best space for planting. The white area gets no direct sunlight (at least in February), so I probably want to avoid planting along the southern fence.
FYI, I did this same process at the end of January. Here’s my sun map for January:

Notice my January yard has fewer places with direct sunlight and those places get fewer hours of sun. Soooo….
1) Why does my yard get fewer hours of sun in January than February?
2) What do you think my sun map would look like in March?
(Answer 1: I live in the Northern Hemisphere, so the sun angle is lower in January compared to February. My southern fence casts a longer shadow in January. Answer 2: The angle of the sun continues to climb until mid-summer, so my March map will have more areas of sun and longer hours of sun than February.)
My blog has been a little quiet lately. Part of the reason for that is my husband is on an extended business trip to Tel Aviv, and I’ve been extra involved with toddler wrangling.
At the beginning of his trip, my kids would ask, “Where is Daddy?”
I would say, “Israel,” and that was good enough for them. End of conversation.
But now they want to know more. Where is Israel? Where exactly in Israel is Daddy? How far away is it?
I would tell them, “Daddy is 6,887 miles away.”
Miles don’t mean much to a six-year-old, so we tired to think about it another way.
Daddy is 371,000 blue whales away or 110 million matchbox cars away or 121,000 soccer fields away.*
The only problem is my six-year-old recognizes numbers like thousand and million, but they are just big numbers…impossibly big numbers. And that makes Daddy feel far away.
When going big doesn’t work, sometimes it helps to think small. So I helped him learn about numbers less than 1–fractions.
Here is the earth:

{one earth}
If you roll it out flat like a map, it looks sort of like this:

If you draw a line down the middle, you would be halfway around the earth.

{halfway, 1/2, 50%}
You can see that our daddy is not even halfway around the earth. In fact, he would have to travel about three times the distance to Tel Aviv to travel all the way around the earth.

{one-third, 1/3, 30%}
Compared to the entire distance around the earth, our daddy is not so far away.
*If you want to check my fraction multiplication for the distance between Portland, Oregon and Tel Aviv, Israel in blue whales, soccer fields, and matchbox cars, here is my work:

We were washing dishes the other night when my son said…
Him: There’s this song I really like, but I can’t remember all the words.
Me: What do you remember?
Him: Something about…deep in my heart…
Me: We Shall Overcome?
Him: Yes, that’s it. I love that song.
His singing reminded me Martin Luther King, Jr. Day is coming. We’ve done a few crafts this week to celebrate.
I Have A Dream Self Portraits

Each of the kids drew a self portrait. We cut out the portrait and put it on colored construction paper. Then we glued on cotton balls to make dream clouds.
It was a good chance to talk about Dr. King’s dreams and what dreams my own kids have.
The Q-tip People March on Washington

I cut a bunch of Q-tips in half. By mixing small amounts of burnt sienna (brown) and ivory acrylic paint, the kids and I were able to make a variety of skin tones. We dipped their heads in paint for hair and applied eyes using toothpicks.
After the paint dried, we glued the Q-tips to a printout of the Lincoln Memorial. Here’s a blank copy of the Lincoln Memorial just in case you want to make your own march on Washington picture:
March on Washington PDF

(Note: Because of the fine motor skills required for this craft, I recommend it for ages seven and up.)
The best part about these crafts were the conversations I had with my kids. My five-year-old was surprised to learn some people used to not be able to eat at certain restaurants or sit on buses because of the color of their skin. We talked about how unfair that would be and how even today we can find ways to choose more kindness.
We shall overcome hate and hurt with a little more love. Thanks Dr. King!
This year we did a homemade Christmas. I thought it would simplify the season and make it more meaningful.
It did make the season more meaningful, but simplify…not so much.
I made a personalized fan art for my nieces and nephews.
The first step was easy. I googled high resolution images of their favorite characters, printed these, and copied the scene using tracing paper and pencil.

After the initial sketch I went over all the lines heavily with a #2 pencil.
Then using a family photo, I traced in an additional character (or in this case a new face):

{Here I taped the tracing paper right to my computer screen using masking tape. This made it easy to zoom in and out until the picture was the right size for the picture.}
Once I had all the lines the way I wanted them. I took my tracing and transferred it to 140lb watercolor paper by placing the drawing face down and rubbing the back with pencil.

This makes a light mirror image copy on the new paper:

From there on out it just became a a process of coloring in the lines with watercolors:


So it wasn’t overly difficult, but it was time consuming, especially considering I made five of these this month. But it was fun and it felt good when they finally all went out in the mail.
Happy holidays all!
My big-little-man turned eight this month. His current passion is Star Wars, and that’s convenient for me because Star Wars is everywhere.
I picked up this banner from my local party supply store for about $3, and we played pin the lightsaber on Darth Vadar:

We pinned lightsabers by printing off paper lightsabers from this post.
At first the kids were, like…
Kids: Hey, Darth Vadar already has a lightsaber!
Me: If you win, you get silly putty.
Kids: Ooooh, can I go first? No me! No me!
Cheap motivational prizes solve pretty much all potential birthday party problems.
I also made a Death Star Piñata:

Really, who doesn’t want to take a whack at the Death Star?
The nice thing about the Death Star is it’s round.

Don’t tell Darth Vadar we built this Death Star around a pink balloon. The piñata paste was made by combining all-purpose flour and water at a 1:1 ratio (one cup water, one cup flour). I dipped newspaper strips in the paste and covered the balloon until I felt like it was strong enough to withstand a rebel attack.

I let it dry for a few days and the cut a hole for the prizes. Then I taped up the hole really well and painted over the entire thing with black and gray acrylic paint (see above).
For the pièce de résistance, I made a Millennium Falcon cake:

I baked two cake rounds, chopped one of the circles up, gave the entire cake a drizzle glaze (regular frosting with extra milk added) of white over they entire cake, and marked it up with gray and black cake decorating gel (click to see a larger step-by-step photo process. I usually frost my cakes with wax paper liners underneath. Then I can remove the wax paper and any frosting drips.

Have you ever wanted a Big Improbable Thing? You know, one of those things you can’t control. And yet, you prepare and plan for it anyway. Because should Big Improbable Thing ever happen, you want to be ready.

{My Improbable Things: Twin A and B.}
That is the heart behind Julie Fogliano’s picture book, If You Want to See a Whale.

In this story, a little boy really, really wants to see a whale. Erin E. Stead’s gorgeous illustrations complement Julie Fogliano’s subtle and enticing text.
This book has an ending that will surprise and delight children. As an adult, I like it because it reminds me that journeys can be just as beautiful as destinations…
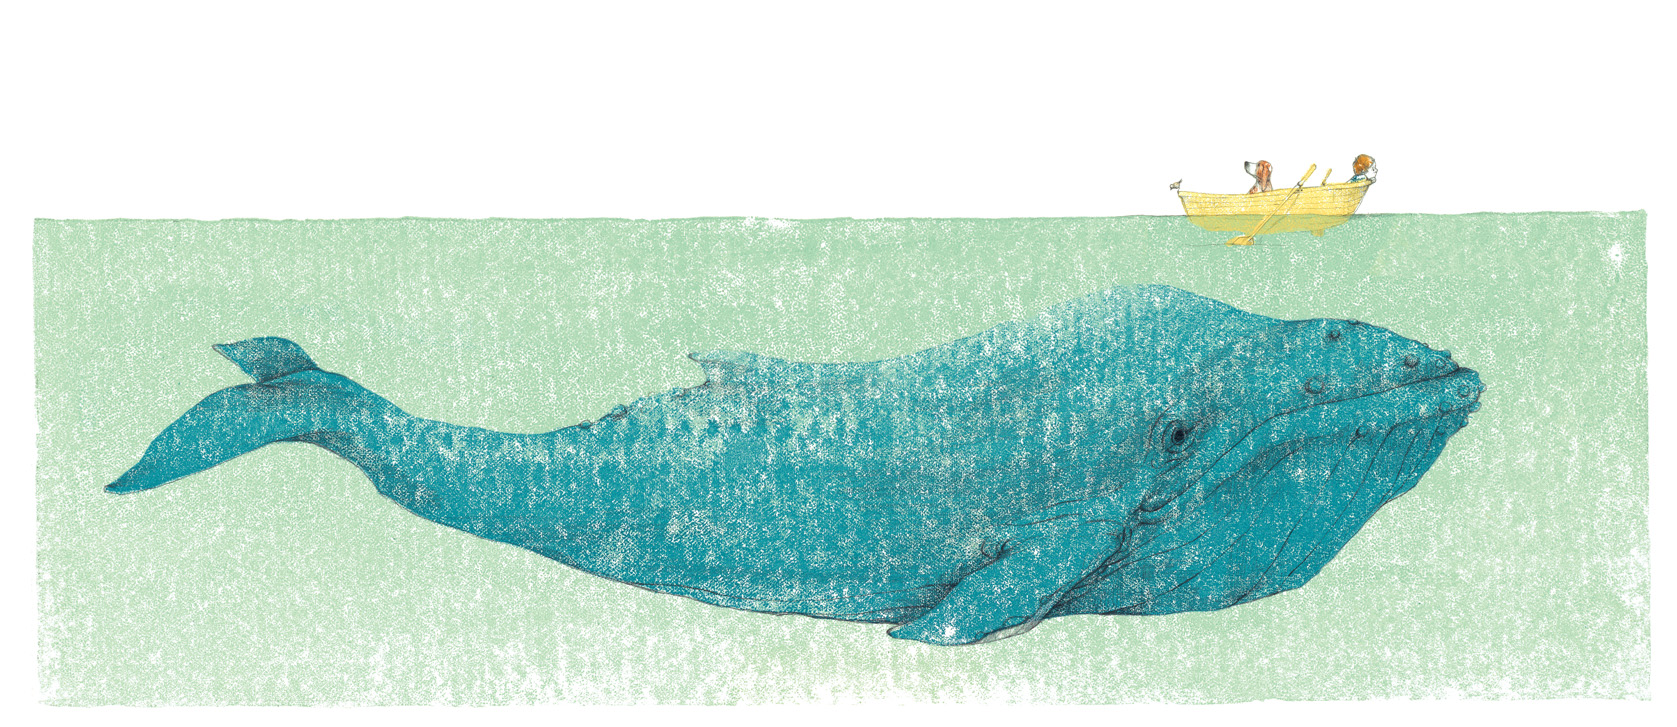
…and Big Improbable Things are still possible.

If you could make any building from children’s literature out of gingerbread, what would it be?
I would love to make The Plaza Hotel from Elouise or Harry Potter’s Hogwarts. I used to make gingerbread castles, creating full scale models from cardboard and etc (hey, I was a civil engineering major).
But these days, with the kids, my gingerbread creations are more modest. This year I made Virginia Lee Burton’s The Little House.

I used the recipe and gingerbread template from Bon Appétit. This recipe is super-delicious, and it makes enough dough for six small gingerbread houses (like the above) or if you are feeling more ambitious…perhaps, the castle from Journey:
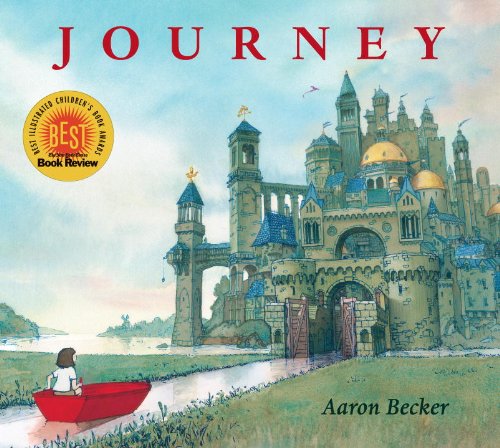
What would you build?

My children went through a phase a while ago where all their speaking vowels became extra extended. It sounded something like this: “I waaaant peanut butter. I doooon’t like tuuuuna.”
And this, “I waaant to plaaaaay. Plaaaay with meeee nooooow.”
It was driving me crazy, so I created a job jar for whining. Every time a child came to me with “the voice,” I sent them to pulled a popsicle stick from the jar. The sticks had a variety of tasks written on them. They included things like:
- give someone a hug
- pick up three toys and put them away
- draw a picture for Grandma
- find two pieces of paper on the ground to recycle
- pick a toy to share with your brother
The tasks were all simple things that 1) required almost no supervision on my part and 2) redirected their behavior. After a child understood their job, I had them put the stick back in the jar to use again later.
I’m not sure whether or not the job jar made this phase shorter, but it made it easier for me to pass through it. And that is a small victory in itself.
Me = 1, Whining = 0
The other day my five-year-old asked me, “What’s a continent?”
Me, “It’s a large land area on a tectonic plate.” (My husband likes to tease me for being incapable of simple explanations. I thought I was keeping it pretty simple, until…)
Him, “What’s a tectonic plate?”
Suddenly, I knew this explanation needed play-doh:

Question: What is a tectonic plate?
Answer: Tectonic plates are pieces of the earth’s crust. The earth’s crust is one of three main layers of the earth, including the core, mantle, and crust.
The core is the center of the earth. It is made mostly of metal and is surrounded by a liquid-ish mantle:

The earth’s crust rests on the mantle:

The crust is where you find people, and continents, and, oceans and….

I tried keeping it simple. How I’d do?
This week I had a hankering for gingerbread. It might be too early for Christmas music and gingerbread men, but it’s the perfect time for ginger-spooks!

Boo! I followed this recipe for ginger cookies, and frosted them monster-style with a simple glaze.
{Note: to pipe designs on the cookies, I filled a sandwich bag with frosting and snipped off one of the corners with scissors. No fancy cake decorating supplies needed!)

They were frightfully good!
We also made paper bag pumpkin puppets. I always keep lunch bags around the house. They are cheap and have so many uses. I cut pumpkin faces and features from construction paper and showed the kids how to glue them to the bags.


Happy Halloween!

I know most of my readers aren’t local to Portland, but it’s a gorgeous place to visit (and live). If you ever find yourself in the Pacific Northwest, here are a few of our favorite family-friendly floral destinations.
1. The Portland Rose Garden

- Best time to visit: June-September
- Cost: Free
- Why we like it: rows and rows of roses for your noses
- Location:400 SW Kingston Ave Portland, OR 97205
2. Wooden Shoe Tulip Farm

- Best time to visit: late March-early May
- Cost: $10/car
- Why we like it: It’s like a trip to Holland without the jet lag
- Location: 33814 S Meridian Rd Woodburn, OR 97071
3. Swan Island Dahlias

- Best time to visit: August-September
- Cost: Free
- Why we like it: Dahlias are my favorite flower. They are a hardy kind of cheerful.
- Location: 995 NW 22nd Ave Canby, OR 97013
4. Crystal Springs Rhododendron Garden

{Photo courtesy of the lovely Marcie Colleen}
- Best time to visit: Spring
- Cost: Free on Tuesdays and Wednesdays
- Why we like it: Rhododendrons are not the state flower of Oregon, but I feel like they should be. They are plentiful, gorgeous, and peak in spring. (Always a welcome sight after a long gray Oregon winter!)
- Location: 6015 SE 28th Ave, Portland, OR 97202
Because I couldn’t choose between Marcie’s photos, here are a few more pictures from Crystal Springs:


It’s not that I’m getting more lazy as a parent (cough, cough). No, surely that isn’t it. However, this time around I didn’t feel overly motivated to start potty training.
For one thing, there are two of them:

Also our summer schedule was crazy. But my biggest reason for the delay was this: I follow the golden rule of potty training…
Positive Reinforcement Only
This rule is about me, not them. Forget potty training in three days. Forget potty training before a certain age or stage; I simply want to be a happy and supportive mother during the process. And up until recently, I was a post-moving apocalyptic mess.
So yes, the babes needed to be ready for potty training. But even more importantly I needed to be ready. ‘Cause I have to be able to smile and say, “Ooooh that was so close!” when they step in their own poop and run around the living room.
Here’s how I approached potty training with my multiples:
1) I didn’t even think about potty training until BOTH twins were giving readiness signs (vocalizing and recognizing body functions, plus an interest in the toilet). Hey, I only wanted to do it once. Perhaps this was unfair to the twin who was ready first, but she never seemed upset about staying in diapers. So we just rolled with it.
2) Even after that I waited until all major family stresses were over: until after we moved and settled into our new house, my older boys started school, and we were in a stable daily routine. I’m a firm believer that you shouldn’t work on too much while potty training… So if a child needs speech or behavior therapy, it might be good to hold off a little longer on potty training.
3) Keep them in diapers or pullups until they consistently poop in the potty. Cleaning urine spills isn’t so bad. The other one… Phew! Giving my twins a safety net, eased the stress for both of us. Some people think keeping children in diapers during potty training just delays their ability to recognize body signals. It does. But I wasn’t concerned about potty training within a certain time frame. Just maintaining sanity.
4) I purchased multiple potty seats for my little multiples because often little bladders need to GO RIGHT NOW MOMMY at the same time.
5) Congratulate attempts as well as successes. One of my twins mastered potty training first, but I encouraged both girls equally. As long as they sat on the potty, they received congratulations, hugs, and high-fives. Yes, there were a lot of false trips. Yes, there were times we all hung out in the bathroom for thirty minutes or more. It’s all part of the process.
6) Remember your multiples will be potty trained before their sixteenth birthday… probably. Who cares if your three-year-old is still in diapers? So what if they can’t start preschool next year? It will happen. Stay positive. Less stress equals more success. If you start and they need to go back in diapers, embrace it. It’ll all be okay in the end.
We are now a (mostly) diaper free home. Wahooooo!
As you might have noticed, I’m on a dry-erase kick. But this is my easiest dry-erase project yet.
Did you know packaging tape works as a dry-erase surface? I didn’t until I tried it out the other day.
I simply printed out a chore chart for my kids and placed a piece of packaging tape over the areas they needed to check off:

I made one for each of my boys. If they get all their chores checked off for the week, we have a special treat on Monday night.
We’ve been doing this for three weeks, and they are now in the “chore routine.” During the first couple of weeks, they forgot a chore once or twice. I let them do double chores the next day to make up for it. Hey, they wanted the treat and I want chores done. Win-win. So far this is working for us.
How do chores work at your house?
My five-year-old starts kindergarten tomorrow (sniff, sniff).

He’s a great kid and he’ll be fine. I, on the otherhand, turn into a bowl of melted butter just thinking about him leaving for school. He’s a joy to have around and one of my biggest helpers with these two:

Like many young learners, my five-year-old is experimenting with his expanding vocabulary. English is a tricky language, and those darn irregular verbs like to trip his tongue. So I made a reference chart and a few sentence puzzle to help him remember how the “to be” verbs change around:

Because the plural verbs are the most consistent, I start by having my son ask the question, “Is there more than one thing I am talking about?” If the answer is yes, then the conjugation is straightforward. If not, we try to pick out the right verb together.
Here are sentence puzzles for the past tense (click on the link for pdf):

You’ll see I only made a singular and a plural sentence. You could modify this for other options (like “I” by taping a picture of your child to the puzzle piece and modifying the sentence with a permanent marker).
Here are the present tense puzzles. This is the most complicated tense, so I made two more options:


Finally we have the easiest tense of all: future tense.

Lastly, these puzzles are meant to be an enjoyable activity. If your five-year-old is frustrated or things are getting “tense,” take a break. It’ll be okay. Irregular verbs are tricky. Overtime your child will master it.
What it looks like:

What it feels like:

Me moved houses! It was a good move for our family, and we are lucky/thrilled/happy to be in our new place. But I also spent most of the last few weeks packing and trying to keep permanent markers and box cutters away from two-year-olds. That’s part of the reason the blog has been quiet this month.
Also, summer isn’t complete without at least a few shenanigans. We’ve been taking day trips to the coast and visiting family.

We went to a carnival at our church last Saturday. The lady at the water booth asked my son, “Is it okay with your mother if you get wet?”
To which he replied, “It’s okay. She’s letting us roam free.”
He summed up my parenting style rather nicely:

I hope you all enjoy a lovely, unstructured, and carefree rest of your summer. See you in September with more crafts, games, and books.
It’s summer and my kids are obsessed with water play. And that’s just fine with me because it’s been HOT.
Here’s a simple water craft they can do inside (on rainy days) or outside (on days like today)…

You will need:
- a paper cup
- crayons (or markers)
- scissors
What to do:

- Color a clown face on the paper cup and cut out the mouth (adults will probably need to help with this part).
- Hold the cup under running water.

That’s it. Easy-peasy and tons of fun.
When I was a kid, I loved comic books. What’s not to like about epic battles between good and evil? Also I might have had a crush on Batman.
But then I got older and realized you don’t need a Lycra outfit or a mask to be a hero. Real heroes simply stand up for the things they believe in, and real heroes show their faces. I still have a soft spot for do-gooders.
So when I received an email from Kate Moore at UNICEF asking if I would make a UNICEF worker for my paper doll series, I jumped at her request.
UNICEF workers help children and their mothers in almost every country.
The hardest part of this project was deciding what UNICEF project to highlight.
Should I cover infant nutrition in Bolivia?

Or increasing vaccination rates in Canada?

Or malaria prevention in Nigeria?

I only had 191 countries to choose from. In the end, UNICEF’s School-in-a-Box project appealed to the teacher in me. It’s an innovative solution to a wide-reaching problem. Here’s the purpose of School-in-a-Box from the UNICEF website:
School-in-a-Box is a portable way to keep kids learning… [and]… education going during times of crisis and conflict, or in the hardest to reach areas.
I love the idea of a portable school for children in need.
Here are the UNICEF worker paper dolls (pdf copies below):
UNICEF School-in-a-Box Paper Dolls Page 1 (pdf file)
Many thanks to
Kate for all her help researching this project.
Note: This post is my way of saying thanks to UNICEF. If you feel like saying thanks to UNICEF, you can do so here or here.
Last summer we regrew green onions and celery from stubs.It worked so well that the celery is now as tall as my two-year-old:

We wanted to see if we could do the same thing with lettuce. We put a Romain lettuce stub in a small bowl of water and waited…

It’s day 14 and we have some respectable looking lettuce leaves. Cool. Huh?
Along with this project we read The Magic School Bus Gets Planted. After reading the book, my five-year-old asked, “How do plants make food out of water and air?” Or…

I could have given him a one word answer (photosynthesis!). But he asked a thoughtful question and I thought it deserved an equally thoughtful answer.
First we talked about what is water made of?
Atoms: atoms are tiny, tiny building blocks. They are like the mini-legos of life. Atoms are so small you cannot see them with your eyes or even a magnifying glass. You need a special looking machine (an electron microscope) to see the biggest atoms. Some atoms like to hangout with other atoms:

And others prefer to keep to themselves:

When a group of atoms hang out together, it is called a molecule.
Water is made of molecules. Water molecules look like this:

Air is also made of molecules. It is made of lots of different molecules, but the molecule that plants use is called carbon dioxide. It is a carbon atom with two oxygen atoms:

Now let’s talk about food, like sugar. Yup, that’s right… some plants use sugar for energy. But they don’t eat it. They make it. Here is what one type of sugar looks like:

Let’s check if we have all the right building blocks. To make sugar we need carbon, hydrogen, and oxygen. Can we get all of those atoms from water and air?
YES! From water we get hydrogen and oxygen, and from air we get more oxygen and carbon. Here is how plants use air and water to make food:

The “big dance” that rearranges the atoms is called PHOTOSYNTHESIS. Photosynthesis means light (photo) and making-stuff (synthesis). Plants take water and air and use light to turn atoms into food. If you have the right building blocks and the right conditions, you can make almost anything.
Note: My seven-year-old liked this discussion, but it was a bit too much for my five-year-old. If this is too much detail for your tykes, here is the two sentence explanation:
Q: How do plants make food out of air and water?
A: Under the right conditions air and water can be turned into sugar (and other foods). The process of turning air and water into food for plants is called photosynthesis.
Extension activity: Playdoh Molecules

What you’ll need
- Different colors of playdoh
- Cut up straws
Form the playdoh into balls and connect them using bending straws bits. See if you can make all the different molecules in this posts.

Last week I was giving my older children their piano lesson, and I thought, “I need a dedicated music whiteboard.”
So we all took a trip to the local music store, and I found what I was looking for. Unfortunately they wanted $56 dollars for the musical whiteboard. $56! That just seemed like a ridiculous number to me.
I didn’t buy it. Instead I stopped by a thrift shop on the way home and picked up a cookie sheet to make my own white board. My total cost of materials was around $6.
What you’ll need:
- a thrift store cookie sheet
- white contact paper
- clear cellophane
- school glue
- a foam brush
- a plastic card (like a credit card)
First I cut the contact paper down to the size of my cookie sheet. This was fairly easy as most contact paper has guidelines on the back. Then I placed my contact paper on the cookie sheet and smoothed out any bubbles with the plastic card. (You can also get rid of bubbles by popping the center with a needle).

After I had the contact paper in place, I drew a musical staff with a permanent pen. If you want a regular board, skip this step.
While I let my marker dry, I cut my cellophane to size. I used the left over plastic from the contact paper to match sizes. Then I painted the top of the contact paper with a thin layer of the school glue.
The cellophane went over the top of the glue (again smoothing out any bubbles with the plastic card).
I let the board dry overnight, and it was ready to use by morning.

Need a last minute Father’s Day gift? Try turning your child’s drawing into a t-shirt for Dad. Here’s how:

What you’ll need:
- a colored t-shirt (we found ours at a thrift shop)
- a piece of cardboard
- a washable marker (we used Crayola fine point)
- a Clorox bleach pen
I put the cardboard between the layers of t-shirt and had my son draw a portrait of my husband on the shirt with a washable marker.
After he was finished, I took the bleach pen and copied over his drawing. I let it set for a few minutes. Then I washed out the bleach (quickly!) in cold water. Finally I ran the T-shirt through a washing machine cycle.

The entire process (minus the wash cycle) took all of fifteen minutes. I think my husband will like his new personalized t-shirt. It’s way cooler than a tie.
View Next 25 Posts


NOW I understand these things! What great examples and explanations. I wish I had little kids to practice on. Hmmmm…..I *do* have these grandchildren. Thank you!
Love your Venn diagram. My children are definitely a lot like bears much of the time – sometimes lovable, huggable bears, other times fierce bears who roar and scratch their claws on the furniture.