


.jpg?picon=694)
This is Day 2 of the Blogging A to Z Challenge.
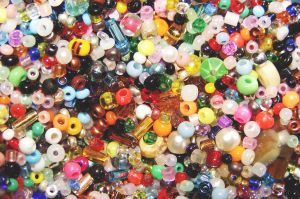
If you’ve ever walked into a bead store, you know it’s an amazing experience. Shelves line the walls and each shelf is filled with hundreds of different types of beads. Metal beads, shells, glass beads, colorful beads, simple beads, a bead for every taste, personality and jewelry type. You almost cannot help but buy a bag of beads with no plan for them.
Whether you have a bag of beads at home waiting for inspiration or you are interested in creating custom jewelry, here are two projects you can do yourself or with your preteen or teen.
Project #1 – Beaded Bracelet
You’ll need:
• Wire or nylon thread.
Wire is more durable; however, it is less flexible. If you want a lot of movement in your bracelet you may prefer nylon thread.
• Crimp beads and the little beads you place on the end to keep the other beads from falling off
• Crimp pliers
• Beads of your choice
• Clasp
Step #1
Plan your design. Lay out your beads the way you’re going to place them on your bracelet.
Step #2
Cut your wire or thread. Add a few inches on the ends so you have enough room to work with.
Step #3
Slide a crimp bead on one end of the wire and slide it through one end of your clasp. Then slide the end of your wire back through the crimp bead so you’ve created a loop with the clasp in the loop.
Step #4
String your beads.
Step #5
Add your crimp bead and the other end of your clasp and you’re done. You now have a custom piece of jewelry you created yourself.
Project #2 – Caribbean Foot Jewelry
If you have many smaller beads, or you’re ready for a more difficult beading project, you can make foot jewelry. In addition to about 50 – 75 small glass beads you’ll need:
• Elastic, about two and a half feet
• White glue
• Four silver or gold 4 mm beads
Step #1
Stiffen the ends of your elastic with white glue and let dry.
Step #2
String 12 glass beads on the elastic to the center of the cord. Make sure you have enough to go around your toe (the long one next to your big toe).
Step #3
Slide both ends of the elastic through a 4mm bead. This will create a loop around your toe. You may want to position the elastic around your toe as you create the jewelry to make sure it sits where you want it and fits how you want it to.
Step #4
String about 1″ of beads on each end of the elastic. Make sure they mirror each other and are the same length.
Step #5
Again, push both ends of the elastic through a 4mm bead. Repeat this process a few times until you’re up next to your foot. Then slide your beads on in a pattern until you’ve reached the back of your ankle. You should now have a circle of beads around your ankle and a chain extending down to your toe. Tie off the back of the bracelet with a double knot and trim the loose ends.
That’s it!
Beading is fun and easy when you have the right tools and a plan.
Go ahead, visit that bead store and let your creative side come out.
Imagine what you and your teen can create and then make it happen.
Here’s a book you might find helpful, too:
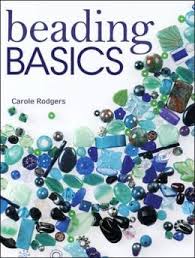
Title: Beading Basics