JacketFlap connects you to the work of more than 200,000 authors, illustrators, publishers and other creators of books for Children and Young Adults. The site is updated daily with information about every book, author, illustrator, and publisher in the children's / young adult book industry. Members include published authors and illustrators, librarians, agents, editors, publicists, booksellers, publishers and fans. Join now (it's free).
Login or Register for free to create your own customized page of blog posts from your favorite blogs. You can also add blogs by clicking the "Add to MyJacketFlap" links next to the blog name in each post.
Blog Posts by Tag
In the past 7 days
Blog Posts by Date
Click days in this calendar to see posts by day or month
Viewing: Blog Posts Tagged with: how to, Most Recent at Top [Help]
Results 1 - 25 of 347
How to use this Page
You are viewing the most recent posts tagged with the words: how to in the JacketFlap blog reader. What is a tag? Think of a tag as a keyword or category label. Tags can both help you find posts on JacketFlap.com as well as provide an easy way for you to "remember" and classify posts for later recall. Try adding a tag yourself by clicking "Add a tag" below a post's header. Scroll down through the list of Recent Posts in the left column and click on a post title that sounds interesting. You can view all posts from a specific blog by clicking the Blog name in the right column, or you can click a 'More Posts from this Blog' link in any individual post.
Author and illustrator Joyce Wan is back on Ready Set Draw! This time around she teaches you how to draw a delicious treat from her board book, You Are My Cupcake! No matter your skill level you will be able to draw a super cute cupcake. Go wild with your markers, colored pencils, or crayons by adding sprinkles and your favorite toppings.
When you’re finished drawing these cupcakes perhaps you’ll be inspired to make a batch of your own. Watch Joyce’s episode of StoryMakers, with Kathleen DeCosmo, to learn how to make cupcakes and easy toppers!
If your child or student isn’t ready to draw their own cupcake, they can decorate this printable:
Click the image above to download the full-sized printable.
Did you, a child, or student draw cupcakes using this video? Share your images with us via Facebook, Instagram, or Twitter! Use the hashtag #ReadySetDraw on Instagram and Twitter too. We can’t wait to see what you’ve drawn!
You Are My Cupcake
Written and illustrated by Joyce Wan
Published by Cartwheel Books
A scrumptious board book, filled with sweet terms of endearment. This bite-sized board book is an ode to all the names we call our children: cutie pie, sweet pea, peanut, pumpkin. With a candy-colored palette and irresistible art with glitter and embossing.
ABOUT JOYCE WAN
Joyce is inspired by Japanese pop culture, Scandinavian design, modern architecture, and the little things that put a smile on her face. In Joyce’s perfect world “everything would be cute, round, and chubby,” which is evident in her illustrations. Joyce is the author of several bestselling board and picture books including You Are My Cupcake and The Whale in My Swimming Pool, a Spring 2015 Junior Library Guild Selection.
Although Joyce’s parents had the equivalent of a middle school education, and her mother wasn’t able to speak English, her mother took Joyce and her siblings to the library every week. Picture books were integral to Joyce’s love of reading as she and her siblings made up stories to go along with the illustrations. Joyce counts the determination of her parents as a driving force behind her perseverance and success. “When I first started Wanart, I was working at a 9am-6pm job at an architectural firm. I spent many late night hours on my own business with only a few hours of sleep in between the two “jobs”. I did this for two years before I quit my full time job to pursue my own business full-time.”
Joyce graduated from Barnard College, Columbia University in New York City with a liberal arts degree in Architecture. Joyce teaches greeting card design and art licensing at the School of Visual Arts. The self-proclaimed night owl prefers drawing and writing in the early morning hours “when everyone’s asleep and the world is quiet.” Joyce lives in Ridgewood, New Jersey with her husband. The architect turned author and self-trained illustrator hopes to inspire people to “embrace the spirit of childhood and follow their dreams.”
Author and illustrator Roxie Munro returns to Ready Set Draw!, with a new project inspired by several of her books, including Market Maze. In this episode Roxie teaches you how to draw your very own busy random Roxie reversing maze! Go above, go under; make turns and twists. There are no mistakes, only opportunities to create new paths.
Did you, a child, or student draw their own maze using this video? Please share your images with us via Facebook, Instagram, or Twitter! Use the hashtag #KidLitTV on Instagram and Twitter too. We can’t wait to see what you’ve drawn!
Market Maze
By Roxie Munro
Published by Holiday House
Eight trucks hit the highway in a colorful and mesmerizing maze book that helps kids understand how food gets to their tables. In eleven intricately drawn mazes, eight vehicles, each carrying a different product, are on their way to the city. Fish, apples, dairy products, corn, vegetables, flowers, eggs, and baked goods all travel through colorful and minutely detailed landscape mazes to reach the city farmer’s market. Information on all of the products and their journeys is included along with answers to all of the mazes. For additional fun kids are challenged to look for objects hidden on each spread.
ABOUT ‘MAZEWAYS A TO Z’
Mazeways A to Z
By Roxie Munro
Published by Sterling Publishing Company
Prepare to be astounded, because these are no ordinary mazes! Welcome to Mazeways, where A is for Airport, B is for Boatyard, C is for Circus, and everything is exciting. In this eye-opening world, each letter in the alphabet transforms into a fantastic maze and fingers have to trace a path through fantastically detailed environments. Navigate these puzzles as you would if you were traveling in real life: drive your car on the right side of the road, cross the street only at the crosswalks, and feel free to walk around furniture or landmarks as long as nothing blocks your path. Each maze comes with directions on how to launch into the adventure, and features really cool things to find and guide you along the waylike crocodiles and seals, clown cars and motorcycles, baseball diamonds and sunken treasure, and more!
Find more of Roxie’s books, including more mazes, here.
ABOUT ROXIE MUNRO
Via RoxieMunro.com
Roxie is the author/illustrator of more than 40 nonfiction and concept books for children, many using “gamification” to encourage reading, learning, and engagement. Her books have been translated into French, Italian, Dutch, Chinese, and Japanese.
Roxie was born in Texas, and grew up in southern Maryland, by the Chesapeake Bay. At the age of six, she won first prize in a county-wide contest for a painting of a bowl of fruit. She has been a working artist all her life, for a while freelancing in Washington DC as a television courtroom artist. It was great training for life drawing, concentration under pressure, and making deadlines. Clients included CBS, the Washington Post, and the Associated Press. Fourteen of her paintings have been published as covers of The New Yorker magazine.
She also creates oils, watercolors, prints, and drawings, primarily cityscapes, which are exhibited widely in the US in galleries and museums. Roxie’s work is in numerous private, public, and corporate collections.
Roxie Munro studied at the University of Maryland, the Maryland Institute College of Art (Baltimore), earned a BFA in Painting from the University of Hawaii, attended graduate school at Ohio University (Athens), and received a Yaddo Fellowship in Painting. She lectures in museums, schools, libraries, conferences, and teaches in workshops.
Many oils and watercolors are views from the roof of her sky-lighted loft studio in Long Island City, New York, just across the East River from her home in mid-Manhattan. Roxie is married to the Swedish writer/photographer, Bo Zaunders.
Renaissance woman Alex De Campi is not only a writer and director…she also letters her own comics and now she’s shown you how you can too! I am one of those rare writers who letter their own comic books. It started off, as so many things do, because we couldn’t afford a decent letterer. Then […]
0 Comments on Alex de Campi shows you how to letter and teases Mayday as of 1/19/2016 7:55:00 PM
Title: how to
Written and illustrated by: Julie Morstad
Published by: Simply Read books, 2013
Themes/Topics: how to guide, imagination, whimsy, wonder
Literary awards: Marilyn Baillie Picture Book Award (2014), Christie Harris Illustrated Children’s Literature Prize (2014)
Suitable for ages: 6-9
Opening:
how to go fast
Synopsis:
This imaginative ‘how to’ book explores … Continue reading →
The response has been great! We’ve assembled a nice group of folks who are looking forward to their free daily writing tips all through the month of November.
There’s still time to sign up. Just go here for all the details and to get the free download of TOP 10 MISTAKES WRITERS MAKE. And be sure to tell your other writing pals. The more the merrier!
0 Comments on Come join us for November writing tips! as of 10/29/2015 11:41:00 AM
November is novel writing month! I’ve decided to expand the secret gift I was going to send a writer friend of mine, and send out daily writing inspiration and tips to anyone else who would like them! Here are the details. Sign up and let’s write!
0 Comments on Sign Up for November Writing Tips! as of 10/15/2015 9:34:00 PM
Yep, I signed up. Why? Because as much as I enjoy eating all the chocolate in the world when I’m working on a book or screenplay, I don’t actually like the brain fog that comes with it. So I’m more than happy to turn to science to help me solve the sugar thing once and for all.
If you have your own particular food issues and you’re interested in joining me, here’s the final video in Dr. Susan Peirce Thompson’s excellent, informative Food Freedom series. She’s also giving some free webinars with Q & A this week. I signed up for the one on Tuesday afternoon.
Like I said before, it’s not like I’m particularly proud of fueling my creativity with so much sugar over the years, but I do see from your emails and comments to me that you appreciate me talking about it in public. So here I am again! If that helps you, I’m happy.
Here’s to eating in a way that feels easy, automatic, and free. ‘Bout time!
~Robin
(Photo credit: Maja Petric, via Unsplash.com)
0 Comments on Bright Line Eating Boot Camp as of 10/6/2015 2:33:00 PM
A lot of you have written to me in the past few days thanking me for sharing my own struggles with sugar addiction (a.k.a. my kryptonite), and also for sharing Dr. Susan Thompson’s videos about what she’s learned as both a neuropsychologist and as a formerly obese woman about how to rewire our brains and finally get rid of cravings once and for all. Yes, please, now!
(And by the way, thank you for all your emails and comments! I really do love the solidarity we can have about this topic. It’s not something any of us are particularly proud of, but it feels good to be able to talk about it with each other!)
The third video in Susan’s series is now out, and it’s the best so far: about the 5 critical ways we can rewire our brains so that eating the right foods, and not eating the wrong foods, becomes completely automatic.
If you haven’t already watched videos one and two yet, I highly recommend them, since each is chock full of all sorts of cool science about why we crave what we do, why willpower fails us (it’s not the right tool), and other answers to questions you’ve probably had as you dive into that fourth serving of cookies, candy, cake, or ice cream. I know because I have been there, my friend. As recently as last week!
Hope you love this last video as much as I did! LEARNING! Love it!
~Robin
(Photo credit: Alex Jones, via Unsplash.com)
0 Comments on How to rewire your brain when it comes to food. as of 1/1/1900
Read fast, because I have the feeling I’ll be deleting this in a few days. It’s not usually the kind of thing I enjoy talking about in public. But I’m doing it for the same reason I posted about my experience of having horrible acne when I was in high school and college: I actually think I can help people. So here goes:
I have, at various times in my life, been merely overweight, then obese, then heavy, then down to slim and trim, then up a little to what I considered “sturdy,” rather than fat, then down a little, up … a lot of you can relate to the pattern.
And right now, coming off multiple months in a row of writing for sometimes 18 hours a day, not getting as much exercise as I usually love, and powering my books and screenplays with WAY too much sugar, I feel pretty gross. I still love myself and want to be nothing but kind to myself no matter what, but I know my “kindness” of feeding myself a whole bunch of chocolate to keep up my energy and creativity during this time of intense work has actually not been a kindness at all.
Sometimes information comes to you at just the right time. Or maybe it’s always out there, but you’re not ready for it until you are.
A week or so ago, a friend of mine sent me a link to an interview with Dr. Susan Peirce Thompson. She’s both a psychology professor and a formerly obese woman. And I just loved her energy. I loved her sincerity and her passion for teaching what she knows about finally breaking free of food addictions and finding our individual bodies’ own natural weight. It was a theme I explored in my novel FAT CAT, and it’s definitely something that speaks to me personally.
(And by the way, when I was researching and writing FAT CAT, I completely gave up sugar. Weight melted off me. I felt great. My brain was clear, I had incredible energy … and yet here I am again.)
What drew me in was Susan’s own story about appearing to be very accomplished in some respects — highly educated, very successful in her career as a professor — but at the same time feeling like a failure because she was always overweight. How could she be so smart in other areas of her life — how could she know so much about science and psychology — and yet still look like … that?
Then one day she was finally ready to turn her years of research and knowledge on herself and figure this out once and for all. And to her utter delight, she discovered it wasn’t an issue of willpower or weakness or laziness, it was actually just a matter of brain chemistry. Some people are more susceptible to certain foods than others are. It’s not a moral issue, it’s just biology. And we can work with biology.
For some of us, sugar is as addictive as cocaine or heroine. If you’ve felt as enslaved by sugar as I have at times, you know it absolutely feels like a drug.
By the end of watching that interview, I knew I wanted to hear more of what Susan could teach. So I actually contacted her to find out when her next course was. Turns out it starts in just a few weeks. PERFECT.
A lot of you have written to me over the years after reading FAT CAT to share with me your own struggles or journeys about food and weight loss. I’ve read them all, I’ve answered them all, because I know what you’re going through and I want to try to help where I can. I’ve passed along resources I relied on in writing the novel, such as websites and books and cookbooks. I hope all of you who have written to me have gotten great value out of that information.
So now I’m passing along Susan’s free video series, too. I’m also including a link to her Susceptibility Quiz, which will evaluate how high or low you are on the scale of being susceptible to certain foods. I’m a 7 out of 10. Just saying.
The first video is out now, and the second and third will be released over the next few days. I’ll add those links then.
Good luck, fellow foodies! Hope this information helps. Pass it along to other foodies if you think they’ll like it, too.
And here’s to freedom. ‘Bout time!
xoxo
Robin
6 Comments on Confessions of a fatty., last added: 9/27/2015
Great post, Robin! Sugar can mess with you in so many ways. When I eat sugar it revs up my appetite so much that I can’t sleep through the night without getting up and eating. It also creates a cycle of low to high blood sugar that leads to migraines for me. I am much happier when I avoid sugar, not to mention well rested, and more energetic, but it’s hard to give up! I find avoiding it takes a lot of commitment, even though sugar makes me feel quite sick, which goes to show how addictive it is.
Robin said, on 9/27/2015 1:41:00 PM
Hey, Amy, thanks so much for chiming in! (By the way, I’m usually a lurker on your FB posts rather than an actual commenter, just because I don’t always have something to say about them, but this is a great chance to tell you I love what you’re putting out there — very thoughtful and/or entertaining!). Anyway–
The reason I’m so into how Susan is teaching it is because she completely identifies my own embarrassment: just like she says, a lot of us are very well-informed about health and nutrition, we’re smart, we get it… but that doesn’t mean we do it. Yep, raising my hand there, Susan.
Sometimes I just need a guide. Yes, I could figure it all out for myself, but I’m a great student, so putting myself in a class setting really works for me.
Thanks for your sugar testimonial/confession. Solidarity!
Elizabeth said, on 9/27/2015 4:39:00 PM
I’ve always been overweight and come from a long family history of obesity and attendant health issues. But here’s a thing. In 2012, I joined Weight Watchers. I followed their system religiously and lost 75 pounds in six months. I looked great…but at the same time, my mental health issues (depression, anxiety, undiagnosed Asperger Syndrome) were running amok. I lost 75 pounds and then I tried to take my own life. When I got help, I gained back all that weight.
I feel like a failure in some ways, but at the same time, weight loss is going to be forever tied in my memory to that darkest of hours. I want to be healthier; I don’t ever want to spend another night on the bathroom floor thinking that the world would be better off if my life ended on the business end of a razor blade. Sometimes I wonder where the balance is and I’m still trying to find it. That search isn’t helped by the people who tell me I was “so much prettier when I was thin.”
But all of it–Asperger diagnosis, med change, therapy, more therapy, weight loss, weight gain–all of it needs to come in balance. My writing, too, is often fueled by coffee laced with way too much artificial flavored creamer; my one published story is practically an ode to Wild Mountain Blueberry and amaretto creamer.
All things in balance–caffeine and sugar, too. I deserve to be the best me I can be, right? Here’s to the journey.
Jessie Andersn said, on 9/27/2015 4:52:00 PM
This is a good word, Robin! I’m passing it along. I think it’s something all of us struggle with. Thanks so much for sharing.
Robin said, on 9/27/2015 4:56:00 PM
Thanks, Jessie!
Robin said, on 9/27/2015 4:56:00 PM
Elizabeth, this is a very brave and open thing to share, and I appreciate you for doing it. It also makes me so sad because I THINK YOU’RE WONDERFUL! You’re one of the kindest people I’ve ever met, and please know that you’ve added value to my life in the time we’ve spent together in person and online, and I know you’ve been important to other people, too.
But I also know that sometimes hearing that isn’t enough to make you feel happy in dark times. Still, that won’t ever keep me from saying it!
Food issues, weight issues, health issues … they really interfere with us using our wonderful creative minds for better things besides obsessing about what we just ate, what we’re going to eat next, wish I hadn’t eaten that, I should probably eat that …
I think what you said is absolutely the bottom line: we all just want to feel healthy. No matter what size we are, how we look — we just want to feel great. All the time. Every day. And hearing “You used to look so much better!” – ugh. So not helpful.
It’s an internal and personal issue. We want to feel how we feel at our own best. It’s up to us to decide what that is.
I support you, Elizabeth, in being yourself no matter what! That self is a beautiful person!
Some writers rely on drugs and alcohol. Not me. I just finished writing a screenplay fueled mostly by coffee and Reese's peanut butter cups. Soooo much better, right? *cough*
One of the reasons I wrote my novel FAT CAT was that I was an overweight teen (and adult, at times), and I wanted to sit down and research everything I could find about food, weight loss, and healthy eating. Then I came up with the science project plan for my heroine, Cat, to put herself through. I even did it myself while I wrote the book so I could accurately depict what Cat was feeling from day to day.
And the hardest things for both Cat and me to give up were -- you guessed it -- sugar and caffeine. Cat's withdrawal struggle in the novel was mine. But once I got passed that, boy, did I feel great! But then after I finished writing it, I eventually slipped right back into my old habits. And to be honest, I'm still struggling with that today.
Which is why I'm so excited about this free video series from Dr. Susan Peirce Thompson. She's a tenured psychology professor with a Ph.D. in Brain and Cognitive Sciences (and you know how much I love SCIENCE!). She also used to be obese. I always love to learn from someone who's been on the front lines and has figured out how to do something better.
For years now Susan has been teaching her findings in her college course on the Psychology of Eating. But last year she realized she should make that same information available to more people. She decided to create her free video series to share the truth about the psychology and neuroscience of weight loss and food freedom.
I'm glad she has! I've already listened to some of her presentations, and WOW. So much of what she had to say really hit home.
I’m so excited by these books, I have to pass them along.
First of all, right now you can get for the incredibly low price of $20 this entire story bundle of writing books. I would have bought just one of the books on my own–the horse one by Judith Tarr, since I’m writing a lot of horse scenes these days for The Bradamante Saga and yes, I’d like to make sure I get them right–but then once I saw all the other awesome craft books in this bundle: SOLD. Because every writer can get better, and it’s such a pleasure to read a great craft book by authors who are experts in their field.
And speaking of authors who are experts in their field, the great young adult author Tom Leveen now has a new book out on writing dialogue. Before turning to novels, Tom spent many years in the theater as both an actor and director. I’ve taught writing workshops with him, and his tips for writing great dialogue are always FANTASTIC. Treat yourself to this book. You’ll learn a ton.
That’s it for now, gang. Happy Writing!
0 Comments on For My Writing Friends: Some Great Books To Help You Up Your Game! as of 5/15/2015 12:27:00 PM
Did you know you can get your ebooks signed and personalized? I didn’t until about an hour ago (thank you, BH!). There’s a service called Authorgraph that allows you to request and collect signatures and messages from your favorite authors.
I thought the above illustration was a good fit with today’s post. Since I feel that this post will help you stir up you manuscript to keep your readers reading, just like illustrator Alik Arzoumanian did letting her cute lady stir up the sky.(Note: I am looking for artwork to show off)
1. Keep solving problems and adding new ones. Mix up the problems by using physical, logistical, and ones with other people.
2. Make your MC be in a worse place than before the last problem.
3. Beware of the “one Darn Thing After Another” Syndrome. You don’t want your MC to always be stuck dealing with things that don’t change their circumstances.
4. Deliberately shorten your sentences in tense scenes.
5. If you keep your chapters short, you will lore the reader into reading a little more before taking a break.
6. Stun your protagonist with a negative surprise that comes out of the blue. Shock your hero and you will shock your reader into reading more by ramping up the tension.
7. Delay revealing important information to ratchet up the tension. Let your readers worry about unanswered questions.
8. Contract you protagonists universe by making sure their are consequences for each choice. Lost opportunities add tension. When he chooses one option, he will no longer be able to purse the other good things he might have bee able to do.
9. Make an ally into an oppositional character with a conflicting goal.
10. Use dialogue to imply thing that are not directly said. Add in ironic statements to keep the reader wondering.
11. Make sure all the actions are built upon, leading to something. Look for places in your story that are dead ends.
12. Each scene must have a purpose – pointless events – excessive explanations – backstory. You might want to note the purpose after the first draft to remind you why you included it. This will make it easier to see if you need to eliminate it in later revision.
Do you have any other things you do to avoid reader boredom?
Hi, everybody! Yep, it’s time. Back by popular demand (and to remind myself, in addition to all of you), it’s the New Year’s Eve Ritual. Here’s how it goes:
Years ago a friend of mine told me about his Korean mother-in-law’s tradition for New Year’s Eve. Her theory was that you want to go into the new year the way you want the rest of the year to go. If you want abundance, ease, order, fun, etc., these are among the things you do:
Fill your car with gas.
Fill your cupboards and refrigerator with groceries.
Put money in your pocket.
Catch up on your bookkeeping/bills.
Clean your house.
Catch up on your laundry and ironing.
Clear out any old clothes in your closet that don’t fit or that you don’t absolutely love anymore, and give them away so someone else can start enjoying them right now.
Catch up on your beauty routine (get a fresh haircut or color your hair, do your nails, shave/wax, etc.)
Eat the kind of food that you love.
Pick an event for yourself on New Year’s Eve that symbolizes the kinds of things you want to do more of in the coming year.
That’s just the base list to get you started. The fun is in adding your own items year by year. Maybe you want to spend the day reading, to make sure you read more books in 2015. Or maybe you want to see a great movie. Or spend time with your loved ones. Or get more sleep! Pick something you’ve been meaning to move to the top of your list for the coming year, then treat yourself to it right away. We all need to practice being sweeter to ourselves. The day leading into the new year seems like an excellent time to start.
Enjoy your fresh start! And Happy 2015 everyone!
0 Comments on The Clean Slate New Year’s Eve Ritual as of 12/31/2014 4:47:00 AM
Yvonne Ventresca (Pandemic author) sent me a note pointing out all the wonderful writing worksheets on Jami Gold’s Blog. I wanted to make sure I pointed out all the helpful information you can find, download, and use on her site.
Last week we talked about the Seven Point Story Structure System. You can find worksheets for other story structure systems to use on Jami’s site, too.
I particularly like the one below because you can use to see if each scene in your manuscript has what it takes when you revise.
Here is Jami Gold’s Elements of a Good Scene Worksheet from her blog:
Full Beat Sheet Basics OnDemand Workshop Information:
Beat sheets, long used by movie scriptwriters, can also help us create strong stories for our novels.
Don’t know what beat sheets are or how to use them?
Do you write by the seat of your pants and don’t want to plan your story in advance?
Never fear—learn the terminology, uses, and ways to adapt beat sheets to our writing methods. At the end of this class, students will have an overview of story structure and beat sheets:
Introduction to story arcs
Introduction to beats and terminology
Digging deeper to avoid formulaic clichés
Using beat sheets to find unnecessary scenes and pacing issues
How those who write by the seat of their pants can use beat sheets too
A little bit about Jami: After escaping the corporate asylum by leaving a clone in her place, Jami Gold moved to Arizona and decided to become a writer, where she could put her talent for making up stuff to good use. Fortunately, her muse, an arrogant male who delights in causing her to sound as insane as possible, rewards her with unique and rich story ideas. Fueled by chocolate, she writes paranormal romance and urban fantasy tales that range from dark to humorous, but one thing remains the same: Normal need not apply. Just ask her family—and zombie cat.
darlenebeckjacobson said, on 12/10/2014 9:42:00 AM
What a great post…and just in time for my revision. I’m having some trouble with scene content, and will use Jamie’s guides to help things along. Thanks Kathy and Jamie!
Donna Maloy said, on 12/10/2014 9:43:00 AM
Wow, thanks! These are great for us plotter-people.
Kathy Temean said, on 12/10/2014 10:37:00 AM
Donna,
I thought so, too. I’m going to try them out as soon as I get the Christmas decorating done.
Happy holidays,
Kathy
Kathy Temean said, on 12/10/2014 10:38:00 AM
Darlene,
That’s the first one I am going to use.
See you soon,
Kathy
Tracy Campbell said, on 12/10/2014 1:47:00 PM
Yes, Jami’s blog is chock full of writing goodies. Glad to see her on your blog, Kathy. :-)
writersideup said, on 12/10/2014 9:20:00 PM
Ooooooh, Kathy, you KNOW how I love charts! lol This one is great only I know I’d have to redo it so that the column headings didn’t read top to bottom! Love this! Thank you :D
sindhusays said, on 12/11/2014 7:13:00 AM
Thanks for this post, Kathy. Jami’s blog is a gold mine of ideas and solutions. Love it!
Kathy Temean said, on 12/11/2014 3:36:00 PM
Donna,
You don’t have to do that. Jami already has it that way. I changed it so people could read it on the blog. It was too small to read when I reduced it.
Kathy Temean said, on 12/11/2014 3:38:00 PM
Tracy,
I’m glad I found her to put her up. I am sure her worksheets will help a lot of writers.
To build a story you must have a story in mind. Plot – characters – conflict. Before you start to layout your plan for that book Dan Wells tells us, don’t start at the beginning, but start at the end. This is not the last chapter. It is the climax. Figure out the external conflict and internal conflict.
Once that is done then go to the other end, the beginning and start. Normally a good book will take a weak or flawed character on a journey that ends with them growing in some way. By the end, they are a better or stronger person because of their journey. I’ve heard Richard Peck tell writer that he always rewrites the first chapter after he is finished the first draft. He says you can’t know where to start until you figure out how the story ends. He is doing the same things as what Dan is suggesting, except Dan is trying to save you from having to rewrite the first chapter.
This system can be applied to almost any writing, including short stories and novellas.
Here are the notes I wrote while watching the videos below:
The Seven Points:
Hook – Starting state loser – weak – flawed.
Plot Turn 1: Introduces conflict. Just as the midpoint moves you from the beginning to end, Plot Turn 1 moves you from the beginning to midpoint. Call to adventure. Introduces the conflict. The character’s world changes: Meets new people – discovers new secrets – follows the White Rabbit.
Pinch 1: Applies pressure – something goes wrong – bad guys attack and the MC is forced to go forward – often used to introduce the villain.
Midpoint: Learns the truth. This is wear the MC changes from reaction to action.
Pinch 2: Applies more pressure until the situation seems hopeless. A plan fails – a mentor dies, leaves the hero alone – the bad guys seem to win. These are the jaws of defeat from which your hero will be snatching victory. Make sure the teeth are sharp.
Plot Turn 2: Moves the story from the midpoint to the end. At the midpoint your MC is determined to do something, and finds the resolution you do it, so Plot Turn 2 is where the MC obtains the final thing they need to make it happen. “The power is in you!” Grasping victory from the jaws of defeat. MC has the piece they need even if they don’t realize it. The piece that gives the character something they decide to do in the climax.
Resolution – What is the climax? MC succeeds, and is now a changed person.
The story is not complete. It is just a skeleton, and needs flesh to fill it out: Rounded characters – Rich environments – Prologue? – Try/Fail cycles – Subplots.
If you haven’t watched Dan Wells videos, you might want to take a few minutes to do so. At least bookmark this page, so when you have a half hour you can watch without wasting time to find it.
Jennifer at Write Kids' Books said, on 12/2/2014 4:08:00 AM
I like this seven-point structure because sometimes, the classic 15-point “beats” system seems too elaborate for a children’s book, particularly one without a “B” plot. Thanks for sharing it in such a clear and understandable way!
Thanks Kathy! Went to a recent plot workshop with Mina Witteman based on Save the Cat. This is a great review!
Kathy Temean said, on 12/5/2014 4:05:00 PM
Laurel,
I know many writers know about the 7 Point System, but sometimes we pick up things we forgot when we read something again. Or sometimes we say we are going to try something, but you haven’t tried it yet. So I am glad you let me know you thought it was a good review.
I have been trying to share Gregory Manchess’s art for most of this year. He is a very talented artist, but a very busy artist. He exhibits all over the world, teaches workshops, lectures at universities, plus everyone is trying to bang down his door for a little piece of his genius talent. I gave up on getting the answers to my too many interview questions and showing him off without the interview. But there is a lot of meat to this post with a lot of tips for illustrators, so take a look and don’t miss the link to his two hour “How to” video.
Creating a moment that communicates emotionally with the viewer is the essence of Gregory Manchess’ artwork. A native of Kentucky, he spent two years as a studio illustrator with Hellman Design Associates before striking out on his own in 1979.
He combined his love for fine art and science fiction and began his freelance career painting for OMNI magazine. His versatility and broad range of interests allowed him to crossover to mainstream illustration. There he was able to expand his client work to include covers for Time, Atlantic Monthly, spreads for Playboy, Omni, Newsweek, and Smithsonian, and numerous book covers.
Manchess’ interest in history and his excellent figure work has made his paintings a favorite choice of the National Geographic Society on many occasions, including an expedition down the Fond du Lac river in Canada for the 1996 article David Thomson: The Man Who Measured Canada.
Widely awarded within the industry, Manchess exhibits frequently at the Society of Illustrators in New York. His peers at the Society presented him with their highest honor, the coveted Hamilton King Award in 1999, and a year later, the Stephan Dohanos Award.
Manchess’ work has also been recognized in the children’s book market. His latest children’s book illustrations narrate the story Cheyenne Medicine Hat about wild mustangs. A lavishly illustrated limited edition of Robt. E. Howard CONAN stories with over 60 paintings, is due out in 2010. He has recently finished 10 murals for a traveling exhibition on the Pirate ship, Whydah, for the Nat’l Geographic Society. His painting of the Oregon coast was used for the 2009 Oregon Statehood Stamp by the USPS.
Gregory is included in Walt Reed’s latest edition of “The Illustrator in America, 1860-2000.” He lectures frequently at universities and colleges nationwide and gives workshops in painting at the Norman Rockwell Museum in Stockbridge, MA, and the Illustration Master Class in Amherst, MA.
Here are a few pictures showing Gregory’s process:
Thumbnail sketch for layout.
Character sketches
Sketches for the wolves
Cleaned up sketch
Sketching in more detail.
Adding Shadows
Adding foreground characters
Continuing to develop sketch.
Final Sketch
Final Painting done in oil.
This is the final cover for LORD OF CHAOS published by Tor.
You can view a two hour video of Gregory’s painting process available as a download from http://Conceptart.org
One of Gregory’s many murals. Must have been fun to see it on the top of a NYC building.
ABOVE and BELOW: Gregory’s illustrations have been in National Geographic Magazine.
Gregory also was chosen to do a few postal stamps.
The Society of Illustrators exhibited 50 of Gregory’s illustrations in 2013.
ELEVEN GREGORY TIPS:
Value range. I start with darks first, to get the deep shadows laid in. Obvious places: nostrils, eyelids and eyebrows, mouth line. Next, I’ll put in broader, but slightly lighter shadow shapes like under the nose, under the eye sockets, under the bottom lip, chin, deep cheek bones, hair. I place the boldest shapes to establish deeper values, then work my way up through the darker values of color to the lighter values placed on top.
Avoid highlights.
Until the last bits of painting, I avoid the highlights as long as I can. Two reasons. One, I need to work my way up, so putting them in too soon will defeat that effort. Two, I leave something fun for the last. I delay gratification as long as I can. The best part of painting in oils occurs within the last few layers and strokes.
Vary forms.
Hair is a bold shape, not individual hairs. I study folds and constantly vary them. Repeating the same folds will kill a painting as dead as an assassin’s shot through a pillow. I don’t think about the object I’m painting. I separate myself from the subject and only paint the form. I won’t ‘follow’ the form either. I cut my strokes across the surface of the forms. This adds dimension and lets objects feel sculptured.
New painters: Avoid primary colors. Ultramarine Blue. It’s deadly. It’ll make mud faster than 35 school kids running for the bus. And no, Cadmium Yellow Light is not a miracle color. Get over it. Using it straight from the tube does not show how brilliant one is at mixing paint. Same is true for Ultramarine. New painters seem to think they are phenomenal because they used Ultramarine Blue straight from the dang tube. They step back and declare, ‘look at me, The Genius. I have explained the essence of pure painting by opening a paint tube and using yellow next to blue. Admire me.’
Using primary colors as a statement of painting brilliance screams ‘AMATEUR.’
Amount of pigment. I trained to know just how much pigment is on the end of my brush. No matter how large or small, my awareness of the amount is paramount to good layers, good coverage, good overall effect in any painting.
I studied calligraphy. It taught me how to make letterforms with a brush or pen. Knowing the amount of ink held on an instrument for calligraphy is critical to achieve a skilled work.
Brush angle. Calligraphy also taught me how to angle a pen or brush. Making letterforms is a key factor in learning to paint. I know many great painters who also started by copying letter shapes, making signs, copying comics (bang! zoom! pow!). They learned to handle the brush and at what angle AT ALL TIMES.
The angle of the brush helps lay down the right amount of pigment, at the right angle, in the right direction, with the right pressure to achieve a free and confident stroke.
Brush size. I start with the largest brush for as long as I can and work my way down to the smaller brushes. Many times, as I near the end of a painting, or even slightly before, I switch back and forth. It’s a good, general idea to keep things from getting too focused too early.
Stroke speed. Painting fast and loose comes the same way as anything else: with time. I painted very slowly in the beginning, placing my strokes deliberately, to look as if they were painted fast. Once down, it’s usually hard to tell the speed the stroke was laid. Over the years, I built up speed through confidence. It’s just plain ol’ experience. And LOADS of training.
Patient strokes. I don’t judge my strokes too quickly. I lay it down, and press on. I come back to that area after a bit to judge whether it was the correct feeling, size, color, etc. I don’t lay one down, hate it, and take it off. Or worse, try to keep changing it.
At this point in my career, I lay strokes down that don’t make sense, but I let them sit. I find that they are just fine once I come back to judge them in context, against other strokes that are adding to the whole piece. Judging too early destroys spontaneity.
Scale. I decide how I want the paint to feel once a piece is finished. I scale the brush size to fit the scale of the painting. If it’s a small painting in a magazine, I have to decide how clearly the strokes will be seen and what feeling they project to a reader.
If it’s a large painting and I want it to feel loose, I have to decide on the size that feels best. Paint it too large with small brushes, and when it comes down in reproduction, it can look too detailed. Too small with large brushes, and the piece can look too loose, too unfocused.
New painters can make the mistake of painting too small with too large of a brush and vice versa.
Below is Gregory explaining his thought processes for Jake and the Other Girl.
There’s another way to make successful thumbnails that can lead to a final sketch.
Get right to the research first. Instead of exploring small thumbnails on the page, searching for the right image design, there are times where I know that the assignment demands a clearer knowledge of the setting before an idea takes hold.
I read this short story for Tor.com, a follow-up for a previous story, “Dress Your Marines in White,” by Emmy Laybourne. I toyed with a short-lived idea that might connect with my illustration for the first story, based on a set of men’s arms.
But I had a clearer idea that I needed to know & show the environment for the piece. The mood needed to be established instantly. The story is post-apocalyptic. I quickly rejected that early approach after researching, at length, war-torn cities, destroyed cities, hurricane, tornado, and earthquake damaged city streets. There is only a brief scene where the main character is outdoors, but it gives the tale a sense of place and I wanted the reader to feel that.
I gathered abandoned cars, some parked, some wrecked, some neglected. I used the status of the cars to reflect the status of the story. I researched shots of broken buildings, street scenes, and abandoned towns. I put all of these images up on my computer and freehanded a large scale thumbnail as the main sketch.
With that much information, I only needed to hit it one time. Most times, you have to create your own luck.
But the challenge after getting the idea was to pull it off. It must read fast and it must feel factual. Rendering cars is not so fun, but discovering and simplifying their shapes to read quickly was very gratifying. But I had to show more than just shiny cars parked. I wanted some to feel like they had just been abandoned, while others had been there for some time.Again, getting the value correct meant the difference here. Capturing that feeling meant I had to forget what it felt like, and pay more attention to exactly what it looked like. By doing that, I managed to capture the feeling of a dust covered car.
Not so intuitive. I had to study and mix the difference in value range to get shiny vs dusty. I wasn’t surprised to find out how much I learned from this painting about simplifying detail.
As painters, we must sometimes compartmentalize our feelings to actually capture those same feelings in the image. We start with the impression of feeling, reverse-engineer it methodically through observation and application that then re-communicates the feeling we were after originally. Using contrast was another way of projecting that feeling. I decided to have someone leave a cryptic message on the windshield, like a “wash me” note. The difference between the soft values of the dusty windshield and the crisp, hand drawn letters brought this across. To get that affect, I had to pay attention to exactly what value would be revealed if someone had haphazardly wiped away some dirt.
I could’ve added that passage after the oil was dry, but instead, I painted it digitally. This allowed me to give the art director, Irene Gallo, the choice to keep it or not.
This is yet another way in which digital is informing my analog painting development.
I would love to hear what you think about Gregory’s illustrations. Maybe you have taken a class with him or got to see his illustrations when he exhibited in NYC or for that matter in one of the many places he has exhibited around the world.
I am a big believer in creating an outline of your story and keep telling other writers how much it will help them with writing their novel. They nod their head, when they really want to pat me on the head and say, “Thanks, but no thanks.” So tonight read the beginning of K.M. Weiland’s “how to write book” titled, OUTLINING YOUR NOVEL, hoping to find someone else who could help persuade others to realize how much it will help them with their manuscripts. After reading the excerpt below, I bought the book and I hope you will check it out. She lays out some good reasons to outline.
Here it is:
Benefits of Outlining Your Story
Ensures Balance and Cohesion
In an outline, you can see at a glance if the inciting even take place too late in the sotry, if the middle sags, or if the climax doesn’t resonate. Instead of having to diagnose and remedy these problems after the first draft, you can fix problems in the outline in only a few keystrokes.
Prevents Dead-End Ideas
How many times have you started writing an exciting new plot twist, only to realize – 5,000 words later – that it’s led you to a cul-de-sac? You either have to spend valuable time bactracking and trying to write your way around the roadblock – or you have to cut the subplot altogether and start afresh. Outlines allow you to follow plot twists and subplots to their logical end (or lack thereof) in much less time. You can identify the dead-end ideas and cull them before they become annoying and embarrassing ploy holes.
Provides Foreshadowing
It’s nearly impossible for an author to foreshadow and event of which he has no idea. As a pantser, when a startling plot twist occurs late in the book, you’ll have to go back and sow your foreshadowing into earlier scenes. Not only is this extra work, it can often be difficult to make the new hints of what’s yet to come flow effortlessly with your already constructed scenes. Because an outline give you inside knowledge about what’s going to happen in subsequent scenes, it provides you the opportunity to plant some organic foreshadowing.
Smoothes Pacing
Like foreshadowing, pacing often requires inside knowledge. If the author doesn’t know the protagonist is about to be shot in the back, he can hardly adjust the pacing to introduce this shocking new event in the right manner. An outline shows you the places where your story is running too fast and the places where it is lagging and sagging.
Indicates Preferable POVs
When working with multiple points of view it can often be challenging to know which scene should be written from which POV. Too often, we write a scene from one character’s POV, only to realize a different character’s narrative perspective would probably have offered a better experience for the reader. As a result, we’re forced to go back and rewrite the entire scene. Outlines allow us to make educated decisions about POV, thanks to insights regarding plot and character. Just as importantly, outlines permit us to look at the balance of you POVs over the course of the entire novel, so we can ensure each character is getting an appropriate amount of time at the mic.
Maintains Consistent Character Voice
When writing without an outline, we’re often discovering the characters right along with the readers, and because our perception and understanding of our character often evolve over the course of the story, the result can be an uneven presentation of the character’s voice.
Offers Motivation and Assurance
Writing a novel can be overwhelming. Typing thousands of words is an undertaking in itself – but when those words all have to hang together in a way that is sensible, entertaining, and resonant, that’s enough to make our knees start shaking beneath our desks. Outlines give us the assurance that we can craft a complete story; all we have to do now is fill in the blanks. And because those blanks are ones that fascinate us, outlines also motivate us to keep on writing through the tough spots, so we can get to the good stuff.
Leeza Hernandez is an award-winning illustrator and children’s book author, hails from the south of England, but has been living in New Jersey since 1999. In 2004 she switched from newspaper and magazine design to children’s books, and hasn’t looked back. With a few books now under her belt, she’s currently working on three new projects: a follow up to Dog Gone! called Cat Napped; a sequel to Eat Your Math Homework called Eat Your Science Homework, other released this year. In 2013 she illustrated a picture book written by acclaimed actor and author John Lithgow. Follow Leeza on Twitter @leezaworks. She also took over my place as the Regional Advisor for the New Jersey SCBWI chapter and is doing a great job.
Below is Leeza at six years old with her cat Minnie Weasle!
Here is Leeza explaining her process:
The cover of Never Play Music Right Next to the Zoo took a fair amount of working out—between not giving too much away and showing to little that it looked too vague. The images show a handful of the different covers that were sketched up, then the progression of the final color cover.
These are the thumbnail sketches for the book layout.
Because there were so many animals in Never Play Music Right Next to the Zoo, I keptall my research pictures organized in a jumbo ring binder.
But, no matter how hard I looked, I just couldn’t find an image of a yak playing a sax so had to use some creative license!
Below you can see the process of the cover art.
Below is an up close look at the final cover.
What caused you to move from the UK to the US?
Work. I took an art director position at a newspaper in the late 90s which was the field I worked in back then.
When did you decide you wanted to illustrate for children?
It wasn’t a conscious decision really, but in the early 2000s I discovered Illustration Friday (www.illustrationfriday.com)—a great source of inspiration but also a way to help you create illustrations for yourself based upon a weekly word prompt. Browsing through the site, one link led to another and I eventually landed at SCBWI (www.scbwi.org) and that was that!
This image was created for the Illustration Friday prompt “Wisdom” and received an American Illustration selection back in the early 2000s. I added it to my portfolio among a handful of painted images and it was what art directors responded to the most. I was encouraged to create more!
What was the first picture book that you illustrated? And how did that contract come your way?
Eat Your Math Homework was the first trade picture book I was hired to illustrate, which came about after attending a Rutgers One-on-One Plus conference (ruccl.org). I met an editor at the luncheon who took my promo postcard away with her and about six months later the designer reached out to my agent asking if I was available-yay!
How did you connect with John Lithgow to illustrate his book, Never Play Music Right Next to the Zoo ?
I was asked to do some samples (along with some other illustrators) for a book written by a ‘high-profile’ author but I didn’t know who it was until I found out I was picked for the project. It was all very mysterious and exciting!
Have you met John Lithgow?
Yes, he’s lovely. We launched the book together in New York, it was so much fun. He sang his songs. I spared the audience and did not sing!
How long did you have to illustrate Never Play Music Right Next to the Zoo?
This was one of the quickest turnaround books I have worked on and it was 40 pages. From initial sketches, through revisions and to final art was a little less than eight months total.
I see you illustrated a second book with Ann McCallum this year, titled Eat Your Science Homework. Did you sign a two-book deal when you illustrated Eat Your Math Homework in 2011?
No two-book deal. It was simply an organic progression. Ann had an idea and submitted her proposal for the science book and a few months after they acquired the manuscript, Charlesbridge asked if I’d
illustrate it.
Will there be a third book with Ann?
Yes! Eat Your U.S. History Homework is due to release in late 2015.
I am assuming that Cat Napped! published by G. P. Putnam’s Sons came about due to the previous book you wrote and illustrated titled, Dog Gone! Can you tell us the story behind these two books?
Back in 2009 I won the Tomie de Paola portfolio award at the New York SCBWI conference—which was amazing. As a result, I was invited in to the Penguin offices to meet with an editor, publisher and art director and they looked at my work as well as a sample and manuscript for Dog Gone! and they took it. I was beyond thrilled and so, so grateful for the opportunity.
During the time I worked on Dog Gone! I had this idea that I wanted to create a cat book in the same vein and I already had the title Cat Napped! noodling around in my head, but it took a while to flesh out the story. I remember having submitted the story along with a couple of other ideas to the editor and right after Dog Gone! released they took it.
Have any of the books you worked on won any awards?
Eat Your Science Homework was awarded a 2014 Junior Library Guild selection—awesomesauce!
Do you have plans to write and illustrate another book?
Hahaha, yes of course! I hope I never stop.
What do you consider your first big success?
Wow, that’s a tough question. I’m not sure I can measure one big success that easily. Having a book published is amazing, but I also consider the ever-evolving process as a series of successful stepping-
stones and I do a little happy dance each time I move to the next one—because they all teach me something about myself and/or my work. Creative folks are such sensitive creatures and it can be
intimidating to put our work out there in front of people, so each time we are brave and face our fears head on, that’s a success. Actually, when I attended a SCBWI conference for the first time, I was so overwhelmed I almost didn’t go back the next day—so I’d say not giving up right off the bat was my first big success!
For pencil work, I use 2H, HB, 2B and 5 or 6B pencils on Arches hotpress 140lb paper.
What is on the drawing board now?
My schedule has been a little nuts lately so I am taking a rest-of-the-year break and finally getting around to updating my website, which has been somewhat neglected.
Do you ever use Corel Painter or Photoshop when illustrating?
I ‘collage’ in Photoshop. I take all the pieces that I create by hand, scan them in, then slice ‘n’ dice them into a final illustration. I think of Photoshop as my digital scissors and glue, but I don’t actually illustrate with Photoshop if that makes sense, like, I’m not drawing or painting digitally using brushes and filters.
Do you own a graphic tablet?
No. If you mean a Cintiq or Wacom, that is. I’ve seen them in action though, wow!
Is there one thing that you did or happened that you feel really pushed your career to the next level?
I joined SCBWI. So far, this has been an amazing journey of education, connections, opportunities, projects and rewards, but it all started with this incredible organization that continues to play a role—LOVE SCBWI!
Do you take pictures or other research before you start a project?
Before and during—yes. Having reference material gives me a much better understanding of what I am drawing than simply imagining. I like to begin by drawing realistically before I think about characterizing for a book because it gives me an accurate sense of anatomy, behavior, body language, etc., even though they’re very loose drawings. There were a number of animals in Never Play Music Right Next to the Zoo that I hadn’t drawn before, so I filled a ring binder with reference just for that project.
The original pick-up truck for Cat Napped! was a struggle, but after sharing with my editor, we realized it was too square and modern, so I went back and researched vintage trucks from the 40s and 50s. The end result was a bit of a hybrid but its softer, curvier edges suited the tone of the book far better than the angular truck I had originally drawn.
The internet is a powerful tool—National Geographic (nationalgeographic.com), Nat Geo Kids (kids.nationalgeographic.com), NASA (nasa.gov), and Pinterest (pinterest.com) are some of my favorites but discipline is key. The amount of research I do depends upon the project but I have to be careful with the amount of time I spend researching versus creating the art.
I use a timer to stay on top of it. And even if I am not researching for a particular project, I carry a sketchbook with me and either have my phone or camera for taking any pictures. Inspiration strikes when I least expect it so I like to be as prepared as possible.
Have you found most art directors and editors give you a lot of freedom when illustrating a book? Do they want to be involved all the way through the process?
Once, I was given very specific art notes for an educational book but the turnaround time was tight, so the notes were helpful for me to jump right in. I’ve received minimal notes for nonfiction projects if there was a point that needed to be demonstrated visually for some specific text. For example: the Homework books sometimes have charts.
For the fictional projects, I’m pretty much left to it for the first round of sketches, then the art director and/or editor and I discuss together. Sometimes, I’ll offer up additional sketch options for a handful of spreads if I have lots of ideas and can’t decide which direction to go. There can be a lot of back and forth on the cover, though.
What is the one thing in your studio that you could not live without?
My art materials—pencils, brushes, paper, inks, sketchbooks—I’d be kinda lost without them!
Do you try to spend a specific amount of time working on your craft?
Yes, even if it’s only for ten minutes, that’s my rule.
Do you have any career dreams that you want to fulfill?
To travel, keep making art, and continue creating books for young readers—that would be lovely!
Thank you Leeza haring your journey and process with us. Can’t wait to see your career go forward. You can visit Leeza at her website: http://www.leezaworks.com to see more of her work.
If you have a moment I am sure Leeza would love to read your comments. I enjoy them too. Thanks!
CB (@chrisjbehrens) said, on 11/22/2014 6:28:00 AM
Great work and story!
catugeau said, on 11/22/2014 7:33:00 AM
loved this Leeza….wonderful styles and growth. love to chat?….
Helena Bogosian said, on 11/22/2014 8:36:00 AM
Wonderful work, really enjoyed this!
Leeza said, on 11/22/2014 9:07:00 AM
Thank you for your lovely comments everyone! and thank you so much Kathy for inviting me to be featured on your blog – love all that you do for the kidlit community. :)
Cheers and enjoy your Thanksgiving week!
xxx
Kathy Temean said, on 11/22/2014 10:27:00 AM
Hi everyone,
I hope you will stop back to read the end of Leeza’s interview. I somehow missed the last two questions, which I just added. Leeza shared a lot of great information about materials to use, etc.
Thanks for stopping by and leaving a comment.
Kathy
teresarobeson said, on 11/22/2014 12:31:00 PM
I won a bit of schwag from Leeza when she was on KidLit411.com and I loooove her art! I now have a small print of hers permanently on my fridge. (Thanks so much again, Leeza!). :)
And thank you for this detailed interview too, Kathy, especially that last part you added because I am always curious about what other artists/illustrators use for media and materials!
Thanks Leeza for all your art materials info! I especially liked the suggestion of the Borden and Riley Boris Layout Paper! And I’m enjoying your lively illustrations in Never Play Music Right Next to the Zoo. Thanks Kathy for sharing Leeza’s art and info!
anitanolan said, on 11/22/2014 4:21:00 PM
Enjoyed the interview, and Leeza at 6 looks almost the same as she does now!
writersideup said, on 11/23/2014 8:40:00 PM
Leeza, you are brilliant, talented and generous and I just love to see/hear what you’re up to :) I was lucky to be in the workshop you help at our Craft Day, showing us how to use the levels to clean up smudges on sketches. It was fantastic! You are one lovable, impressive woman! :) And now I understand that the paper you use is transparent, but not as smudgy as tracing paper, which is what I typically use. Thanks!!! :)
Ever think about self-publishing a book using CreateSpace? Maybe you have hesitated because you were nervous about the expertise needed to digitally format the manuscript to look professional. Well, Roxanne Smolen has worked through the process, wrote up the step-by-step process below, and is willing to share it with you.
Here is Roxanne:
I think of myself as an Indie author, although I’m actually a hybrid. I have seven books published by a small publisher. Those books can be found in every book selling venue possible. But honestly, almost all my sales are through Amazon. I started thinking, why sell through a publisher and give them a healthy cut when I can make more money by doing it myself?
So I began self-publishing. I published two middle-grade books that I wrote with my young granddaughters (under the name R.A.P. Smolen), four writer’s advice books that I wrote with seven other authors (under the name of C. S. Writers), a science fiction novel that I wrote about a woman who literally goes to hell (Satan’s Mirror), and the first three novels of my current book series (The Amazing Wolf Boy).
The Amazing Wolf Boy is a humorous paranormal romance for young adults about a sixteen-year-old nerd who turns into a werewolf during Christmas Eve dinner. His parents banish him to Florida (That’s where I live. What a coincidence.) where he fails to fit in with the other kids. You can buy book one here.
I’m pretty proud of the book, not only because I wrote it but because I published it. Self-publishing does not carry the stigma it once did. If you are thinking about publishing your own book, my biggest piece of advice is to proofread and edit carefully. It’s so easy to publish a book nowadays authors are putting their work out there with all sorts of errors. You don’t want to be that guy.
The best thing, of course, is to hire an editor. But good editors are expensive, and many of us can’t afford such an investment. If you plan to do it yourself, I have a tip for you—change your font. Just for the editing process. Make it something a little difficult to read, like Broadway or Impact. Something to make you focus. Your brain doesn’t always read what your eyes see; it reads what you thought you wrote. That’s why we can read over a sentence with a misspelled or missing word twenty-five times and not pick it up. If you change your font, your brain will think it’s reading something new and it will pay attention.
I would also advise you to take care with your book formatting. Readers don’t have the patience to read text with large gaps or ragged indents. On that note, I have written a tutorial.
How to Format Your Book for CreateSpace
I get a lot of formatting questions, so I thought I’d put it all down in one place. If you find it useful, let me know.
Note: I use Word 2010. Your version of Word might look a bit different, but it should be similar enough for you to figure out.
And now, without further ado, here is how I format a book for CreateSpace.
Ready, Set, Go
Open your Word .doc
Set the margins. Go to PAGE LAYOUT –> MARGINS –> CUSTOM MARGINS.
Under the Margin Tab, make the top 1″, the bottom 1″, the inside .9″, and the outside .6″.
Orientation should be Portrait.
Multiple Pages should be changed to Mirror Margins. That’s it for the Margin Tab. Don’t close the box yet.
Then under the Paper Tab, change the Paper Size to the size of the book you are planning to publish. I like my books to be 8″ by 5″ so I change:
Width to 5″
Height to 8″. Then click OK to close the box.
SELECT ALL (it’s over in the top right-hand corner.) Delete all tabs by using REPLACE (also in the top right-hand corner.)
Go to the Replace Tab
Click More
Click Special
Click Tab Character
Leave REPLACE WITH blank
Click REPLACE ALL
SELECT ALL
Click the corner box next to Paragraph.
Under Indentation, go to SPECIAL
Select FIRST LINE
Under BY type .25
SELECT ALL
Change line spacing to 1.5
Click both REMOVE SPACE BEFORE and REMOVE SPACE AFTER so both read ADD.
SELECT ALL
Change your font and font size. I usually use Georgia 12pt.
SELECT ALL
Justify your margins. Yes! Don’t argue with me.
SELECT ALL
Under PAGE LAYOUT, click Hyphenation and Automatic.
SELECT ALL. Make sure you don’t have any double spaces after punctuation. (This is for all us older authors because we were taught that in high school.)
Go to the Replace Tab
Under FIND WHAT, hit the spacebar twice
Under REPLACE WITH, hit it once
Click REPLACE ALL
Make sure the end of every chapter/short story has a new page character.
Go to PAGE LAYOUT –> BREAKS
Under Section Breaks, click NEXT PAGE (One caveat to this is if you are publishing a book of short stories. You want each story to start on the right-hand side, right? Or some people want each chapter to start on the right. In that case you would click ODD PAGE.)
There should be no page numbers, headers, or footers on blank pages.
Front Matter Matters
In order:
TITLE PAGE
Use a larger font and make it bold.
Type your book title about halfway down the page.
Type your name at the bottom. (This should give you plenty of room to sign at book signings.)
End the page. (PAGE LAYOUT –> BREAKS –> NEXT PAGE)
COPYRIGHT PAGE
Type in your Copyright Notice.
Example: This is a work of fiction. The characters and events described herein are imaginary and are not intended to refer to specific places or to living persons alive or dead. All rights reserved. No part of this publication may be reproduced, distributed, or transmitted in any form or by any means, including photocopying, recording, or other electronic or mechanical methods without the prior written permission of the publisher except for brief quotations embodied in critical reviews.
ISBN (Type in the number provided by CreateSpace.)
You can also add your publishers name, state, website, and logo if you have started your own company.
End the page. (PAGE LAYOUT –> BREAKS –> NEXT PAGE)
DEDICATION PAGE
This is optional. If you are dedicating your book to a loved one or an organization, type it here.
End the page. (PAGE LAYOUT –> BREAKS –> NEXT PAGE)
TABLE OF CONTENTS
You should have a table of contents to list each chapter or short story.
Go to REFERENCE and click Table of Contents.
End the page. (PAGE LAYOUT –> BREAKS –> NEXT PAGE)
NOTES
If necessary, add a blank page at this point (PAGE LAYOUT –> BREAKS –> NEXT PAGE) so that the first page of your story starts on the right-hand side.
There should be no page numbers, headers, or footers on the FRONT MATTER (or the back matter either for that matter.)
Back Matter Matters Too
Add a page for Your Author’s Bio, headshot (I mean a photo, not an actual… although if you’re writing horror and you’re good with make-up…) website, and email address.
End the page. (PAGE LAYOUT –> BREAKS –> NEXT PAGE)
Add another page for a list of your previous works and where to buy them.
End the page. (PAGE LAYOUT –> BREAKS –> NEXT PAGE)
If you are writing a series, you can put an excerpt of an upcoming book here.
Remember, there should be no page numbers, headers, or footers on the front or back matter unless you want to use Roman Numerals.
About Your Headers and Footers
Go to the first page of your story. (Story, not Front Matter.)
Click INSERT.
Click HEADER.
Choose your Header Style. (I usually use Blank.)
Type the name of your book. (I recommend using a smaller font.)
Highlight what you just typed and Right align it. (On the Home Tab.)
Under HEADER & FOOTER TOOLS click ODD & EVEN PAGES.
Make sure LINK TO PREVIOUS is not selected.
Now go to the second page of your story.
Click the Header and type your name.
Highlight what you typed and Left align it.
You should now have your Title on the right and your Name on the left on alternating pages.
Check to be sure the header hasn’t shown up on your Front Matter.
If it has, delete it and de-select LINK TO PREVIOUS on each page.
Go back to the first page of your story.
On the left-hand side of the HEADER & FOOTER TOOLBAR, you will see Page Number. Click it.
Choose Bottom Of The Page.
Choose your style. I use Plain Number 2.
Note: You will have to do this twice—once for the right-hand (odd) side and once for the left-hand (even) side.
Note: You may have to format the page numbers to get them to run consecutively. To do that, click Page Number again and scroll down to Format Page Number.
Kill the Widows and Orphans
Widow
A paragraph-ending line that falls at the beginning of the following page/column, thus separated from the rest of the text.
Orphan
A paragraph-opening line that appears by itself at the bottom of a page/column.
A word, part of a word, or very short line that appears by itself at the end of a paragraph. Orphans result in too much white space between paragraphs or at the bottom of a page.
Word kills your widows and orphans by default, but the result makes a ragged bottom margin. I’m one of those persnickety people who feel that when you open a book, the bottom margin on both pages should match up. So I kill them manually.
Click the corner box on PARAGRAPH.
Click the LINE AND PAGE BREAKS Tab.
Uncheck Widow/Orphan Control.
Go through each page of your 500 page book and look for Widows and Orphans, adding or deleting words until the page looks right.
And Another Thing…
The first paragraph of each chapter and after a drop should be flush left, meaning don’t indent. Also, the first letter of the first word of that paragraph should be fancied up. I’m sure you’ve all seen the first letter in a different font with scroll work, etc. The problem is that it messes with the line spacing of the paragraph. The only work-around I know is to insert a picture of the necessary letter in the desired fancy font and then have the text wrap it so there is no problem with the spacing. But that is a lot of work for little gain. I just bold the first letter and leave it in the same font as the rest of the paragraph.
Easy Peasy
When all looks good, you need to save the book as a PDF. Word can do this for you.
FILE –> SAVE AS –> PDF
Now you are ready to upload the .pdf to CreateSpace.
See? It’s as easy as 1, 2, 3… 4, 5, 6… Oh, you get the picture.
Thank you Roxanne for sharing this process with everyone. I know this will help a lot of writers, if not now, later. I am sure they will want to save this for future use. Here is the link to visit Roxanne’s blog: http://www.moonrox.wordpress.com/
It’s been a long time since I had acne. Thankfully. Because I had severe cystic acne–the kind that looks like open sores all over your face and chest and back–all through college and well into my late 20s. I think I saw the last of it when I was 29, and that was only after two full rounds of Accutane. Accutane is some scary stuff. I had to sign all sorts of waivers and promises to stay on birth control because the drug causes horrible birth defects. Over the course of the two years I used it, I couldn’t wear contacts because my eyeballs dried out. I had to put lotion on every inch of my skin several times a day because it was all so parched and flaking. I felt itchy and sore. But yes, the drug finally worked. And I was incredibly grateful.
Which is why I’m posting this video. Because if I had known when I was younger what Randa and Nina have discovered, I would have changed my diet right away. Acne like the kind they and I had destroys your self-confidence and makes you want to crawl into a hole and not let the world see you. And in my case, unlike theirs, I was also obese in college, so between that and the acne, you can imagine I wasn’t really enjoying my 20s.
If I could go back to the young woman I was and whisper in her ear, “Hey! Look at this!” I would. But until I’ve worked out all the mechanics of time travel, the best I can do is to help any of you who might be suffering from the same problem. Because it is suffering–I know that too well.
Best of luck to all of you! And thanks Nina and Randa for sharing your story and your pictures. I know that was hard!
0 Comments on To My Fellow Horrible Acne Sufferers as of 1/1/1900
For readers to become invested in a story, they need to “see” characters’ movement and action within a setting. Writers often hear, “Show don’t tell,” and sometimes we think, “But I did show – didn’t I? How do I fix this?”
Here are a few quick tips for showing rather than telling:
Use ACTIVE VERBS rather than passive ones wherever possible.
Keep this list of passive verbs near your computer until you get in the habit of using them sparingly. (I tell my students: “If you must use passive verbs, limit them to no more than one or two on a page.”)
Forms of be to AVOID: is, are, was, were, be, being, and been
Auxiliary verbs: am, did, do, does, can, may, might, will, would, shall, should, must, has, have, had, could
Adjectives (describing words)
Adverbs (words used to modify verbs that tell us when, where, how, in what manner, or to what extent – words ending in –ly; other examples: yesterday, here, barefoot, fastest)
Telling/Passive: She was running quickly to the dilapidated shed because she needed a place to hide.
Showing/Active: She sprinted to the shed, slipped inside, and crouched under a sawhorse behind a stack of paint cans.
Place your characters in a setting at the beginning of every scene, so your reader can “see” them.
Begin every scene with a few words of setting BEFORE a character shares thoughts or engages in conversation. Otherwise, fuzzy talking heads float in space until the writer gets around to putting the characters in a specific location.
Example:
I heard the T.V., so I went to the living room and found my dad on the couch rubbing his temples.
“You got it wrong,” I said. “Someday these time-wasting doodles will make me rich.”
A quick aside: Forget all the fancy words you learned in middle school – replied, chortled, stuttered, etc. – and use SAID, which is considered the invisible dialogue tag.
Write ACTION TAGS within conversations rather than dialogue tags wherever possible.
If your characters shove their hands in their pockets or tuck a curl behind an ear or move to the other side of the room, action tags can show details and movement, adding to the depth of the scene.
Example:
I heard the T.V., so I went to the living room and found my dad on the couch, rubbing his temples.
“You got it wrong.” I dropped my drawing in front of him on the coffee table. “Someday these time-wasting doodles will make me rich.”
These three things: active verbs, establishing the setting, and using action tags in dialogue, will transform your scenes from flat and fuzzy into mental motion pictures.
Trish Wilkinson is a writing coach, content and line editor. You can find her at: www.write-to-win.com
Thanks Trish for sharing your expertise with us. I am sure it will help many of the new writers who visit and also help remind the rest of us to always strive for an active voice.
Throughout history, some people have chosen to take huge risks. What can we learn from their experiences?
Extreme activities, such as polar exploration, deep-sea diving, mountaineering, space faring, and long-distance sailing, create extraordinary physical and psychological demands. The physical risks, such as freezing, drowning, suffocating or starving, are usually obvious. But the psychological pressures are what make extreme environments truly daunting.
The ability to deal with fear and anxiety is, of course, essential. But people in extremes may endure days or weeks of monotony between the moments of terror. Solo adventurers face loneliness and the risk of psychological breakdown, while those whose mission involves long-term confinement with a small group may experience stressful interpersonal conflict. All of that is on top of the physical hardships like sleep deprivation, pain, hunger, and squalor.
What can the rest of us learn from those hardy individuals who survive and thrive in extreme places? We believe there are many psychological lessons from hard places that can help us all in everyday life. They include the following.
Cultivate focus.
Focus – the ability to pay attention to the right things and ignore all distractions, for as long as it takes – is a fundamental skill. Laser-like concentration is obviously essential during hazardous moves on a rock face or a spacewalk. Focus also helps when enduring prolonged hardship, such as on punishing polar treks. A good strategy for dealing with hardship is to focus tightly on the next bite-sized action rather than dwelling on the entire daunting mission.
The ability to focus attention is a much-underestimated skill in everyday life. It helps you get things done and tolerate discomfort. And it is rewarding: when someone is utterly absorbed in a demanding and stretching activity, they experience a satisfying psychological state called ‘flow’ (or being ‘in the zone’). A person in flow feels in control, forgets everyday anxieties, and tends to perform well at the task in hand. The good news is that we can all become better at focusing our attention. One scientifically-proven method is through the regular practice of meditation.
Value ‘knowhow’
Focus helps when tackling difficult tasks, but you also need expertise – high levels of skills and knowledge – to perform those tasks well. Expertise underpins effective planning and preparation and enables informed and measured judgements about risks. In high-risk situations experts make more accurate decisions than novices, who may become paralysed with indecision or take rapid, panicky actions that make things worse.
Expertise also helps people in extreme environments to manage stress. Stress occurs when the demands on you exceed your actual or perceived capacity to cope. An effective way of reducing stress, in everyday life as well as extremes, is by increasing your ability to cope by developing high levels of skills and experience.
Developing expertise requires hard work and persistence. But it’s worth the investment – the dividends include better assessment of risk, better decision-making, and less vulnerability to stress.
Getting enough sleep is often difficult in extreme environments, where the physical demands can deprive people of sleep, disrupt their circadian rhythms, or both.
Bad sleep has a range of adverse effects on mental and physical wellbeing, including impairing alertness, judgment, memory, decision-making, and mood. Unsurprisingly, it makes people much more likely to have accidents.
Many of us are chronically sleep deprived in everyday life: we go to bed late, get up early, and experience low-quality sleep in between. Most of us would feel better if we slept more and slept better. So don’t feel guilty about spending more time in bed.
Experts in extreme environments often make use of tactical napping. Research has shown that napping is an effective way of alleviating the adverse consequences of bad sleep. It’s also enjoyable.
Be tolerant and tolerable.
Adventures in extreme environments often require small groups of people to be trapped together for months at a time. Even the best of friends can get on each other’s nerves under such circumstances. Social conflict can build rapidly over petty issues. Groups split apart, individuals are ostracised, and simmering tensions may even explode into violence.
When forming a team for an extreme mission, as much emphasis should be placed on team members’ interpersonal skills as on their specialist skills or physical capability. Research shows that team-building exercises – though often mocked – can be an effective way of enhancing teamwork.
Effective teams are alert to mounting tensions. Individuals keep the little annoyances in perspective and respect others’ need for privacy. To survive and thrive in demanding situations, people must learn to be tolerant and tolerable. The same is true in everyday life.
Cultivate resilience
Extreme environments are dangerous places where people endure great hardship. They may suffer terrifying accidents or watch others die. Such experiences can be traumatic and, in some cases, cause long-term damage to mental health.
But this is by no means inevitable. Research has shown that many individuals emerge from extreme experiences with greater resilience and a better understanding of their own strengths. By coping with life-threatening situations, they become more self-confident and more appreciative of life.
Resilience is a common quality in everyday life. We tend to underestimate our own ability to cope with stress, and overestimate its adverse consequences. Some stress is good for us and we should not try to avoid it completely.
Featured image credit: Mount Everest, by tpsdave. Public Domain via Pixabay.
Dialogue is one of the most important pieces of any manuscript, and this often goes double for children’s works. Dialogue moves the story along, develops the connection between your readers and the characters and keeps things tangible and realistic.
That means that mastering Kid-Speak is unequivocally important.
There is a rhyme and rhythm to the way that kids communicate, where they pause to think, how they choose their words, the direction their stream of conscious takes them in. I’ve often wondered if there are linguists who study children specifically. I bet we could learn a lot about the development of the brain and human instincts by looking at how and why kids pick their words.
As writers, if our characters don’t sound realistic, we’ve already lost the battle. It’s something a child will instantly and instinctively pick up on. The character will seem fake and they won’t bond with them. Even in a plot-driven story, if the readers don’t connect with the characters, the story won’t resonate.
Here are a few things you can do to work on the dialogue in your stories:
Eavesdrop!
Listening to children talk is one of my favorite things to do. This can be a bit trickier to do with older kids. Teenagers aren’t big on you overhearing their devastatingly important and secret information. But there’s a great trick to overcome that. Stick two or more kids in the back of a car and drive around a while. Even teenagers will fairly quickly forget that you can probably hear them and get swept up in the excitement of their chatter. When hushed whispers are completely ignored, they often become full-volume conversations within a few minutes.
It’ll be a hit with the other adults in your life too! The fact that I’m quick to volunteer for anything kid and car-pool related is a much-appreciated running joke among my friends and family.
Listen to yourself:
Most writers understand the value of reading the dialogue sections of a manuscript out-loud. But you can take this even further. Record yourself reading it. Play it back. Have someone else read it to you. Have multiple someones read it to you.
Better yet, have an age-appropriate child read it to you. See how it sounds coming from them. Does it sound natural? Stale? Funny? Bland? Vocabulary that encourages learning and reaching is excellent when carefully placed in children’s books. But (unless it’s your character’s quirk) you want to keep the dialogue age-appropriate.
Hearing how the lines sound with the natural intonation of a child’s voice can be a simple and surprisingly effective way of polishing up the dialogue.
Give Everyone Their Own Unique Voice
If you ask five kids the same question, you will get five different responses, even if they all have the same general answer. You have a voice as a writer. Be sure each of your characters has a voice of their own as well.
We all have our little verbal tics, especially kids. Some are simple speakers, short, two to three word sentences. Some seem to look for any opportunity to use flowery, descriptive words. They know different words based on who and what occupies the majority of their time.
A friend’s five year old used the word “bonemeal” when he was commenting on my conversation with his mother about my garden next year. Turns out, it’s basically a type of fertilizer in Minecraft. I was amazed that he made the connection to a real-life garden, but it was just his natural Kid-Speak.
A great test for this is to pull out all the dialogue in your manuscript and see if you can tell who said what without even looking at the character name.
It’s not an easy test. But for me, it’s given me great perspective on places I need to have the opportunity to personalize and develop that critical bond between my readers, and the characters they’re going to take the journey with.
Dialogue does so much in our manuscripts. It allows us to remove unnecessary words, breaks up long, difficult to read paragraphs, advances the story, gives us relatable realism and lets us see how a character thinks. Take these opportunities to really let the uniqueness of your characters shine, and capture your readers.
Kid-Speak varies for different ages, backgrounds and situations, making it a versatile and powerful tool to make your story, and your character jump off the page and into the reader’s heart.
Your character’s personalities, and your manuscripts, are worth it.
Erika Wassall is a writer, a farmer and a liver of life. She is a member of SCBWI and a proud Mad Scientist, bringing science experiments right into children’s classrooms, and hearts. She has a small farm in New Jersey with sheep, chickens, pigs and vegetables. Check out her new website at www.TheJerseyFarmScribe.com where as a first generation farmer, she often takes the long way, learning the tricks of the trade on The Farm. On her website is also The Shop page with tips and a free Q/A from her husband’s mechanic shop, and The Writer page where she shares stories, experiences and characters from the heart. Follow her on Twitter at @NJFarmScribe. She’d love to hear from you!
Thank you Erika for another great post. I always enjoy them.


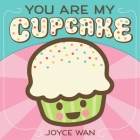


![[P] Ready Set Draw - Roxie Munro Maze](http://kidlit.tv/wp-content/uploads/2016/04/P-Ready-Set-Draw-Roxie-Munro-Maze.png)
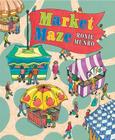
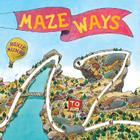


 Yep, I signed up. Why? Because as much as I enjoy eating all the chocolate in the world when I’m working on a book or screenplay, I don’t actually like the brain fog that comes with it. So I’m more than happy to turn to science to help me solve the sugar thing once and for all.
 A lot of you have written to me in the past few days thanking me for sharing my own struggles with sugar addiction (a.k.a. my kryptonite), and also for sharing Dr. Susan Thompson’s videos about what she’s learned as both a neuropsychologist and as a formerly obese woman about how to rewire our brains and finally get rid of cravings once and for all. Yes, please, now!
 Some writers rely on drugs and alcohol. Not me. I just finished writing a screenplay fueled mostly by coffee and Reese's peanut butter cups. Soooo much better, right? *cough*


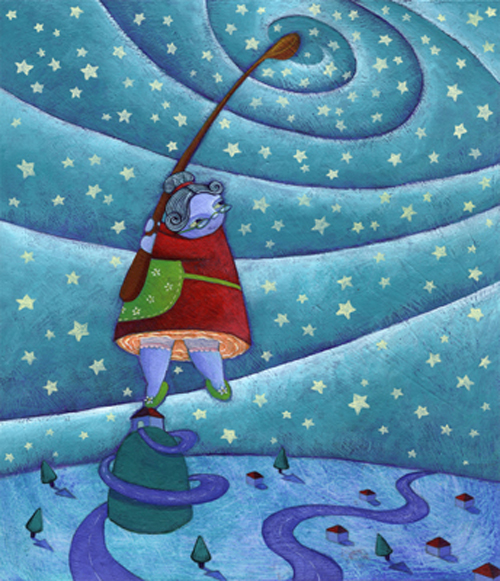

 Yvonne Ventresca (Pandemic author) sent me a note pointing out all the wonderful writing worksheets on Jami Gold’s Blog. I wanted to make sure I pointed out all the helpful information you can find, download, and use on her site.
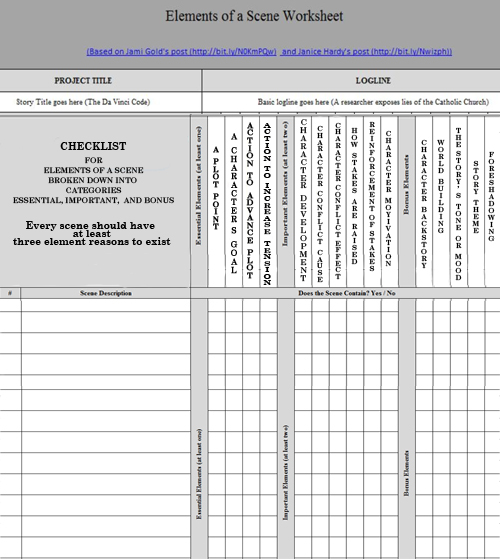


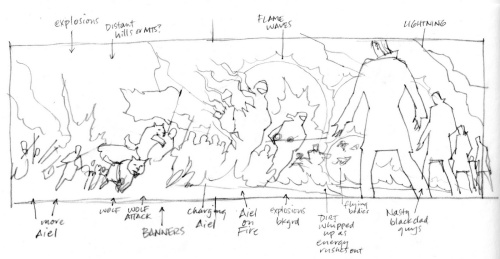
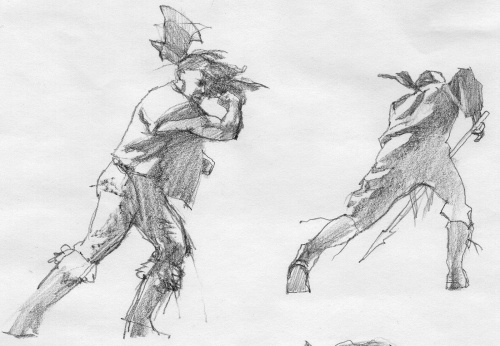
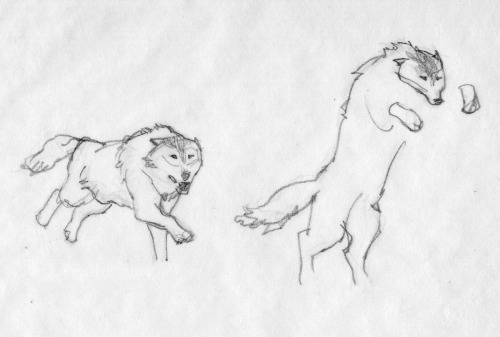
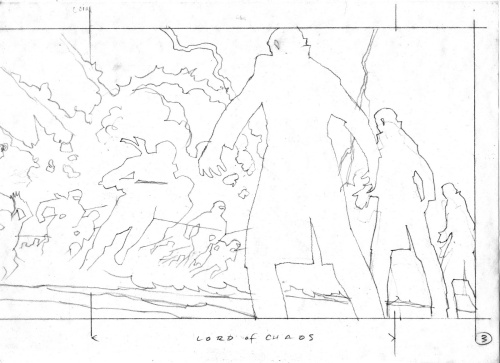
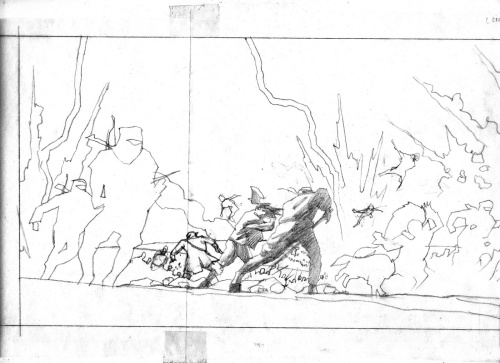
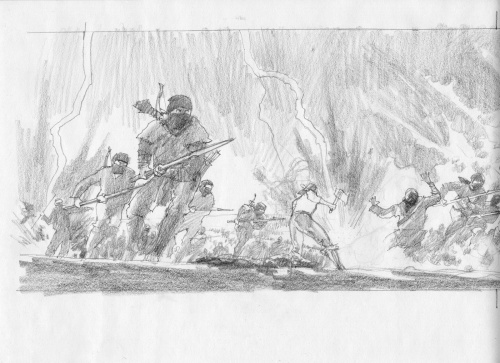
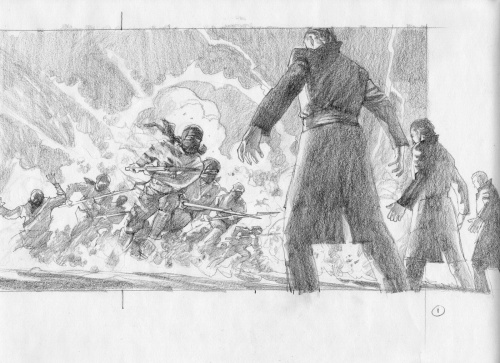
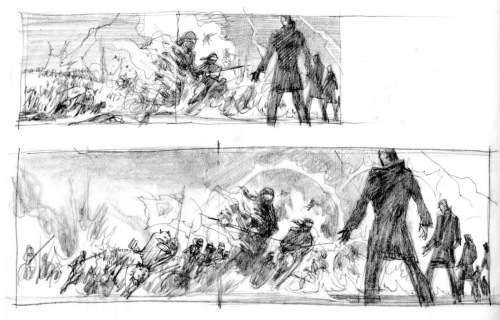

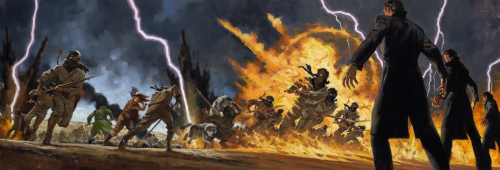
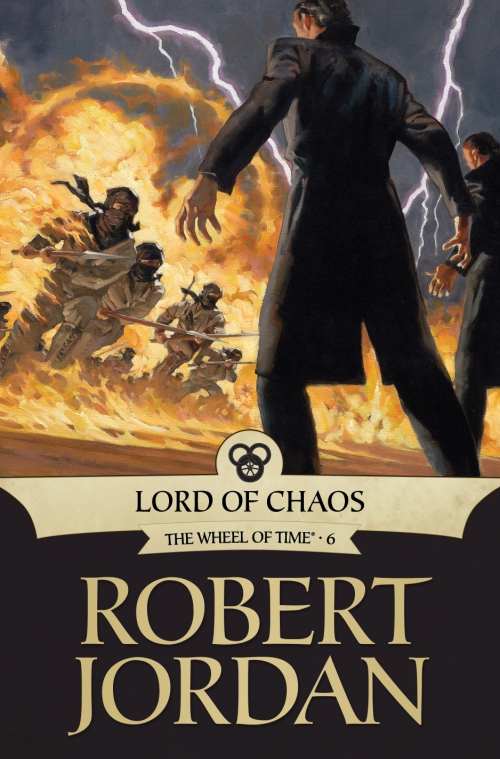
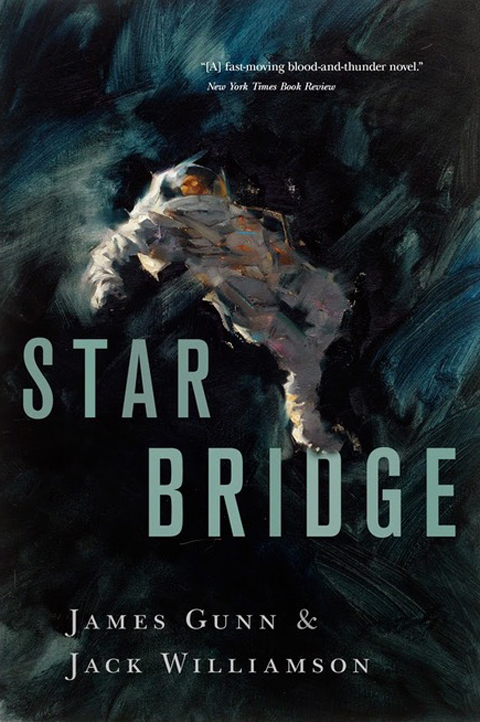
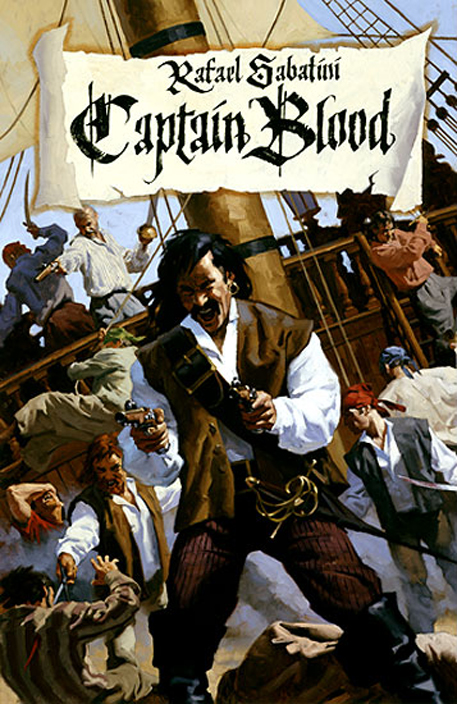
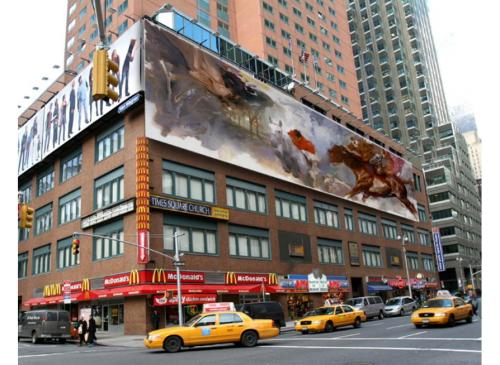

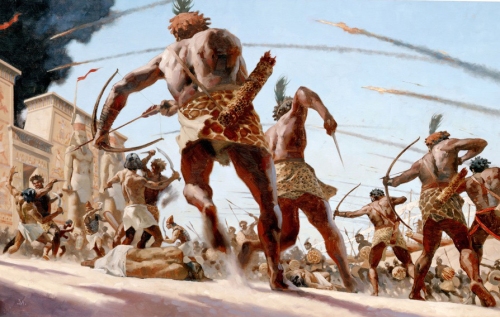

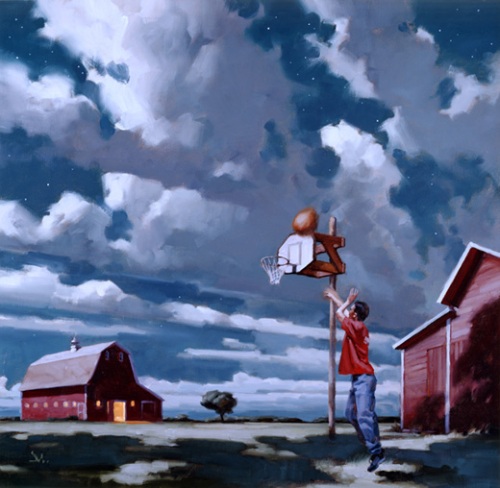

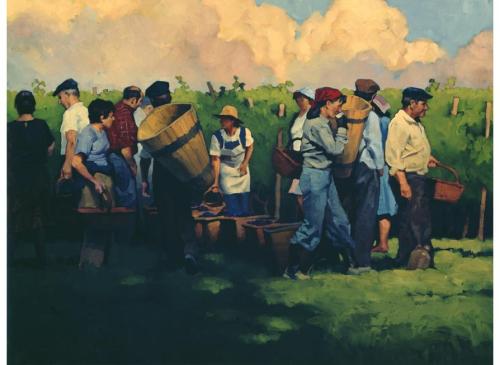
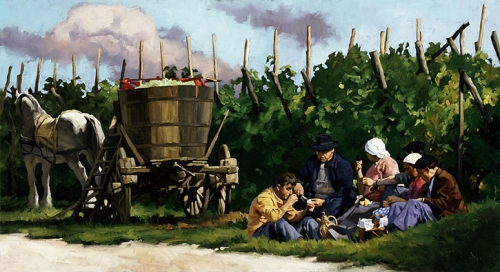
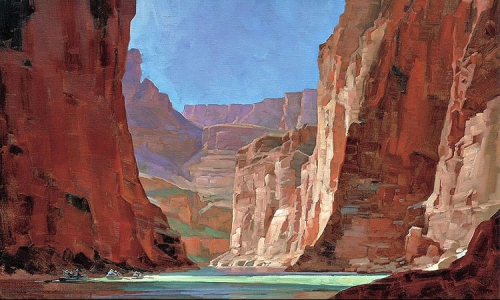
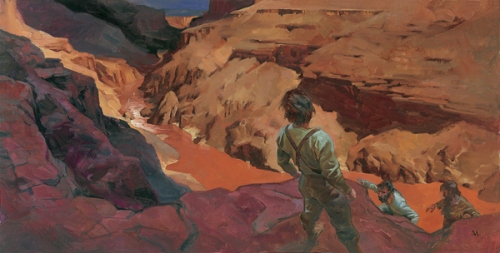
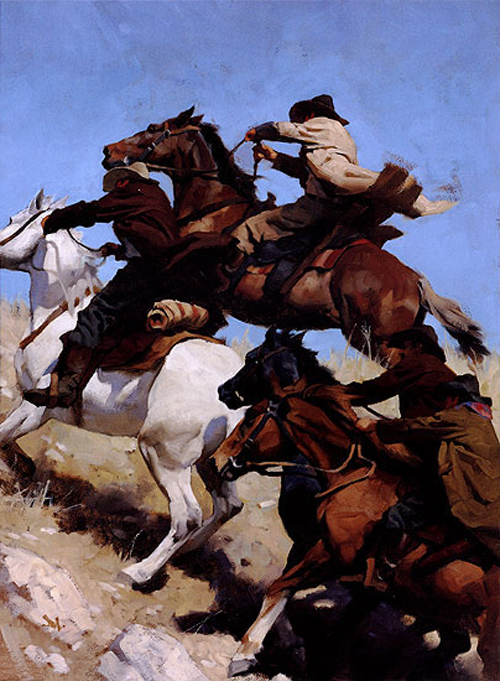
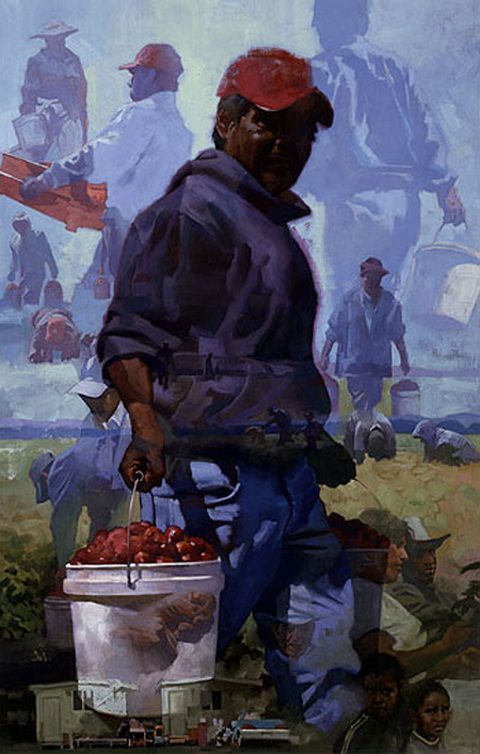
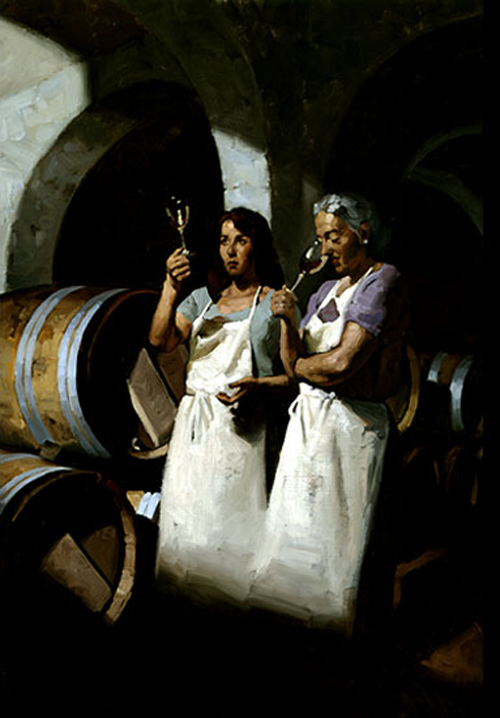

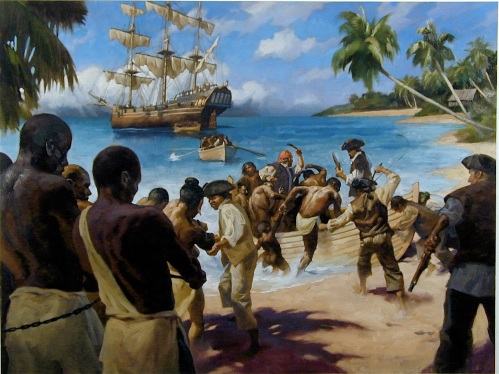
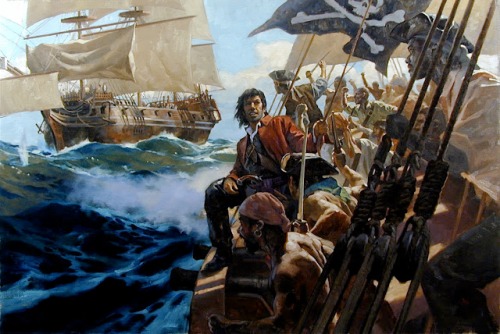

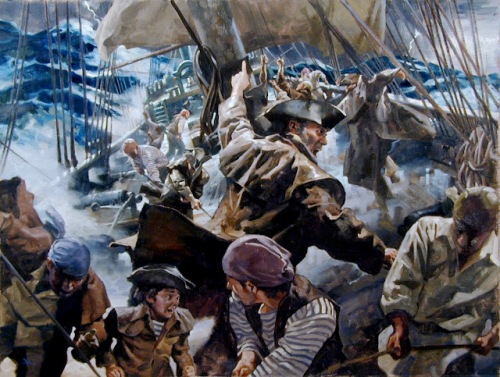

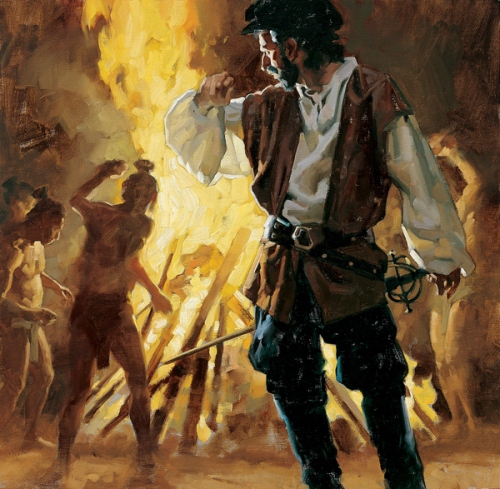
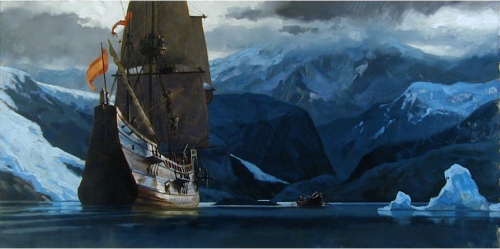
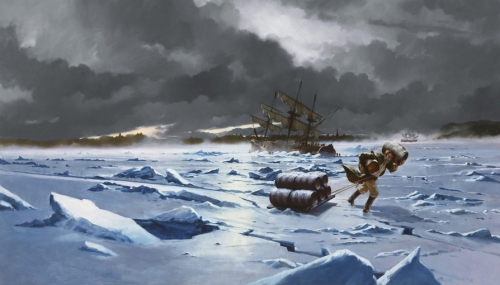
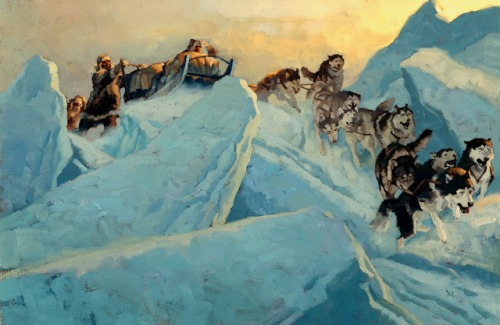
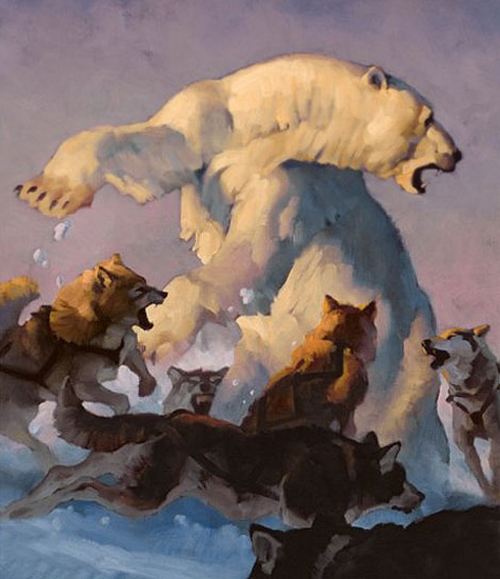
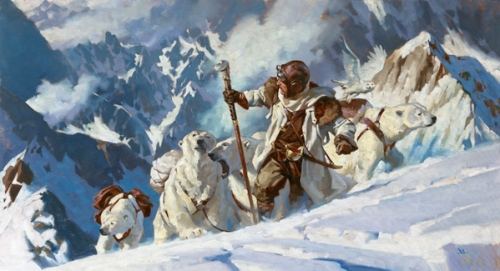
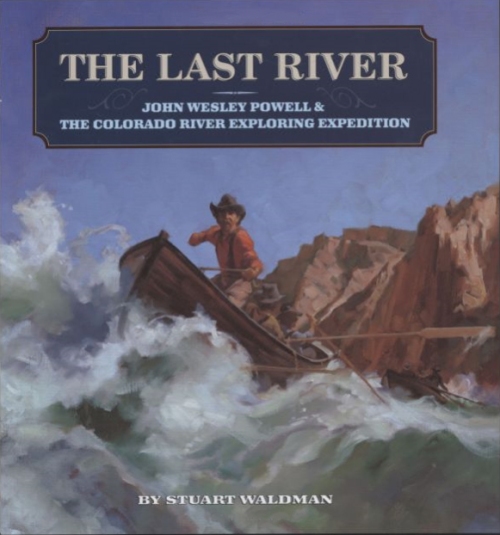
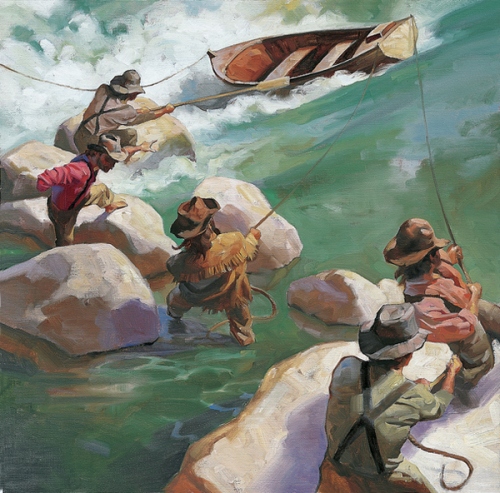
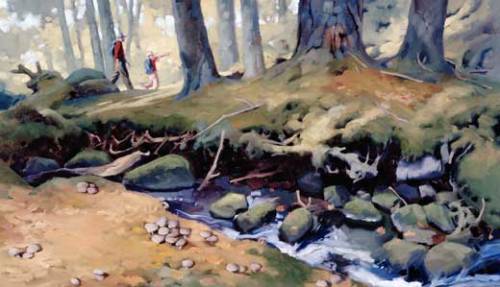
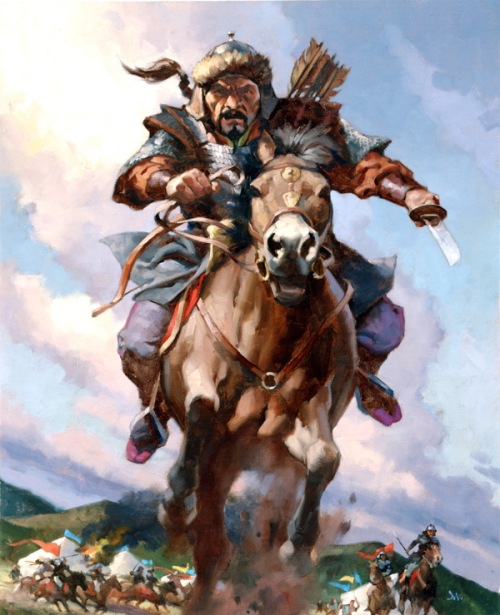
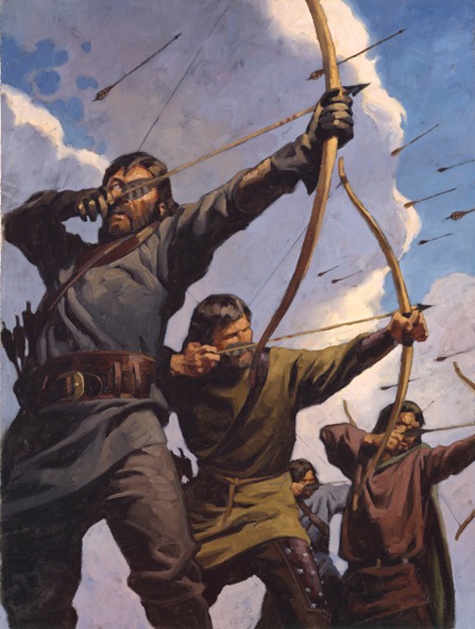
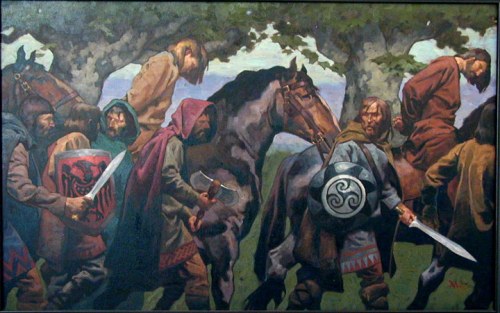
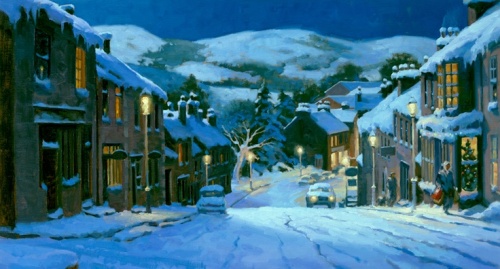
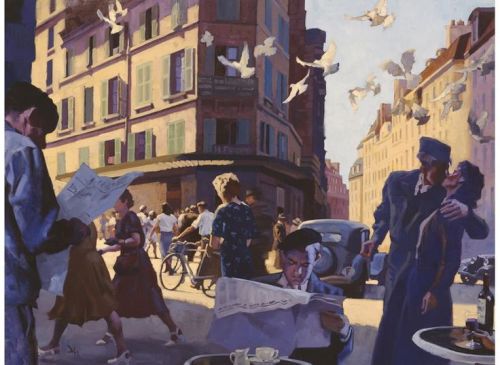
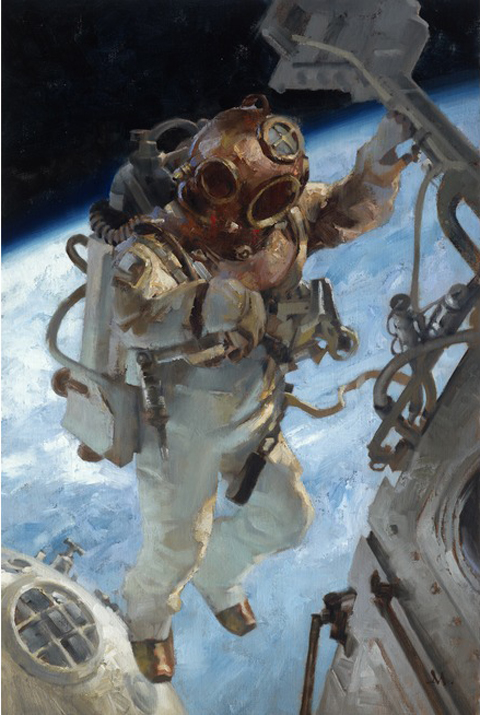
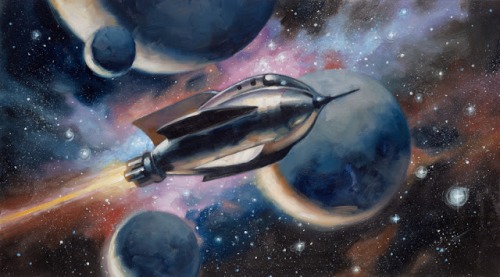

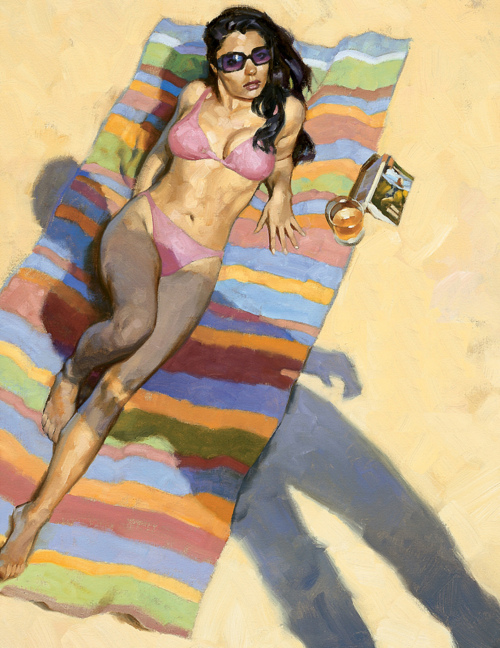
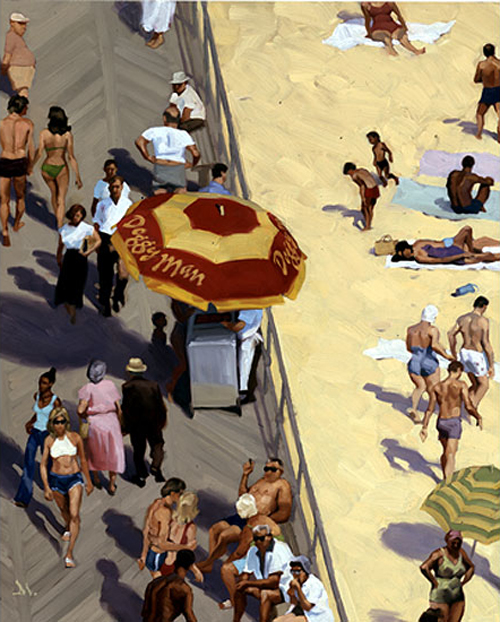
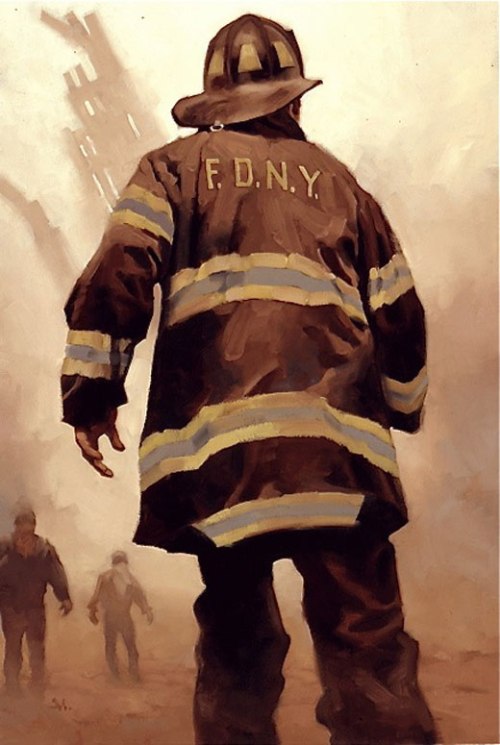
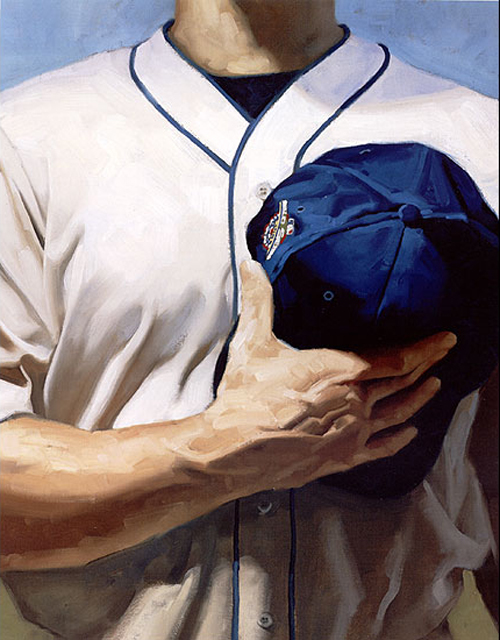

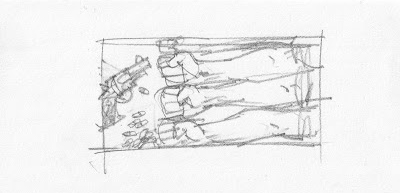

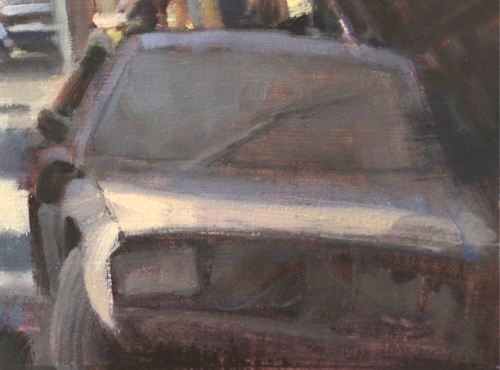
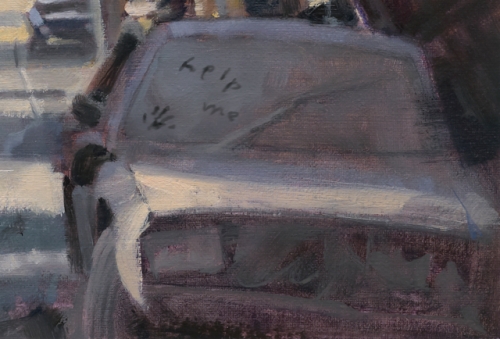

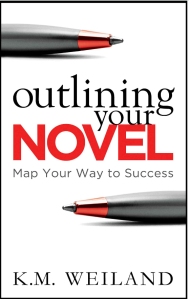 I am a big believer in creating an outline of your story and keep telling other writers how much it will help them with writing their novel. They nod their head, when they really want to pat me on the head and say, “Thanks, but no thanks.” So tonight read the beginning of K.M. Weiland’s “how to write book” titled,

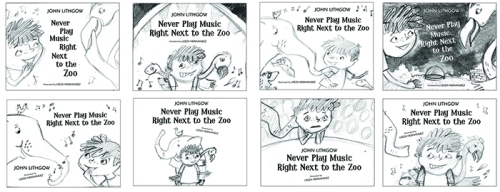
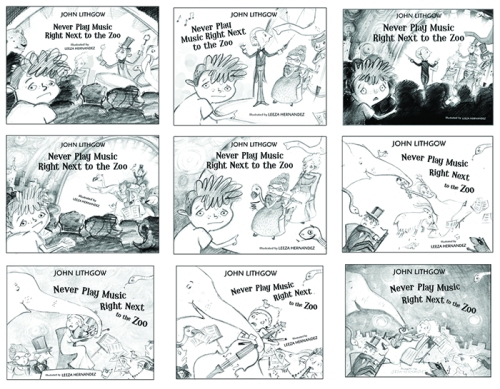


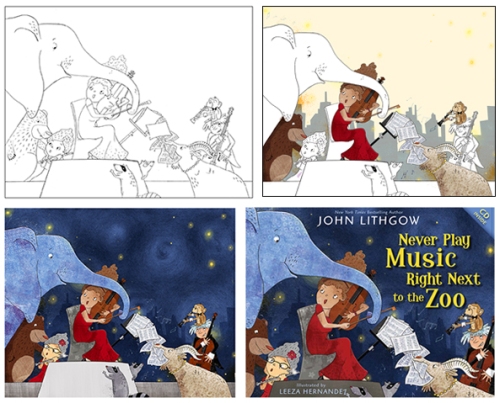
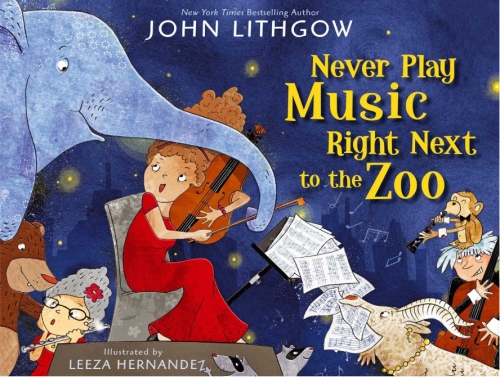
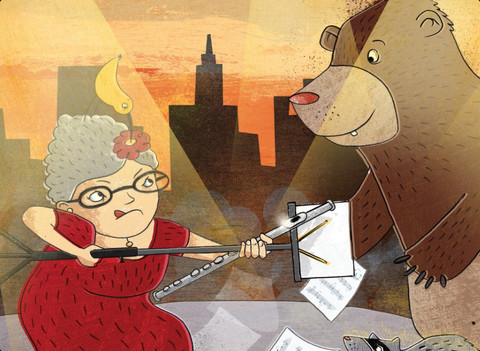

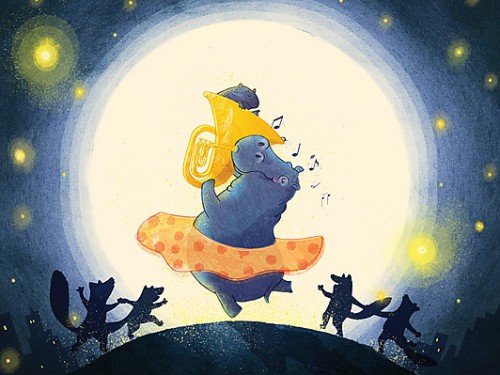
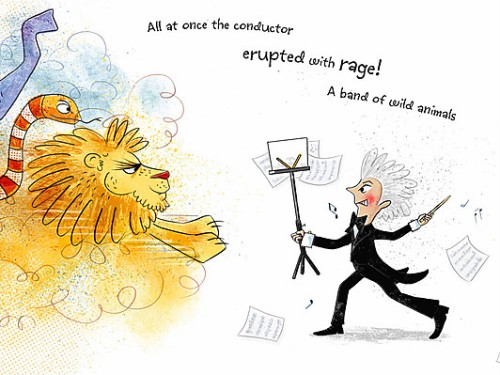
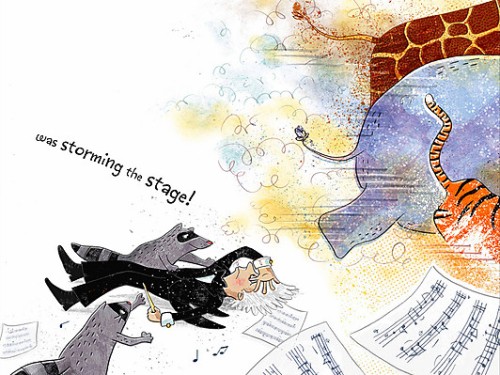
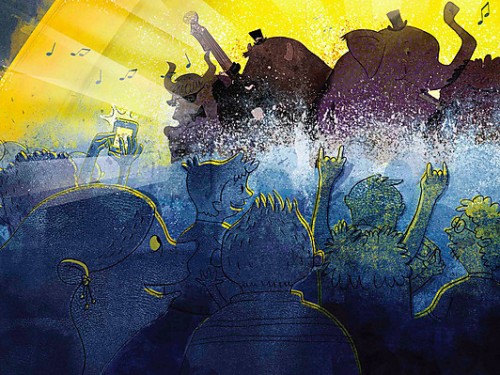
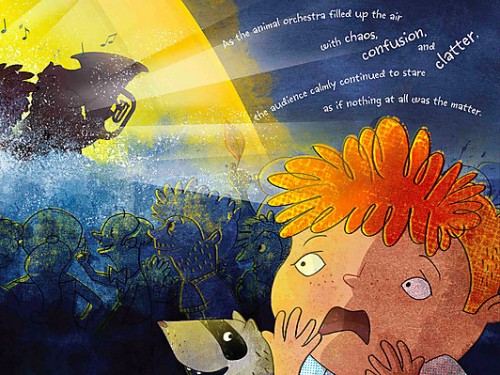
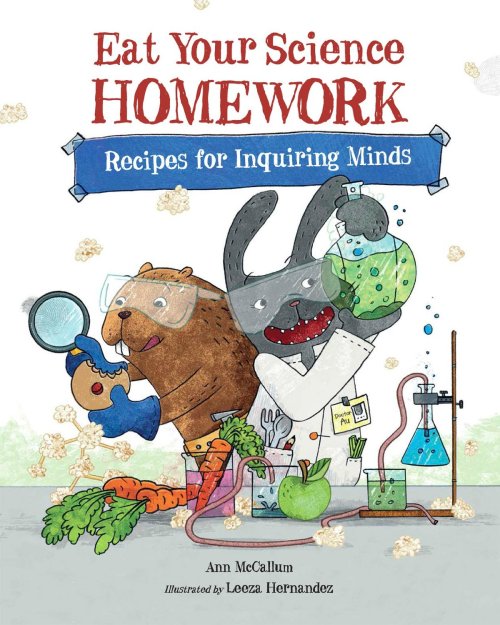
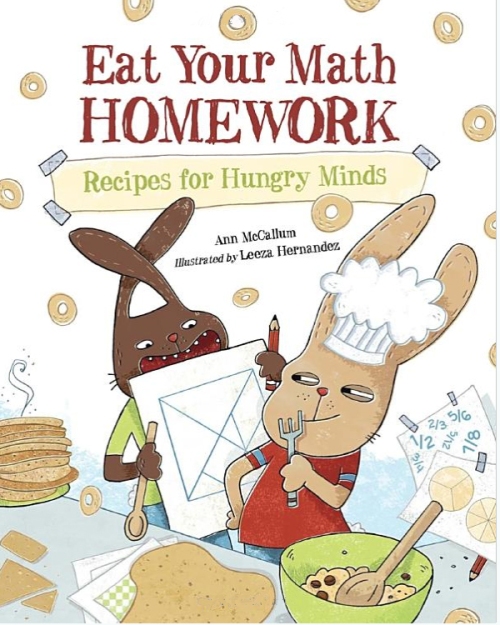
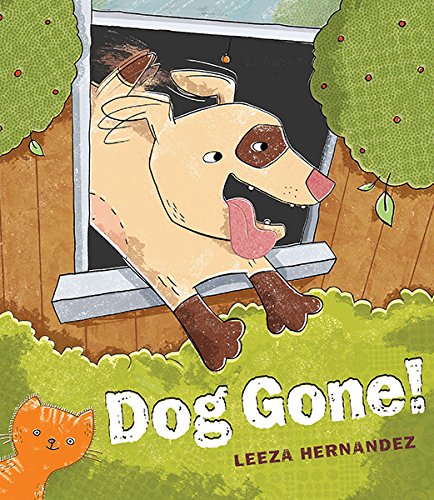
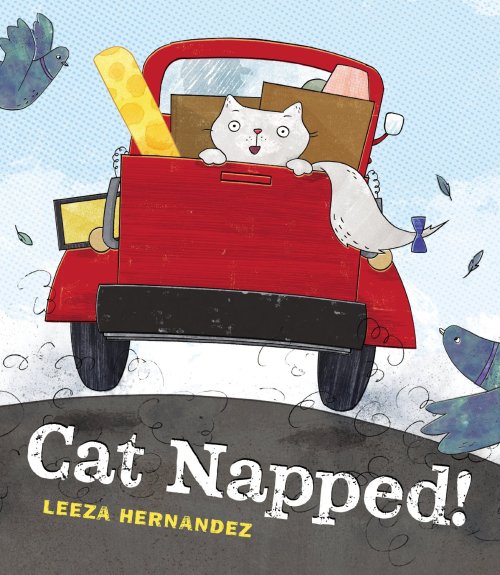
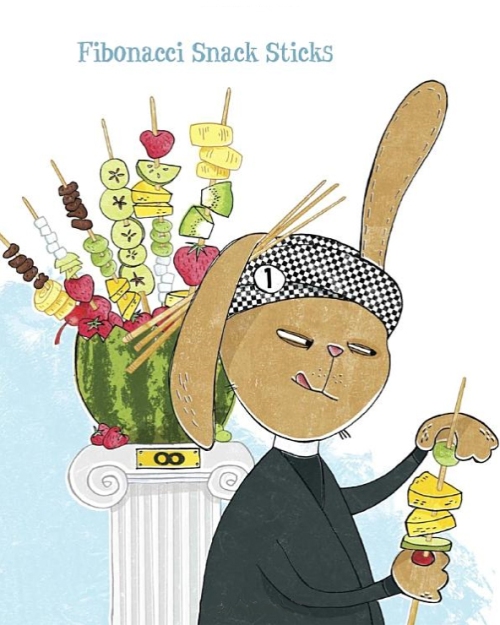

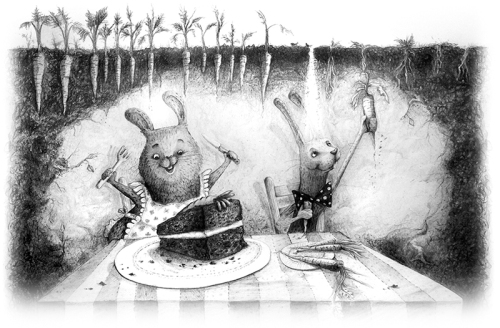
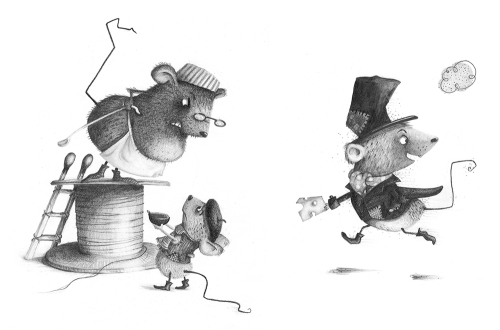 What is on the drawing board now?
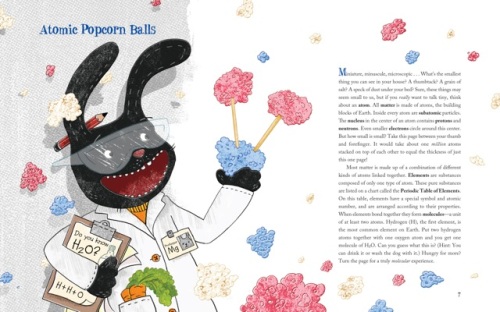
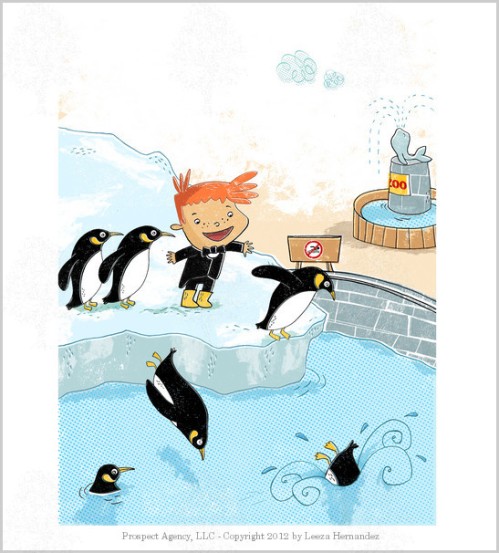
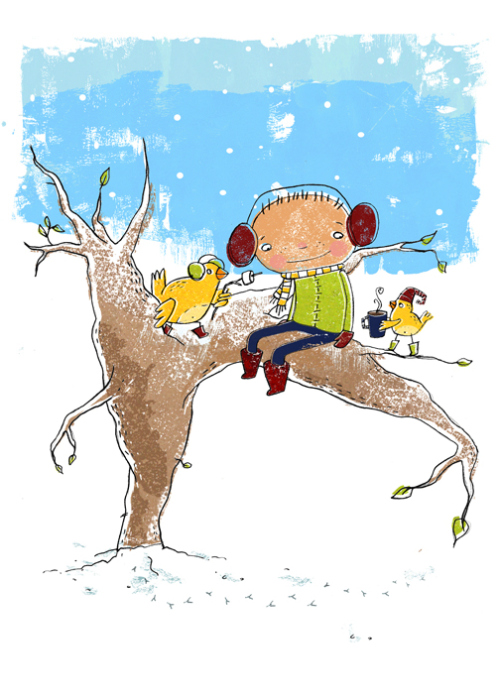

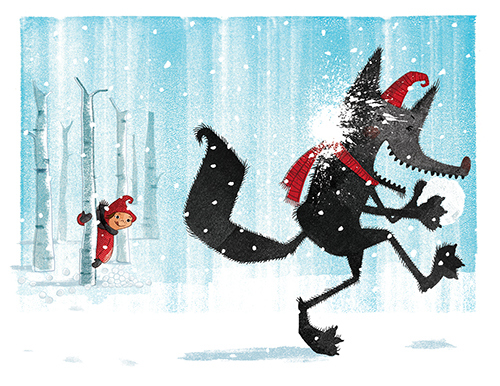
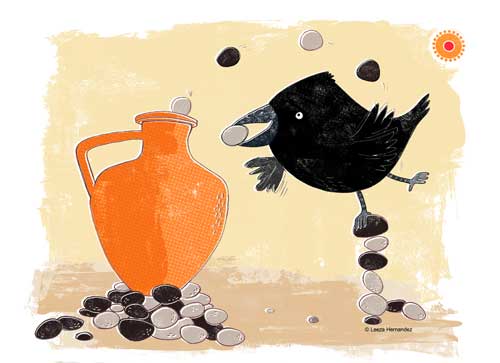
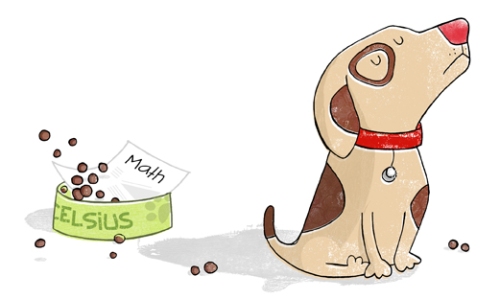
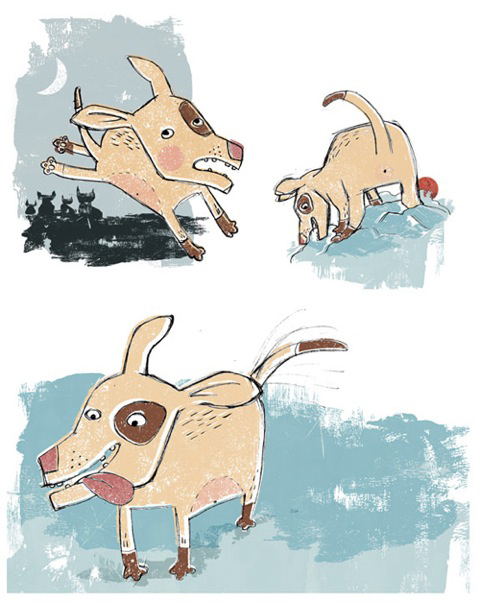

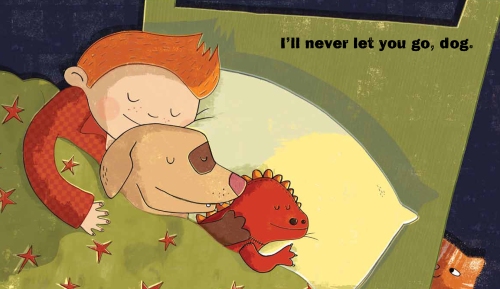


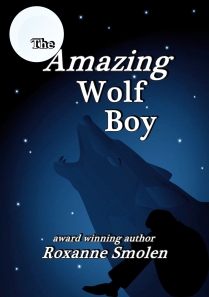 The Amazing Wolf Boy is a humorous paranormal romance for young adults about a sixteen-year-old nerd who turns into a werewolf during Christmas Eve dinner. His parents banish him to Florida (That’s where I live. What a coincidence.) where he fails to fit in with the other kids.
  I would also advise you to take care with your book formatting. Readers don’t have the patience to read text with large gaps or ragged indents. On that note, I have written a tutorial.

 For readers to become invested in a story, they need to “see” characters’ movement and action within a setting. Writers often hear, “Show don’t tell,” and sometimes we think, “But I did show – didn’t I? How do I fix this?”


 Jersey Farm Scribe here on…
Great post, Robin! Sugar can mess with you in so many ways. When I eat sugar it revs up my appetite so much that I can’t sleep through the night without getting up and eating. It also creates a cycle of low to high blood sugar that leads to migraines for me. I am much happier when I avoid sugar, not to mention well rested, and more energetic, but it’s hard to give up! I find avoiding it takes a lot of commitment, even though sugar makes me feel quite sick, which goes to show how addictive it is.
Hey, Amy, thanks so much for chiming in! (By the way, I’m usually a lurker on your FB posts rather than an actual commenter, just because I don’t always have something to say about them, but this is a great chance to tell you I love what you’re putting out there — very thoughtful and/or entertaining!). Anyway–
The reason I’m so into how Susan is teaching it is because she completely identifies my own embarrassment: just like she says, a lot of us are very well-informed about health and nutrition, we’re smart, we get it… but that doesn’t mean we do it. Yep, raising my hand there, Susan.
Sometimes I just need a guide. Yes, I could figure it all out for myself, but I’m a great student, so putting myself in a class setting really works for me.
Thanks for your sugar testimonial/confession. Solidarity!
I’ve always been overweight and come from a long family history of obesity and attendant health issues. But here’s a thing. In 2012, I joined Weight Watchers. I followed their system religiously and lost 75 pounds in six months. I looked great…but at the same time, my mental health issues (depression, anxiety, undiagnosed Asperger Syndrome) were running amok. I lost 75 pounds and then I tried to take my own life. When I got help, I gained back all that weight.
I feel like a failure in some ways, but at the same time, weight loss is going to be forever tied in my memory to that darkest of hours. I want to be healthier; I don’t ever want to spend another night on the bathroom floor thinking that the world would be better off if my life ended on the business end of a razor blade. Sometimes I wonder where the balance is and I’m still trying to find it. That search isn’t helped by the people who tell me I was “so much prettier when I was thin.”
But all of it–Asperger diagnosis, med change, therapy, more therapy, weight loss, weight gain–all of it needs to come in balance. My writing, too, is often fueled by coffee laced with way too much artificial flavored creamer; my one published story is practically an ode to Wild Mountain Blueberry and amaretto creamer.
All things in balance–caffeine and sugar, too. I deserve to be the best me I can be, right? Here’s to the journey.
This is a good word, Robin! I’m passing it along. I think it’s something all of us struggle with. Thanks so much for sharing.
Thanks, Jessie!
Elizabeth, this is a very brave and open thing to share, and I appreciate you for doing it. It also makes me so sad because I THINK YOU’RE WONDERFUL! You’re one of the kindest people I’ve ever met, and please know that you’ve added value to my life in the time we’ve spent together in person and online, and I know you’ve been important to other people, too.
But I also know that sometimes hearing that isn’t enough to make you feel happy in dark times. Still, that won’t ever keep me from saying it!
Food issues, weight issues, health issues … they really interfere with us using our wonderful creative minds for better things besides obsessing about what we just ate, what we’re going to eat next, wish I hadn’t eaten that, I should probably eat that …
I think what you said is absolutely the bottom line: we all just want to feel healthy. No matter what size we are, how we look — we just want to feel great. All the time. Every day. And hearing “You used to look so much better!” – ugh. So not helpful.
It’s an internal and personal issue. We want to feel how we feel at our own best. It’s up to us to decide what that is.
I support you, Elizabeth, in being yourself no matter what! That self is a beautiful person!