Laying in a background color around a subject can be tricky, and it can be very frustrating, especially after taking the careful time to draw out all of your details. It can be approached loosely, or with a tight hand. I will demonstrate both.
Keep in mind, these are my methods, and by no means the ONLY way to go about it. Watercolor painting is a very personal in application. Trial and error are the best ways to learn the medium. The worst thing you can do for your painting is get furious and give up. Give yourself grace and have patience.
Okay, here we go.
Set Up
Place your water, paper towel, and paints on the side you write with, keeping your painting in the middle. Grouping your supplies will help you grab what you need more efficiently.
Choose your brushes. I usually have three different sizes on hand. They are #2, #5, and a #12 (or around that). These are not my BEST kept brushes, and are typically used for events such as this.
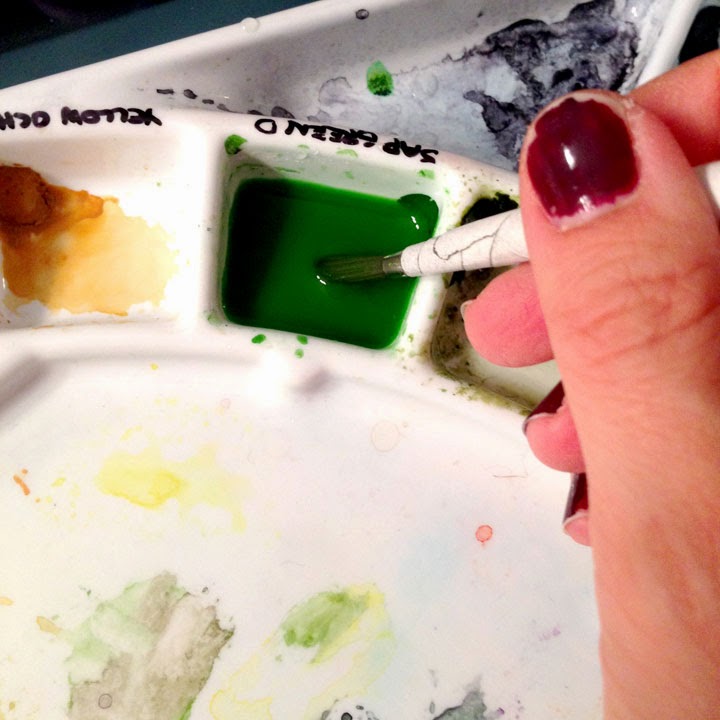
Prepare enough paint to fill the space you're going to cover. Choose a transparent color, like my Sap Green here. It will allow light go travel through down to the white of the paper and back. Trust me. I have also chosen a color that will work well with the other colors I'm going to lay down, such as blues, yellows, and reds.
• • • • • • • • • • • • • • • • • • • • • • • • • • • • • • • • • • • • • • • • • • • • • • • • • • • • • • • • • • • • • • • • • • •Painting Around the SubjectThe Tight Hand Approach
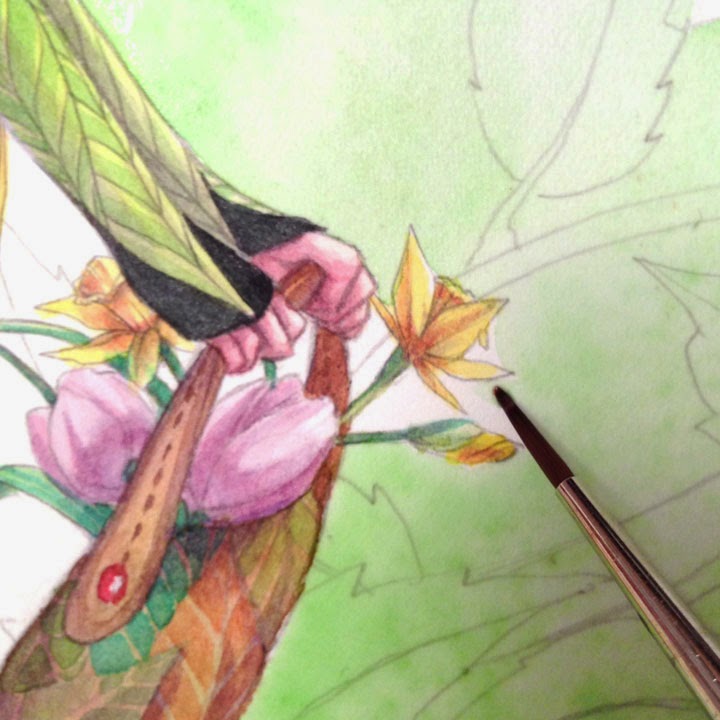
Choose the smallest of your brushes to start, but keep that medium size close by. You want it to be small enough to get into the tight spots, but large enough to hold a decent amount of paint/water mix. You can see I have placed it close to the face (most important to me) to ensure I'll be able to get in around the nose and lips with the point of the brush.
Scary part, start laying in the color. Charge (meaning fill the brush) with your color making sure it's full. Lay down next to the subject, but NOT along your line. Give yourself wiggle room. Make a little 'puddle' of paint, but don't over extend it. The idea is to keep plenty of wet paint sitting there, hence the 'puddle'.
Now pull from the puddle to your line with the color. Slow down here...it should all be wet enough to give you at least a moment to do this. It will take practice to find your sweet speed spot. Remember, give yourself grace.
To prevent unwanted lines, RIGHT after you do some of the face move to the other side of your puddle with a rinsed brush. Fade it out, this way, if it dries, you'll be able to paint and fade over it giving the illusion that you painted it all at once. ;) NOTICE I didn't do the entire face all the way down.
Work in little puddles/spots and work your way down and around, using the same method over and over again.
Again, fading out with a rinsed brush and clean water, getting rid of any unwanted crisp edges.
With this method I can confidently move away from my subject and begin to venture out. You may need to switch to your medium sized brush to have enough paint and water.
I will begin to add droplets of clean water in to help give my background texture, depth, and this will give the eye something to look at other than what I may have missed. Naturally, in my opinion, this is the most beautiful characteristic of watercolor, they're called blooms.
You can continue the entire painting with this approach.
• • • • • • • • • • • • • • • • • • • • • • • • • • • • • • • • • • • • • • • • • • • • • • • • • • • • • • • • • • • • • • • • • • •
Painting Around the SubjectThe Loose Approach
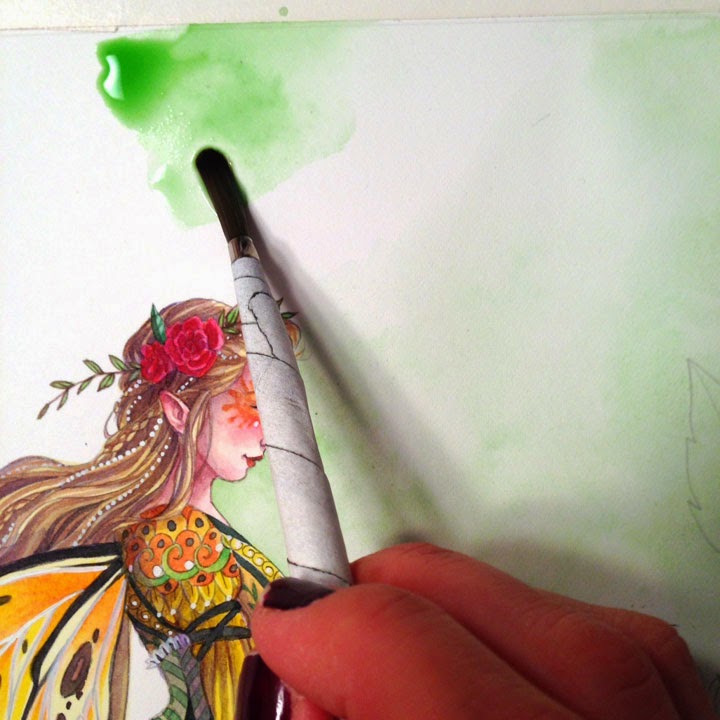
Grab your big brush and charge it up. Lay down a good size puddle, but small enough that you still have a puddle (remember, don't over extend your paint). Also, don't go to your lines, you need the space between.
Rinse out your brush and return to the edge of your puddle, pulling the paint towards and OVER your line art. You are fading out the color on top of your subject.
Like with the tight approach, take your rinsed brush and fade out the back end of the puddle. Repeat.
• • • • • • • • • • • • • • • • • • • • • • • • • • • • • • • • • • • • • • • • • • • • • • • • • • • • • • • • • • • • • • • • • • •
Touching UpIn the tiniest of spots, take your smallest brush and pull the wet paint in. If it's dry charge your brush, but first dab it on your paper towel so that it won't over flow or bubble in the tight space you're painting. Try to match the intensity of the color.
If there are crisp edges you don't want...
...go back in with a rinsed brush and clean water, gently scrub and fade them out.
There are tiny little white spots left around the forehead and nose...see them?
Very lightly, and very gently, with your small brush, pull the paint left in the crisp edge onto the white. Go in, lightly do this, and get out. Too much scrubbing too aggressively will leave inconsistent marks you don't want.
• • • • • • • • • • • • • • • • • • • • • • • • • • • • • • • • • • • • • • • • • • • • • • • • • • • • • • • • • • • • • • • • • • •
Fading Color on top of Faded Color
Just to show I know what I'm talking about, once your first faded section is dry, go in to a new section and start again with a puddle.
Keep making puddles and scooting/painting them over the dry faded area. Once you've overlapped start to fade out your puddle with a rinsed brush. Again, might take some practice, so use light water droplets if you need to. ;)
• • • • • • • • • • • • • • • • • • • • • • • • • • • • • • • • • • • • • • • • • • • • • • • • • • • • • • • • • • • • • • • • • • •
Finishing It Up
Good Luck!And feel free to ask me any questions or if there is something you need a tutorial in I'd be happy to help out if I can.
 Here is Tracy explaining her process:
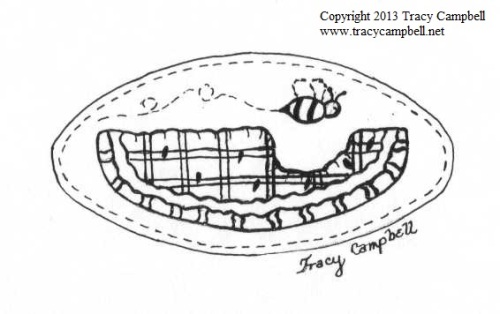
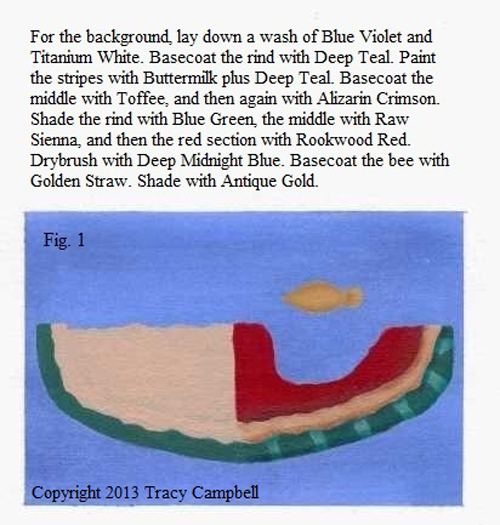
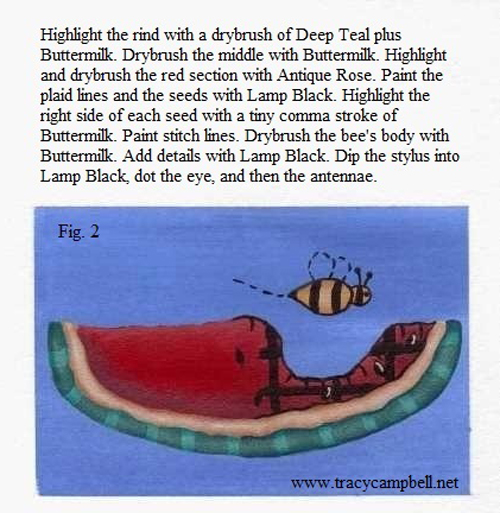
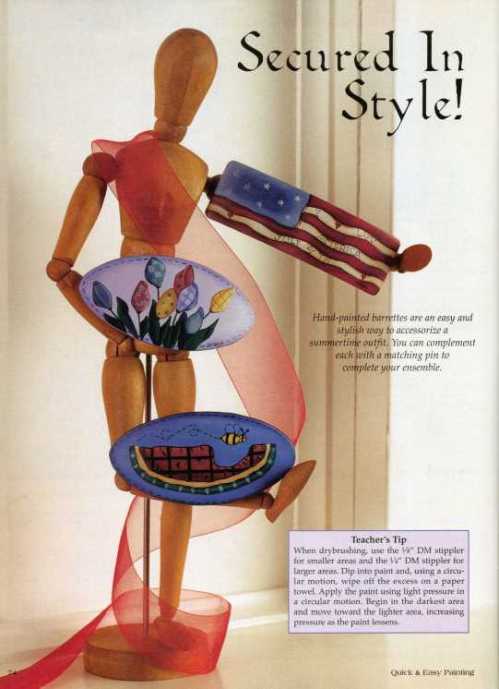
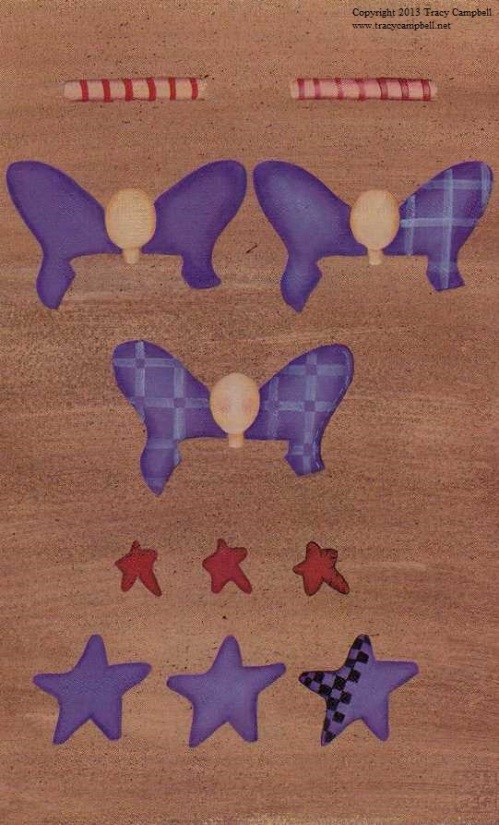
Below, I’ve included some of the steps I used to draw and paint the “Watermelon Barrette”.
Illustration:
- Draw the design, scan it, and then reduce the drawing to fit the surface.
- Trace the design onto tracing paper.
Paint/Supplies/Brushes:
- DecoArt Americana Acrylics.
- DecoArt Matte Varnish Sealer.
- Krylon Matte Finish Spray.
- Brushes—1/8” and 1/4” Stipplers, #1 and #3 Round, 3/4” Wash, #2, #4, and a #10 Shader, #6 Filbert, and a #10/0 Spotter.
Wood Surface Preparation:
- Sand the wood barrette with 400 grit wet/dry sandpaper.
- Remove the dust with a tack cloth.
- Apply one coat of DecoArt Matte Varnish Sealer.
- Allow to dry, sand, and then wipe clean.
- Paint the background with at least three coats of paint.
- Center the tracing over the barrette.
- Slip the dark blue dress-maker’s paper under the drawing, and then
- Trace the main pattern lines with a stylus and/or a pencil.
Color Worksheet:
 Drybrush Tips:
- Use a 1/8” Stippler to drybrush small areas.
- Use a 1/4” Stippler to drybrush large areas.
- Dip the brush into the desired paint color.
- In a circular motion, wipe off the excess paint onto an absorbant paper towel.
- In a circular motion, applying slight pressure, begin in the darkest area and move toward the lightest area.
- Follow the above steps until the desired results are achieved.
Finishing Touches:
- Let the piece cure (I wait three days).
- Apply one coat of DecoArt Matte Varnish Sealer.
- Let dry (15 to 30 minutes).
- Lightly sand with a brown paper bag.
- Apply at least three coats of sealer, sanding between each coat.
- Spray with Krylon Matte Finish.
Did you go to school for art?
No, not unless you count the “How to Paint” workshops I signed up for in 1991.
What types of things helped you to develop as an illustrator?
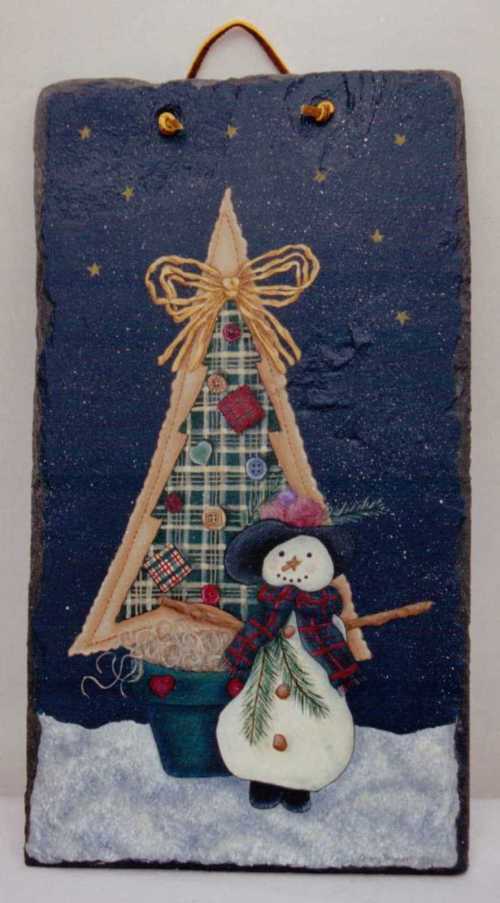
In 1994, a published picture book illustrator encouraged me to draw my own designs. So with shaky fingers, I picked up a pencil and gave it a whirl. And voila! The fabric tree and snow mama was my first design, and I painted it on slate.
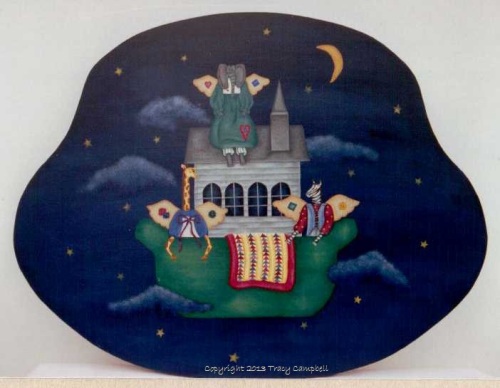
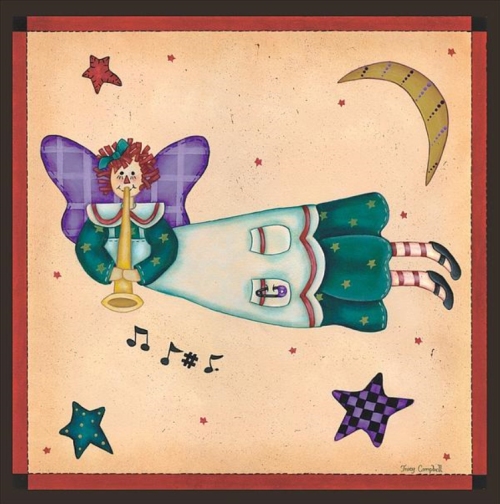
I continued studying “How to Paint” books, and then with three years of drawing and painting practice under my belt, I designed “How to Paint” pattern packets. During that time, I attended a Tuesday morning group for young moms at a local church. The moms loved my designs, and they invited me to teach on Tuesday mornings. One of the designs I taught them, Noah’s Flying Angels, was painted on a wood piece.
My confidence bloomed like the flowers in my garden, and I decided to sell my expanding portfolio. Without access to the Internet, I packed up my car and traipsed all over Southern Ontario, begging and pleading with store owners to stock my designs on their bulging shelves. Krafty Kennedy’s, a store in London, Ontario, took a chance and purchased my packets. Wait, it gets better. They even asked me to teach workshops. A few years later, I became a “Big Brush” teacher at national painting shows in Toronto and London, Ontario.
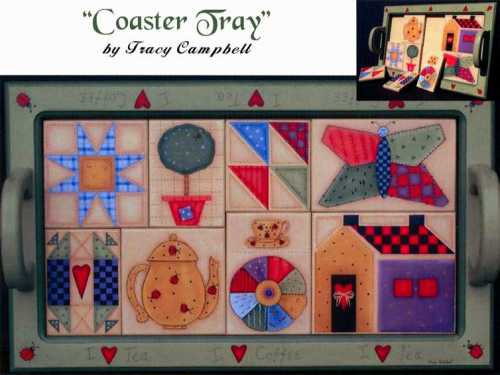
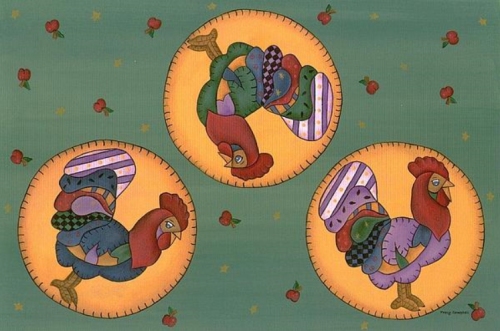
Here is a pattern packet design.
What was the first piece of art you did where someone paid you?
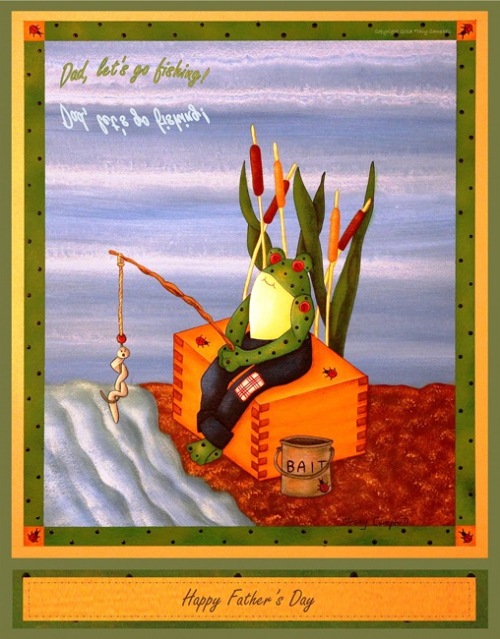
A small marketing company hired me to design thirty cards. I recently revamped “Gone Fishing” to create a Father’s Day card.
Did you start out doing interior design work?
It wasn’t until 2004 that I received accreditation as an International Design and Decorating Professional. I then obtained my Staging, Color Consulting, and Professional Organizing designations. While I was running my decorating business, QC Design School approached me to tutor students and, later, to facilitate Color and Professional Organizing workshops. I’ve recently cut back on my decorating services to allow more time to pursue my new love…writing.
What are your favorite art materials?
Hmm…I don’t really have a favorite. I paint on many surfaces—illustration board, slate, tin, wood, and canvas.
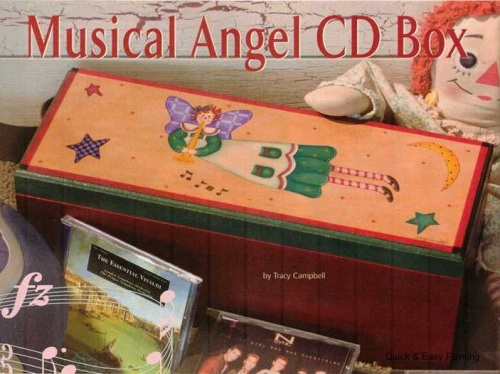
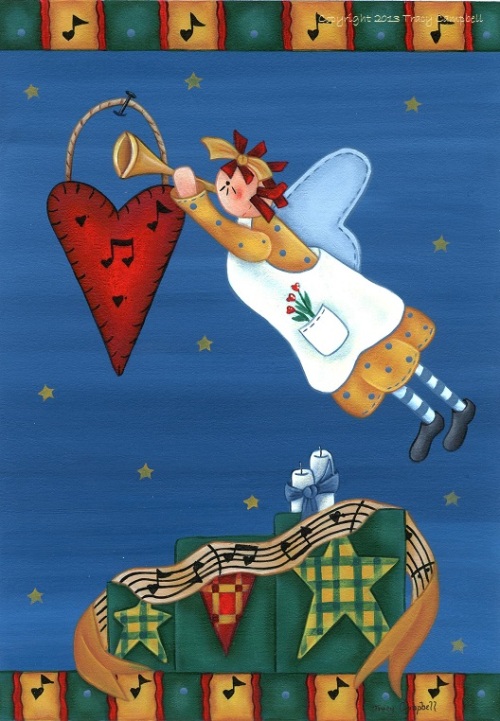
Here is a “Musical Angel” I painted on a CD box.
Have those material changed over the years?
Yes, I’ve discovered Copic markers, which I must say are not forgiving. To avoid making mistakes, I test the markers on scrap paper to ensure I choose the correct tint, tones, and shades. The upside, I reduce my painting time in half.
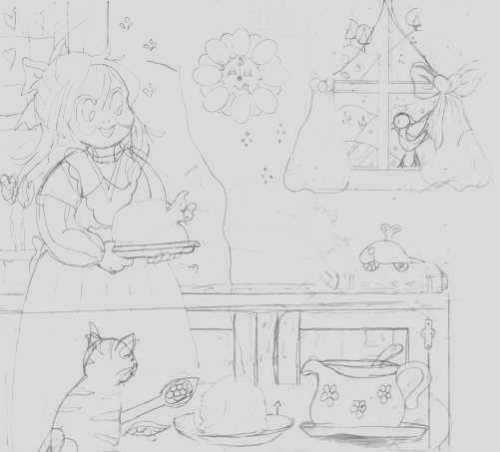
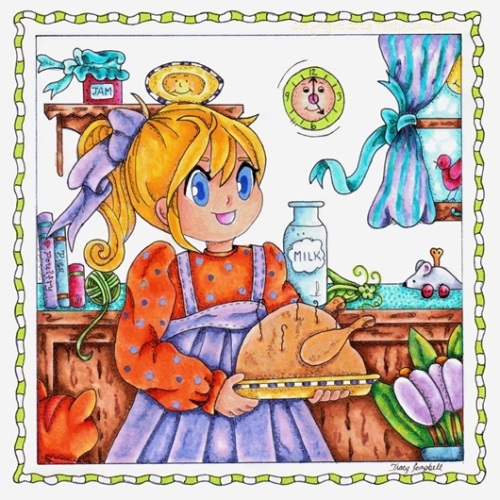
Here is a very rough sketch for the painting below.
 Once the idea takes shape, I redraw each figure, scan it, and then enlarge or reduce each element until I’m happy with the placement. I then transfer the final drawing onto Strathmore WindpowerTM smooth finish, acid free Bristol.
How long have you been illustrating?
I seriously began illustrating in 1994, so that means almost twenty years!
I like your note cards. How did you start creating and selling them?
Thank you, Kathy. Some of my three-dimensional wood designs were the inspiration that lead me to produce a line of square-shaped greeting cards, which I submitted to the Thirteenth Uniquely Ontario Creative Arts Show in Toronto, Ontario. My cards were judged on design, workmanship, promotional materials, and saleability. After receiving a score of 92 out of 100, I was invited to participate in the show that assists in the growth of Ontario’s best home-based entrepreneurs. I was disappointed I didn’t receive 100.
Kathy, I hope you’ll indulge me for a moment. Regal Gifts hired me to create A Country Charm Collection, reproduced on wrapping paper and gift cards.
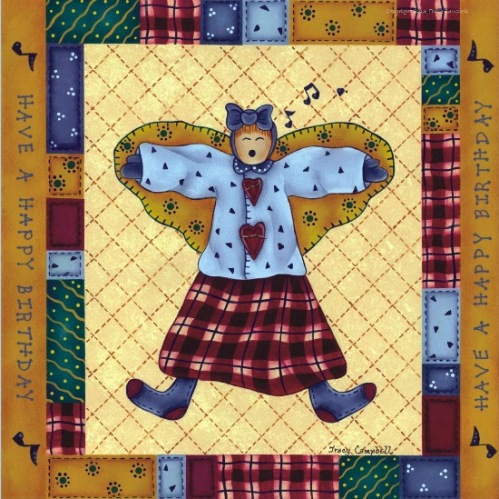
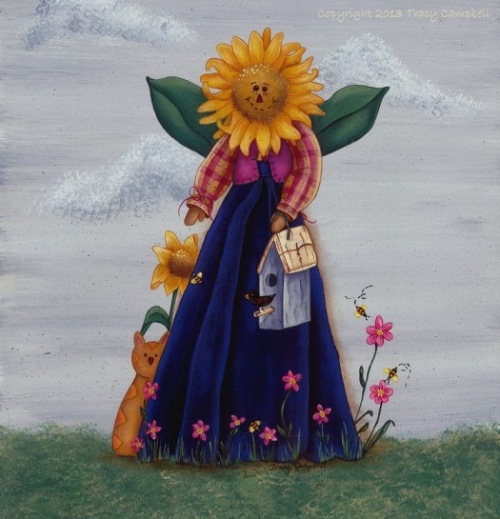
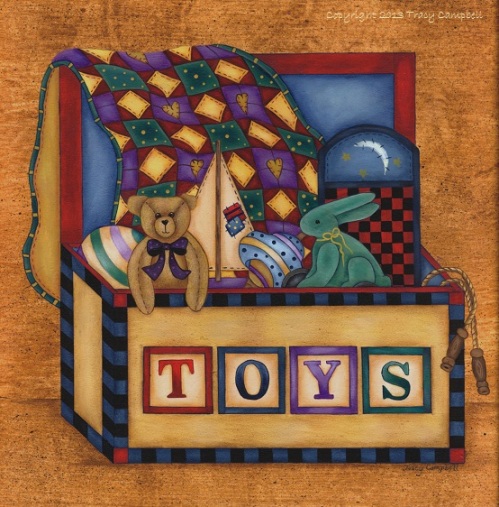
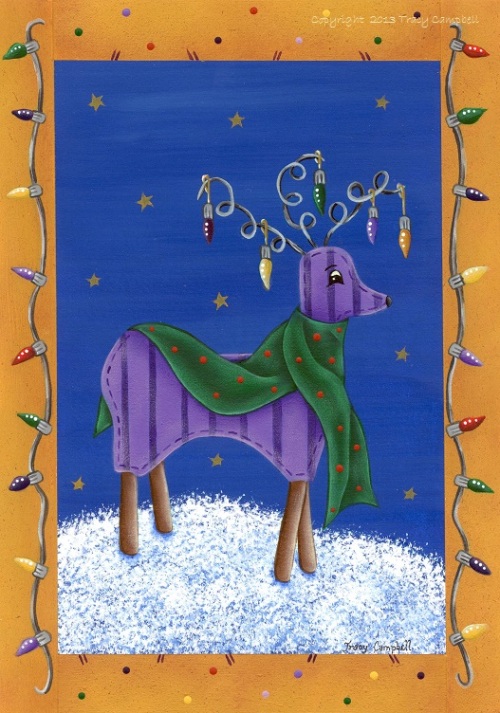
Here are just four designs.

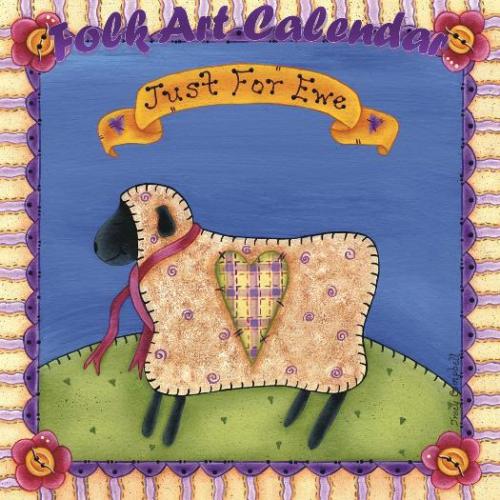
 My confidence soared. I queried a well-known calendar company in Markham, Ontario. Rejected, I sulked, unaware God was still at work. A few months later, I received a call. My name had been passed on to Zebra Publishing. They hired me to design a “baby’s first year keepsake” calendar, and the following year, a “twelve-month folk art” calendar. Both calendars sold like hot cakes in mom-and-pop bookstores, Chapter’s bookstores in Canada, and Barnes & Noble in the U.S.

It looks like you have written and illustrated a children’s book. Can you tell us a little bit about the book?
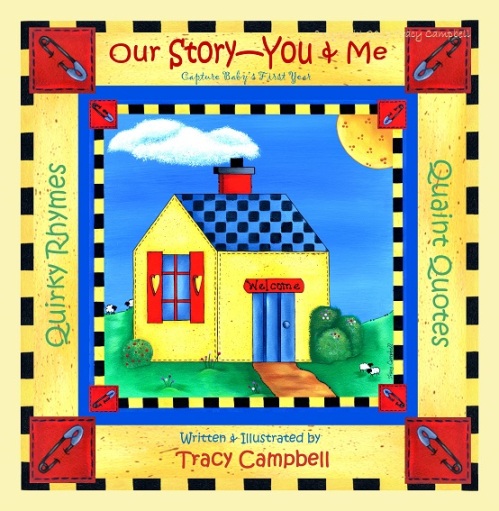
Our Story—You & Me is much more than a children’s book. It’s also a record-keeping book sprinkled with quaint quotes that will appeal to mommies and expectant mommies who want to capture the milestones of their baby’s first year. The book is unique in that it elevates a record-keeping book to an early-reader storybook a mom can read to her child, and uses a child’s natural curiosity about their first year of life to help interest them in reading. In the years to follow, mom and growing child will giggle together, poring over candid photos of things like a toothless grin, wobbly first steps, the ultrasound, and other special moments. This fifty plus page book mirrors my calendar art and will make the perfect baby shower gift.
Do you have plans to self-publish?
I’m on the hunt for an agent.
Is illustrating children’s books a new direction for you?
It sure is.
 Have you ever illustrated something for a children’s magazine?
I haven’t pursued that avenue yet, but I have been published numerous times in American and Canadian “How to Paint” magazines.
Here are two tear sheets.
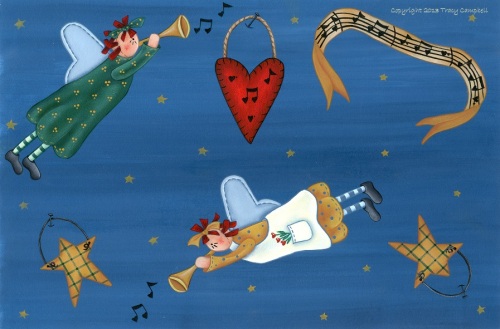
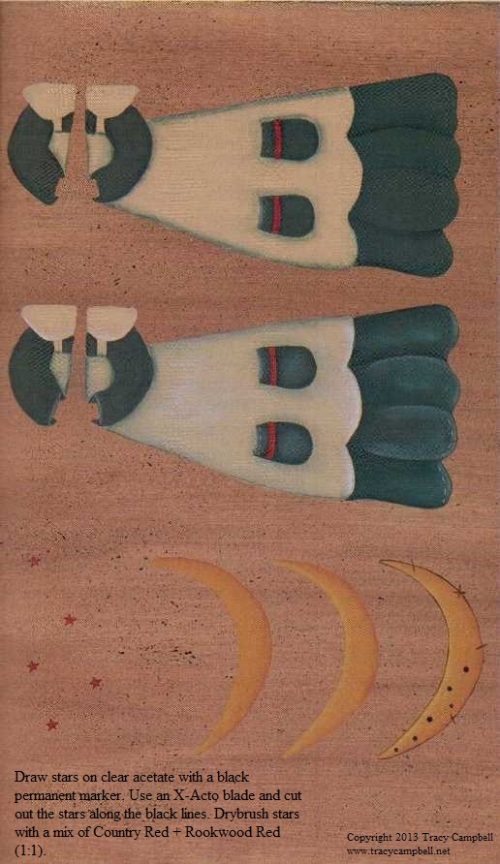
The drawing and painting instructions for the “Musical Angel CD Box” are similar to the “Watermelon Barrette”. Below, I’ve listed the differences.
Additional Supplies:
- DecoArt Walnut Gel Stain.
- Krylon Matte Finish Spray.
CD Box Surface Preparation:
- Prep the box as per the previous instructions, paint the base Napa Red, paint the lid Antique White, and then paint the edge Deep Teal (apply at least three coats of paint).
- Drybrush the Deep Teal area with Blue Green, and again with Deep Teal plus Buttermilk to brighten.
- Apply scotch tape 1/4” from the edge, and then paint the border Country Red.
- Paint corner squares Lamp Black.
- Dilute the gel stain with water, and then apply with a foam brush. Wipe the excess stain with a cotton cloth. Let dry.
- Spatter with Burnt Umber and again with Lamp Black.
- Trace main pattern lines onto the lid.
Color Worksheet 1:
Color Worksheet 2:
What have you been doing to get your artwork noticed?
I have an online whimsical shop over at http://www.tracycampbell.net/shop.html and a website over at http://www.tracy-campbell.artistwebsites.com, where Fine Art America reproduces my original whimsical works of art on metal, stretched canvas, and acrylic. You can also buy unframed prints or framed prints that are ready to hang on your wall or on a friend’s wall.

Have you made picture book dummies to show art directors, editors, and reps.?
Not yet.
Do you have an agent?
I’m hard at work querying agents.
Do you ever use two different materials in one illustration?
Not materials per se, but here’s another style where I used a Micron pen and watered down acrylics.
The above piece was painted on illustration board. The process is the same as painting on wood, except I don’t have to prepare the surface. I just transfer the line drawing, ink the design, and then apply watered down acrylics.
I also paint on Paper Mache items.
Have you seen your style change since you first started illustrating?
Oh my, yes! My earlier drawings and paintings were stiffer than my ironing board.
 Have you gotten any work through networking?
Yes, from author extradornaire, Susanna Hill. She purchased designs for her online course—Making Picture Book Magic. Take a peek over at http://www.susannahill.blogspot.ca/p/making-picture-book-magic.html.
Do you do any art exhibits to help get noticed?
Not at present.
 Are you open to doing illustrations for self-published picture book authors?
Not at the moment. I’d like to concentrate on illustrating my own books.
Do you use Photoshop?
Yikes! I hear the learning curve is steep and I’m not getting any younger. I do scan my artwork, and manipulate my designs with Microsoft Publisher and Paint. Here’s one I reconfigured.
Do you own a graphic tablet? If so, how do you use it?
Unfortunately not.
How much time do you spend illustrating?
Not as much time as I’d like. Some days I work on marketing, other days I write and/or paint.
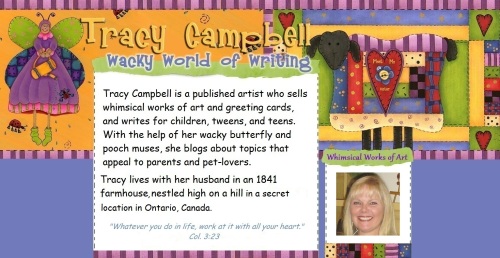
Do you have a studio set up in your house? Where do you live?
I have a second-floor studio in my 1841 farmhouse, nestled high on a hill in a secret location.

Is there anything in your studio, other than paint and brushes, that you couldn’t live without?
My art and writing reference books.
What are your career goals?
My career goals are to find a literary and/or art agent, finish writing two picture books, polish my middle grade novel, and continue creating art that one day will appear on home décor and giftware items. Lord willing.
 What are you working on now?
Besides tutoring, I’m querying agents, blogging, writing a rhyming picture book, and adding art to sell on my website.
Are there any painting tips (materials, paper, etc.) you can share that work well for you? Technique tips?
I love dark blue dress-maker’s paper. I lay my line drawings over the transfer paper, and then I use a stylus to trace the design onto any surface I like. The beauty of this paper is that as soon as you add ink or water—poof—the lines disappear.
Any words of wisdom you can share with the illustrators who are trying to develop their career?
Don’t be afraid to try new things, step out of your comfort zone. As Will Rogers once said, “If you want to be successful, it’s just this simple: Know what you are doing. Love what you are doing. And believe in what you are doing.”
Thank you Tracy for sharing your artwork and process with us. We will be watching to see how you develop your style to illustrate picture books.
If you want to see more of Tracy’s work or follow her in the future, her website is www.tracycampbell.net. Please take a minute to leave Tracy a comment. It is much appreciated. Thanks!
Talk tomorrow,
Kathy
Filed under:
authors and illustrators,
How to,
illustrating,
Illustrator's Saturday,
inspiration,
Interview,
Process Tagged:
3-D wood designs,
How to Paint,
Interior Design company,
Magazines,
Tracy Campbell 


.png.jpg?picon=3640)


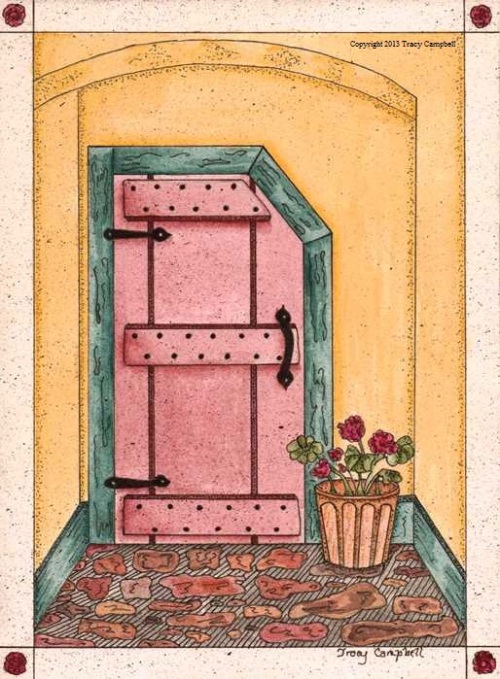
This work has such a lovely, old-fashioned quality that’s so warm. I have to say, my absolute favorite is your “pink door,” Tracy. Just like a perfect first-sentence “hook,” I am compelled to know where that door is located and what’s beyond it Kathy, maybe a future “first page” prompt?
Thanks for sharing, ladies
Hi Donna,
Art is such a subjective thing. I chuckled when I read your fabulous comment about the “pink door” as it’s not my favorite. And I’m glad you find my work has a warm, old-fashioned quality.
Thank you, Kathy for having me as your guest.
Have a lovely weekend.
Tracy
Yes, Tracy, it’s about a subjective a subject as you can subject yourself to Good luck in getting representative and living your dream
Artists and art teachers everywhere should be flocking to this site, Tracy. You shared wonderful instructions.
Excellent post, Kathy and Tracy!
Oh Tracy,
What a delight to go from one lovely art work to another at this site. Thanks for steering me here! I really enjoyed myself.
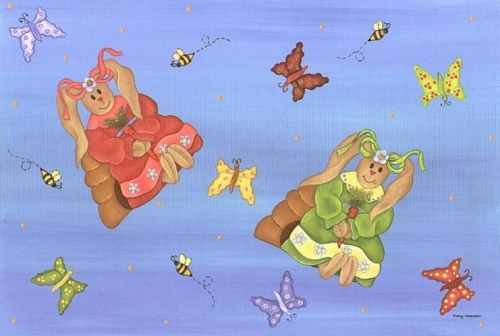
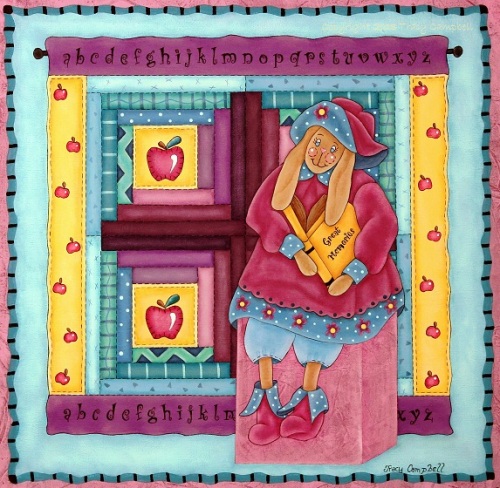
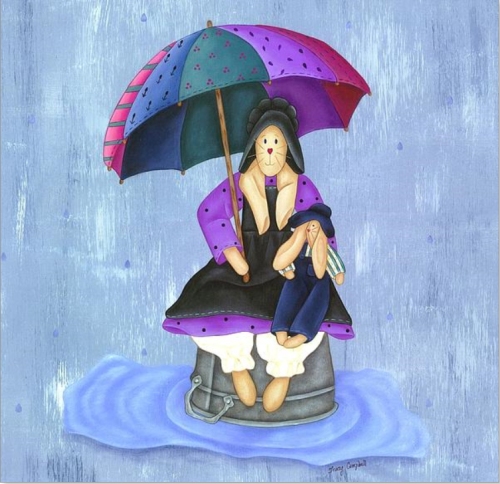
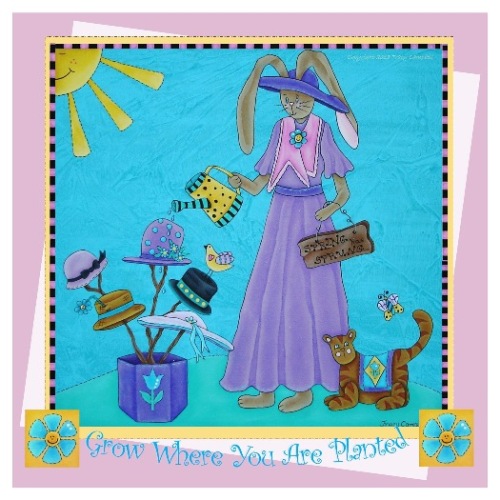
Thanks for sharing your work and techniques, Tracy! You are very talented. I’ll have to say my favorite one was the bunny with the umbrella. So sweet!
Thanks so much, Kathy, for highlighting Tracy! She is an amazing artist…more importantly, she is an amazing human being!
Tracy…LOVE your post…I learned so much about you…and your journey in art. I treasure the notecards of yours that I have…the only problem is that i don’t want to send them to anyone…I want to keep them for myself.:) I’m going to check out the baby book…my son and his wife don’t like to keep a lot of stuff around, but that just might be perfect for the new grand-baby.:)
And Tracy…keep writing…it will happen!
Thank you, Donna, for popping back in and wishing me luck.
I appreciate it.
You’re too kind, Marylin. Hmm…perhaps I might start a feature on “How to Paint” on my blog.
Hi Linda,
Not only does Kathy offer inspiring art work here, but she also posts awesome writing information. Glad I steered you over here, and that you were delighted.
Hi Sharon,
I always smile when someone tells me they have a favorite. Glad you enjoyed my work and the small snippets I offered on how to paint. If I can learn to draw and paint, anyone can.