This is yet another one of those rambling posts about our kitchen chaos. I was thinking about it and if this was a magazine the story wouldn't be ready until I had a perfect final kitchen with beautifully styled pictures. But that's why blogs have something to offer that glossy magazines don't. When we were wondering if we could actually assemble our IKEA kitchen cabinets ourselves I was looking all over the internet for other people's work-in-progress pictures and suggestions.
So that's what this post is about because we've learned things along the way. But first of all I should mention that we had a very simple situation, relatively, because our kitchen layout was already working well, the appliances, plumbing and electrical are all in the same positions. Also, we have a galley kitchen with no corners, islands or oddly shaped walls (aside from the fact that they're not straight in some places but I'll get to that). So I can only say that if you are in a similar situation you can certainly do it yourself, but it's not easy. Unless you're really skilled with renovation-type work of course. I'd say we're handy, but not particularly skilled.
And after a few weeks of this we are tired out, with sore hands and muscles. I woke up this morning with a weird pain in the middle of my back and I had trouble getting up out of bed. I couldn't even turn over! I've been walking around today saying "ouch, ouch, ouch!" and trying to figure out what I can and can't do just now. I can sit and walk, but oddly I can't really lie down. I've tried a few things and I think it was from lots of sawing. I tried imaginary sawing and that hurt the most. But enough about my back.
On Friday I assembled the upper cabinets. We decided there may be a good reason to put those up first so we should try to do it. Our current deadline is Wednesday because that's when someone is coming to measure for our countertop so everything needs to be in place by then.Assembling the cabinets is the easiest part. Especially if you've assembled lots of IKEA things in the past and you're careful about reading the instructions. I think I spend more time undoing things (which is difficult) because of putting things in on the wrong side or whatever. I was also frustrated to find that one of the back panels sustained a crack somewhere along the way, and I drove in a couple of nails askew which caused some small chips inside.
I recommend putting the door hardware on before you hang the cabinets. The screws are actually a bit tough and take some work to get in and it's easier if you can brace against the floor.
As mentioned last week, I had this last wall to repair and paint. IKEA recommends that you paint one coat, then put up the cabinets, then do the second coat. This saves a bit of paint, and I guess you can do touch-ups if you scratch the paint. One of my tricks was not doing too much work on smoothing out the walls because in most places the rough spots where the old cabinets used to be attached were covered by the new cabinets.At this point you need to put up a metal rail that the cabinets hang from (get a nice big level it will be very handy). The rail wasn't long enough, so it was a tricky matter of working out where the studs were, where the cabinets were and cutting two pieces of rail that would maximise the amount of support for each cabinet. I recommend marking your studs on the wall with a pencil and measuring everything carefully and marking it on the wall.
Our oven fan vent can't really be moved and was the biggest problem. It determined where the vent would go, which determined where the cabinet above it would be which determined where all the other cabinets would be. We discovered there wouldn't be enough space between the countertop and cabinets - even our kettle wouldn't fit.Our brilliant solution was that we would (later on) create a small box that could be used as a small shelf. This box would attach to the cabinet over the stove, and the fan would attach to it. This meant the cabinets could be placed higher up. The other tricky part at this stage is working out the position of the little panel strips that fill gaps. In this case a 2" strip goes beside the over-stove cabinet so that its door can open fully, and this allows for a 1" space on either side of our free-standing stove.
At this point we measured and cut the rails with a small hacksaw. The saw is only $4 and works well but it takes a while to cut through the rails. If you had a power saw that cuts metal it would be much easier. The picture below shows Bradley attaching the first rail. You need to buy your own screws for this, we got some really big ones because there's going to be a lot of weight on this rail. And of course the rail needs to be attached to a few studs. The hardest part for us is that the battery for our new drill isn't working properly and it had barely any power.Then finally we could put up all the cabinets. This part isn't too bad, the cabinets are heavy but they attach at two places with a simple bolt. Then they can be adjusted afterwards by sliding them along the rail so that they are all snug against each other. Also you can make sure at this point you have a 2" gap on the side for the filler panel.
Luckily the walls on this side of our kitchen are straight. We have a single cabinet for the other side of the kitchen and the wall it's next to is on an angle. If we added a filler panel there it would be really obvious so we're just going to leave a large gap. It's possible because it's a single cabinet, and we can centre it on the small patch of wall next to the window that it's going on, but if it wasn't we'd have had a problem. Or it just wouldn't look right which is frustrating after spending so much time and money.This is as far as we've gotten. Next, you drill holes and attach the cabinets to each other, then add shelves and doors. Finally you add the hardware for the doors.
The only other difficult thing so far is drilling holes for our plumbing that comes from a side wall instead of directly under the sink. We did three neat holes for the pipes on one side of the end cabinet. We did this with a little hole saw kit - you can get a basic one for under $20. The pieces attach to your regular drill.But the drill isn't working well now and we have six more holes to go! We're going to need to buy a new battery. If your plumbing comes in directly below the sink it's a lot easier because you're cutting through the thin back panel, not through the thick walls of your cabinets.
In short, you can do it yourself. But you may find yourself getting really annoyed at the IKEA DVD and posters (included with any kitchen purchase) that make it look really easy. I found watching the DVD quite soothing until I realized they were basically installing cabinets in what seemed like a completely perfect room, without any crooked walls, unevenly spaced studs, oven vents, or evidence of plumbing or electrical outlets to worry about.
My biggest tip is to make a list and make sure you do things in the right order. I hope we are, because we're not done yet!
Viewing: Blog Posts Tagged with: ikea, Most Recent at Top [Help]
Results 1 - 4 of 4
Blog: Needle Book (Login to Add to MyJacketFlap)
JacketFlap tags: renovation, decor, ikea, kitchen, kitchen, renovation, decor, ikea, Add a tag
Blog: Books, Boys, Buzz (Login to Add to MyJacketFlap)
JacketFlap tags: thankful, IKEA, Add a tag
In other words: IKEA.
I first heard about IKEA when I lived in New York for grad school. My Australian apartment-mate (who later turned out to be a teeny-tiny bit psycho--no offense to the relatively normal Aussie population) basically outfitted her entire share of our apartment with IKEA. For under $500, she got a cute little loveseat, a bed, and a folding dining table and chairs. Well... I was in serious need of a bookshelf (being a grad student, and all) so I ordered a SVEN bookcase. They no longer make SVEN--FJUS is the closest thing they have now--but let me tell you it was a student's dream. $29 plus shipping. Seven feet tall. Strong. Basically a collection of raw lumber organized into a shelving unit, but it was awesome. And I was hooked.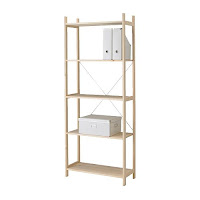
From there I moved to Colorado--which has no IKEA, can you believe it?--and Missouri--of course they don't have an IKEA. Then, finally, to Texas. I furnished my bedroom and office entirely in IKEA.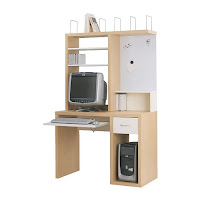
When I went--oh-so-briefly--to grad school in Boston, I got a nightstand and bookshelves for my dorm room.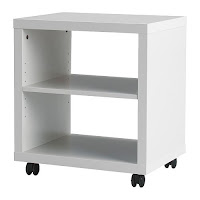
Now that I'm back in Texas, my apartment is--of course--a living breathing ad for IKEA. (And will be even more so when I get the rest of my shopping list!) So far, I have a dining table, six chairs, dresser, mattress, and nightstand for around $400. Can't beat that. Plus, like those other Swedish exports, Saab and Volvo, it's stylish and built to last.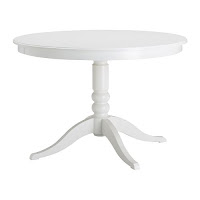
Dish. Do you have any secret (or not-so-secret) sources for affordable, stylish stuff for your home or bedroom?
Hugs,
TLC
OH. MY. GODS. (Dutton) May 2008
Pre-order from Amazon today (and save 32%!)
www.teralynnchilds.com
Blog: Needle Book (Login to Add to MyJacketFlap)
JacketFlap tags: home, house, home decorating, decor, ikea, living room, Add a tag
 Thank you for the nice comments about the house posts, I've hardly had time to do crafts but I did make a little bird bag I will show soon. I'm glad people are also interested in our renovations and decorating because it's definitely what I'm thinking about these days!
I have been swamped recently, though, with a big illustration contract so I've had less time to do things. But working at home means I'm looking around at everything that needs to be done and it can be very distracting. So I take little breaks in the day to do house things, and then work late into the evening on my sketches. Luckily this is one of the benefits of freelancing, you can pick your own hours as long as you meet the deadlines.
One of the things I couldn't wait to do was replace our bookshelves. In our old place we had a long row of short billy's on one wall and it gave us enough book storage and I think it looked nice. But we don't have a wall like that here, and we really needed something else. As you may have noticed I've become all about finding vintage furniture on craigslist, all "good old-fashioned workmanship - no more crummy flatpack!" recently. But I just could not find the perfect bookcases.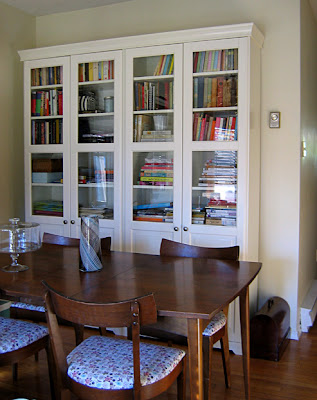 So finally I gave IKEA another chance and was smitten by the Liatorp bookcases. They seemed perfect for our space, two fit the wall I was planning to use perfectly, with lots of height, they have seven shelves (so more than two short billy's), and hidden storage at the bottom. You can join them together to give the feel of custom bookcases, and I like the details, moulding at the top, supports under the shelves (not just those metal pegs) and the edges of the shelves has a nice row of grooves. And you know how I feel about glass doors. Now that they're assembled I absolutely love them, and I really think they're the bookcases I've always wanted.
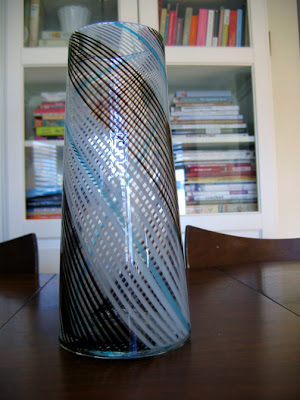 Incidentally, here's a detail of the vase which I found at Pier 1 (thanks to my friend Sandra who gave us the gift certificate!) I'm planning to use the vase colours throughout the room, pale blue, white and dark brown with cream - so it was the perfect addition.
 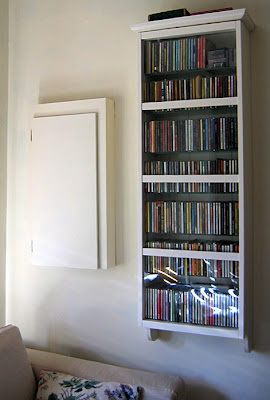 I also found a cd wall cabinet in the same style. This item is new, and I think I was the first person at the store to buy it as I called in the morning and it was out of stock, but when I got there I double checked and they said it had just arrived. It's perfect because it fits all of our cds exactly and now they're no longer awkwardly crammed into a small bookshelf taking up floor space. Plus we're doing matching which seems very grown up.
Here are my assembly tips (for all IKEA flatpack furnishings):
1. pretend you are a surgeon and lay out all the screws and pegs and tools and things on a tray so you are organized
2. use a tea towel under all those things so they don't roll around and drive you crazy
3. don't knock over the tray because you will have to crawl around looking under your furniture for all the little bits and it is VERY VEXING.
4. actually count them so you don't wonder later if something is missing or if you used the wrong thing
5. experienced assemblers will already know this, but each screw has a little number beside it at the beginning of the manual and next to the step where you use it so you can double check it's the right one
6. use the box your furniture came in as a mat to protect the pieces while assembling
7. when the instructions have a little "!" pay attention, or you will regret it
8. don't start assembling at 11pm at night if you are already tired and cranky
9. keep any extra bits for later - and the instructions!
Blog: Drawing a Fine Line (Login to Add to MyJacketFlap)
JacketFlap tags: storage, yarn, IKEA, Add a tag
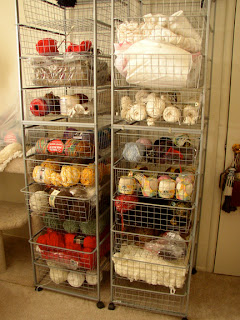
This is how I store my yarn now. It used to be in bags, plastic storage bins in the closet, a cedar chest, or just milling about in cute baskets for that "cozy cottage" look.
Well, that wasn't working. Because when you want to do a project, you have to be able to see what you have, and have it all right there, available, easy to grab.
So. I went to IKEA. After I had my Swedish meatballs and coffee, I started to meander. First I looked at all the nice office and studio furniture, the stylish but too heavy and hard-to-put-together things with drawers. After much thinking, looking, standing back and trying to decide-ing, I finally made it downstairs to the laundry room and closet organizer department. And there it was. My answer.
These units are a lightweight metal frame with removable wire mesh sliding basket "drawers". They come in a 6-drawer height, and a 4-drawer height, and you can put them together in any combination. I made two 10 drawer high pieces. (Actually, first, I just bought one 6 drawer thing. Got it home, put it together, and figured out real fast it wasn't enough, so went back the next day for the rest.)
There's also a little flat wood piece for the top which makes a kind of lid on the whole thing, which you need (and which are where all my stuffed animals now live, who all got cut off in the picture.)
This is a practical, inexpensive and easy to put together solution. And its on wheels! We love things on wheels. You could 'cute it up' by making a curtain to go around it if you're of that persuasion, or just stuff them into a closet. You could stash piles of papers, art supplies, individual projects, whatever.
And if you go to IKEA you know you'll find some other thing you didn't know you needed but there it was and it was so cheap you had to have it, and that's fun too.


Hey, TLC, I don't have any secrets for stylish, well-made furniture, but I can admit to being a long-time fan of everything Swedish, especially the crystal and the meatballs, and my ancestors. :)
I actually spent a year studying the language, worked there one summer, and made friends that I keep to this day.
As for our local IKEA, it's a hot spot around town!
I can't tell you how long I've wanted to visit an IKEA. It sounds right up my alley. Unfortunately I don't have any close. As for cheap furniture sources, we've been lucky to get some "nice enough" pieces from relatives! :)
I need furniture!
I can't step in IKEA because it's just like Target and Wal-Mart. All of those stores should be renamed "OH, I NEED THAT"
IKEA has good stuff! I've been wanting to go.. there's one in the suburbs, but haven't yet made the trek.
One great cheap place for decorating stuff is Cost Plus? They have some cute imported stuff. And of course, thrift stores! I love treasure hunting.
xo,
Heath
Nice blog. I will keep reading. Please take the time to visit my blog about Badcock Furniture