JacketFlap connects you to the work of more than 200,000 authors, illustrators, publishers and other creators of books for Children and Young Adults. The site is updated daily with information about every book, author, illustrator, and publisher in the children's / young adult book industry. Members include published authors and illustrators, librarians, agents, editors, publicists, booksellers, publishers and fans. Join now (it's free).
Login or Register for free to create your own customized page of blog posts from your favorite blogs. You can also add blogs by clicking the "Add to MyJacketFlap" links next to the blog name in each post.
Blog Posts by Tag
In the past 7 days
Blog Posts by Date
Click days in this calendar to see posts by day or month
Viewing: Blog Posts Tagged with: tutorials, Most Recent at Top [Help]
Results 1 - 25 of 40
How to use this Page
You are viewing the most recent posts tagged with the words: tutorials in the JacketFlap blog reader. What is a tag? Think of a tag as a keyword or category label. Tags can both help you find posts on JacketFlap.com as well as provide an easy way for you to "remember" and classify posts for later recall. Try adding a tag yourself by clicking "Add a tag" below a post's header. Scroll down through the list of Recent Posts in the left column and click on a post title that sounds interesting. You can view all posts from a specific blog by clicking the Blog name in the right column, or you can click a 'More Posts from this Blog' link in any individual post.
Once you’ve registered and logged into the First Book Marketplace there are so many new features to explore!
As we’ve shown, you’ll find new navigation and menus. You can use gift cards and promotional codes. But you’ll also find a new dashboard for account information, a new wishlist feature and a section highlighting topics that are important to educators and program leaders serving children in need.
In today’s video, you’ll learn how to explore the dashboard, how to make a wishlist and learn more about popular topics.
It started out innocently enough. I was thumbing through Facebook when I saw an article about hidden features on Facebook. I hardly ever click on these things but for some unknown reason I decided to give it a look. I wasn’t expecting much but what I discovered absolutely ruined my day.
Facebook filters your messages for spam. Hardly a shock, but I had no idea this was a thing. I guess it makes sense, I mean there is a fair amount a garbage that shows up on a daily basis and who wants to be bothered by it, right? Wrong. This filter is built to detect and pull out spam and it does a pretty good job… except when it doesn’t. When I checked mine I found at least 10 or more VERY important messages that were filtered out. Some were from people asking questions about upcoming classes I was conducting, some from students or parents of students wanted to know what illustration classes to take. Some were even about potential illustration jobs that I missed out on because I had no idea they were there or even trying to reach me. The saddest part was these messages date back weeks, months and even years.
I have no excuse. Facebook does a pretty good job about explaining how things work. You can find information about all this and more just by Googling it but I really wish I had know about these filtered earlier, when I could have done something about it. If you’re like me and you had no idea this existed here’s how it works. Go to Messages > More > Filtered. Inside the filtered folde you’ll find a lot of spam but in between the spam you’ll probably find a lot of important stuff too. I am trying to catch up on the ones that are still timely. To the others that I failed to respond to, I’m very sorry and I hope you were able to find the information you were looking for another way. If anyone who was looking for help still needs it please feel free to get in touch through.
Many of my fans, especially the younger ones, are interested in my process of doing my art. Today I would like to show you how I created the #inktober Scarecrow painting that is for sale in my shop at Big Cartel.
First, I took the original sketch and using my light table, I traced it onto #150 lb watercolor paper. I taped it as securely as possible as I didn’t want either paper to slip! I traced this very lightly as I didn’t want the pencil to show through too much on the completed painting. I only did the the main frame, as this is just a guide for the paint. When it was traced to my liking, I placed the traced sheet on a board. I secured it to the board using painters tape all around the edges. Using a brush and water I really soaked the paper. This makes it so it stays nice and tight for the painting later.
I let this dry about a half hour to an hour. Once it was dry, I was ready to paint. Hooray! That’s my favorite part. I tried to use very little water, as I wanted nice bold colors for my scarecrow. Also, too much water could cause a disaster of it running. Note: If I had too much water, I would take a tissue and gently soak up some of it. Luckily, this didn’t happen this time.
Once my scarecrow was painted to my liking, it was time to let it sit and dry. I waited about 2 hours just to make sure. I took the sheet off of the board and placed it back on the light table over top of the sketch again. I lined it up perfectly and made sure to tape it securely again so the papers wouldn’t slip.
I then traced the outlines, using Koh-I-Noor black permanent ink and a thin, small paint brush. You have to go very slow and be very careful. One slip could mean disaster. I take a lot of breaks at this stage and try not to go too fast. And here he is, Mr. Scarecrow, all ready for sale in my shop!
Hi readers its another busy week here at the studio. You may have noticed me posting a few videos last week. They are for a new class I have coming out starting November 6th. It’s called, Advanced Line Art Techniques and focuses on the methods I use to create line art with Adobe Illustrator. It’s a two part class and is for all skill levels. If you’re interested or would like to find out more about the class come see me at: BobTeachesArt.com
This time of year things tend to get busy for us illustrators. That can mean long hours and a lot of time spent organizing schedules, trying to find new projects and wondering where the last week went. Here’s a little tip for anyone who is feeling overwhelmed, out of sorts or needs a little pick-me-up. Go into your calendar and schedule a few positive reminders. Have your calendar send you those reminders on an alert at random times during the week. Next change the settings on your computer so it speaks your alerts. It’s hilarious and usually pops up right when you need it most.
Here’s how it works for me. I’m sitting at my desk after a long week of deadlines, maybe putting together some new ideas for a big program or something else I’m planning. The infamous artist’s self doubt starts to creep in and just as I begin to think maybe my high school guidance counselor was right and I should have considered a career as a pet waste fecal matter removal engineer my an alert goes off. My computer says in it’s slightly weird, slightly mispronounced computer voice, emphasis on all the wrong syllables ….” Excuse me Bob… You are a rock star!”
Ok yeah, not quite as funny in print but I highly recommend trying it because even though it’s silly and ridiculous it reminds me to lighten up, get my head on straight and quit worrying about things I shouldn’t worry about. Thanks computer, you’re a rock star too…
This week is going to have to be a short post. Lots of deadlines to take care of and not a lot of time for writing. I did want to mention one thing however and that was that last Friday on the Drawn by Success Friday Hangouts, Carlos and I got together with licensing expert Tara Reed. It was a great interview where Tara shared a little bit about the new program she’s starting. If you’ve ever thought about licensing your art then this program is for you.
I should mention that the link below is an affiliate link and as you know I hardly ever do affiliates. Please keep in mind that I only stand behind what I think will benefit my readers. My philosophy on learning and teaching is if you want to learn something always seek out the best you can possibly afford. I believe teachers who are also working professionals with a proven track record in their chosen field are the best to learn from after all, they are successful for a reason. Tara Reed is one of those people. She is an excellent teacher and a wealth of knowledge. If you are not subscribed to her blog stop what you are doing right now, head over there and check it out you’ll be happy you did.
In this Youtube Video, I share the technique I use to make my one layered sketch into a multi-layered illustration in Photoshop. Please "like" and share if this is helpful to you!
0 Comments on Make Your Single Layered Sketch into a Multi-layered Illustration in Photoshop as of 7/27/2014 1:16:00 PM
Stay tuned for part three next week, where I will talk about researching editors and agents and sending your Dummy Book out into the world.
In case you missed it, here is where you can find part 1, where I talked about making your dummy book- perfecting the story, making the story board, drawing the sketches and taking them to final paintings. Today I am going to talk about making your dummy book into a PDF, printing it and getting it ready to send to agents and publishers.
In Indesign from the "File" menu, choose "New" and then "Document."
Then you can decide on a size. Make the size of the document the same size as your book will be. So for instance, if you decided your book will be 11 inches by 9 inches, make it that size. You can make your own page size by clicking on "Custom."
Set your document up to have spreads.
Once you are in the document, use the hot keys Command + D (on the Mac) or in the "File" menu click on "Place." Find your illustration file and place it on the page you would like it to go on, and move it around to center it. Continue doing this until you have filled up your entire book.
After you have placed all the illustrations where you want them to go, type in all the words where you would like them to be placed. If you have planned things out right from your storyboard to your sketches, there should be places for your text to go in each spread (see Part 1).
You can then choose "File" and then "Export" and export your file to a PDF.
Printing Your Dummy Book
There are many options for printing your dummy book.
You can print your book on an online printing and publishing site such DiggyPod or Blurb, along with dozens of others. Just google "print my book online."
You could also get your book printed at your local print and copy store such as Alphagraphics or FedEx Office.
I prefer to print my own books on my printer. It looks just as nice if I use card stock so the ink doesn't bleed through. I like this option, because I may want to send my book out to more than one publisher or agent at a time, and it's the cheapest option for printing multiple books.
I don't print the book at 100%, I just print it at a good mailable size. Then I get my book spiral bound with clear plastic covers at the local copy and mailing store. The most important thing to remember is that your dummy book should look clean and professional!
Also remember to keep your digital dummy book handy because many publishers and agents like you to send them everything via email.
Stay tuned for next week's post, Dummy Books Part 3- Sending Your Book to Agents and Publisher, where I will discuss what to put in your packages/emails to editors and agents. I will also talk about waiting, rejections and celebrations.
0 Comments on Dummy Books Part 2- Preparing the Dummy Book to Send to Publishers as of 5/9/2014 1:06:00 PM
This is a little cartooning tutorial I wrote a few years back about creating an illustration using Adobe Illustrator and Photoshop. You’ll notice I begin my drawing in pencil, then move to illustrator for line work and finally Photoshop for color. Although the tutorial is a little old and the programs have advanced since then it’s still pretty useful and works just as well now as when I wrote it (assuming the you’re familiar with the basic functions of both programs). For more advanced students you may want to try adding actions to speed things up a bit.
If this tutorial is beyond your skill level take heart I’m working on a new series that will delve a little deeper focusing on individual tools, how they work and more importantly how to get them to work for you. Many of my first time students are tentative about using these programs to their full potential because they sometimes feel overwhelmed. My advice is always the same. Don’t let your inexperience dictate the scope of your project. Try things that are slightly out of reach and a little ABOVE your skill level. Step outside of your comfort zone and allow yourself to learn some of the tools you’ve been avoiding. If you get stuck don’t panic there are tons of resources available everywhere. The best places I’ve found for quick easy answers (in no particular order) are:
Using the help button built into the program
Posting a question on Twitter, Facebook, or LinkedIn
YouTube
Google
Adobe website
Lynda.com (if you have an account)
On the other hand if you’re just not the adventurous type and you really want to learn the program once and for all consider taking a course. It will cut your learning time in half. There are few substitutes for having a knowledgable instructor to help you gain a clear understanding and get you through those areas you don’t understand.
Bob Ostrom is a children’s book illustrator and instructor of Adobe Illustrator, InDesign and Photoshop at Wake Tech Community College and the State Personnel Development Center in Raleigh NC.
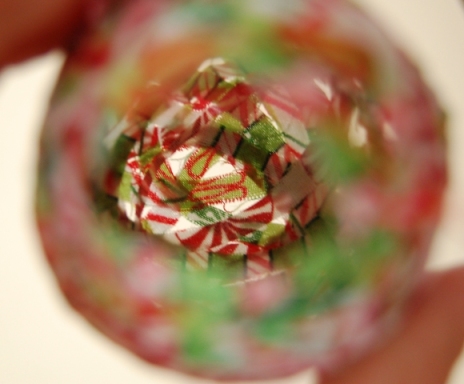
This is one of those last-minute inspirations that happened to work out. I was trimming bits from a Christmas sewing project (to be pictured later) and had all these great strips of cheery prints. It seemed a shame to waste them.
I grabbed a balloon, blew it up just a little (you could do a bigger version if you wanted) and tied it off. Then I made a water-and-Elmer’s-glue mixture, dipped the strips, and wrapped them around the balloon, just like papier mache—-only one layer of strips, though. I left a few holes here and there, but if I had to do it again, I’d leave more holes for effect.
This would be a great quick craft to do with older children, though of course you have to be able to stomach glue mess. Not a problem in my case.
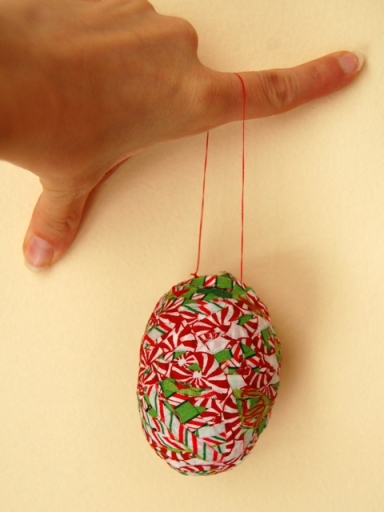
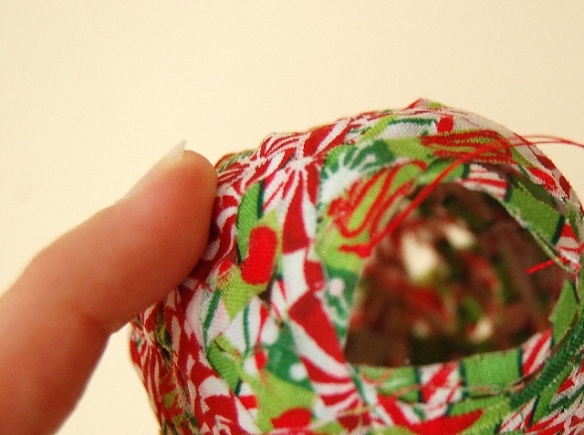
Family members who shall remain nameless were skeptical, but in the morning, when the glue was dry and the balloon popped, it DID actually detach from the cloth and leave this little egg-shaped vessel. It could’ve dried a bit more, though. Make sure it’s dried ALL the way for best results.
Then you just make a thread hoop/hanger thingy and presto! change-o! You’re done.
2 Comments on Quickie Fabric Mache Ornament, last added: 12/23/2012
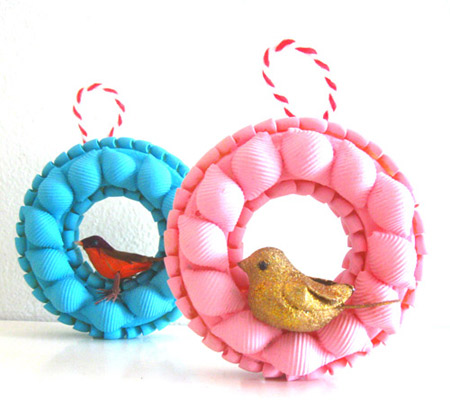
Looking for some small paint brushes, i came across a few small styrofoam wreaths in my craft supply stash. Perfect to make a variation on the vintage inspired pasta Christmas trees i made recently! I quickly forgot about my search for the brushes and started digging further to find some small figures to place in the middle of the wreaths. Vintage mini birds! And i knew i had a little bit of red and white bakers twine somewhere. That would work to get them hanging. A little paint, glue and time later and all done, ready to go up in the Christmas tree!
To make these pasta Christmas ornaments, just follow the tutorial for the Christmas trees, only starting out with the wreaths as the base instead of the cones. Finish them off by glueing the bakers twine (or other string) in a loop at the back, and attach the birds (or other miniature) in the middle with some more white glue.
0 Comments on Vintage inspired craft: Pasta Christmas Ornaments as of 12/19/2012 1:06:00 AM
This weekend, I will be spending ample time with my four-year-old ballerina friend Solveig. I want to have plenty of fun creative things for us to do together, so I made this coloring book for her.
inside front page (color print) and first coloring page
I used a ballet theme for most of the inside coloring pages. Since the recipient takes ballet classes, I am pretty sure we will be "on the same page" with the theme!
another coloring page
Something personaized is always extra-special
Everyone likes to "see their name in lights", so to speak! I included the recipient's name in some of the printed pages. It is a small detail and I know she will be delighted!
For a few of the pieces of art on the coloring pages, I tried different colored outlines instead of brown, just to punch things up a bit... and what young lady doesn't love pink and purple?
Back cover
I covered the front and back covers, both inside and outside, with art prints I already had lying around. I picked out a few that I thought were just rig
0 Comments on A homemade coloring book as of 1/1/1900
It started simply enough. I gave a talk in Missouri and went out for pizza with library school students afterwards and one of them came up to me and said “Hey you mentioned Mousercise in your talk… I know the guy who made that!” He put me in touch and I got to email a bit with Chris Rippel who now works for the Central Kansas Library System and talk a little bit about Mousercise (originally called Mouserobics until Disney found out) , what I think is one of the best sites on the internet. He agreed to answer a few questions for me.
1. Did you make your original Mouserobics/Mousercise as a thing for work? Is it something you used at your job at the library?
When I taught my first basic computer class in Prairie View, Kansas, I lectured on how a computer worked and how to use a mouse. Eyes glazed over. Soon after I made Mousercise.
2. Do you still work at the library?
I still work for the Central Kansas Library System. CKLS has member libraries, not patrons. I was teaching classes in member libraries, not at CKLS.
4. What are your go-to sites for people who are looking to teach people computer basics?
I have no one place. Over the years I have made a number of Web sites with links to online tutorials. My first and biggest was a delicious page called Computer Training Tutorials, or something like that. Now I use blogger Web sites to provide links to more training after specific classes, but they don’t get used. Here is one example. I intended to do a Web page for each software, but I didn’t.
I recently gave one of our computer people, Maribeth Turner, my list of Blogger Web sites and she has incorporated the links into a Web site she is creating.
5. What do you think the biggest challenges are in this day and age for teaching technology skills to novice users?
Patience
Lecturing too much to novices. Novices understand little of what you say and, therefore, remember less. So, for me, the main lesson of mousercise is more work, less talk, and be there to show students how to correct their mistakes. Teaching people how to correct mistakes is as important, sometimes more important, than teaching how to do something correctly. So, in my classes, I generally hand out exercises and tell them to type this. When needed, I give them one- to three-minute explanations of what to do, then let them do it. When that part is done, we go to the next part, i.e., short explanations followed by lots of work.
Covering too much in each class. We often pack in so many topics that novice students can’t remember and learn them. Covering less and giving students time to absorb a few basic things works better for me. This has an additional advantage for teaching librarians. Having to cover less allows librarians who may not be experts to also teach classes. Librarians knowing how to type a letter in Word know enough to teach a novice class on it even when they don’t know all the ins and outs of this program. When people ask about something you don’t know how to do. Then you have a topic for the next class.
6. Anything else you’d like to add?
I was going by myself with a mobile computer lab out
4 Comments on The origin story of Mousercise, last added: 6/7/2012
It’s odd to see an experienced around whom you have several believe in. In the field in the present daytime, take action on those really loves clearly demonstrating other folks what you need inside this subjecttopic. Precisely how fortuitous I am just having without a doubt determined a totally excellent web presence much more. It’s individuals like you who complete a bona fide contrast these days during the entire ideas these individuals talk about.
Harry Willems.CKLS said, on 6/7/2012 5:29:00 AM
I knew Chris when he made his mousercise tutorial, I used it at the Southeast Kansas Library System training librarians new to computers. As the director of the Central Kansas Library System I’d like to commend Chris for his dedication to training librarians in all facets of librarianship. He’s intense, quirky, and knows how to train adults.
Leah Krotz said, on 6/7/2012 7:15:00 AM
I am the director of one of the libraries in the Central Kansas Library System, where Mousercise was born. I have been using it to teach basic computer classes to adults for something like 18 years, and it’s the best tool I’ve found. Students learn to use the mouse, but also develop useful skills they will need to navigate the Internet and other programs. Long live Mousercise!
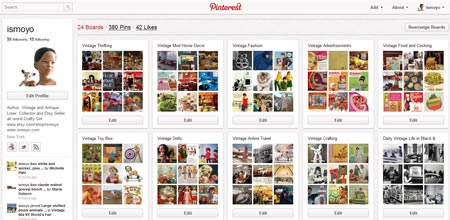
Pinterest, How i use it, and How to find pins of your Etsy shop listings on Pinterest.
When Etsy recently added the Pin this buttons to our listings i knew it was time for me to go ahead and dive into this Pinterest world. I set up an account and quickly found out that it is highly addictive!
Pinterest doesn't like you using the site purely as a self promotional tool. So spam pinning your own stuff is frowned upon, plus usually it won't gain you much lasting followers (just as promo spamming on twitter). I'm also not much of a re-pinner, i do occasionally and i do use the like-button to show my appreciation of other pins. I like to 'give fresh pins' to the pinterest universe. What i did just started is one dedicated board where i re-pin other peoples pins from my Etsy shop. So what ends up in there depends completely of what other people think is special enough to pin. I have also added 'pin this' buttons to my blog posts, to make it easier for people to pin images from my blog to their boards. Locating who pinned what from my blog is not too difficult. I type in http://pinterest.com/source/blog.ismoyo.com and it gives me the pins originating from my blog. You can do this for your own site by changing the end of that url, the part after 'source/' into your own url.
But finding out which of your Etsy listings have been pinned is a bit harder to do since Pinterest throws all Etsy pins on one big source pile. http://pinterest.com/source/etsy.com I doubt anyone would go through all these in hopes to find some of their own.
So how to find those Etsy listings on Pinterest pinned from your shop? Your Etsy Stats page will show pinterest.com as a traffic source if an Etsy listing pin was clicked on and lead to your shop pages. Etsy stats shows the landing page, and this could give you a clue as to which items might be pinned, but it doesn't tell you where on pinterest this pin exactly was that was clicked on. You could try and use the Pinterest Search box to find your items, but i found that not many people pin with relevant keywords, so finding a specific pin is very hard.
If you use Google Analytics for more extensive shop stats, you can find the link to the actual pin. To do so, log into Analytics and go to 'Traffic Sources', then 'Referrals'. Under Referral Sources, click the 'Pinterest' link. This will show you the pinterest links that have been clicked,
2 Comments on How to find pinned Etsy listings on Pinterest, last added: 2/28/2012
I love Pinterest and thank you for your explanation and tips of how to use it. All the time I think: don't even go there! Because how much time can anyone spend online? I'm already Etsy and blog addicted. But, maybe I should give it a try and make an OSKAR en ik Pinterest! Your one looks amazing!
Girl, you would LOVE pinterest! It's such a great way to create moodboards of all those gorgeous things out there. And to find even more though other peoples pins. With your taste, your pins would be worth following!
Even though this is Book Review Friday, recent posts were all book reviews while my foot was healing up. Today I just have to share how good it feels to be up and about again. That, plus the fact that I read about 16 books in the past 5 weeks and I am experiencing "reader glut". My well has been filled with what feels like a lake!
The doctor removed the pin yesterday and gave me some truly uncomfortable toe excercises to do three times a day (but they are already taking positive effect!) Meanwhile, when I rest, my foot still needs to be elevated, but activity is good for it, so I am making a point of walking around the house as often as possible. And yesterday I had both lunch and dinner on the patio, enjoying close up and personal the garden I had been looking wistfully at out the bedroom window for 5 weeks. Listening to bird calls and watching butterflies. Feeling a faint breeze. Joy!
So, what have I been doing besides reading these past weeks? I am happy to say that I submitted 5 poems to various online sites, listened to some great writing tutorials, took notes in my notebook for my WIP, Granny's Jig, and bookmarked magazines to submit to, and agents to query. I also started a new book, inspired byMartha Alderson's wonderful tutorials on plot. Martha Alderson is "The Plot Whisperer", and her approach to plotting is one I like a lot. I first found her on Jill Corcoran's blog, here, and oh, how I wish I were writing the books Jill Corcoran is looking for, because she gives such great advice on her site.
Today Sir Husband set up my computer and printer on a table in the livingroom so I can sit at the computer and work with my foot propped up on a comfortable padded chair. ("Sir Husband"because I knighted him a few weeks back for taking such good care of me and treating me like royalty. He's still doing that, too.) Let me just say it feels great to be hunched over my keyboard instead of balancing my computer on one knee. So my agenda today includes snail submissions for three children's poems, and some query letters for two of my books. (Cross fingers, as I send them out into the world.)
Meanwhile, I have to thank all the reading I did for how mentally massaged I feel, how ready to write again. With all that input, it's time for output again, and I'm all revved up. This is a case where deprivation made the heart grow fonder.
I also want to thank all of you for your comments during this period. It was so cheering to hear from you, and I've enjoyed maki
16 Comments on Reader Glut and Writer Excitement, last added: 8/9/2011
Congratulations on being mobile again! I’m also glad to hear about Granny’s Jig, as I love the setting and mystery of this WIP. Wishing you much good luck with your submissions. :)
Great to hear you are up and about. I've never had a reading glut -- there is never enough for me to even feel sated. I always want more time to read. Good luck as you send your written children out into the world!
Lydia, thanks. I'll be delighted when I can go for loop lo-ong walks again!
Theresa and Rosi, I'm sure my reading glut will be short-lived. I just need some output time. :-)
Richard, I thin every now and then it pays to get sick or have some reason you can't go about your usual routine. Because I couldn't be up and about I had the cance to watch tutorials on writing I always mean to watch, and they really got me going!
Michelle, thanks. Yes, the juices are flowing for Granny's Jig again. I was reading Irish poets this morning and thinking about one of the characters. See? Reader's glut never lasts. I can't stay away from books after all. :-)
I'm an editor by trade, so I always feel like I'm in reader's glut! Hope your foot heals quickly. I'm getting over a broken toe, so I can sort of sympathize!
I switch-up fiction with non-fic a lot, so I avoid the glut, usually. When it happens, I need to just listen to music for awhile to feed another part of my artistic appetites.
Kris, thanks for stopping by. What kind of books do you edit? I'm sure all my blogging friends would like to know. My sympathy re: your broken foot. That doesn't sound fun either.
Will, yes I find that music is a nice alternative, as well as visual art. It sort of soothes the senses.
Golden Eagle and Alleged, thanks for the good wishes. It sure feels good to get outside again, and to be back to some of my writing endeavors, although the latter is only a couple of hours at a time, because I still have to keep foot elevated when not active.
Rachna, glad you like the reviews. It actually was nice to have more time for them, because I can do them from my iPad, and edit the mistakes if I catch them later. For my WIPs, I need more access to notebooks and folders, and all the stuff that ends up on your desk when you're working on something. But . . . little by little . . . .
Elizabeth, I edit almost everything, from children's PB's to chapter books to adult fiction. I've done adult non-fiction, as well. I do not edit erotic. I work for a small press in Michigan, but I do freelance editing on my own. For those who would like more information, you can contact me at kris at krisyankee dot com! My rates are reasonable! I don't have the information online because my website is geared toward my writing, and not my editing. Thanks!
Check out this awesome R2-D2 beanie Wendi made for me! I love it so much I've been wearing it around the house even when there's no one here to see it.
So on Monday I released the Swell Stocking pattern. And yesterday I shared some Neato Ornaments. Today I'm going to show you what happens when you put them together.
Let's start simple. Cut out an ogee shape, stitch on some rickrack and a button, stitch it to the stocking and - voila - you have a fancy ornament.
I cut out three felt trees and stitched them onto a stocking front. I added a scattering of buttons in lots of colors and sizes and - cute! - a forest of Christmas trees.
The stocking might be my favorite. I cut out one ornament-sized stocking, decorated it with a bit of rickrack, then stitched it onto the full-sized stocking leaving the top open so it acts like a pocket.
Jo went nuts when she saw me slip some lollipops into the stocking pocket for the photo shoot. "I thought that was just a decoration, but it's a pocket?! A pocket?! That is soooo cute!" Even Alan gave it props.
You can fit exactly five of the smaller ornament circles in a stack down the side of the stocking. I laid some ribbon down the center over the dots and stitched it down. The sides of the circles aren't attached and look pretty cool that way.
When I was a kid my sisters and I each got a new ornament every Christmas Eve. By the time I graduated from high school and moved out I had a fabulous collection of unique - and mostly handmade - ornaments. It's a great tradition and one I've been happy to carry on with Alan and Jo.
This year I designed a collection of ornaments inspired by vintage glass ornaments. You know the ones? Beautiful and oh-so-fragile. My collection is a whimsical interpretation of those traditional shapes and styles - made of felt and therefore safe from curious toddlers and climbing cats. Plus - they're easy enough for kids to make and the materials are inexpensive and easy to work with. Everyone wins!
So, do you like them? Do you want some for your very own? If so, here are your choices. . .
You can buy finished ornaments from me. I'm working on getting them all listed in my shop.
It's Thanksgiving week - are you ready for Christmas yet? Feeling crafty? Want to make something swell? Well I want you to make something swell - that's why I'm sharing this free pattern for a holiday stocking. (The link is to a downloadable PDF.)
The pattern is just the basic template - the swellness comes in what you do with it. You can start simple with some rickrack or ribbon stitched across the top of the sock.
Easy peasy - and so cute!
Or you could get all daring and sew the trim on the other way - up and down. Oooh - creative!
Don't limit yourself to rickrack and ribbon. How about some fancy beaded trim?
Or a bit of a feather boa? Oooh la la!
Or maybe you want to go Raggedy Ann-style with some eyelet trim. The sky is the limit folks!
Do you have a bunch of buttons just hanging around in jars? I think they multiply when I'm not looking and I'm always looking for something to sew them to. You can add just a few buttons in a nice neat row. . .
. . . or a kajillion scattered over the stocking all willy-nilly.
It's been bunny central around here lately - making me more excited about Easter than I usually am. I wanted to make something quick and easy - something I could make a bunch of and give away at egg hunts this season. I was inspired by Holly'sremake of the classic paratrooper dimestore toy (You haven't seen it? Well go check it out, for goodness's sake! It's fabulous!) and I decided to remake those carrot-shaped cellophane bags you find filled with candy at Easter. My version is made from fabric - thus hiding what kind of candy is inside. Is it M&Ms? Is it jellybeans? Oooh - the suspense! Plus it's reusable and feels so much nicer than the plastic bags. And - it's oh so easy. All you need are some scraps of fabric and a sewing machine - and this easy peasy tutorial. Enjoy!
Oh my giddy aunt - it's COLD outside. Last time I checked it was 17 degrees with shrieking, howling winds. The weather says the gusts are 70 miles per hour! It's also snowing - but the wind makes it no fun to play in it. It's so cold I put a blanket over the opening to the chicken coop and turned on the incandescent light for them.
And then I ran back inside to stay warm and sew. I decided to make up a quickie little project that would be good for Valentine's Day - by which time it will hopefully have warmed up enough for Jo to go outside and play in the winter wonderland.
They're simple - little heart-shaped beanbags filled with rice and a little cinnamon and orange to make them smell nice. Toss them in the microwave for 30 seconds and then slip them in her pockets to keep her fingers warm. And (because if I didn't they'd be lost in a heartbeat) I sewed them to a ribbon long enough to run through the sleeves in her coat so they don't go missing - just like a classic mitten string. Easy peasy! And if you want a tutorial with step by step photos - you can download one here. Happy Valentine's Day!
Once my pencil work was completed, I went in with my Rapidograph pen (.25 point size nib). I love this part of the process. I can kind of "zone out" and let my brain go on autopilot. Inking the lines is still a very creative process but it's kind of like rollerskating wearing knee pads. You are protected to begin with, but you can take a few chances and still feel safe.
Here's the final video featuring the painting I created for the Party Animals book! In this short video, I chat about the details I put in the piece and how those little things mean a lot. > Enter my Party Animals book giveaway
0 Comments on Party Animals Week Day Four: Part 10 Final Video Demo! as of 1/1/1900
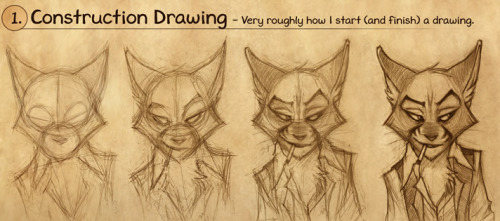
I began my composition by simply fleshing out my idea in rough sketch form. I was not sure where I was going with it, but part of the fun is the journey. I just knew that I liked the idea of all different kinds of dogs dressed in party gear. Each type of dress would show off the individual dog's personality. I love to do characters and show little personality traits through what they are wearing, facial expressions, and demeanor. So I knew that this idea would work perfectly with my sensibilities! > Enter my Party Animals book giveaway
Once I drew a bunch of the dog heads, I decided I would fit them all together, kind of like a puzzle, as though they really were at a party! I wanted to add my signature flourishes—a decorative border plus some fun title lettering, as well. But that would come later...
I then took many of my dog heads and I worked them into the desired space. After scanning the original sketches, I worked in Photoshop to cut them out, head by head, and place them into the desired size of composition (in this case, the entire piece is 8" x 8"). I sized the heads to allow extra space for my lettering/title and the decorative border. Once this layout was complete, I printed out the art to actual 100% size on a piece of 8.5 x 11 paper. Then I drew it onto watercolor paper using my lightbox and the printout as a rough guide. I never trace art work directly because I feel that the finished traced line always lacks life. It makes a huge difference to just redraw instead of trace—it's like night and day! You can really see the difference! So instead, I used the print-out guide as just that: a guide, a marker for where things should be placed in the finished composition. Using the light-pencil lines I put on the paper from the lightbox/printiout sketch, I then redrew all of the elements freehand in my own hand once again. This time I generally followed the original sketch so the general characters is still intact. After this was complete, I then pencilled the title lettering and the decorative border directly onto the watercolor paper freehand.
Friday: ink phase and see the final painting!
0 Comments on Party Animals Week: Day Three - from first roughs to a general composition as of 1/1/1900


.png.jpg?picon=3765)


Very cute! I might try making one with my niece.
Let me know how it turns out if you do!