new posts in all blogs
Viewing: Blog Posts Tagged with: Recipes, Most Recent at Top [Help]
Results 26 - 50 of 221
How to use this Page
You are viewing the most recent posts tagged with the words: Recipes in the JacketFlap blog reader. What is a tag? Think of a tag as a keyword or category label. Tags can both help you find posts on JacketFlap.com as well as provide an easy way for you to "remember" and classify posts for later recall. Try adding a tag yourself by clicking "Add a tag" below a post's header. Scroll down through the list of Recent Posts in the left column and click on a post title that sounds interesting. You can view all posts from a specific blog by clicking the Blog name in the right column, or you can click a 'More Posts from this Blog' link in any individual post.
By:
Sue Morris,
on 6/15/2014
Blog:
Kid Lit Reviews
(
Login to Add to MyJacketFlap)
JacketFlap tags:
Jen Besel,
Children's Books,
recipes,
Middle Grade,
Favorites,
children's book reviews,
desserts,
Holiday Book,
4stars,
Library Donated Books,
cookbook for kids,
Capstone Young Readers,
Add a tag
 .
.
Custom Confections: Delicious Desserts You Can Create and Enjoy
by Jen Besel
Capstone Young Readers 2014
978-1-62370-136-9
Age 9+ 112 pages
.
“Bake up surprises in cupcakes and cookies. Create custom desserts with ease. Or decorate all kinds of creative confections like a pro. Forty fun, simple recipes will have kids (and kids at heart) creating delicious desserts to devour! Step-by-step instructions and photos make red velvet cookies, black-and-white angel food cake, cheesecake stuffed strawberries, and more easy to achieve and tasty to eat. Sweetly simple, appetizingly fun!”
Review
Just in time for Father’s Day, Custom Confections gives the artistic baker in you—something every kid has somewhere, and eager to bake—40 recipes of beautiful desserts and snacks. I was without electricity most of the day, unable to bake anything, but if this dessert book is anything like Dessert Designer: Creations You Can Make and Eat, also by Capstone Young Readers, I can guarantee these desserts are as scrumptious as the pictures are delectable. Most are quick fixes, meaning kids still have time to create something special for dad. An easy cupcake recipe, The Sweetheart Cupcake, with a magical surprise, can express your love for dad in one bite.
Kids can find a different fun recipe for every week of summer. Custom Creations contains fun snacks for the entire family. Cake recipes are in the majority. For the bibliophile in your life bake the Pile of Books Cake. Five layers of cake, each made to look like a bestseller, with noticeable pages and luscious covers—Photoshop not needed. If you like ice cream with your cake, and really, who doesn’t, the Striped Ice Cream Cake will satisfy your sweet tooth. A fun treat for those who enjoy popsicles is the Frosty Frozen Cakesicles individually prepared on a Popsicle sticks.

Every recipe has step-by-step instructions that are easy to understand and written without any extraneous information. To the side of the page is a list of ingredients and supplies needed for that particular recipe. No recipe requires unusual or strange tools kids have never seen. There may be a tool your child does not know how to use, which is where an adult comes in handy. It is also wise, depending on a child’s proficiency, for an adult to help turn ovens on to the correct temperature and help remove hot desserts from the oven. For those in the UK, the author included a conversion chart.
Photographs of each dessert clearly show the finished dessert, which is always helpful. For a delicate dessert, try making the Edible Flower Lollipops. Placed inside the clear homemade lollipops are pesticide-free, edible flowers from a florist. They look too good to eat. Cheesecake lovers will like Blueberry Cheesecake Tarts and the PB&J Cheesecake Brownies. On the last day of school, surprise that favorite teacher with a Mini Apple Cake, seeds included. My favorite, and the recipe I was planning to make, is the Molten Caramel Cake. Nothing is more luscious and creamy, or spruces up a dessert better, than a rich caramel. Mm, yum!

Middle grade and older kids, and adults, who like baking and using their creativity will like Custom Creations. Who can turn away a luscious, interesting dessert? Not me. Custom Creations is a nice addition to any cookbook collection. It also complements Dessert Designer: Creations You Can Make and Eat also for middle grade kids by Capstone. The only thing missing is a nice index of the recipes. There are several tips and tricks, plus a few icing recipes that are simple to make located after the last recipe: a Hedgehog Cake made with buttercream frosting, rice treats, almonds, and a cake of any flavor. The hedgehog is a cute little creature looking too loveable to eat with his big milk chocolate candy eyes. Kids, lacking such sentimentality, will dig right in. Enjoy!
CUSTOM CONFECTIONS: DELICIOUS DESSERTS YOU CAN CREATE AND ENJOY! Recipes copyright © 2015 by Jen Besel. Reproduced by permission of the publisher, Capstone Young Readers, North Mankato, MN.
.
Buy Custom Creations at Amazon—B&N—Capstone—your local bookstore.
.
Learn more about Custom Creations HERE
Meet the author, Jen Besel, at LinkedIn: https://www.linkedin.com/pub/jennifer-besel/b/943/635
Find more books at the Capstone Young Readers website: http://www.capstoneyoungreaders.com/
Capstone Young Readers is an imprint of Capstone
.
Coming Soon from Jen Besel & Capstone Young Readers
Baking Bliss!: Baked Desserts to Make and Devour
Sweet Tooth!: No-Bake Desserts to Make and Devour 
Sugarcoat It!: Desserts to Design, Decorate, and Devour 
.
.

Filed under:
4stars,
Children's Books,
Favorites,
Holiday Book,
Library Donated Books,
Middle Grade Tagged:
Capstone Young Readers,
children's book reviews,
cookbook for kids,
desserts,
Jen Besel,
recipes 


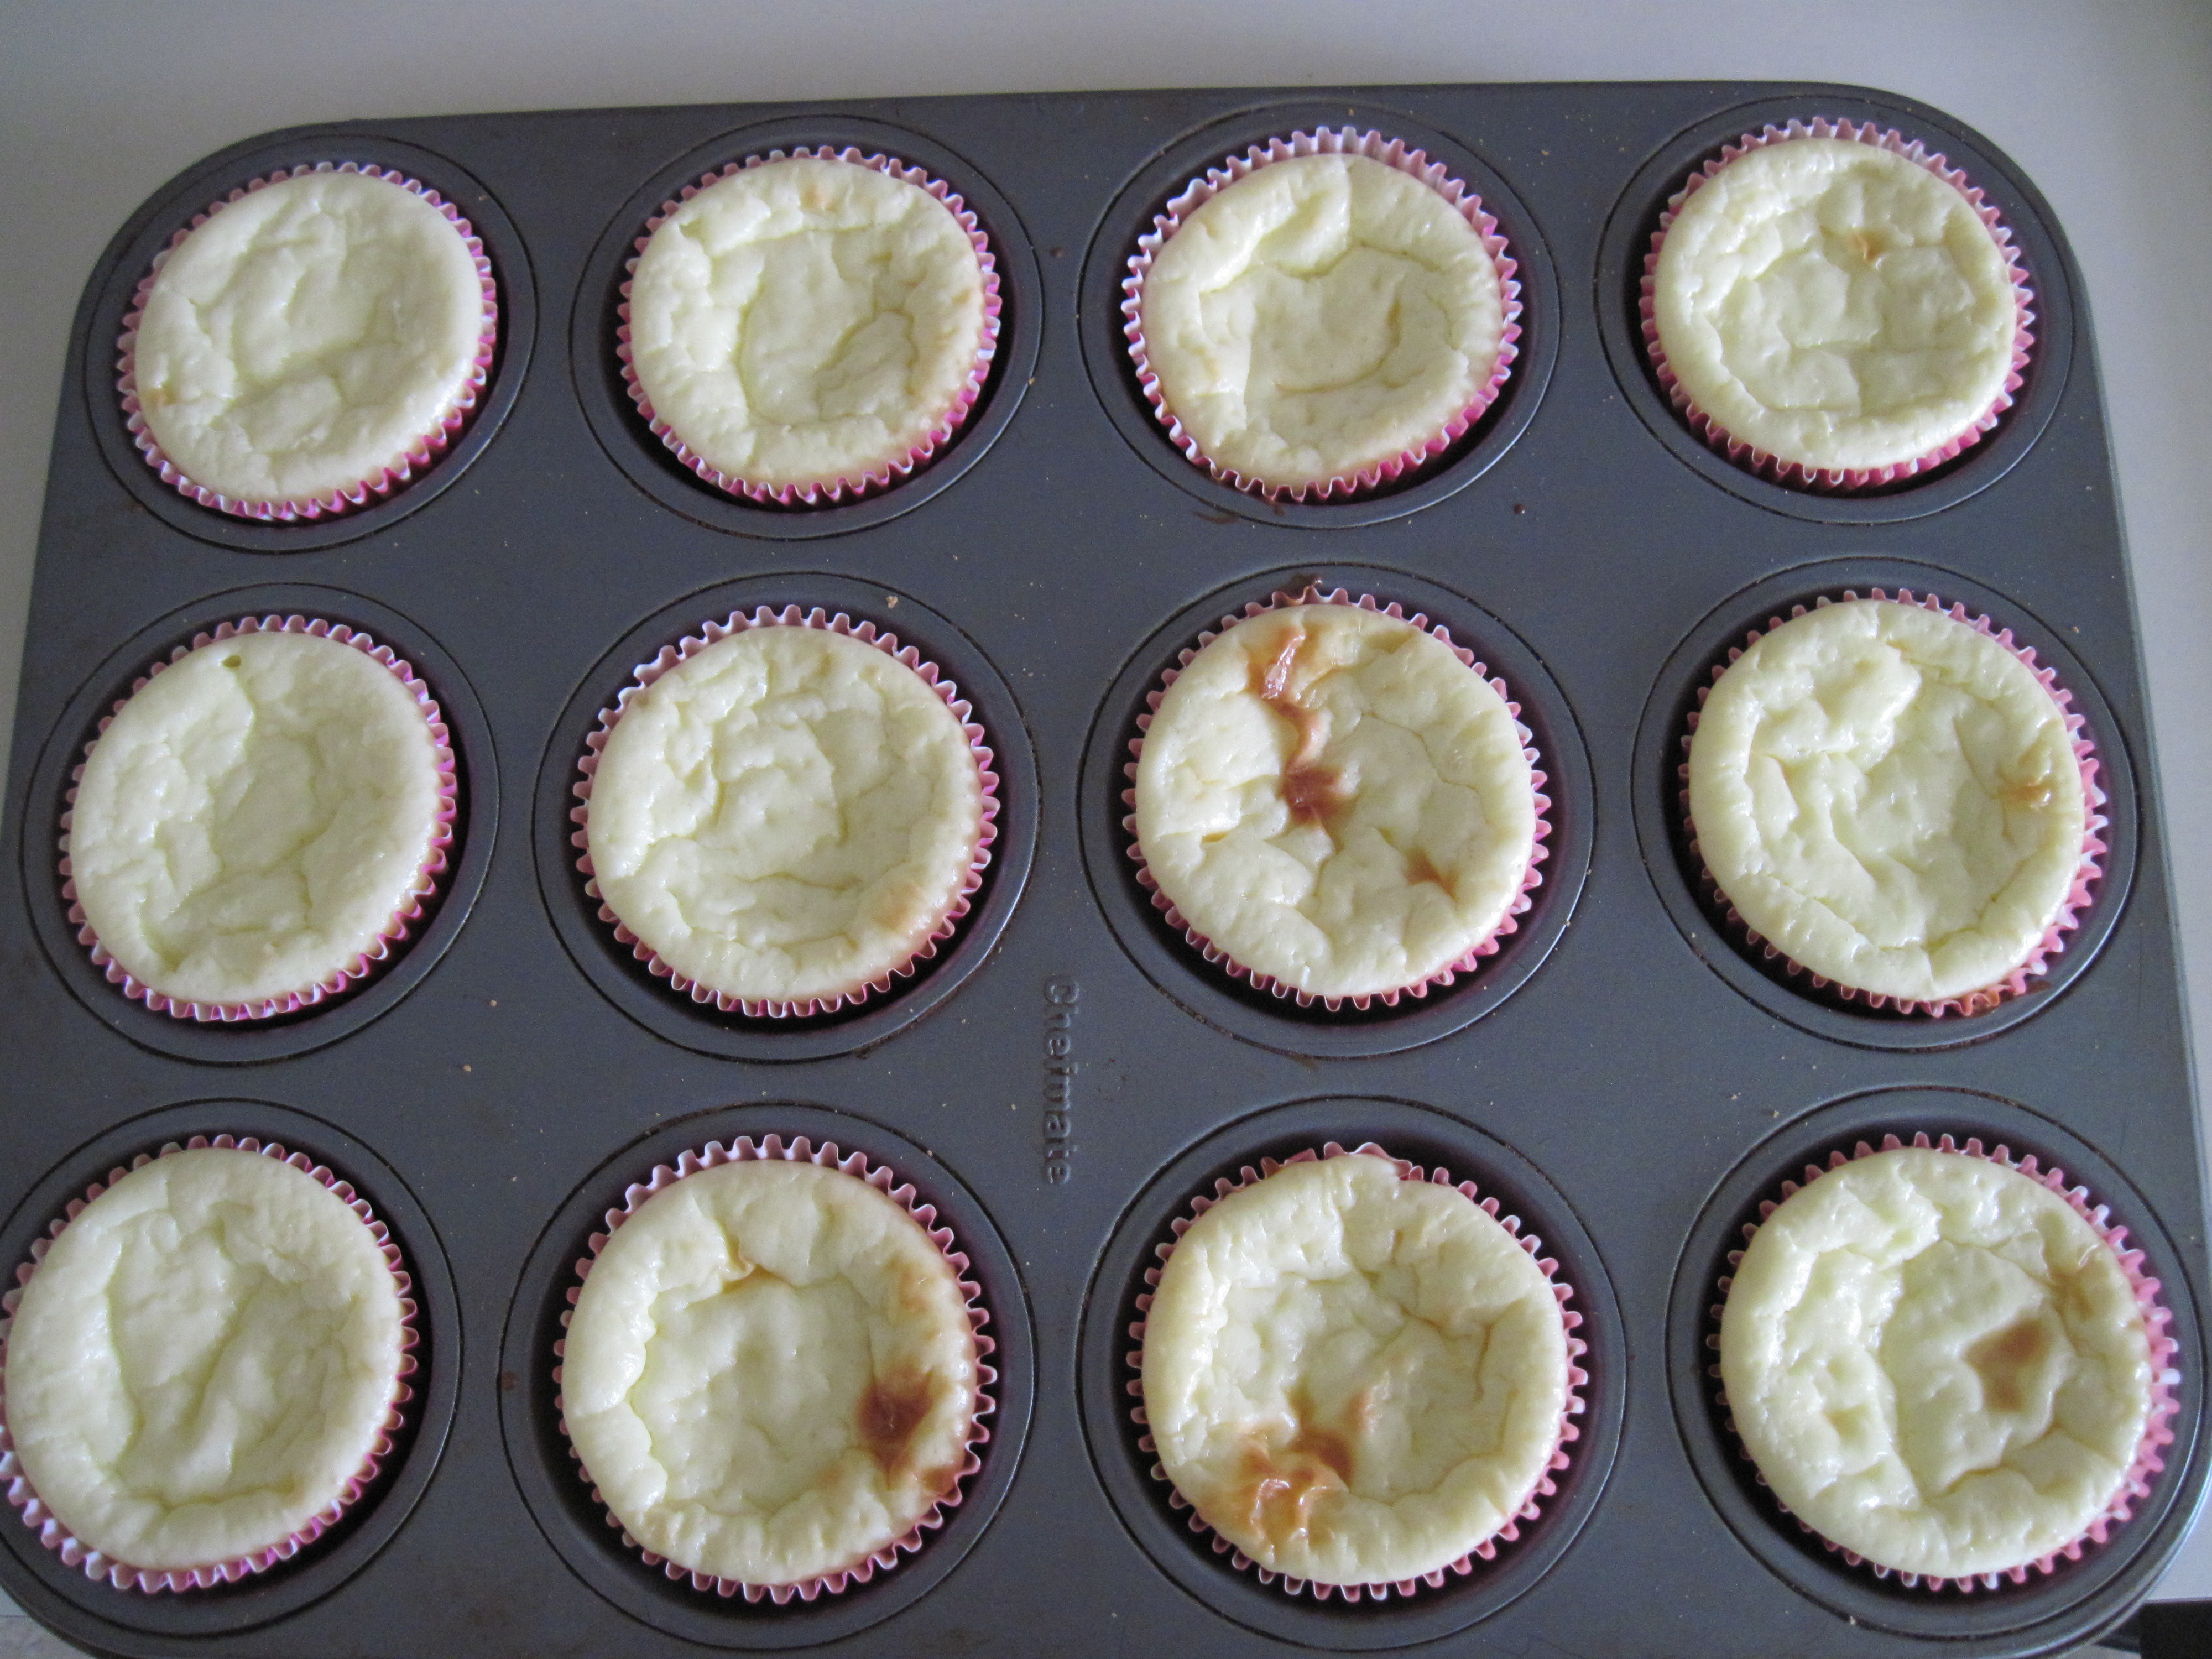
Whether you’ll be having a barbeque or take out pizza for Dad’s big day, homemade desserts are always a great way for kids to show dad their love. Here is a recipe for Cream Cheese Cupcakes that will be a hit.
CREAM CHEESE CUPCAKES
2 8oz. packages of cream cheese ( I used Neufchatel)
2/3 C sugar
3 eggs
1 tsp almond extract
Vanilla wafers
1. Line muffin tins with paper liners. Set a vanilla wafer in the bottom of each.
2. Mix all other ingredients until smooth.
3. Fill cups and bake 25 minutes at 350 degrees F.
4. Chill overnight. You can eat them like this, or top with a variety of fruits such as crushed pineapple, strawberries, cherries. 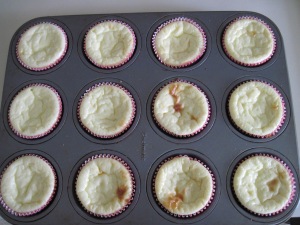 And, speaking of strawberries, it is peak season for these delicious bits of heaven. Make a few chocolate covered ones by: 1. Melting morsels in a microwave-safe dish for 60 seconds. 2. Stir and repeat for 30 second intervals until smooth. 3. Stir in 1/2 tsp of vegetable oil to make the mixture thin enough for dipping the berries into. 4. Hold the strawberry by the green cap and dip it into the chocolate mixture. 5. Set onto waxed paper and refrigerate until set.
HAPPY FATHER’S DAY!


I was chatting idly with my best friend the other day, and as usual, we ended up talking about books and food (this is doubtless a big reason why we are friends in the first place). Sometimes it's one, sometimes it's the other, but in this particular case, it was both of them combined. "I [...]
Is there any better treat perfect for a summer picnic or backyard barbeque than homemade ice cream sandwiches? They are a big hit and simple to make. You can make several ahead and freeze them for anytime you want a special, tasty treat.
Instead of the traditional chocolate chip cookies with vanilla, be adventurous and try peanut butter cookies with strawberry banana frozen yogurt. Or Mint ice cream sandwiched between chocolate wafers or chocolate chunk cookies. I don’t think there is a bad combination when it comes to ice cream or frozen yogurt and cookies.
Two hints: 1. Make sure the cookies will hold up well when frozen. And, 2. soften the ice cream or frozen yogurt a bit before placing a scoop on one cookie and pressing a second one to close it. 3. You can roll the sandwich in crushed nuts, coconut, mini chocolate chips or toffee bits and then place on a cookie sheet in the freezer until firm.
For more ice cream sandwich ideas visit: http://www.buzzfeed.com/tashweenali/delicious-ice-cream-sandwiches Teaser: I can’t wait to try the Snicker doodle one! Or how about a Brown sugar bacon?
What’s your favorite recipe for ice cream? Send it to me and I’ll share it here.


By:
[email protected],
on 5/25/2014
Blog:
Perpetually Adolescent
(
Login to Add to MyJacketFlap)
JacketFlap tags:
Books for Cooks,
Books,
food,
Book News,
winter,
recipes,
non-fiction,
cookbooks,
Australian,
Add a tag
Winter is almost upon us, and as the days grow darker and the nights become cooler, my mind turns to comfort food from my slow cooker. Anyone with me? It’s time to pull out your slow cooker from the back of the cupboard, box or garage and begin to look forward to some delicious meals. Slow cookers are a fabulous time-saving appliance, and there’s nothing better than coming home from a busy day out to a delicious concoction cooking away on your bench top.
Now, if you’re anything like me you’ll have your tried and true favourites (lamb shanks, beef hot pot) but I’ve pulled together a collection of Australian books for you to spice up your repertoire. The best thing about this collection is that each of these books have been selected from the Boomerang Books list of Australia’s Top 1000 Bestselling Books, which means you can enjoy an additional 20% off the RRP.
 First, I bring you the 250 Must-Have Slow Cooker Recipes (pictured left), which contains recipes for time-strapped cooks and busy households, including breakfasts and desserts. Recipes include cooking with meat, poultry, seafood, vegetables, pulses, rice or pasta to create soul-warming dishes. Yum!
If 250 recipes isn’t enough, try the The 1000 Recipe Collection – Slow Cooking, which has (as the title suggests) an astonishing 1000 recipes to choose from. Getting hungry?
The Complete Slow Cooker By Sally Wise is a combination of two of her previous slow cooker books and is appropriately jam packed full of great recipes. If you’re looking for ideas for delicious and nutritious meals from an experienced cook, you can’t go past The Complete Slow Cooker by Sally Wise. According to the publisher, Sally Wise is the: “best known, best loved and the biggest selling author of books on slow cooking,” so you really can’t go wrong with this one.
Finally, a collection of Australian cook books wouldn’t be complete without including an Australian Women’s Weekly edition, and so I give you Cook it Slow by Australian Women’s Weekly. Cook it Slow contains almost 500 pages of recipes and also includes other methods of cooking slow including oven and stove top recipes; making this book perfect for those without a slow cooker at home.
Let me know if you’re a slow cooker devotee, and if you have a favourite recipe you’d like to share with us.
If you’re still hungry for more, check out Slow Cooking By Hinkler Books.
Here is a healthy and easy recipe for crepes that you can adapt and use with whatever fillings you like. The crepes can be made ahead and frozen until ready to use. If you decide to freeze them, place waxed paper between each on for easy thawing.
Mother’s Day Crepes
2/3 C buckwheat flour 1/3 C whole wheat pastry flour 2 eggs
1 ¼ C almond or soy milk 1 T honey or agave syrup ¼ t salt
1-2 T oil – as needed to cook crepes
1. Combine flours and eggs. Mix well
2. Stir in milk, honey, and salt. Beat with a whisk until smooth.
3. Drop less than ¼ C of batter at a time onto a hot, oiled skillet or crepe pan. Tilt and rotate to distribute batter evenly over the bottom, of the pan.
4. Cook until done on bottom (Lift edge, if it is lightly flecked with brown, it’s done)
5. Turn crepe over and cook several seconds on second side.
6. Repeat with remaining batter, oiling skillet as needed. 
7. Stack crepes until ready to fill.
Filling: spread each crepe with Nutella and sprinkle with sliced strawberries, raspberries and/or blueberries. Fold over and sprinkle with powdered sugar or cocoa powder.
Variations: Spread crepes with peanut or almond butter and sliced bananas. Or try tropical fruit such as mango, papaya and pineapple and sprinkle with coconut.
For other Mother’s Day Recipes, try visiting: http://www.familycircle.com/momsdayrecipes


Spring is the perfect time to make a pot of Asparagus Soup since the vegetable is found in abundance this time of year and is also quite economical. This recipe is so easy and perfect for kids to make. It will impress any guest and add an elegant touch to a lunch or dinner. There is also a GLUTEN FREE OPTION. See below:
Light and Easy Cream of Asparagus Soup
3 C sliced asparagus – about 1 pound
1 chopped leek or medium onion
2 C of chicken or vegetable broth
¾ t. thyme
1 bay leaf
1 clove garlic, minced
1 T flour (note: for a GLUTEN FREE option, eliminate flour and dice one potato to add as thickener)
2 C low fat milk
Dash of nutmeg
2 t. butter
Salt to taste.
1. Combine first 6 ingredients in a large saucepan over medium heat. (If using potato instead of flour add it to the above. Bring to a boil, reduce heat, cover and simmer 10 minutes. Discard bay leaf.
2. Place mixture in a blender and process until smooth.
3. If using flour to thicken, add it to the pan and whisk in the milk until blended. Return pureed asparagus mixture to the pot and add nutmeg. Stir to combine.
4. Bring to a boil and simmer 5 minutes, stirring constantly. Remove from heat, stir in butter and salt to taste. Garnish with asparagus tips if desired. 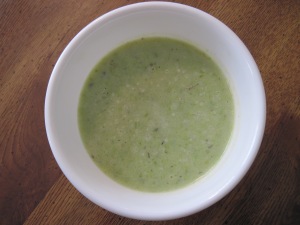
Variations: Substitute 2 C baby carrots for asparagus for Cream of Carrot Soup. OR, substitute 2 C leeks and 2 C diced potatoes for Leek and Potato Soup.


By:
Robin Brande,
on 4/12/2014
Blog:
Robin Brande
(
Login to Add to MyJacketFlap)
JacketFlap tags:
Smoothie Recipe,
Green Smoothie,
Green Smoothie Recipe,
Chocolate Banana Strawberry Green Smoothie,
Chocolate Green Smoothie,
Health,
Recipes,
Nutrition,
Eating,
Wellness,
Add a tag

Chocolate Banana Strawberry Pineapple (Etc.) Green Smoothie
Here’s today’s experiment:
- 1 handful sprouts
- 2 large Swiss chard leaves
- 3 dates
- 4 frozen strawberries
- 1 frozen banana
- 3 frozen pineapple chunks
- 1 heaping Tablespoon peanut butter
- 2 heaping teaspoons cacao
- About 1 cup water (up to the Nutribullet fill line)
Taste review: Looks like a chocolate smoothie, tastes a little more gardeny than that. I started with just half a banana and no dates, and it wasn’t sweet enough. I think I could have gotten by with just one teaspoon of cacao. I’m kind of sick of the taste of dates. Will be looking for other ways to sweeten. But overall, not bad! And very, very filling.
Health review: After just a few days of one green smoothie a day, my skin already looks so much better–healthy and clear in a way it hasn’t for months. And my digestion: wow. I won’t go into detail, but let’s just say it’s meeting my need for spring cleaning.
The key, though, is these smoothies have to taste good. This is a voluntary activity and if it’s not fun I won’t do it. Which is why I’m experimenting with flavors. And why I’m reporting to you about those experiments, so that if you’re in the green smoothie mood, you can do it in an enjoyable, non-punishing way. Because we’re against punishment here on the blog.
Carry on, Greenies!
By:
Robin Brande,
on 4/10/2014
Blog:
Robin Brande
(
Login to Add to MyJacketFlap)
JacketFlap tags:
Food,
Health,
Recipes,
Nutrition,
Eating,
Spring Cleaning,
Smoothies,
How To,
Wellness,
Green Smoothies,
Smoothie Recipe,
Fruit Smoothies,
Green Smoothie Recipe,
Nutribullet,
Recovery Foods,
Sports Recovery Foods,
Spring Cleaning Foods,
Spring Cleaning for Your Body,
Add a tag
As you may have been able to tell from my recent photos and posts, I was skiing up until a few days ago. Just arrived home to the desert where it’s already 92 degrees. It’s a little . . . jarring. Dogs are looking at me like, “What the–?” and while they’re busy shedding as much of their fur as possible–I’ll be able to knit a new Labrador in about a week–I’m taking my own measures to adjust to the almost summer.
It’s a two-phase action plan: Clean my house, clean my body.
Believe it or not, the body part of it is much simpler. All I have to do is switch out of winter eating mode (soups, sandwiches, pastas, sweets, sweets, more sweets) and turn to my old friend the green smoothie.
Also known as Baby Poop.
Why Baby Poop? Because if you saw the way one of my green smoothies has traditionally looked–dark brown, sometimes brownish-red, with hints of green flakes–you’d say, “Yeah, good luck with that, think I’ll have a salad.” But for some reason, I’ve been out of the salad mood for about a year now. Can’t explain it. So I’m just going with it.
The thing that’s going to banish the baby-poopedness look of my smoothies from now on is that tomorrow I’ll be getting this nifty machine that actually has a proper motor. I discovered while skiing that that’s been the whole problem with my green smoothie life. I just haven’t had enough power.
I made that discovery by watching someone else make one for me. The things she put in there! (To be discussed below.) And by the time she poured it into a cup, the liquid was this beautiful, light green, and instead of tasting gritty and *good for me,* it tasted smooth and delicious, more like a dessert. Which, see above re: winter diet, sold me.
But even better, the smoothie fixed me. Day after day I’d stumble into that place, start croaking out ingredients–”Dates! Cashews! Oh my gosh I’m about to pass out–coconut! More fat! Bring it!”–and the lovely proprietoress, Gretchen, would keep adding and adding (see below) and then give me basically a cup full of green medicine.
I have never recovered from a big physical effort more quickly and more deliciously. That’s what I’m saying. That’s why I’m trekking down the Green Smoothie Way.
I’ll be experimenting with new recipes as I go, and I’ll post some of the best ones here, but let’s start with the Skiing Kicked My Butt recipe that got me through:
- Big handful of unsalted cashews
- Normal handful of unsalted sunflower seeds
- One heaping teaspoon peanut butter
- Big handful of dates (about 5)
- One banana, preferably frozen to give the drink some thickness
- Big handful of strawberries, also preferably frozen
- Normal handful of blueberries (optional–makes the color a little weirder, but tastes good)
- Two heaping teaspoons cacao (unsweetened cocoa powder will do) (also optional, but wow)
- One teaspoon coconut (optional, but yum)
- Three huge leaves of kale or Swiss chard, stems and all, ripped into pieces and layered on top
- About 1/2 to 1 cup of peach, pear, or apple juice
- About 1 1/2 cups pure water–start with 1 cup, then add more as you assess the thickness. Some people like their smoothies thicker, some more liquidy. You’re the boss.
I tried this in my regular blender, but no. Baby poop. I’ll take a photo of the proper green smoothie once I try it with my new machine tomorrow. You’ll see. Fresh and spring-looking.
Onward, green smoothiers!

By: Emily Smith Pearce,
on 4/9/2014
Blog:
Emily Smith Pearce
(
Login to Add to MyJacketFlap)
JacketFlap tags:
author,
Food,
Recipes,
writing,
recipe,
Gluten Free,
vegetables,
vegetarian,
salad,
vegan,
gluten-free,
beans,
Add a tag
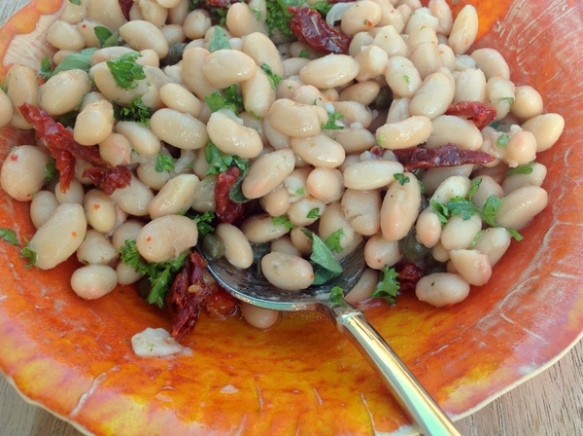
This is my weeknightified version of a Foster’s Market recipe. It’s super simple and really hits the spot when I want a tasty deli-style salad with next to no work. You could dress it up as much as you like with fresh veggie add-ins. The original recipe is lovely, though not super fast (you cook the beans yourself and make their delicious dressing from scratch, among other things). Again, this is more a list of ideas than a real recipe, but it’s not hard to eye the proportions.
Ingredients:
Rinsed and drained canned white beans (I like navy beans)
Italian dressing—-I like the Penzey’s mix
Capers
Sundried tomatoes
Chopped fresh parsley
Mix beans with enough dressing to coat and enough capers and tomatoes to give it a little color. Let marinate a few hours if you have time. Add parsley. Enjoy!
Got some more feedback on my nonfiction manuscript this week. Things are finally moving forward. So excited.
Still working on the last few chapters of my young adult novel. It’s slow-going, but I do think I’m getting somewhere.
And in other news this week, I’ve been talking to 4th and 5th graders about writing an early reader (i.e. Slowpoke). Fun times! Love getting their questions.
For more food-related posts, click here. Have a great rest of your week.


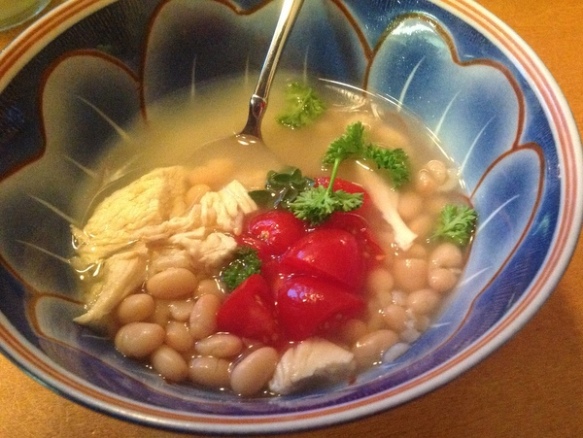
 How about a final soup to say good-bye to cold-weather? Am I jinxing us just writing that?
I was going to call this a Greek chicken soup, but it’s really just Greek-inspired. I like to make it when I’m feeling a little tired of our usual chicken noodle with carrot and onion version.
This is less a recipe and more an idea for flavors.
You need:
–chopped cooked chicken (I usually poach* some breasts. Roasting bone-in is probably the most flavorful way you could go, but poaching is quick and painless)
–chicken broth (I use chicken base and water)
–cooked rice
–pre-cooked or drained and rinsed canned white beans. I like navy beans.
Assemble and heat gently until hot. Then add:
–chopped tomatoes (I used cherry ones since they’re always available and good)
–oregano (I grow it in the back yard, but dried is also ok—-as I look at my photo I see what appears to be parsley. hmmm…well, that will work, too and is also growing in the back yard)
–juice from 1/4 to 1/2 lemon
Enjoy! For more of my cooking and eating adventures, click here.
Hoping the weather is sunny and warm wherever you are.
Things making me happy this week (besides the lovely weather): I discovered the NPR Pop Culture Happy Hour podcast. Smart people talking about tv and movies. A dream!
Speaking of dreaming, I’ve been tweeting what my imaginary personal chef would make me for lunch if she existed. If you want to dream-eat with me, find me @emilysmithpearc on Twitter.
Also, Call the Midwife is back! And, I finished a draft of my nonfiction manuscript and sent it off for comment. Wahoo!
And now, trying very hard to focus on finishing this draft of my novel. Nose to grindstone.
*Poaching is like allllmost boiling something, but don’t let it come to a boil. Cook slowly at the almost boiling point until done, and you’ll have tender chicken. Boiling will give you a rubbery mess.
See you again soon!


Vicki Vinton's recent post about the overuse of graphic organizers was thought-provoking. Is even the thoughtful use of an occasional teacher-made or teacher-provided organizer in order to acquaint children with the kinds of tasks they will be asked to do on a high-stakes (we're talking fail-the-grade high stakes) test overuse? We think not. There needs to be a balance. But by balance, we're not suggesting one-for-one. Balance to us goes back to "sparingly" and "thoughtful."
I was thinking of Vicki's post yesterday at Environmental Club. I provided students with teasel seed heads (harvested from the weedy area along the train tracks in my neighborhood),
and felt, pom-poms, pipe cleaners, google eyes, clothespins and magnetic tape. The goal...or I should say, MY goal, MY idea, was to decorate the clothespin and make a refrigerator magnet that would hold their papers. I sat and cut felt and pipe cleaners for them while they worked. Here's a sampling of what they made:

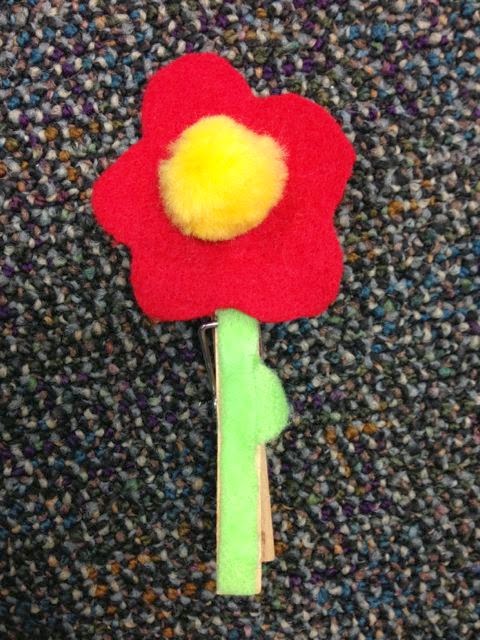


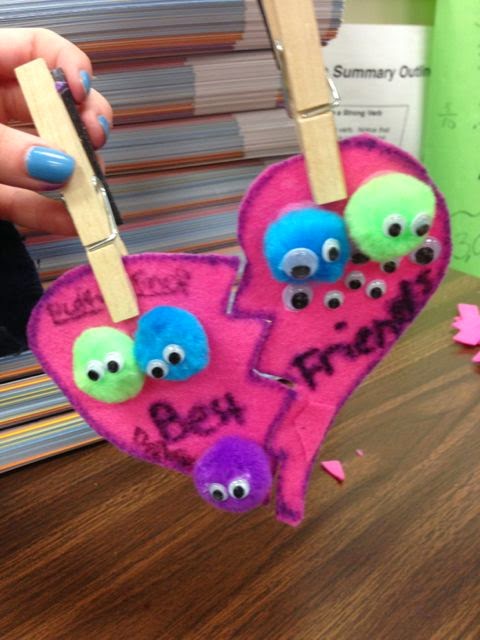
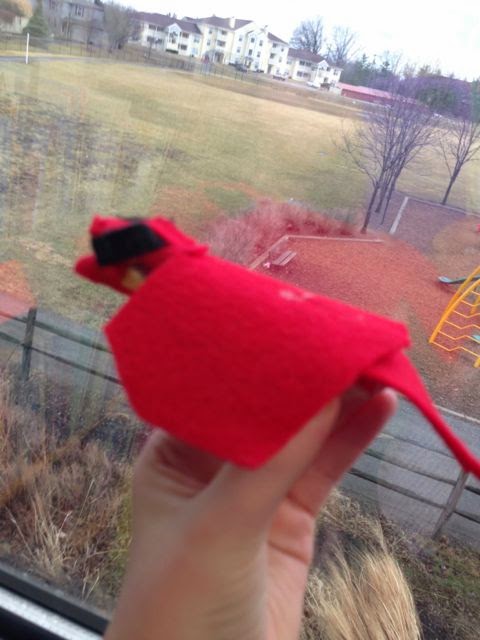
Most of the outcomes bore no resemblance to the idea I had in my head when I bought/gathered the supplies. Free to make whatever they wanted, they made some AMAZING creations! (And a huge mess...) It didn't matter. I intentionally hadn't provided a pattern, so I celebrated every creation.
When I opened Blogger to begin this post about boxes and organizers and patterns, I was struck by what met me: a template. With pre-set boxes to be filled. And I have no problem with that. Would I want to sit down to a blank page every time I write a post and create the formatting? I think not!
Next weekend, I will make my famous three-layer-from-scratch chocolate cake. It will take some improvising: the recipient wants coffee buttercream instead of the usual frosting. But will I try to bake the cake and make the buttercream without a recipe? Nope.
On the other hand, as I try, without success, to pin myself down on my Poetry Month poem-a-day project, I find I'm leaning more and more to something very unstructured and spontaneous. Last year's "
Common Inspiration--Uncommon Creations" was a huge success and loads of fun...and very structured.
So in life, as well as in our classrooms, it shouldn't (even can't) be either/or: ALL structure or ALL freedom. We need to notice WHEN we need an organizer or a pattern, a template or a recipe, and when we can do away with them and create freely.
By: darlenebeckjacobson,
on 3/16/2014
Blog:
Darlene Beck-Jacobson
(
Login to Add to MyJacketFlap)
JacketFlap tags:
healthy eating/snacks,
good health habits,
Home Schooling Ideas,
Recipes,
Inspiration,
Nature,
spring activities,
Green food recipes for St. Patrick's Day,
Children,
Activities,
cooking with kids,
Add a tag
With St. Patrick’s Day arriving next week, why not plan a Green Day and serve green foods, wear as much green as you can and plant some seeds in a pot to get a head start on the growing season. Lettuce, parsley, and chives are all quick sprouters and don’t mind the chilly days of early spring. While you wait for the lettuce greens to grow, try this recipe for a healthy green salad:
MIXED GREENS SALAD: 1. Wash and pat dry a mix of salad greens such as romaine, spinach, arugula, radicchio, or any combination you like. Now the tasty fun begins.
Add any or all of the following to make a plain salad a satisfying main dish: sliced cucumbers, olives, shredded carrots, dried cherries or cranberries, sliced strawberries, blueberries, or grapes. Add toasted, slivered almonds or walnuts, sunflower seeds, pumpkin seeds, and grated Parmesan cheese (or any cheese of your choice). If you’re a vegetarian, you can stop here. 
The photo version has a packet of salmon on top. I’ve eaten it with shredded chicken or tuna as well. ANY leftover meat works well.
Sprinkle with your favorite dressing – I used a raspberry balsamic with olive oil – and serve with breadsticks or garlic toast and you will get rave reviews.
Another GREEN food treat that is fun and easy for kids to make is KALE CHIPS. Check the recipe section of this blog for the recipe.
Stay tuned for some kid-friendly gardening tips to make things turn green in your own backyard.


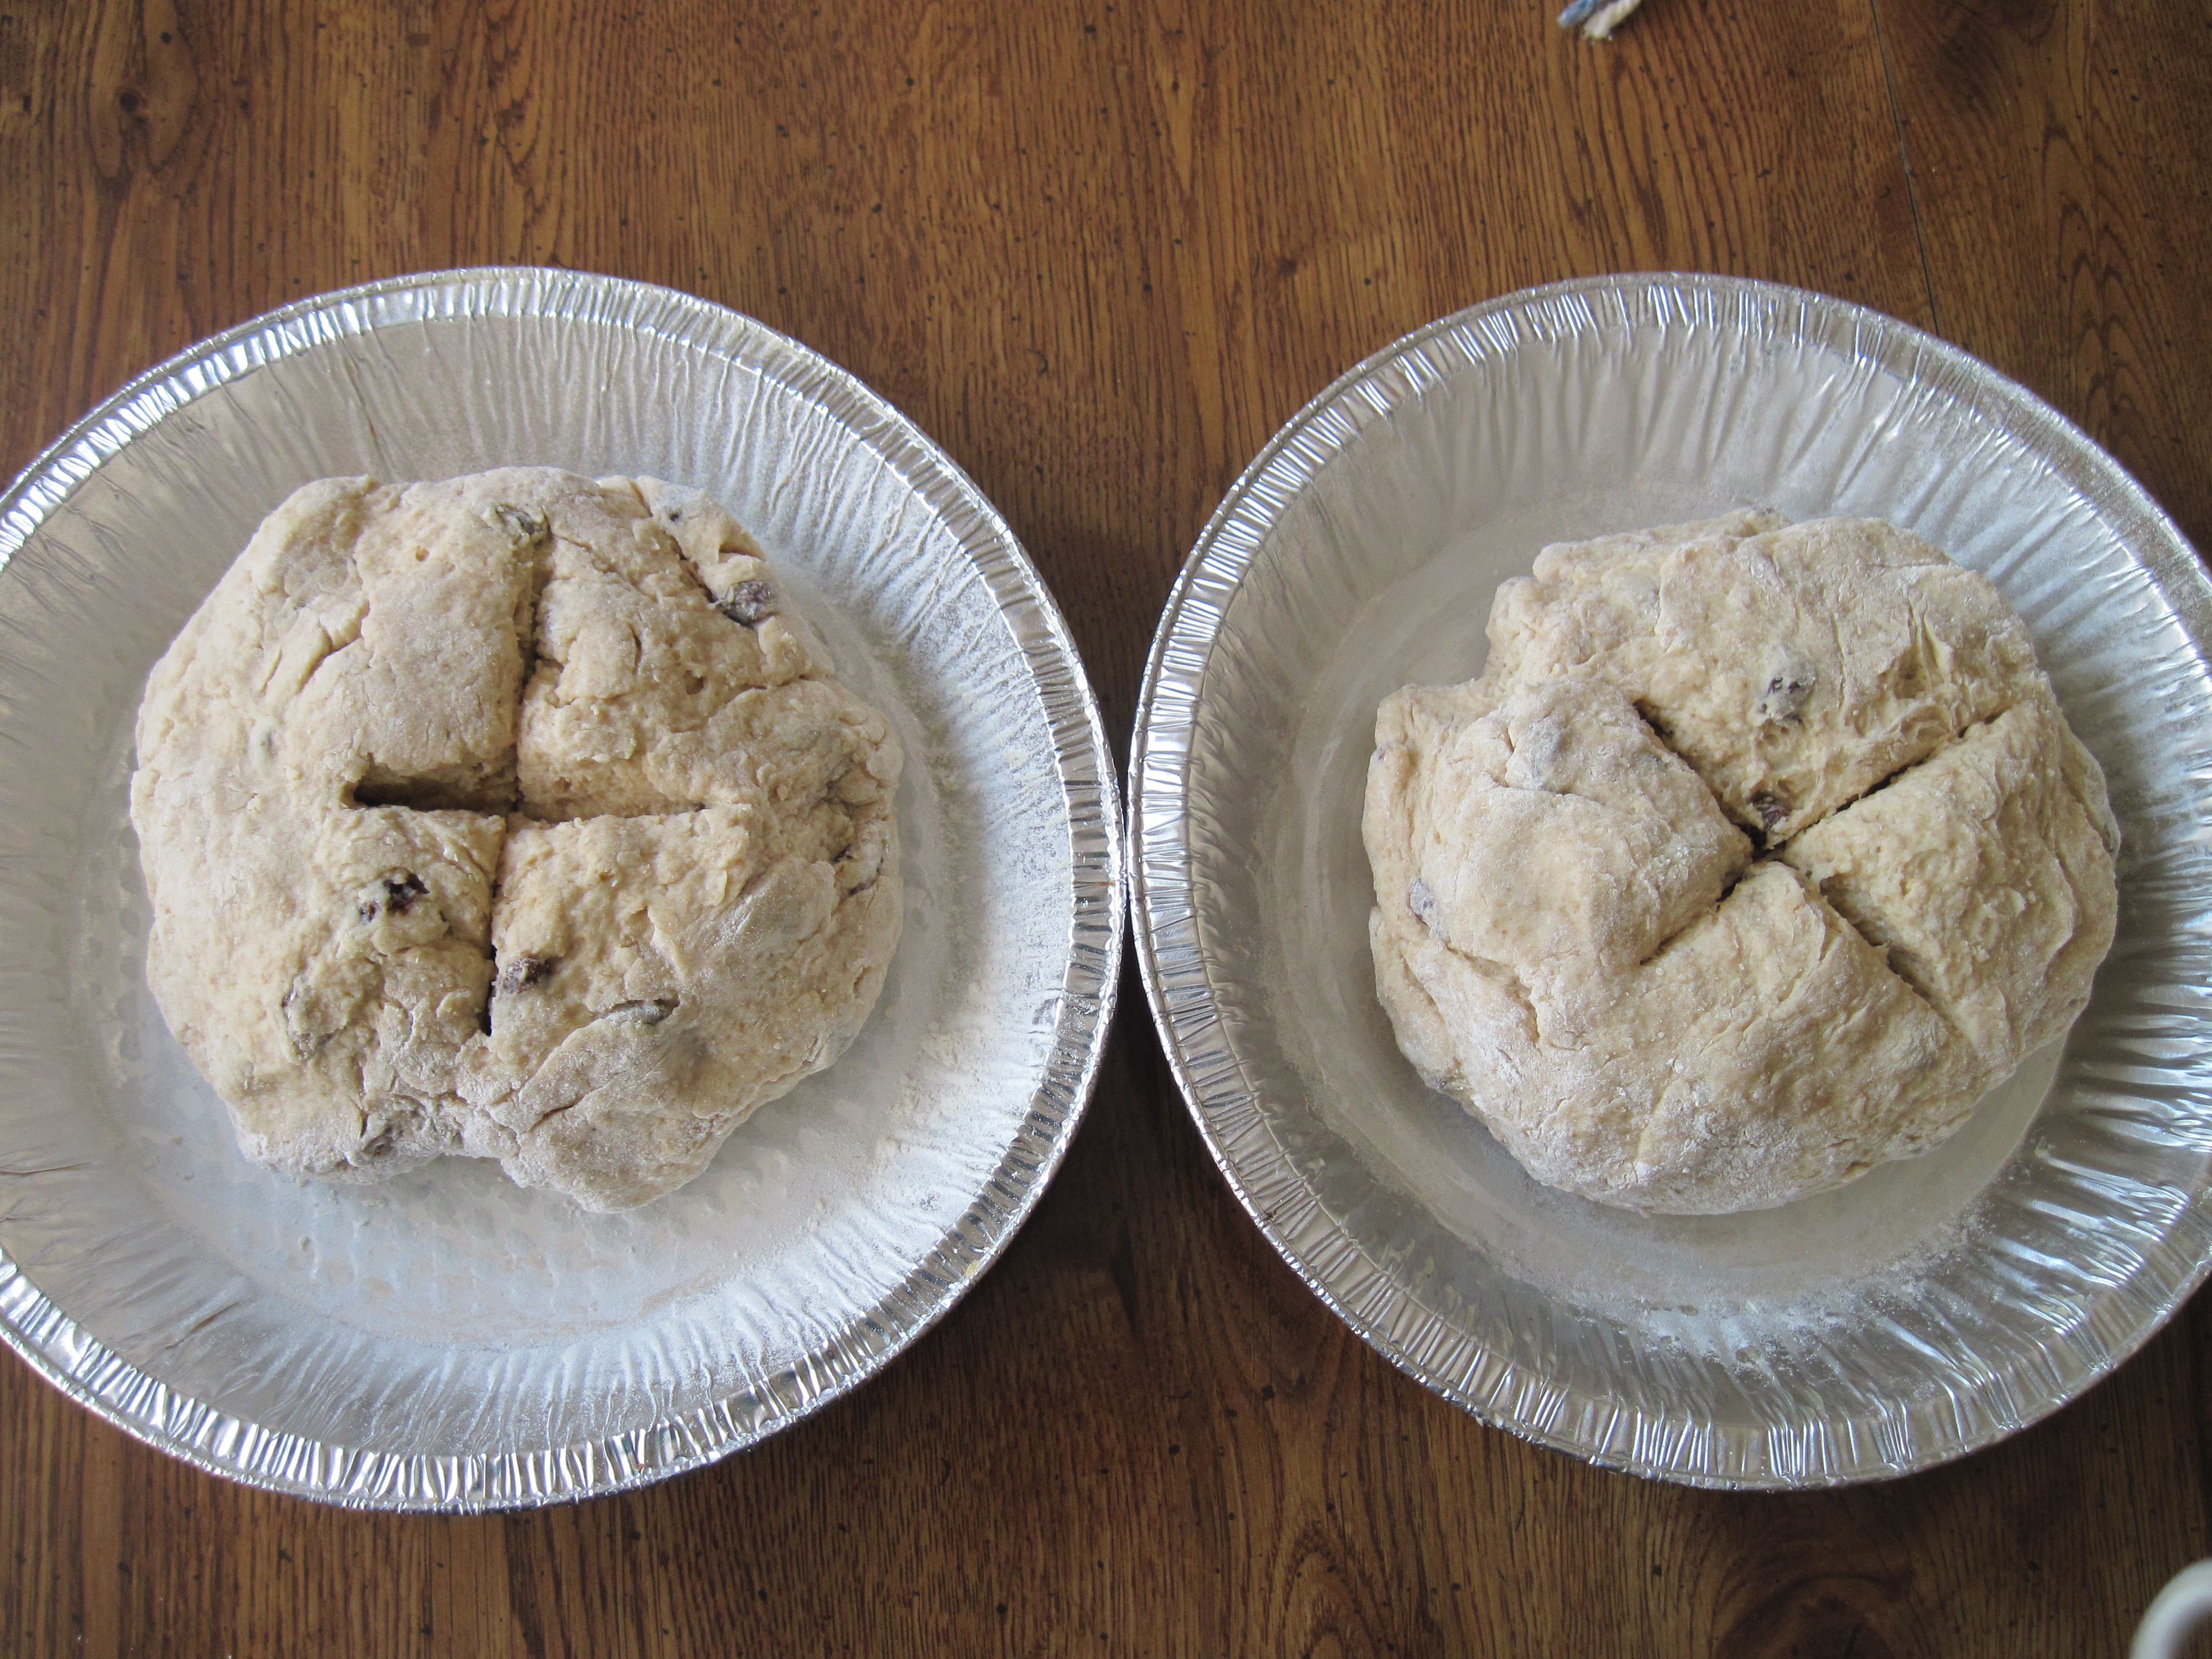
This recipe for Soda Bread is more moist than many thanks to the buttermilk. If you can’t find buttermilk, use regular plain yogurt (NOT Greek).
Irish Soda Bread
4 C flour (I use 1C whole wheat) ½ C sugar 1 T baking powder
1 t salt 1 t baking soda 1 C. raisins plumped (see note)
4 T melted butter 1 ½ C buttermilk 1 lg. egg
- Preheat oven to 375. Grease and flour a round pan or cookie sheet.
- In large bowl, combine flour, sugar, powder and salt.
- Pour melted butter into dry ingredients and mix until the mixture resembles coarse crumbs. Stir in raisins.
- In a separate bowl beat buttermilk, egg and baking soda. Add to flour mix until blended.
- Turn dough onto floured surface, and knead until smooth – about 1 minute. If dough is sticky, flour your hands as you knead. Shape dough into two round loaves.
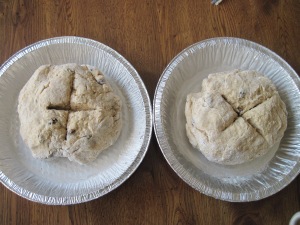
- Place dough in prepared pan. With a sharp knife, make 2 crisscross slits in dough.
- Bake for 45-60 minutes until a toothpick inserted in the center comes out dry. Let rest for 10 minutes before removing from the pan.
- Serve sliced with butter or jam. Bet you can’t eat just one piece!
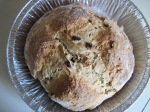
NOTE: Pour boiling water over the raisins and let them stand for 5 minutes to soften. Drain and pat dry.


.jpeg?picon=3496)
By: amysecretseed,
on 3/4/2014
Blog:
Secret Seed Society
(
Login to Add to MyJacketFlap)
JacketFlap tags:
children,
kids,
fun,
Recipes,
cooking,
recipe,
play,
kitchen,
pancakes,
seed,
pancake day,
vegetable,
Shrove Tuesday,
Seed Agent News,
veg,
Cooking Missions,
Add a tag

Today is Pancake Day! Also called Fat Tuesday or Shrove Tuesday if you take part in Lent. It’s traditionally a day to eat up all sorts of yummy things in your house that you are promising not to eat during Lent, like chocolate. It’s a long month if you’re giving up your junkiest habit so first of all you need to eat a shed-load of pancakes.
It’s strange people MAKE and EAT pancakes only one day a year.
HOW ODD?! Why only eat such a great food one day out of 365? We must change this silliness once and for all.
But how? …Time for a Seed Agent Mission.
WHAT IF?! We rename pancakes Flippers! Every time we make a pancake we call it a Flipper. Everytime we eat a pancake we call it Flipper. Everytime we see a pancake we call it a Flipper. Soon the world will call pancakes – Flippers!! And then we can eat Flippers ALL year round, and not just on Fat Tuesday.


There’s nothing that can’t be used to fill a flipper, sweet or savoury, hot or cold, the choice is yours Seed Agents! Try some veg-flippers! “Move along old-school lemon and sugar”, “Bye-bye gooey joys of chocolate”, “Hello pongy cheese, spinach and mushrooms!”
")
Have a go at making your own flippers here and experiment eating them with different fillings. Discover which one you like best!

.
When you buy a DVD these days, you expect something extra than what you saw in the store. You expect to see a Director’s Cut, interviews with cast/crew/directors/critics, insider info or jokes, deleted scenes and outtakes. What’s your favorite kind of ancillary materials? What do you buy the DVD for? And how can you translate this to your own book marketing?
As you are writing, think about these extras that you can add on your author website. Here are some things you can do as you write your story:
Stop and Write an Essay. In the midst of writing your novel or picture book, stop and write an essay. We know that stories shouldn’t preach, but should tell a story. So write an essay that delves deeply into the themes of your story. Why does this story hold passion for you? Here’s Kate DiCamillo talking about the super squirrel in the 2014 Newbery award book, Flora and Ulysses. Yes. Think about what you might write for a newspaper article! But strike while the moment is hot, while you are writing the story. Then you’ll be ready when the invitations for featured articles come your way.
Recipes, coloring pages, play lists. What sorts of things relate to your story? If you like to doodle, but you know you’re not ready for prime time, use the doodles to create a coloring page, or a creative coloring page. My current series about aliens on Earth involves recipes and I’m gathering great ones for the launch of that book. Many authors create playlists they listen to when they write a particular story.
 Outtakes or deleted scenes. Personally, I think this takes guts! But I am trying this on my new novel, THE GIRL, THE GYPSY AND THE GARGOYLE. I wrote a prologue for the book, even though I knew I probably wouldn’t use it. That’s what we do, we try different directions and try new things. For this story, there’s a Gargoyle Man whose face is scarred and I felt a need to know him better. So, I wrote the prologue about how he and his brother–the Gimpel brothers–discovered a magical stone. Read the outtake and a sample chapter here.
Just out of curiosity, I’d love to see a “Director’s Cut” for a novel, the novel the way the author him/herself might have edited it. Sure, I know that’s probably not possible; and it would be a gutsy thing to do. But it would be fascinating.


Turns out my recipe for almondy cookies easily adapts to a gluten-free version. I made a half-batch last week just to test it out. Everyone loved them, including visiting gluten-eaters. They are not too sweet and have a nice shortbready-type texture.
I make my own gluten-free flour blend in large batches according to the recipe in Artisanal Gluten-Free Cooking, but you could probably use any GF flour blend.
GLUTEN-FREE ALMONDY CUT-OUT COOKIES (adapted from this cooks.com recipe)
Makes about 4 dozen cookies, depending on the size of your cutters, but you can easily halve it if you don’t want that many.
2 sticks butter (I’ll have to try subbing coconut oil another time….)
1/2 cup white sugar
1/4 cup brown sugar
1 egg
1/4 tsp. almond extract
1 1/2 cups almond meal
3 cups gluten-free flour blend (homemade or purchased)
pinch of salt
Cream together butter, sugar, egg, and almond extract. Beat in flour, almond meal, and salt.
Make a ball and flatten it, wrap in wax paper and place in the fridge for an hour or a day.
Preheat oven to 325°, roll out dough, and use cutters to cut shapes. Ours were a little thicker—in the 1/4 inch range, but you could go thinner, depending on how crispy or chewy you want yours. Just watch the time—you definitely don’t want to overcook them.
Bake for 8-10 minutes or more. They should be very lightly browned. I should’ve cooked ours a little longer, but I got impatient.
I’m tempted to up the almond meal further and lower the flour portion. Maybe next time. Also hoping to try out a GF molasses cookie recipe. Stay tuned. For other eating and cooking adventures (including gluten-free) click here.


By: Emily Smith Pearce,
on 10/30/2013
Blog:
Emily Smith Pearce
(
Login to Add to MyJacketFlap)
JacketFlap tags:
Food,
Recipes,
Add a tag

I was in Trader Joe’s yesterday, and my eyes landed on these beauties. According to TJ’s, they are “Gold Nugget Squash,” but they’re similar what we called Hokkaido pumpkins in Germany, and I knew I just had to have some pumpkin soup for lunch. I’d been looking for some similar pumpkins here, but this was the first time I’d seen anything close.
I was psyched to find that the Gold Nugget cooked up just like a Hokkaido, which is loads better than a pie pumpkin when it comes to soup-making.
I wanted to recreate some soup, chef unknown, that I’d had at a school function, but I didn’t want to spend my day making soup, since it was just for me. Sadly, the family is not nearly as enthusiastic about pumpkin soup as I am. All the recipes I could find were pretty involved, so I came up with my own.
I’m sure the “involved” recipes are, you know, fancier, but this method totally floated my boat. Super delicious and easy! Here’s my Amelia-Bedelia* recipe:
Simplest Curried Pumpkin Soup
1 thin-skinned, dark red pumpkin/ squash (My pumpkin was about the size of a grapefruit. Adjust spices up if your pumpkin is bigger, always tasting to see if it suits you).
water
1 tsp curry powder
1/2 tsp powdered ginger
a few sprinkles dried onion flakes
a few sprinkles garlic powder
small sprinkle red pepper flakes
salt to taste
One of these gold nuggets made about 3-4 bowls of soup (umm….yes, I ate it all in one sitting).
Preheat the oven (I used the toaster oven) to 375 degrees F. Prick the skin of the pumpkin a few times with a fork or knife tip. Roast whole until it’s nice and tender. I think mine took about 35 minutes or so. At this point, you could set it aside to cool and refrigerate until you’re ready to make the soup.
Slice the pumpkin in half and scoop out the seeds with a spoon. Now scoop the flesh out of the skin, and if you have a hand blender, place directly in your soup pot. I mashed mine a little with the potato masher. Add a cup or so of water, mash a little more, and then puree with the hand blender. Add more water if needed to make it the consistency you like.
Alternatively you could place the pumpkin flesh in your blender with water, then empty the puree into your soup pot.
Okay, you’ve got pumpkin puree. Now heat slowly and season with the spices to your taste. I used Penzey’s mild curry powder, which worked beautifully.
Serve and eat. I added a squeeze of lime and a dash of Sriracha sauce to mine. This is definitely going into my rotation for as long as I can get my hands on those little pumpkins!
*for friends unfamiliar with Amelia Bedelia, she’s a children’s book character. Ms. Bedelia is a little dim with housework, but her saving grace is her fabulous no-recipe cooking. She cooks with ”a little of this, a little of that.”
It’s been Soup Central around here, with tomato soup, golden chick pea soup, and coming tomorrow, chili. For more of my less-meatarian cooking posts, look here. What have you been cooking lately?
Meanwhile I think our costumes are allllllmost finished. Just need to paint our little ninja’s cardboard weapon. Hope to post directions for his tunic soon. Happy Halloween!


Many gluten-free baked foods taste funky to me. This one is delicious through and through. I include links to the brands I used, so I cannot testify to the outcome if you substitute these for other brands.
Ingredients:
- 3 large ripe or 6 extra small ripe bananas (FYI-I Live in Miami so we grow the small ones here)
- 3/4 cup All Purpose Gluten-Free Baking Mix (I got mine at Home Goods on a fluke but you can buy online)
- 1/4 cup Raw Coconut Flour (Can buy at Whole Foods)
- 3/4 cup dark brown sugar
- 1.5 teaspoons baking powder
- 1/2 teaspoon salt
- 1 teaspoon cinnamon
- 1/2 teaspoon vanilla extract
- 1 stick of butter (No margarine!) Melt in microwave for 40 seconds.
- 1 cup chocolate chips
Directions
Preheat oven to 350 degrees. If you have a convection oven, set it to the bake/convection combination setting. Spray 2 muffin tins liberally with baking spray. I use Baker’s Joy. Or you may use butter anf gluten-free flour to coat. You don’t need an electric mixer for this. You can just use a whisk.
In large mixing bowl, mash bananas well with potato masher. Add eggs and mix well. Add melted butter slowly so you don’t cook the eggs. Add brown sugar and mix well. Add vanilla. Combine dry ingredients – flour, coconut, salt, baking powder, cinnamon. fold into wet ingredients. Mix in chocolate chips.
Spoon in muffin pans. I put batter all the way to the top of opening so they bake with a nice big muffin top. (This is the only place in life where a muffin top is a good thing!) This recipe will make between 16 and 20 muffins. Bake until tops are light brown, from 20-25 minutes. If you have a convection oven, they will bake faster so check after 15 minutes. Cool on a rack. Eat when it’s still warm! These freeze well.
September is National Childhood Cancer Awareness Month. Most of us know first hand how devastating cancer can be. It is especially difficult when a child is struggling with the disease. You and your kids can help fund much-needed research by hosting a BAKE SALE. For information, go to: http://www.cookiesforkidscancer.org
Here is a delicious cookie recipe to get you started.
Oatmeal Chocolate Chip Cookies
1 C white flour 3/4 C whole wheat pastry flour 1/2 C rolled oats 1 tsp baking soda
1 stick softened butter 1/2 C canola oil 1/2 C granulated sugar 1/2 C brown sugar
1 tsp vanilla 2 lg eggs 2 C chocolate morsels 1 C chopped walnuts or other nut of choice
1. Heat oven to 375. Combine dry ingredients and set aside.
2. Beat butter, oil, sugars and vanilla in large until creamy. Add eggs and beat until blended.
3. Gradually add dry ingredients and nuts. Mix until combined. 
4. Drop by spoonfuls onto ungreased cookie sheets. Bake for 9-11 minutes, or until edges are lightly browned. Remove from pans to cool.
These cookies freeze well and can be jazzed up with sunflower seeds, dried cranberries or whatever other dried fruit you enjoy. Don’t be afraid to experiment.


.jpeg?picon=3655)
By: alethea aka frootjoos,
on 9/4/2013
Blog:
Read Now Sleep Later
(
Login to Add to MyJacketFlap)
JacketFlap tags:
Macmillan,
ClaudiaMills,
ZeroTolerance,
book review,
5 stars,
netgalley,
recipes,
middle grade,
blog tour,
librarybook,
FarrarStrausGiroux,
applenachos,
Add a tag
Thanks to Claudia Mills and FSG for inviting me to kick off the Zero Tolerance blog tour!
Category: Middle Grade Realistic Fiction
Keywords: School controversy, friendship, family, values, morality
Format: Hardcover, eBook
Source: Library; Netgalley
Synopsis:
Seventh-grader Sierra Shepard has always been the perfect student, so when she sees that she accidentally brought her mother's lunch bag to school, including a paring knife, she immediately turns in the knife at the school office. Much to her surprise, her beloved principal places her in in-school suspension and sets a hearing for her expulsion, citing the school's ironclad no weapons policy. While there, Sierra spends time with Luke, a boy who's known as a troublemaker, and discovers that he's not the person she assumed he would be--and that the lines between good and bad aren't as clear as she once thought. Claudia Mills brings another compelling school story to life with Zero Tolerance.
Review:
I was initially drawn to read this by the great cover art by
Vera Brosgol (author-illustrator of
Anya's Ghost -- note, not all her artwork is SFW ;) Sierra's worried brows striking just the right gesture of uncertainty towards the green apple on top of her head, William Tell-style, with the subtle background behind her forming a target. The symbolism of the apple is so clever--not just its part in setting off the events in the book, but also the reference to
apples for teachers, that iconic fruit for teacher's pets. I started this late one night and finished around 3 am, earning it the
Stay up all night rating!
Careful plotting and great characters are what make this middle grade novel by Claudia Mills so compelling to read. The book centers not necessarily around the zero tolerance policy that Sierra unwittingly breaks, but around the idea that right and wrong aren't always clearly defined. For a goody-two-shoes like Sierra and the other good girls she hangs around with, everything seems black-and-white... until she gets suspended and put on a track towards expulsion.
Her perspective shaken off its axis, Sierra starts to see people differently: Mr. Besser, the school principal she had previously viewed with an almost worshipful eye; her lawyer dad, who might not be handling the situation in a completely above-board way; and her friends, especially a cute boy named Colin who sticks up for her, but maybe not for the reasons she wishes he would. Then there's the hyperactive Luke, perennially suspended but not exactly bad-to-the-bone. Sierra starts to make impulsive, spiteful decisions she will later regret. As the consequences start to pile up, she needs to re-balance her views of good and bad if she is ever going to be able to make things right again.
There are a couple of words used that might make this objectionable for parents (assuming it's assigned for school reading), however I think Sierra's attitude towards swearing and how it changes throughout the book is a great way to broach the topic with tweens and younger teens (who, lets face it, probably swear a lot more than their parents think they do). Counterbalance that analysis with the school's creed: RULES - RESPECT - RESPONSIBILITY - RELIABILITY, and you've got quite a lot to talk about. The author provides
a discussion guide with activity ideas on her website.
I think this would make a great family tv-movie. Nick Offerman would make a great Mr. Besser; Joel McHale and Alison Brie could play Sierra's dad and mom. I don't know of any young actresses that could really pull off the various emotions and attitudes that Sierra goes through, do you?
Lastly, Sierra's mom keeps trying to keep her spirits up. She's affectionate and loving, but most noticeably (as most good moms do) she keeps feeding Sierra comfort foods. As the book goes on and Sierra becomes more and more disgusted by her own actions, she develops aversions to particular foods. I can't say I blame her! If only she hadn't brought that knife to school by accident... So below, I've included some ideas for apple nachos--if you're a kid, have an adult help you with the chopping and heating parts. You can vary the amounts as you wish, but for a lot of the toppings just a tablespoon of each will do. Recipes for the sauces follow. I'll try to update this post with more photos when I can make the other variations. And please, remember to leave the knife at home!
Enjoy!
Apple Nachos
.JPG) |
| "The Sweet Sierra" |
Ingredients:
An apple, any variety
A lemon
Assorted toppings
Equipment:
A knife
A cutting board
A mixing bowl
A serving plate (or a container with an air-tight lid if you're taking it to school)
Makes 1-2 servings
- Wash and dry an apple. You can peel the skin off if you want to, but I like to keep it on unless it's a variety that has a bitter or waxy skin.
- With an adult's help, chop the apple into quarters. Carefully cut out the core with the stem and seeds, then slice each quarter into thinner slices. These are your "chips".
- Cut the lemon in half and squeeze the juice into a bowl.
- Toss the apple chips in the lemon juice and let them soak for a minute. This will stop them from turning brown right away. Drain and pat the apple chips dry with a paper towel.
- Arrange the slices on a plate and add your choice of toppings. You can drizzle the sauces on or put them on the side for dipping.
- Eat it right away, or take it to school with you.
Suggested Toppings:
The Sweet Sierra (pictured above)
the sweet and sour variation
Dulce de leche or caramel sauce + raisins + mini chocolate chips + shredded coconut
Media Circus
the nutty variation
Peanut butter sauce + raisins + chopped pecans + banana slices
The Principal Besser
the school lunch variation
Nacho cheese (yes, apples taste great with cheese!)
+ diced tomatoes, olives, and jalapeños (optional)
The Gerald Edward Shepard, Esquire
the fine dining variation
Extra-virgin olive oil + balsamic glaze or vinegar
+ pine nuts + crushed dried basil or oregano + parmesan cheese
(You can toss a little crushed garlic in there if you're really feeling brave)
The Cornflake
the French toast variation
Maple syrup + crumbled shredded wheat or other cereal +
cinnamon sugarThe Angie Shepard
the tough cookie variation
Cookie butter sauce + slivered almonds + dried cranberries
The Comfort of Friends
the hot chocolate variation
Chocolate syrup + mini marshmallows + whipped cream*
*You're going to want to eat this right away, unless you for some reason have access to a refrigerator at school. You can also toast this combo after adding marshmallows but before adding the chocolate syrup and whipped cream!
***
2 Tbsp brown sugar
1 Tbsp half and half, heavy whipping cream, or milk
1/2 Tbsp butter
Tiny pinch of salt
A few drops of vanilla extract
In a small saucepan over low heat, stir together all the ingredients except the vanilla. When the sauce has melted and blended together (about 1 minute), stir in the vanilla. Turn off the heat and keep stirring all the while to help it cool down. When it is no longer very hot, pour over apple nachos.
***
Peanut butter sauce
2 Tbsp peanut butter, smooth or crunchy
1 Tbsp half and half, heavy whipping cream, or milk
1 Tbsp white or brown sugar
Tiny pinch of salt
1 tsp maple syrup or light corn syrup
In a small saucepan over medium heat, stir together all the ingredients until well blended. Turn off the heat and keep stirring all the while to help it cool down. When it is no longer very hot, pour over apple nachos.
***
Cookie butter sauce
1 Tbsp half and half, heavy whipping cream, or milk
1 Tbsp white or brown sugar
Tiny pinch of salt
In a small saucepan over medium heat, stir together all the ingredients until well blended. Turn off the heat and keep stirring all the while to help it cool down. When it is no longer very hot, pour over apple nachos.
***
I used a Granny Smith apple for The Sweet Sierra variation since it's a little tart -- it balances out all the sweet stuff and I thought this represented Sierra's character changes throughout the book. I used Gala apples for all the rest but you can use any kind you like or have available. I also used Mallow Bits for the hot chocolate variation, but use regular mini-marshmallows if you're going to toast it.
There are so many recipes made for kids who are interested in learning how to prepare or cook simple meals. Depending on the age of the child, all children can lend a hand in the kitchen. It is a great way to build self-esteem and get your child to try new foods. When he or she has helped prepare a meal, tasting the food is part of that job.
Some simple kitchen and meal prep tasks are: chopping or dicing vegetables, spreading butter or other condiments onto bread, grating cheese, mixing sauces, beating eggs, tearing lettuce for salads, measuring ingredients for baking, rolling out dough, sifting flour, stirring, coating chicken in breadcrumbs. I’m sure you can think of many more. Will the kitchen be messier when kids participate in cooking? Sure, but clean up is part of the job.
Being competent in the kitchen is not only a necessary life skill, it increases awareness of what goes into a meal and where food comes from. It also can lead to our children making better, healthier food choices. And, it’s a way for busy families to connect and have some time together. Everyone has to eat. Involve the kids and make meal time a family affair. Here are two web sites for inspiration: http://www.cookinggames.com and bbcgoodfood.com/recipes/collection/kids-baking


I don’t know what it’s been like in your part of the world, but here in NJ we have had a bumper crop of sweet, juicy peaches this summer. IN addition to eating them out of hand, I’ve made peach crisp, peach pie, and peach smoothies. But here is a simple recipe you and the kids can use to make the taste of summer last a bit longer. Try making some homemade Peach Jam.

1. Place 6 large peaches in a pot of boiling water for 1 minute; rinse in cold water and peel.
2. Remove pits and cut peaches into wedges until you have about 6 cups.
3. Transfer to a food processor until coarsely chopped. NO food processor? chop or dice by hand.
4.In a medium stainless steel saucepan, (don’t use aluminum…the acid in the peaches leaches out the aluminum and not only gives the peaches a bad taste, it gives the body unwanted aluminum) combine peaches, 2 cups of sugar, 2T chopped ginger, 1 T lemon juice and 1/4 t. salt. This is medium sweet. Feel free to adjust the sugar if you like it less sweet or more sweet.
5. Simmer over medium heat, stirring now and then until thick. It should take about 30 minutes. Ladle into mason jars and cool. Refrigerate overnight.
You can store this for up to 1 month in the refrigerator. Makes a great last minute gift for a picnic or barbeque. Serve it over ice cream and watch the rave reviews.


By: Alan Dapré,
on 8/7/2013
Blog:
Alan Dapré - Children's Author
(
Login to Add to MyJacketFlap)
JacketFlap tags:
recipes,
cereal,
breakfast recipes,
alan dapre,
mumsnet,
breakfast ideas,
Have Kid Will Scribble,
alan dapré blog,
breakfast blog,
kids breakfasts,
mash ups,
mixing cereals,
tasty breakfast,
Add a tag
Youngsters today mash up their music, mixing two tracks to make a third. Well, oldsters like me mash up their cereal. I have done since my student days when I discovered that Alpen tasted better mixed with sugar puffs. These … Continue reading →
By: darlenebeckjacobson,
on 7/26/2013
Blog:
Darlene Beck-Jacobson
(
Login to Add to MyJacketFlap)
JacketFlap tags:
Recipes,
Activities,
summer fun,
Science activity,
Rainy Day Fun,
Home Schooling Ideas,
Children,
chemistry.about.com,
easy science experiments,
Make your own ooblick,
Add a tag
Oobleck was the name given to a type of slime in a Dr. Seuss book that was capable of gumming up a whole kingdom. The oobleck the you can make for a science project isn’t gummy, but it does have interesting properties of both solids and liquids. It normally behaves like a liquid or jelly, but if you squeeze it in your hand, it will seem like a solid. This recipe and article were taken from: chemistry.about.com How to Make Ooblick by Anne Marie Helmenstine, Ph.D.
Difficulty Level: Easy Time Required: 10-15 minutes
You Will Need
water corn starch food coloring (optional)
1. Mix 1 part water with 1.5 to 2 parts cornstarch. You may wish to start with one cup of water and one and a half cups of cornstarch, then work in more cornstarch if you want a more ‘solid’ oobleck. It will take about 10 minutes of mixing to get nice homogeneous oobleck.
- Mix in a few drops of food coloring if you want colored oobleck.
Tips:
- Oobleck is a type of non-Newtonian fluid called a dilatant.
- If you slowly lower your hand into oobleck, it will sink, but it is difficult to quickly remove your hand (without taking all the oobleck and its container with you).
- If you squeeze or punch the oobleck, the starch particles will not move out of the way quickly, so the oobleck will feel solid.
- Oobleck can be molded in a container, but when the mold is removed, the oobleck will lose its shape.
If you want to learn more about cool chemistry projects check these links:


View Next 25 Posts


.JPG)


Yum!